Making a cardboard box with your own hands. Out of the shoe box. Simple rectangular or square
For many centuries, paper has traditionally been a material for a variety of crafts. This is especially true of all kinds of boxes that are used as packaging for gifts or storing small items.
If you do not know what to give your mom, grandmother or friend on March 8, then a useful souvenir made by yourself can be a good solution. For example, a box in which they can store jewelry and costume jewelry. Can't imagine how you can make it? Do not worry! We will tell you, made of cardboard or paper with our own hands.
Simple option
If you are not confident in your abilities, then use the instructions on how to make a box out of paper, taking a ready-made box as a basis.
First, its surface must be cleaned of film and labels. Then a lid is put on the box and a line is drawn along the board with a pencil. Then everything is simple:
- cut off excess cardboard along this line;
- put on the cover;
- at its junction with the cut-off side of the box, sticky tape or other adhesive tape;
- do the same with the inside;
- when the base of the product is ready, they begin to decorate it.

How to make a box out of paper: decorating
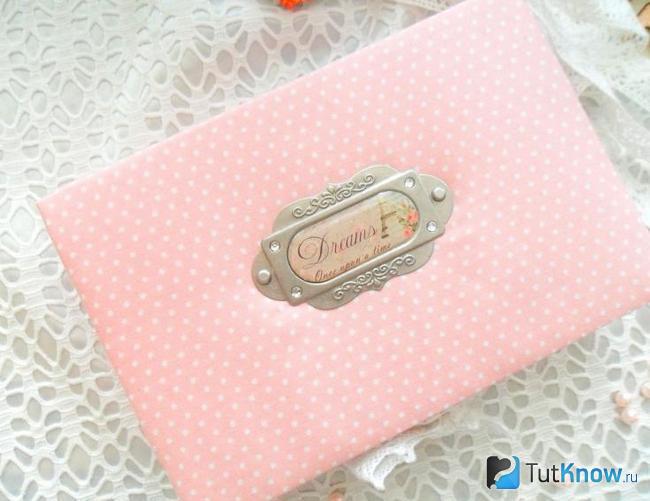
Today, the scrapbooking technique or the shabby chic style is very relevant. They are also suitable for decorating a box.
We offer a version with flowers and lace.
For this:
- an oval is cut out of corrugated cardboard;
- stick it on the lid;
- take office paper and wrinkle it well;
- stick it on the lid so that the oval relief is visible from under it;
- do the same with the walls and bottom of the box from the outside;
- glue the inside of the box with crumpled or music paper;
- paint is applied to the sponge and pressed in different places on the surface of the box to tint the folds;
- make decorations from a mixture of plaster and PVC glue, for example, curly corners;
- lace, small foamiran flowers and other decorative elements are glued on.
How to make a box in the form of a chest out of paper: what you need
What word comes to mind when talking about treasure? That's right, "chest"! Therefore, many are interested in the question of how to make a paper box in the form of an ancient object, where pirates put the stolen treasures.
This will require:
- thick paper;
- unnecessary sturdy box or packing cardboard;
- long ruler;
- 3 sheets of thick paper;
- 1 simple pencil;
- spicy ;
- 2 sheets of colored paper;
- PVA glue;
- 2 satin ribbons 15 cm each.

Manufacturing procedure
The paper box-chest is glued together and decorated in this order:
- the drawing presented above is printed;
- translated into a piece of fairly thick cardboard;
- cut out;
- a part for the cover is drawn in the form of a semicircle with a radius of 12.4 cm;
- a line is drawn at a distance of 2 cm from the center;
- two such parts are cut out;
- the box is glued according to the first drawing;
- with scissors, allowances are cut along the edge of the lid into a small fringe and semicircular parts are glued;
- all walls are duplicated from the inside with cardboard to strengthen the chest;
- strips are glued, starting from the place where the box lid is attached to the wall;
- decorations are cut, for example, fasteners, etc.
Variant Ten-Sided Yin-Yang Globe
If you like folding paper figures, try making an original souvenir using origami technique. The box, the diagram of which is presented below, looks unusual and will delight the one to whom you present it.
To make it you need:
- print 2 sheets of A4 printer paper with patterns, as in the photo, in two different colors, for example, white and purple;
- to cut;
- bend the rounded ends of all parts;
- attach the details, alternating colors so that they have the same center.

If everything is done correctly, then you should have a figure that resembles a spiral sign of eternity with outgoing rays.
Then you need to cut a circle of small diameter out of paper and stick it on the wrong side.
Turn over and begin to collect the rounded ends into a new spiral, just like the first time.
When all the parts are woven, you do not need to glue the circle, since if the paper is thick enough, the box will not open by itself.
Old style option
If you are thinking of how to make a jewelry box out of cardboard so that it looks solid and presentable, we suggest paying attention to the product with three drawers.

To decorate it, you will need artificial ribbons, pearl-like beads and flowers.
First of all, you need to glue three square boxes from thick cardboard, the depth of which is equal to a third of the length of one side.
- cut shapes (see photo) from cardboard;
- glue the "corners" of them;
- two boxes are glued into the first so that there is space between them for the third;
- in the second, exactly in the center, insert a third box with two sides smeared with glue;
- decorating.
Alternatively, you can offer to glue the box with a cloth or artificially aged newspaper or music paper. To do this, put the leaves in strong tea (of course, without sugar) for a few minutes and dry in the sun.
Then they connect the two parts of the box, tucking the extreme fragment of the corner glued from the left part (see photo above) inside the other.

I decorate the top of the product with artificial flowers, beads, ribbons and lace.
Now you know how to make a box out of paper, and in several ways, and you can make such an ornament for your dressing table or as a gift to loved ones.
How to make a beautiful box out of the box, which will not only come in handy on the farm, but also become a gift for a loved one? Everyone knows that it is convenient to store small things in a specially designated place for them.
Many people keep hairpins, buttons or jewelry in small bags or boxes. It's convenient, but ugly. You can make a wonderful box with your own hands.
Tissue box
How to make a box out of a shoe box? Simple enough.
- Empty shoe box;
- Cardboard;
- Two types of fabric;
- A needle with multi-colored threads;
- Glue;
- Scissors;
- Material for the manufacture of decor.
To make the box more stable and last longer, it must be sealed. To do this, draw rectangles on a cardboard sheet that correspond to the dimensions of the box in length, width and height.
Rectangular blanks are made in duplicate. Carefully glue the box with cut cardboard blanks. If one layer for sealing is not enough, you need to stick more. It is not recommended to touch the box until the glue is completely dry.
The next step is to prepare the fabric for the covering. For outdoor decoration, a denser fabric is suitable. It can be brocade or tapestry. For inner wrap, silky fabrics work well to create drapery. When cutting a pattern from fabric, remember to keep seam allowances in mind. They should be 1.5-2 cm.
After cutting out the details from the fabric, sew them. It can be machine stitching or hand stitching. The corners are necessarily well processed. For the strength of the seam, the outer side can be trimmed with decorative tape. The same is done with the inner lining.
The frame is covered with a sewn fabric cover, after which it is glued with textile glue so that no traces remain on the fabric. Foam rubber can be glued to the bottom under the fabric. This will give the box a more attractive look. The lid can be decorated with coins.
Depending on what will be stored in the box, its size is determined. How to make a ring box from a candy box? Any box can be decorated as you wish. For a narrow, small box, you can use colored paper or foil appliqués. The cover can be removed separately or attached to one side. Thus, instead of packaging from sweets that were in plastic cells, you will get a box for storing small jewelry.
Matchbox box
How can you make a box out of matchboxes?
To make it you will need:

- 8 empty matchboxes;
- Thick cardboard sheet;
- White and colored paper;
- Soft fabric;
- Thin braid or tape;
- Scotch;
- Glue;
- Scissors;
- Decoration.
To make a chest of drawers, you will need 8 empty matchboxes.
Stick strips of colored paper on the end of the drawer. After the glue dries, you can start attaching the handles. It is convenient to use brads for this. At the same time, a beautiful handle is obtained on the front side, and reliable fasteners on the inside. If there is no brace, handles can be made from beads or buttons, and sewn with threads.
Cut rectangles out of soft fabric that are 1 centimeter longer than the drawer. This is necessary in order to hide the handle fasteners under the fabric. The number of fabric blanks and drawers for the chest of drawers must be equal. Gently stick the prepared pieces of fabric inside the cardboard box. Fold matchboxes in 2 rows in height and 4 in length.
Thick cardboard is used as the base and top of the chest of drawers. Measure the length and width of the future box. Then cut out a workpiece 1 cm longer in length and width from it. Also cut two cardboard blanks to fit the sidewalls and one to the back. Cover the cut cardboard blanks with white or colored paper.
After the glue has completely dried, start assembling the chest of drawers. Glue the folded boxes of the box together and glue the prepared cardboard blanks on them.
After assembling the chest of drawers, you can start decorating it. Cover the ends of the matchboxes with acrylic paint. Just decorate the side panels and top cover with decorative ornaments. It is convenient to store small jewelry, beads or rhinestones in such a mini-chest of drawers.
Where to store jewelry?
Having shown imagination, you can figure out how to make a jewelry box out of a box. For storing small accessories, you can use a box, for example, from children's shoes. If you have more voluminous jewelry, such as massive beads or necklaces, you will need a larger box.
It is also convenient to have a craft box. Needles, threads, pins will always be in one place. How to make a craft box to store everyday items like needles, thread, scissors, and more? The technique for assembling a jewelry box is the same as for storing handicraft equipment.
For manufacturing you will need:

- Box;
- Two types of fabric;
- Textile glue;
- Scissors;
- Decorative ornaments;
- Cardboard;
- Needles and threads.
Take a cardboard box of the appropriate size. If it is necessary to seal the frame, cover it with cardboard.
Use a soft cloth to cover the outer sides.
Prepare a cut to size with seam allowances. They should be no more than 2 cm. Sew the fabric according to the pattern, and coat the folds of the box with textile glue. After drying, gently pull the fabric over the frame, straightening it in the places where it will be glued. Silk-based material works well for the inner sides.
DIY casket can be made of cardboard, woven from newspaper tubes or created using an old plastic bottle. Your main task is not only to choose a material for creativity with which it will be easy for you to work, but also to come up with an original decoration of the finished product, especially if you want to present the made box for a holiday to a loved one. Sometimes the box can be hidden in a book cover or in a fluffy dress of a baby doll.
DIY box: master class
A unique gift idea for a close friend, how to make a box with your own hands, does not require you to work with special tools, because you can make an original and spacious box for various little things from ordinary cardboard. Special attention must be paid to the materials so that our product is durable and will serve you for many years. We can use fiberboard with a thickness of 3 mm or thick cardboard, we also need a sheet of cardboard 2 mm thick and whatman paper. To fix the parts, we will use instant fixing glue - "Moment", and we also need regular PVA in the decorating process.
To decorate the box, we will use fabrics with a bright original print. In the process, we will also need scissors, a stationery sharp knife, masking tape and a brush for applying glue.
Fiberboard 3 mm will be durable DIY box, master class will describe in detail all the subtleties of its implementation. Fiberboard can be bought in hardware stores, and for cutting it we will use a sharp stationery knife.
For work, we need parts of this size:
10x15 cm - 2 pcs.
15x5 cm - 2 pcs.
10.6x6 cm - 2 pcs.
10.6x2.5 cm - 2 pcs.
15x2.5 cm - 2 pcs.

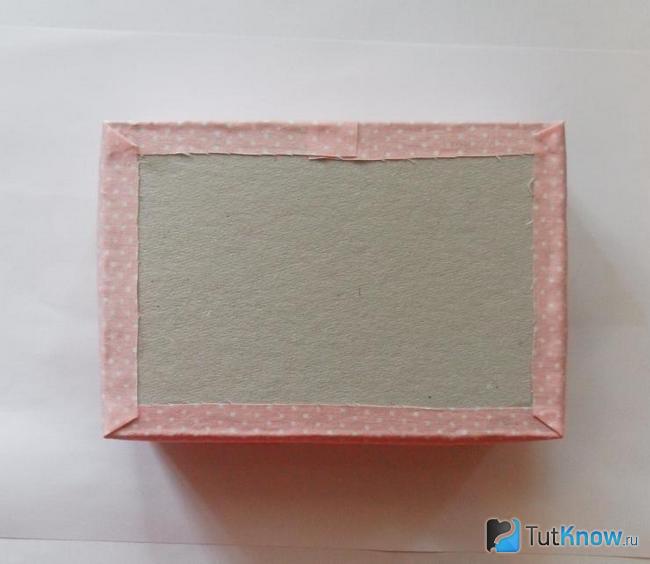
The base and lid of our craft have the same area, but they will have different heights. When all the parts are cut, you can start assembling. When gluing parts with the help of "Moment", it is necessary to hold the parts at an angle of 90 degrees (at a right angle), and "Moment" should be carefully applied to the edges of the base, then apply the side walls to them. First of all, you should glue the long walls - their length is 15 cm, and then proceed with the rest. It is imperative for the strength of the structure to glue the outer and inner corners using masking tape.

How to make a box with your own hands
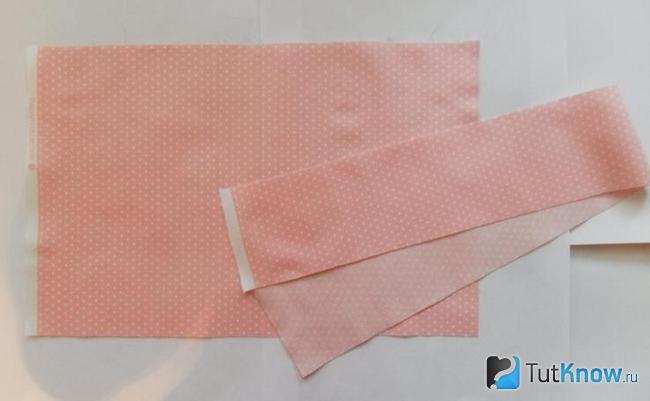
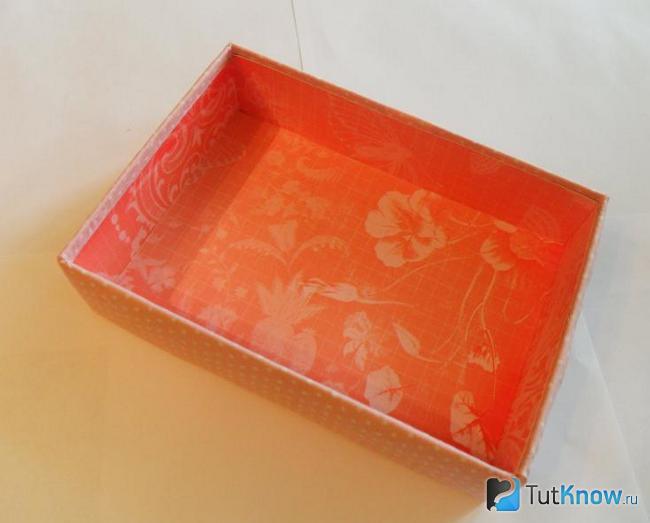
Beautiful textile DIY box, master class involves gluing the inside as well as the outside with a cloth. For the walls, you will need a piece of fabric 8 by 45 cm, for the lid - 25 by 20 cm. We will glue the outer part with this fabric, so choose bright prints. Iron the fabric if necessary before use.
The sides must be smeared with a thin layer of PVA, leaving one centimeter uncoated from the edges. Now this side needs to be applied to the fabric, which should be carefully spread out on the table surface. Then the fabric must be gently smoothed out with a stack so that there are no folds and "bubbles" left. For the first craft, it is better to use a cotton fabric for decoration, as it is easy to glue and smooth.

The end of the cut of the fabric must be bent, and then glue it, but if there is a large residue, then cut off so that the allowance is only 1 cm, which must be bent. When you fold all the edges, you need to cut the corners with scissors so that the cut is under a sharp corner.
We would like to draw your attention to the photographs, which show in detail how you need to paste over all sides of the box. Now we need to glue the top lid of the box: the top part must be glued in the center of the workpiece, carefully smoothing the surfaces so that no wrinkles remain. It is necessary to step back one centimeter from the edges and cut squares in the corners. And the segment that turned out should be cut diagonally to the very corner.
The first step is to glue the sides 15 centimeters long, and glue the allowances to the adjacent walls. Sides of 10 cm, gluing, it is necessary to adjust the fabric in width, bending the allowances along the edges.

To decorate the bottom, you will need a Whatman paper: you need to cut a piece out of it that would correspond to the size of the bottom of our box. A piece of Whatman paper must be glued to a piece of fabric so that there are allowances, which then need to be tucked in, and the corners must be cut off. The finished "bottom" must be glued, and in the same way make a part for the inner part of the bottom.
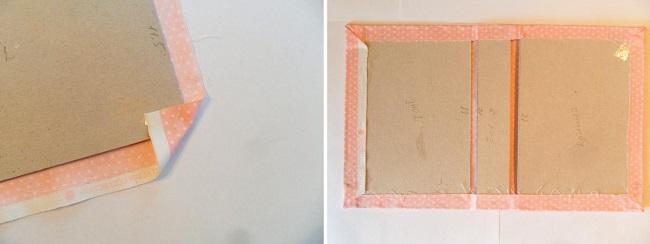
For the further stage of execution, we need thick cardboard (2 mm thick). From it, you should cut out details for decorating the inner walls: two blanks measuring 5.5 by 15 cm and two blanks measuring 5.5 by 9.6 cm.As you can see, they will turn out higher than the walls of our box, and this is a necessary step to the lid was tightly closed and held so that all the folded jewelry in the box was safe. All cut out blanks must be decorated with fabric, but you must remember that the allowances must completely cover the part of the "seamy" side that will protrude on the top bar of the box, as shown in the photographs.
It remains only to wait for the glue to dry and you can enjoy the result. If you wish, you can additionally arrange the lid of our box, for example, make flowers from ribbons, as for.

DIY cardboard box
A real needlewoman who loves to create jewelry and has probably gathered a lot of necessary little things at home. The easiest way to put your creative mess in order is to make a box with your own hands where you can put all the little things that may be useful to you in the process. But for this you need to complete the craft with the branches.
DIY cardboard box can have six separate sectors, so it will be convenient for storing various jewelry: rings and earrings, bracelets and brooches, as well as other stylish little things.
We can make a convenient box for storing 1000 little things using milk cartons as material. We need tetrapacks, which have a square base. For this craft, you will need two packages in total. For the base and the formation of the lid, thick cardboard is useful to us, and for the base you can take a ready-made cardboard box without the top.

In the process of working with cardboard, you will definitely need scissors and PVA glue. Before gluing, we will wrap all the details with craft paper, we also need a braid. And at the last stage - wrapping paper and beads for decoration, large wooden beads, with the help of which we will make the legs, as well as two small magnets, thanks to which our box will be securely closed.
Two tetrapacks should be cut, each into three parts, having previously cut off the neck and bottom. As a result, we got six square parts, which must be placed inside the cardboard base, glued together. Previously, square parts must be pasted over with craft paper.
To form the bottom and the lid with one side, we need to cut two blanks 15.5 by 22 cm and one - 7.2 by 22 cm from the cardboard. 7.2 cm - this is exactly the height in our square parts that we used to form sections. Tips for you will help you decorate the finished craft.

DIY jewelry box
The most coveted gift for any fashionista who has a lot of accessories is DIY wood box, but to complete it you will need special tools for woodworking, so we will use more readily available materials, such as paper.
If you have already made from newspaper tubes, then you can also easily cope with the task of creating an original heart-shaped box. As a result, you will get a unique souvenir, beautiful and original, for the creation of which you will use unnecessary old newspapers.
To make it neat DIY jewelry box, you can use sheets of A3 white paper, in this case, after completing the craft, it can be painted in any color. If you use newspaper tubes, the printed text will be visible on them, so you need to paint the paper with several coats of acrylic paint.

We need to twist tubes from white paper, how many of them are needed - depends on the desired size of the future product. We will use cardboard for the bottom, and self-adhesive wallpaper for decoration (but you can use any paper you like).
For the base, you need to cut a heart of the desired size from cardboard. Small holes should be made at the base (a paper tube should pass through them). There should be two centimeters between the holes, so mark first to make all holes the same distance from each other. It is necessary to pass a tube into two adjacent holes, and grease them with glue on the lower part of the base.
When the base and axles are ready, you can duct until you reach the desired height. The ends of the axles must be cut and tucked into the braid. The lid should be made in the same way. The finished craft can be painted and decorated to your taste.

DIY casket doll
Children will be happy to do it if you offer them an original idea, for example, together with them you can bring to life the most unique craft - a book-box. To do this, you only need an old thick book (you can choose a textbook on the subject taught by the teacher, or make it from any other book, and then arrange the cover separately).

DIY casket doll- a unique craft, to complete it you need a plastic Barbie, it is also advisable to immediately buy a dress for her. We will use the top of the dress in the craft, and you will make the fluffy skirt, which will hide the box, yourself.

So that you master the master class on how to perform DIY box, photo we have prepared for you, they show in detail the entire process of creating a doll with a secret. To create a box directly in which you can hide the most intimate, we will use a plastic bottle, and to make the doll's skirt lush, we need lace and braid.
After reading about how to decorate a casket, you will find out that it is not difficult at all. And you can make such things from a milk bag, an adhesive tape reel, from a wooden bracelet.
How to decorate a box with painting?

To create a masterpiece like this, take:
- casket;
- oil paints;
- gold leaf;
- sandpaper;
- gold paste;
- nacre;
- polish;
- squirrel brush No. 2-6;
- synthetic brushes No. 00-3;
- oil for painting;
- oil paint;
- oil varnish;
- a set of cutters;
- Sinteko varnish;
- turpentine;
- car polish;
- flat synthetic brush # 20;
- sanding paper turpentine;
- technical capacity;
- tee.

Now you need to process the body of the product with sandpaper to remove the coating. When a matte surface appears, then finish this stage of work.

Use fine sandpaper to avoid scratching the surface of the product. You can download the presented drawing or use another one. Transfer the appearance of the Snow Maiden to tracing paper.

Now place it on the lid of the box and mark the places that you will decorate with mother-of-pearl paper. Then cut pieces of the desired size from it and attach them to the surface of the product to make sure that these inserts will just be in the place of the pompons of the Snow Maiden's hat and gloves.

Holding each such mother-of-pearl insert in turn with your fingers, you need to circle them with a cutter so that it leaves scratches here. Now you need to cut the surface of the product along these basting and insert an insert made of this thin shiny material into the recess. But first you need to coat this place with Poxipol glue.

After 15 minutes it will dry out, then you will remove excess glue with sandpaper. Then go over the surface of the product with Sinteko varnish. Here's how to decorate the box further.
Wait for the first coat of this varnish to dry, then wear the second one. In the same way, while waiting for the previous layer to dry, cover the box with four coats of this varnish. When the top layer also gets stronger, go over the surface with fine emery paper.

To decorate the box further, carry pf-283 varnish on it. It needs to be dry, but not completely. Then apply with a brush the silver.

This is what the box looks like at this stage. Now attach tracing paper to its lid and trace the details of the image with a pencil so that they are well printed on the surface of the product.
Make the background by mixing oil paint with gold and silver paste. Use a thin brush to paint in the details of the image. Paint over the fur, facial features of the Snow Maiden, and the squirrel with oil paints.

Using paints of the desired shade, select other elements of the image, and also show where there is more light and where there is shadow.

The lid should now dry out in a warm place for a few days. When this happens, apply 4 coats of Sinteco varnish in succession. After the top is dry, go over the image with fine sandpaper.
Cover the surface of the box with a so-called imitation. It consists of several materials. First, squeeze oil paint onto the lid, then drop varnish and a little thinner here, which is called a tee. Put this mass in a bowl of water and draw a drawing on its surface with a brush handle. You need to lower the box into it.
This will cover the painted part with imitation. Where it is not needed, it is necessary to wipe off the excess with a cotton swab.

Now put the box back in a warm place so that this coating is completely dry. After that, you paint it with varnish, when several layers of it are dry, then apply golden leaf on some of the details of the work. First mix varnish with turpentine and apply this mixture to the places where you will glue the gold leaf. Which is what you will do.

When the varnish is completely dry, remove excess veil with cotton wool, then apply varnish on top and dry the product. It remains to highlight some places in the picture, prescribe the areas where you glued the leaf, dry the work and varnish it. When all its layers are completely dry, you just have to polish the surface of the box with a soft cloth and admire what a wonderful work of art you have.

If the method of how to decorate a box using this method still seems difficult to you, then check out another one. But if you do not have such an item, then you can make it yourself, using very affordable material for this.
How to make a cardboard box?
You can create such a beautiful product if you take:
- binding cardboard;
- the cloth;
- thin synthetic winterizer;
- cotton lace;
- a piece of paper;
- quick-drying glue, for example, Moment Crystal;
- cotton lace;
- pencil;
- ruler.

Press firmly on the pieces to be glued so that they stick firmly to each other. Therefore, you need to use a quick-drying glue.
If you want to make a cardboard box of the same size, then use the following markings for craft paper, which you will be decorating this box with.

Apply an iron ruler to the paper and cut off unnecessary pieces with a clerical knife. Based on the pattern presented, bend some of the blanks.
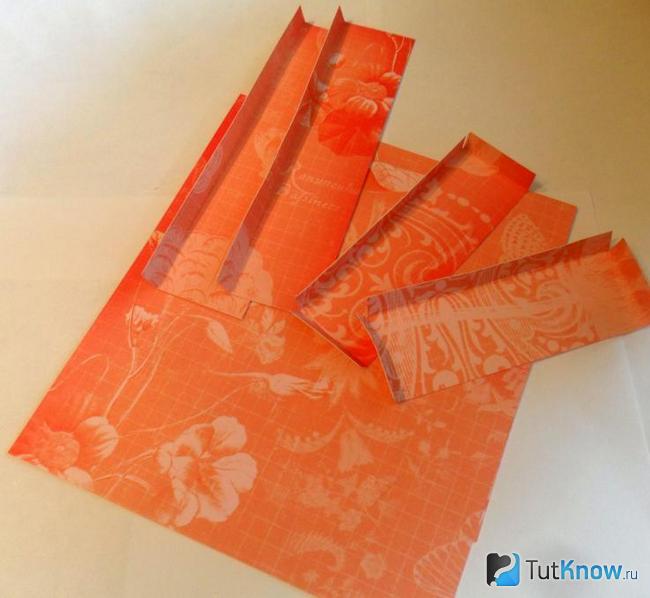
Here's how to make a cardboard box next. Steam the fabric with an iron so that the surface is perfectly flat. Cut 2 parts from the blade. The first will measure 33 by 23 cm.The second will be 7 by 56 cm.
Glue a synthetic winterizer on the outside of the sides of the cardboard box, use quite a bit of glue so as not to crush the material, or double-sided tape. Now glue the fabric sidewalls on these places.
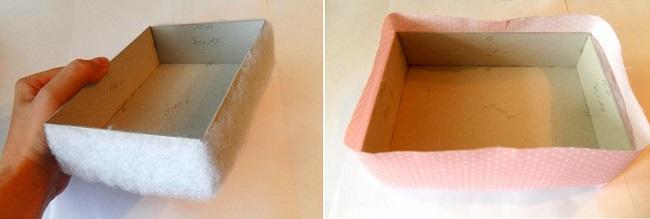
Fold the fabric down to the bottom and glue it here.
And cut the corners from above, not reaching the cardboard about 2 mm and bend the sidewalls, gluing them to the sides.

Glue the paper inside the cardboard box. This is how beautiful the workpiece looks at this stage.
You need to make the top of the box. To do this, glue the synthetic winterizer on the large cardboard rectangles, which are located on the left and right in the next photo.

As you can see, there is a distance between these three cardboard pieces. It is equal to 7 mm. Now fold the fabric onto a paper base and glue the corners first, then the sides.
Here's how to make a cardboard box next. You can sew the same tag to the bottom of the product.

Attach the lace tape by sewing it on. You can also attach a metal tag.

Take a piece of scrap paper and place it on the back of the lid so that the same small fabric frame forms on all sides. Run your fingers or a scissor handle over the folds.
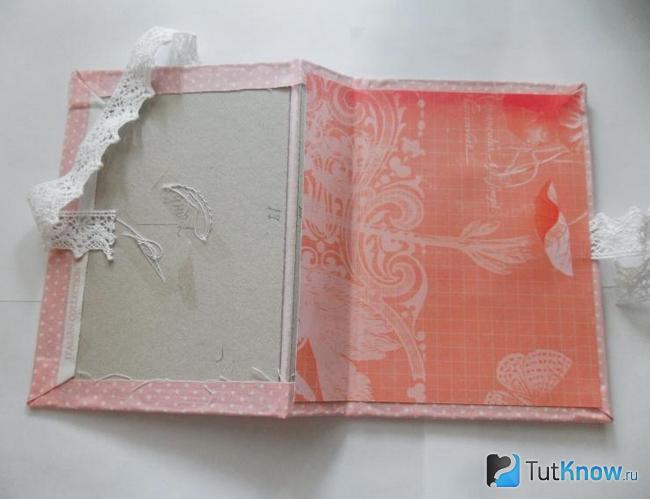
Apply enough glue to the second piece of cardboard and glue it to the box.

Once it's dry, you can put jewelry or other small items inside the box. A very nice box made of cardboard, which is made by hand.
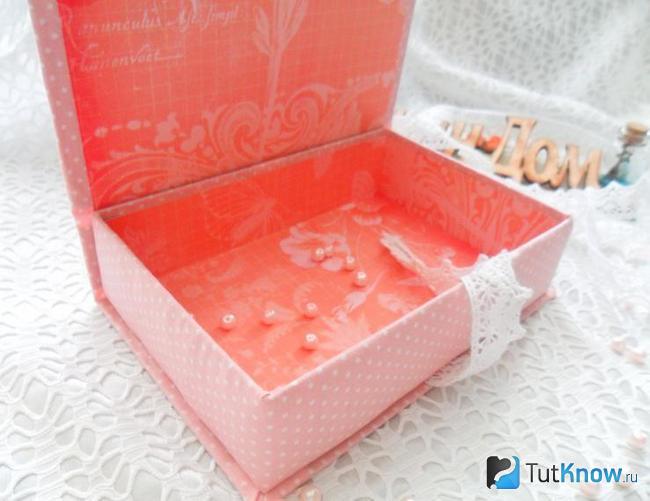
If you have a great desire to have such a thing, but not enough materials, then see if you have a wooden bracelet, a cardboard scotch tape reel, a milk bag, an eggshell, a box at home. After all, from each such item, you can make a wonderful casket.
This is what you will learn now.
How to make a box - master class
If you like the shabby chic style, then by all means make this type of box.
Shabby chic

For the base of the box, you will need a cardboard box of Raffaello chocolates, but you can take another one, including a metal one.
Here's what it takes to make the box:
- a box of Raffaello chocolates;
- the cloth;
- lace;
- leaflet with a picture;
- bead tape;
- glue;
- paper;
- threads;
- Styrofoam;
- thick thread;
- various decorative elements.

Cut the same circle out of paper and also from foam to fit the bottom of the box. Coat the sides of the container with glue and attach a piece of paper with a picture here. Place a piece of foam on the fabric and cut a larger circle out of it.

Place a cardboard circle on top of a foam blank. Gather the edges of the fabric with a thread and thread them onto the top of the piece of paper.

Drag the threads over the edges of the canvas to secure the piece in this position.

Connect the lid to the box and decorate the outer walls with lace, beaded ribbons and other decorative elements. Secure the tape with a thick thread.

If you have wooden bracelets, you can make a jewelry box out of them.
Casket made of wood
You will need:
- wooden bracelets;
- multi-colored polymer clay;
- glue gun;
- round cookie cutter;
- white marker;
- brushes;
- paints.

Roll a sheet of polymer clay into a circle with a rolling pin, put a wooden bracelet on it and cut off the excess along the contour of this product.

Bake the polymer clay to create a bottom for the box. Now you need to paint the bracelet yellow or another color and draw various lines or other patterns with a marker.

Slide the baked bottom of the bracelet down and secure with a glue gun.

Now take a couple of cookie cutters, the diameter of the first should be the same as the diameter of the bracelet itself, and the second slightly smaller. Use them to squeeze out two circles of green polymer clay and bake them.

Also bake a leaf cut from this material. Then you need to glue it up. Here is such a wonderful lid and the box itself will turn out.

If you liked it, but there is no polymer clay or bracelets, then make the same round one from scotch tape spools.
Out of the sleeve
Take:
- tape bushings;
- liquid plastic;
- polymer clay;
- satin ribbon;
- cardboard;
- glue;
- talc;
- texture sheets for clay;
- varnish designed for working with plastics;
- scissors;
- brush;
- video clip.

Now glue these circles to make a box with a bottom and a lid.

Roll out the clay thinly and cut a rectangular piece from it, which needs to be cut with a knife on both sides.

Lubricate the sides of the bushing with a gel designed for gluing polymer clay products. Attach this segment here. Use a thin knife to remove the excess.

Thus, arrange the entire inner wall. Now cut a circle of polymer clay to fit the diameter of the bobbin and glue it as the bottom.

If you used dark polymer clay, then make a flagella from light or vice versa. Glue it at the junction of the inner wall and the bottom of the box.

Decorate the other half of the box in the same way and bake these two blanks in the oven so that the polymer clay hardens.

While this is happening, you will take a texture sheet and dust it with talcum powder. Now you can roll out this material with a roller and cut it into squares. With them, you will lay out the outer wall in the box, attaching these elements to the gel. But first, you need to glue these two bobbins to get a higher capacity.

Do not cover one strip yet, you will put a satin ribbon here, then grease with gel on top and glue the rest of the squares here.

Cut a circle out of the clay, cover the bottom of the product with it, and then it remains to bake the box again. Thus, you have designed the bottom of this container. To finish up and up, decorate this part also with squares glued to the gel.
The ribbons will allow you to hold the two parts and flip the lid with ease.
The next box is made of junk material. Dairy cartons are usually thrown away, but if people saw what a cardboard box could be made, many would want one.
From milk packaging

To get such a beautiful item, you need the following set of items. It consists of:
- packages from dairy products;
- double-sided tape;
- piece of canvas;
- ribbons;
- scissors;
- knife;
- rulers.

Using double-sided tape, you need to glue these elements together, and then attach the cloth to the future box.

Cut a rectangle from the side, it will become the lid. Also, applying tape here, glue this part with a cloth. Stick on the ribbon. You can still tie a beautiful container.

It will remain, using double-sided tape, to glue the lid and the bottom of the box together and a wonderful box, made with your own hands, will appear before your eyes.

Many useful things can be made from eggshells, including decorative items for the box. The rest of the materials are also quite affordable.
Eggshell
Take:
- eggshells;
- napkins;
- sticks for manicure;
- paints;
- PVA glue;
- thread;
- primer;
- sandpaper.

Rub over the surface of the box with sandpaper to align here. Prime the surface and grease it with glue. Break the shells and attach their fragments here.

To break the pieces of shell into even smaller pieces, press on them with a stick.
Thus, decorate the surface of the box, and then grease the top with PVA glue.

When it's dry, cover it with white acrylic paint in several coats.

Decoupage of the box will help to further decorate it. Take the upper part of the napkin, glue it to the surface greased with PVA glue. After it is completely dry, you will see such a beautiful box for jewelry or small things.

If you were interested in learning how to make a box in a similar way, then you can see how others make them.
If desired, even ice cream sticks will turn into such a designer thing.
It is quite easy to make a box out of a regular shoe box.
It is very easy to make a box for jewelry made of cardboard with your own hands, and its production does not require financial costs. Many houses have wrapping paper, pieces of lace, beads and other similar materials lying around in their homes, which are a pity to throw away. And you don't need to throw it away - you can give them a second life by cheaply creating an exclusive item for storing useful little things.
Cardboard box with compartments for various small items
There are many options for homemade boxes, so let's dwell on popular models and consider decoupage ideas.
Popular ideas
With the help of the master class, you can make a specific model of the box step by step. But all the necessary materials are not always available at home, so we will consider how to make the base for the box, and the basic ideas for decor. And then the master can create on his own, based on his imagination.
Despite the variety of shapes, all models can be roughly divided into three groups:
- Box. Looks like a box with a lid. Inside there is one or more compartments where you can store jewelry or other useful little things.
- Chest of drawers. A small box with drawers resembling a chest of drawers.
- Curly thing. It can be made in the form of a flower, heart or any other shape.
Box

Simple rectangular model is easy to use
Making boxes out of rectangular or square cardboard is the easiest option. A big plus is that you can make such a little thing already from an existing cardboard box of chocolates, having completed only the external finish. But you can make a box yourself. This will require:
- a sheet of thick cardboard;
- Scotch;
- PVA glue;
- pencil;
- ruler;
- scissors.
Before starting work, you need to decide on the dimensions and make a drawing:
- from the horizontal edge of the cardboard sheet, the height of the side of the future product is measured and marked with a straight line;
- the same markup is done from the vertical edge;
- from the formed right angle, the length is deposited in one direction, and the width of the future box in the other (you should get a square or rectangle - this is the bottom of the future product);
- from the other two formed sides of the bottom, the height of the side is deposited.

The finished drawing will look something like this (the size of the side and bottom can be changed at will).
Further, the walls of the box are glued together with PVA glue. If the cardboard is too dense, then it is recommended to fasten the structure with tape to avoid ugly thickenings. If necessary, the inside of the box is divided into compartments for storing small items. It is better to attach cardboard lintels to the walls and bottom with tape.
The cover is cut to the same width as the bottom and fixed to one side with an elastic band.
If desired, the lid can be made removable and with sides, according to the scheme suggested above, but at the same time, 0.5 cm on each side must be added to each edge of the bottom to ensure free opening and closing.
Dresser
The next master class will tell you how to make a jewelry box with drawers. The manufacturing technique is similar to that described above:
- a rectangular box without a lid is made (its dimensions correspond to the future "chest of drawers");
- jumpers for drawers are inserted;
- a box is made 0.5-1 cm in size smaller than the compartment made (for ease of pushing).

Drawer options look very original
The number of boxes is not limited and depends only on the desire of the master, but it is not recommended to do more than three (the structure will look unnecessarily massive). The most popular option: a simple box for small items is located on top, and at the bottom there are 1-2 drawers for various accessories.
Figured design
Do-it-yourself figured box at first glance seems complicated. But in fact, there are no big difficulties in manufacturing, you just have to carefully read the instructions:

The finished product must be decorated. Try making jewelry boxes out of cardboard and fabric, or using pieces of wallpaper, kraft paper, self-adhesive tape, and other materials for decoration.
Here are some topical tips:
- If you plan to make a hinged lid on "soft hinges", then the elastic tape must be fixed before decorative pasting.
- When finishing things with light fabrics or transparent paper, in order to preserve the color scheme, it is recommended to paint the base from the outside with white acrylic paint.
- If the drawers of the chest of drawers are finished, then the front part must be made a little wider and equipped with a "handle" for ease of extension (the role of a handle can be played by a glued large bead or a loop made from a beautiful ribbon).
After pasting the product from the inside and outside, you can make a decoupage of your own free will. For this, any materials are used: beads, lace or ribbons. Some craftsmen use acrylic-coated pasta or toothpicks to create unique masterpieces. You may try:
- weave flowers from ribbons;
- lay out a mosaic of cereals;
- combine different materials.
The proposed recommendations will help make an original box of the required size and shape from cardboard and improvised means. An original and beautiful product will perfectly decorate the interior and help to conveniently store small items in one place.