Knitted summer hat for a boy with knitting needles. Cap for the boy spokes automobile. Cap for a boy with a pattern “two-color rice”
Having bought a new suit for the summer for my son, I want to choose a suitable headdress. The store presents a wide range of variety of baby hats. For boys, there are slightly fewer options, however, than for girls, but there are still plenty to choose from. However, at the peak of sales in stores, sometimes there are only dark hats that are suitable for evening walks, but in search of white or just light caps or hats with fields, you have to run around more than one store.
If during such searches it was not possible to find anything suitable, then you can start creating a suitable panama hat with your own hands. A handmade hook gives a lot of opportunities for creating almost any headdress with your own hands. For a baby, you can knit a cap, bandana, or you can make a panama hat with fields that help protect your eyes from the sun's rays. To work on a summer knitted hat, you will need to buy everything you need. From materials it is better to choose cotton yarn. In choosing a color, it is better to give preference light shades or combine white with other colors of yarn. The thickness of the yarn must be chosen quite thin to make a delicate hat.
In our master class, Seam Anna 16 yarn was chosen in white, light green and green colors. The hook for them is selected for size 1.25. With the help of such a hook, it turns out quite dense knitting, but at the same time the final product remains quite soft.

The scheme chosen for a summer hat for a boy is quite simple. In it there is an alternation of solid and loin rows with columns with 1 crochet (CCH).
Scheme

As can be seen from the diagram, the beginning of work consists of 6 air loops, turned into a ring with the help of a connecting loop (SP).

The first row will be knitted into this very ring. To do this, 15 columns with 1 crochet (CCH) are inserted into the ring. The first of 15 columns imitates 3 lifting VPs.

According to the scheme, 2 CCHs (checkmarks) are tied into each column.

The next row is sirloin - there is an alternation of 1 CCH and 1 VP.

The next step is to introduce yarn of a different color. First, a row of CCHs is knitted (1 column to the top of 1 CCH and 1 CCH to an arch of 1 VP). The next row is again fillet.

We make the next 2 rows white again. There, a continuous row of columns and a loin row are repeated, where not 1 VP each, but 2 VP each is located between the columns.

In the green row following the white, in a continuous row of CCHs, we knit 3 CCHs into arches of 2 VPs, and in the sirloin row we also make 2 VPs between CCHs.

In the white row, we introduce 2 CCHs into the arches between the columns, and in the sirloin row we make 2 VPs between the columns.

The next green row repeats the knitting mechanism of the previous row.

The round bottom must be knitted until the desired diameter is reached. If it is not possible to try on a hat during the knitting process, then you can follow the recommendations from this table.
Table

According to the same table, you can calculate the height of the cap. To obtain the desired height, alternating colors, we knit the same sequence of two rows - solid and loin.

To move on to knitting the cap fields, you need to knit a series of single crochet stitches (RLS) in which the stitches themselves cling to the front half loop each time.
Based on this crochet hat for a boy, it is easiest to understand the principle of knitting hats for men and teenagers with a convex geometric pattern. They can be very diverse, these hats with convex columns.
Not only do they look good, but they also fit great. male head. They look moderately brutal, no matter how old the man is.
On the baby, she looks cute and "manly" at the same time. knitted hat crochet for a boy is given with a description on two year old.

Description of knitting hats


Materials and tools
- Yarn (55% cotton and 45% polyacrylic, 50 g/160m) - 1.5 skeins
- hook number 3
The cap is knitted with convex and concave double crochets and half double crochets. The last row knit with single crochet.
OG - 47 cm, the diameter of the bottom should be 47 cm x 3.14 p (according to the loop sample = 15 cm).
It is better to take 1 cm less, for a better fit on the head, a total of 14 cm.
Knitting goes in a circle, we close each row with a connecting column to the top of the first column of the row. We always start the next row with three lifting air loops.
Designations in the text
- embossed column with a crochet front - l.r.ssn
- embossed double crochet purl - izn.r.sn
- half-column with a crochet (like a column with a crochet, but we knit all three loops on the hook in one go) - p / sn
Row explanations
 The bottom of the cap
 - 1 row: we close 5 air loops in a ring, we knit 8 columns with a crochet into it. Next, we will add 8 loops in each row to expand the circle.
- 2 row: in each column we knit 2 l.r.sn = 16 loops.
- 3 row: * 1 l.r.ssn; we knit 2 l.r.sn from one * repeat from * to * seven more times = 24 loops.
- 4 row: * 2 l.r.ssn; we knit 2 l.r.sn from one * repeat from * to * seven more times = 32 loops.
- 5 row: * 3 l.r.ssn; we knit 2 l.r.sn from one * repeat from * to * seven more times = 40 loops.
- 6 row: * 4 l.r.ssn; we knit 2 l.r.sn from one * repeat from * to * seven more times = 48 loops.
- 7 row: * 5 l.r.ssn; we knit 2 l.r.sn from one * repeat from * to * seven more times = 56 loops.
At this stage, the diameter of the bottom was 8 cm. We have 8 wedges containing 7 loops each from the front relief columns. Next, we make the expansion by knitting the wedges between the stripes from the relief columns.
- 8 row: * 7 l.r.ssn; 1 p / ssn (it is tied out of the jumper between the facial embossed columns) * repeat from * to * seven more times = 64 loops.
- 9 row: * 7 l.r.ssn; 1 l.r.sn (we knit from the jumper between the previous l.r.sn and p / ssn); 1 p / dc * repeat from * to * seven more times = 72 loops.
- 10 row: * 7 l.r.ssn; 1 p / ssn (it is knitted from the jumper between the facial relief columns); 1 l.r.sn; 1 p / dc * repeat from * to * seven more times = 80 loops.
- 11 row: * 7 l.r.ssn; 2 p / ssn (the first according to the loops of the previous row, the second from the jumper between the p / ssn and l.r.sn); 1 l.r.sn; 1 p / dc * repeat from * to * seven more times = 88 loops.
At this stage, the diameter of the bottom will be 12 cm.
Additional explanations. According to the knitting rule for hats, to get the shape of the cap we need, we need to increase further through the row.
Accordingly, we will not make an increase in the next row, and here it will appear the new kind a column, due to which a relief strip is formed in wedges.


- 12 row: * 11 out.r.sn; 7 l.r.sn; 2 out.r.sn; 1 l.r.sn; 1 out.r.sn * repeat from * to * three more times = 88 loops.
This row forms our transverse strips in wedges.
The next row will be with increments. - 13 row: * 7 l.r.ssn; 3 p / sn (2 according to the loops, the third from the jumper between the p / sn and l.r.sn); 1 l.r.sn; 1 p / dc * repeat from * to * seven more times = 96 loops.
In this place, the diameter of the bottom has reached the required 14 cm. And then we knit straight without increments.
Additional explanations. The size of the bottom can be varied with the help of thread thickness, hook number, knitting density, and due to the number of increases.
- 14 row: * 7 l.r.ssn; 3 out.r.sn; 1 l.r.sn; 13 out.r.sn * repeat from * to * three more times.
From the 15th row to the 18th row we knit similarly to the 14th row. - 19th row: * 7 l.r.ssn; 3 p / ssn; 1 l.r.sn; 1 p / dc * repeat from * to * seven more times.
- 20 and 21 knit similarly to the 19th row.
- 22nd row: * 12 out.r.sn; 7 l.r.sn; 3 out.r.sn; 1 l.r.sn; 1 out.r.sn * repeat from * to * three more times.
- 23rd row: we knit similarly to the 19th row.
- From 24 to 28 we knit similarly to the 14th row.
- We knit the 29th row in the same way as the 19th row.
- 30 row - we make reductions so that the cap fits snugly to the head near the face. We also knit this row in the same way as the 19th row, but where 3 p / dc we make decreases, knitting 2 p / dc together. Thus, we decrease 8 loops around the circumference = 88 loops.
- We knit 31 rows in the same way as 12 rows.
- 32 row - the last, we knit with single crochets.
You can continue according to the pattern if you need more depth for the cap. The description is given from the author Yulia Dorokhova.
Crochet men's hats

According to the same principle as in the description above, a men's hat is crocheted. Its main advantage is that it sits on the head like a glove. And it doesn’t look like a banal “stocking” (if not to put it more precisely and rudely) that men don’t like so much.
Men are hard to please, even if you think a hat is great for warmth and looks good, they may have a different opinion. Try to show them this model. Perhaps they will like such a hat, and you will already know how to knit it.
We knit hats with knitting needles for a boy according to the scheme with a description (photo)We knit hats with knitting needles for a boy according to the scheme with a description (photo)
You can simply buy a hat for your boy in a store, but knitting it yourself is much more interesting. In addition, it will be possible to make a choice of materials and an individual style for the child. Children's knitted things cause delight, so we offer to knit the most uncomplicated item on our own. children's wardrobe- a cap. A knitted hat for a boy is a very simple but significant wardrobe item, which is presented in our unique selection. It would seem that the choice of hats for your beloved son or grandson is not so great, but the imagination of the craftswomen is inexhaustible, so the selection provides a fairly wide range of models to choose from. We suggest that you familiarize yourself with interesting options knitting hats with descriptions and photos. 


Winter hat for a boy
In the cold period of time, the main thing for the baby is to keep his head warm, for this purpose knitted hat knitting needles for boys. For knitting, it is desirable to use natural yarn from 100% wool. Below is the course of knitting a winter hat for a boy. If you mix acrylic and wool, the hat will turn out to be autumn or spring. These hats for boys are the easiest to knit. 
To calculate the number of loops, you need to know the volume of the child's head. The dependence of the volume of the child's head on age is presented in the table, which also demonstrates, by the presence of a photo in it, the correctness of measuring the volume of the head.
Children's winter hats, as a rule, are insulated with a fleece lining. Before proceeding with the implementation of a unique hat, we make a choice of tools and materials:
- straight or circular knitting needles;
- decorating elements (buttons);
- two-color yarn;
- scissors;
- needle.
Now you can take measurements:
- measure the circumference of the head;
- we knit a sample with a size of 10 p. × 20 p;
- we measure the length of the sample in cm and find out the number of pet. for a hat, using the measured volume of the boy's head.

Knitting a hat for a boy is provided detailed description. With knitting needles, cast on the approximate number of buttonholes (80-100). If you have knitting experience circular needles, then apply them. if there is none, then we will burn out with ordinary stocking needles, which will give no less interesting and high-quality results. We knit with an uncomplicated pattern - stocking stitch, 15 centimeters from the start of work we knit with such a pattern (on the front side we knit with the wrong side with buttonholes, on the wrong side - with the front ones). In order for the cap to fit snugly around the head, we make reductions. For this purpose, we divide the entire work into eight equal segments, which we will call wedges. At the beginning of each wedge, we decrease by knitting two loops. together at the beginning of each wedge. We make such decreases in each strip of the front pet.
When eight buttonholes remain on the needle, it is worth cutting off the tail of the thread with some margin. Time to use the needle and pull these 8 loops into a small ring. We sew the edges of the work, hiding the seam with wrong side. The stitching pattern is located at the bottom. 
The main part of the cap is ready, it remains to tie the visor and ears. The ears are knitted in stocking stitch. Having knitted 10 centimeters, you can proceed to their rounding. To do this, we knit two loops together along the edges of the ears. face loop. We make such decreases in three rows, then we simply close all the loops. 
We turn to knitting the third element of the cap - a visor, for knitting which we use yarn of a different color. The length of the visor will be 10-12 loops, which will close at the same time in the last row.
So, the winter hat for the boy is ready. The result can be seen in the photo below. Winter hat will save your baby from bad weather and cold.
The link to the video gives talented knitters the opportunity to visually get acquainted with the detailed description of knitting winter hat for a boy 2-uh-3-ex years.
Video: We knit a hat for the winter
Spring and autumn hat may not be knitted from wool, but according to the principle of winter. Knitting such a headdress is not difficult, see for yourself!
Models of hats with a description of the knitting process


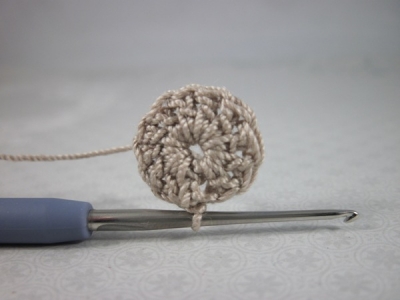
Knitted summer hat for a boy

It can be assumed that in the summer a hat is useless for a child, but this opinion is erroneous. Sometimes a summer evening can let your little one's ears freeze. A summer baby hat can prevent freezing. AT recent times such useful accessory became very popular. Before you start knitting, you need to familiarize yourself with the description of the sequence of work.
Many are accustomed to crocheting children's summer hats for a baby, but a summer children's hat can also be knitted. In order to knit a summer hat for a boy with knitting needles, you can use simple pattern, which is done with knitting needles, its demo photo is presented below.
For work, we need a pair of ordinary knitting needles 3-3.5 mm thick and a skein of cotton thread (composition 70% cotton and 30% viscose) with a density of 100 g per 300 m. You can take a multi-colored thread with a gradient, or you can use different threads, different color and then you will alternate them, knitting the pattern first with one, then with another thread. The diagram below is relevant for summer hats for boys, as well as a photo of a knitted sample.
As you can see, knitted summer baby hats are knitted very simply! 
A hat for a baby should be not only warm, but also modern and fashionable. Moreover, it must be compatible with color scheme with a jacket or overalls. Therefore, in the wardrobe of each child should be at least three hats for the cold season. Knitted things look unusual on small children, so all young mothers should learn this art.
Do not forget that knitting is a rather painstaking task that requires a lot of patience and attention from the needlewoman. Our selection is suitable for both beginner moms and experienced ones. The above knitted
for boys, any needlewoman can do it with her own hands, albeit for more long period time. A knitting pattern with a detailed description will help every woman.
Video: Demi hat
Comments
related posts:
 We knit a jumper male knitting according to the scheme with a description (photo)
 Beanie knitted for newborns with photo and description
In late spring and summer, babies need to wear hats instead of the usual summer options hats to keep your head from overheating sunbeams. A summer hat will protect the baby from sunstroke with prolonged exposure to the sun. natural materials These hats absorb excess moisture well and keep your baby comfortable on the street for much longer. To create a summer hat, this tutorial uses cotton yarn of different shades.
Knit a hat to be, following the pattern.

General knitting recommendations:
- the beginning of knitting is carried out from the center, which is a ring of air loops (vp);
- further ch will be used, columns with 1 crochet (s1n) and connecting loops (sp) at the end of each row;
- for the beginning of each row it will be necessary to knit lifting elements;
- the main pattern of the upper part of the cap consists of 12 rows, each of which is indicated on the diagram in a separate color.
So, let's move on to the description of the knitting process itself.
The start ring consists of 6 ch.

A block of 11 s1n is knitted into this ring, in front of which 3 lifting chs are knitted.
The second row also consists of 11 s1n and a lifting chain of 3 ch, but we already knit 1 ch between the columns.

In the third row, we knit 4 s1n in arches from ch.

The fourth row repeats the alternation of the second row.

In the fifth row, we knit 3 s1n in arches between the columns.

Again we knit a row similar to the second.


After knitting a row similar to the second, we knit a row, where 2 s1n are knitted into arches. Next, we again knit a row similar to the second.

In the eleventh row in the arches, in turn, we knit either 3 or 2 s1n. After that, we knit the columns again, alternating them with 1 ch.

We repeat the row, where 2 s1n are knitted into the arches, and after it we knit white row from columns and air loops.

The next stage of knitting consists in alternating the pattern of the thirteenth and fourteenth rows without increasing the number of loops and columns. The height of the hat should be adjusted by periodically trying on a hat for a child or comparing the height with a regular hat right size if it is not possible to try on an intermediate version of a knitted hat.

The final stage of knitting consists in knitting single crochets (sbn).

We knit 4 rows of sc without increasing the number of loops. After that, we knit a row in which we knit 2 sc into every fifth top of the sc. After that, we make a row of sc without increasing, but with the help of yarn of a different color. Again, the white row is knitted with an increase in the number of loops by knitting 2 sc in every sixth top. Next, several rows of sc are knitted without increasing the number of rows. After white, we introduce a beige row, again white and finish knitting with orange yarn.

As a result of many hours of work, we got such a hat for walking in sunny weather.


And this is a hat along with the same sandbox, under which the colors of the yarn were selected.
Hats have been around since time immemorial. The first drawing of a man in a hat was found during excavations in the ancient Egyptian city of Thebes. Hats at all times had two roles: one utilitarian - protection from heat or cold, the second - symbolic. She was played various crowns, wreaths, etc. something that showed others the status of the owner.
The history of hats and caps is full of various funny and unusual moments. At the same time, over time, headdresses had another role - a decorative one, which remains popular to this day.
One example of a combination of decoration and protection can be children's summer panamas. These are beautiful and comfortable gizmos that you can buy, or you can create with your own hands.
This article will discuss wonderful crocheted panama hats and hats for boys and girls.
Choose light cotton threads and hooks No. 2, No. 2.5 for summer hats. In order to create a beautiful summer hat for babies, it is enough to measure the circumference of the head and add 1 cm to the resulting number, for a loose fit. To calculate the diameter of the bottom, and crochet hats are usually knitted in this way, you need to divide the number obtained as a result of addition by 3.14. Now you have the necessary parameter for the bottom of the cap. Below is a table of the depth of caps for babies of different ages.
There is one more trick in store experienced craftswomen. In order for the cap to fit the head more tightly, the knitting of the last 4-5 rows of the bottom should occur with alternating rows with and without increments. In any case, make a few fittings in the process of knitting, so you will know for sure - you need an increase or it's already enough.
Set Strawberry from a hat, handbag and beads .

You will need:
- Cotton yarn in red, green, white and yellow;
- Wooden beads of different diameters for tying (minimum 15 mm);
- Small transparent beads and beads for decoration;
- Lace for beads;
- Material for stuffing (very little for the hearts of flowers and berries of strawberries);
We start knitting a hat from the bottom. We knit red yarn.

First r. In an amigurumi ring of 8 loops, tie 3 ch. and 15 st. s / n. finish 1 s.s.
Second r. In every st. s / n knit 1 tbsp. s / n and 1 v.p.
Third r. We knit this circle in 1 ch, in each we need to tie 2 tbsp. s / n, between the deuces of columns we knit 1 ch.
Fourth r. we knit similarly to the third, but not 2 tbsp. s / n with a common base, and 3.
Fifth r. we continue to knit in 1 ch. fourth row of 3 tbsp. s / n, but in every 4th loop should be connected (3 tbsp. s / n, 1 ch, 3 tbsp. s / n).
Sixth r. knit similarly to the fifth, but the construction of 1 ch. (3 tbsp. s / n, 1 ch, 3 tbsp. s / n) knit in every 5th ch. They should be arranged in a checkerboard pattern relative to the fifth row.
Continue knitting by analogy until the diameter of the circle is equal to the required one. After that, knit just 3 tbsp. s / n in each vp circle without increments to the desired depth - 2-3 cm. Tie the last rows of art. b/n. you can even make 3-4 decreases in 1 loop so that the cap sits better on the head. Knit the last row st. b / n with pico green yarn.
Now let's start knitting flowers.
Use yarn for the cores yellow color. Knit st. b/n. in a spiral. Make a mark on each row to correctly increase the number of loops.
First r. in a ring of 3 ch tie 6 tbsp. b/n.
Second r. Double the number of loops, knitting 2 tbsp in each. b / n with a common base.
Third r. Knit 2 tbsp. b / n with a common base in every second loop.
The fourth row is knit without increments. Fill the resulting workpiece with stuffing material and knit three rows, making decreases in the same way as increases. It turned out to be a nice yellow heart.
Now knit with white yarn 5 arches of 5 ch, securing them with st. b / n in the fourth row of the core.
We also knit the next row with white threads in arches. In each tie 1 tbsp. b / n, 1 vp, 2 tbsp. s / n, 5 tbsp. with 2 / n, 2 tbsp. s / n, 1 vp, 1 tbsp. b/n.
In the example of such flowers, 3 are needed, but you can decorate the product with any number you wish.
Now let's take a look at the strawberries. We will knit them with red yarn as follows:
First r. Knit 2 ch. and 4 st. b / n in the 2nd loop from the hook
Second r. Knit st. b / n, in the second and fourth loops, tie 2 tbsp. b / n with a common base. There were 6 loops in total.
Third r. Again, increase in every second loop.
Continue inc for 3 more rounds, then work 6 rows without inc.
Now it is necessary to fill the workpiece with stuffing material and close the loops in 4 circles, making uniform decreases. You adjust the size of the strawberries yourself, you can connect more rows with increments, and your berries will turn out to be more juicy. After the strawberries are tied, they can be embroidered with beads.
Now with green yarn we will knit leaves. We offer these 2 schemes, you can choose any that you like more. In the example, the leaves are connected according to the first pattern.


Cast on ch 12 with green yarn.
Then we knit 1 vpp, 1 tbsp. b / n, 1 semist. s / n, 2 tbsp. s / n, 2 tbsp. with 2 / n with a common base, 2 tbsp. with 3 / n with a common base, 2 tbsp. with 2 / n with a common base, 2 tbsp. s / n, 1 half. s / n, in the extreme loop we knit 3 tbsp. b / n and mirror knit the second half of the leaf.
The sepal is knitted from 5 leaves, connecting them into a circle with a ring. Knit in height in a circle. b\n. about 6 - 7 rows, we will get a strawberry tail.
It's time for wooden beads. 6 bigger size tie with red yarn, 6 smaller ones with green. Tie one large piece with yellow yarn.
We will tie the beads. b/n. First you need to tie a circle with a diameter equal to the diameter of the bead.
First r. In a ring of 3 ch. tie 6 tbsp. b/n.
Second r. All loops must be doubled.
Third r. Knit 2 tbsp. b / n with a common base in every second loop.
Fourth r. knit 2 tbsp. b / n with a common base in every third loop.
Fifth r. and knit all the rest in the same way as the previous ones. When the diameter of the circle is the desired size, it is necessary to knit rows without increments. They should be the same number as the rows with increments. Insert a bead and start knitting rows with decreases, in the same sequence in which the increases were made. Reduce loops by knitting 2 tbsp. b / n with a common top.
Now in the middle row of Art. b / n in a bead tied with yellow yarn, it is necessary to knit petals from white yarn, as well as in flowers.
Thread the string through the beads, placing the flower in the center.
Knit a handbag with the main pattern of a hat with red yarn. The last 4 rows knit st. b / n and one more row of st. b / n green yarn. Tie with green threads long chain from vp, thread it into the holes of the last row of st. s / n, fasten one strawberry and one flower on it.
Decorate the hat with strawberries and flowers too. Refer to the photo or come up with your own layout.
Below are the knitting patterns for the handbag handle.

Next summer hat crochet for a little princess decorated with a real crown.

To create it you will need:
- Yarn raspberry color and some yarn with metanit or lurex;
- beads;
- Ribbon to match;
- Hook of the corresponding number;

First r. In a ring of 6 v.p. tie 3 v.p.p. and 17 st. s / n, alternating them 1 cp Finish 2 s.s.
Second r. 3 v.p., 1 v.p., in 1 v.p. of the first circle, tie 1 tbsp. s / n, * 1 ch, skip 1 loop in the next. c.p. tie 2 tbsp. s / n and 1 v.p. between them, again tie 1 ch, skip 1 loop and next. tie 1 tbsp. s / n, 1 ch, skip 1 loop, 1 tbsp. s / n *, continue from * to the end of the circle, finish 2 s.s.
Third r. 3 ch, 1 ch, then tie 2 times in ch. second round 1 tbsp. s / n + 1 vp, * next. c.p. the second round we knit 2 tbsp. s / n with a common base and 1 v.p. between them, then 1 ch, in the next 3 ch. knit 1 tbsp. s / n + 1 ch *, continue from *.
Fourth r. knit not 3 times st. s / n + 1 vp, and 4, in the fifth 5 times, etc. do not forget to knit in the fourth row in every fifth ch. 2 tbsp. s / n with a common base and 1 v.p. between them, in the fifth row - in every sixth loop, etc.
Knit until the diameter of the bottom reaches the desired size, then knit 1 tbsp. s / n in each vp row and 1 ch. between columns. When the cap reaches the desired depth, tie a row of st. b/n.
Next, tie arches from 5 ch. metallic yarn, fixing them with art. b / n in every fifth loop of the row. Second row: knit in even arches 7 tbsp. s / n, in odd 1 tbsp. b/n. Third p.: tie the fields of art. b / n yarn with metallic.
For the crown, you need to take a hook of the minimum number suitable for the yarn, so that the product turns out to be more rigid and keeps its shape better. Knit with metallic yarn.
Close in the ring 30 ch. Knit in height 6 circles. Then divide into 5 equal parts and knit each part separately. We will get 5 rays of the crown with 6 loops in each. Knit 3 rows with decreases. Knit 2 extreme loops in each row on both sides with a common top. Sew beads on the ends. Decorate the entire hat with bows from small pieces of ribbon and beads.
Here is another example of the same hat, made in white.

Next adorable crochet hat fit and for young sailors and for brave sailors, everything will depend on what decorations you attach to the cap.

You will need:
- Yarn of white, blue and blue colors;
- Hook of the appropriate size.

Getting started with yarn white color. We knit the first 11 rows of art. s / n according to the scheme of the usual circle.
First r. In an amigurumi ring of 6 loops, tie 3 ch. and 11 st. s / n. Finish 1 s.s. in the 3rd v.p.p.
Second r. Double the number of loops.
Third r. Knit 2 tbsp. s / n with a common base in every second loop of the circle. in the remaining loops, knit 1 tbsp. s / n. Finish all 1 s.s.
Fourth r. Knit 2 tbsp. s / n with a common base in every third loop of the circle, in the remaining loops knit 1 tbsp. s / n.
Knit the next 7 rows by analogy.
12th p. knit st. b/n.
13th and 14th p. knit yarn blue color. 1 v.p.p., * 5 tbsp. s / n, 5 tbsp. b / n *, continue from *, finish 4 tbsp. b / n and 1 s.s.
15th p. knit st. b / n white yarn without increases and decreases.
16th and 17th p. 3 v.p.p., * 5 tbsp. b / n, 5 tbsp. s/n *, continue from *. Finish 4 tbsp. s / n and 1 s.s.
18th row knit st. b / n white yarn.
Then knit the 19th and 20th rows of yarn of blue color similar to the 13th and 14th rows. Then again a row of Art. b / n with white yarn and 2 more rows of blue yarn, similarly to the 16th and 17th rows. Knit the last row with white yarn. Knit in st. b / n st. s / n and vice versa - in Art. s / n knit st. b/n. Thus, the edge of the cap will turn out to be even. Below is a diagram for an example. Focusing on it, you can connect the most various options waviness. You can start knitting beautiful waves straight from the crown, making increases, as in the group of art. b / n, and in the group of art. s / n.
It remains to decorate the hat, if it is intended for a little sailor.
We wish you even loops.