Pattern of a coat for a girl. How to sew a winter coat for a girl with your own hands? Coat pattern for girls: the best options for young ladies Sew a summer children's coat
What parents don’t want their child to have all the best, from toys to clothes. Especially if there is a little princess growing up in the family, because the desire to dress beautifully is inherent in women’s nature from birth. Therefore, today we will look at how to sew a beautiful, bright coat for your fashionista. Of course, such clothes are not very suitable for spring walks through puddles or digging in the sand, but they look great while walking in the park or attending various social events. The pattern for creating a stylish coat for a girl can be completely different - try to get creative!
Sewing almost any clothing, including coats, starts with a basic pattern. Let's take a step-by-step look at how to build a pattern for the base of a children's coat.
Learning how to create a basic pattern for a coat for a girl
Measurements required to create a pattern for a children's coat:- Coat length.
- Back width.
- Chest circumference.
- Neck circumference.
- The length of the sleeve.
- Arm circumference.
- Fist circumference.
On the left side of the sheet we build a right angle with the vertex at point A. Down from point A, along a vertical straight line we put aside a value equal to the length of the coat according to the measurement + 1cm. Place point B and draw a horizontal line from it to the right. Then again from point A downwards we lay a segment equal to 1/3 of the neck circumference + 2cm, put point C and from it draw a horizontal line to the right - this straight line is the line of the width of the back.
We make the neckline.From point A we put 1 cm down and put a dot, and to the right a segment equal to 1/6 of the neck circumference + 0.5 cm and also put a dot. Using a pattern, we connect these points and get a neckline.
From point C to the right we measure a segment equal to 1/2 the width of the back + 1cm and place the letter D, from it upward we build a perpendicular with a dotted line until it intersects with horizontal A. Along this dotted line from horizontal A down we measure 3cm and place point E. We connect point E with the neckline cutout point located on the horizontal A, an inclined line, which we extend 1 cm beyond point E and place point E1
We draw a side cut line.
From point C to the right in a straight line we lay off a segment equal to 1/4 of the chest circumference + 2 cm and put a point D1, from it we draw a perpendicular downward with a dotted line until it intersects with the horizontal line B. From point D1 down the perpendicular we lay off a segment equal to 1/6 of the neck circumference and put a point F, which shows the depth of the armhole. We continue horizontal B to the right beyond the dotted line by 6 - 8 cm and place point G. We connect points F and G and get a line for the side cut of the coat.
We draw up the armhole line.
We connect points E1 with point F through point D with a smooth line using a pattern.
We draw the bottom line.
From point G we put 2cm upward along the side cut and put a point, this point is smoothly connected to point B.
We continue straight B to the left by 3 - 5 cm and put point B1, connect point B1 with the neckline point on straight AB, we get the line of the middle of the back. When creating a pattern for a straight-cut coat, straight AB remains the midline.

On the right side of the sheet we build a right angle with the vertex at point A. We draw straight lines from point A horizontally and vertically - they are auxiliary. Down horizontally we put the coat length measurement + 3cm and put point B, from point B to the left we draw a horizontal line.
Next, point A down vertically, lay a segment equal to 1/3 of the neck circumference + 3 cm, put point C and draw a horizontal line from it to the left.
We make the neckline.
We construct the width of the neck in the same way as on the back part, and to construct the depth of the neck down from point A we set aside a segment equal to 1/6 of the neck circumference + 2 cm. We put points indicating the width and depth of the neckline and connect them with a smooth line using a pattern.
We draw a line for the shoulder cut.
To do this, draw an auxiliary dotted line, which starts from the cut line of the front neckline 4 cm below straight A. Then, from the neck cut point, located on straight A, along an inclined line we lay off a segment equal to the shoulder length measure minus 0.5 cm until it intersects with the dotted line, put point D.
We draw a side line.
Along the horizontal line C we plot a value equal to? chest circumference according to the measurement + 4 cm and put point E, from it we draw down a perpendicular straight line to straight line B. From point E along this vertical we lay down a segment equal to 1/6 of the neck circumference according to the measurement + 2 cm and place point F, which shows the depth of the armhole. We continue straight line B to the left 8 - 10 cm from the auxiliary perpendicular and put point G, connect points F and G with an inclined straight line, obtaining a side cut line.
We draw up the armhole line.
From point D we lower the perpendicular until it intersects with straight line C, from the resulting point we lay off a segment equal to 1 cm to the right and place point E1, which shows the width of the shelf. We connect points D, E1, F with a smooth line using a pattern.
We draw a line for the curvature of the bottom.
We put 2.5 cm from point G up along the side cut line and smoothly connect this point to point B, straight line AB is the line of the middle of the shelf.
Stage 3. Construction of a side cut.
We continue horizontal B and the neckline line to the right by 5 - 7 cm, connecting the resulting points with a vertical line indicating the side cut. Then to the left of the side cut along the neckline cut line we set aside a segment equal to 1 cm and put a point H, smoothly connect the point H with the line of the side cut. Thus, we get a coat model with a straight or round collar.

We connect the parts of the back and shelves along the line of the shoulder sections, draw a contour on paper along the lines of the neckline and the lines of the middle of the shelves, then remove the patterns of the back and shelves and build a collar within this contour. The cut of the collar stand is formed by the contour line of the neckline, located between the mid-back mark, which is designated by the letter A, and the mid-front sign, which is designated by the letter B.
We draw a cut line for the collar departure: from point A in the middle of the back, we set aside a segment equal to 5 - 6 cm and put a point C. From point C we draw a rounded line, parallel to the collar stand to the line of the middle front and place a point D. From point D along the cut line for the collar departure we measure 2 cm and put point D1. We connect points B and D1 with a smooth line and get a rounded end of the collar. If you want to make the ends of the collar straight, then points B and D1 should be connected by an inclined line.
Stage 5. Construction of a sleeve pattern.
We will construct the coat sleeve pattern in one grid, since it consists of two parts - the upper, which is larger in size, and the lower, smaller part. To do this, we build a rectangle ABCD, the length of which is equal to the sleeve length according to the measurement, and the width is 1/3 of the arm circumference + 2 cm.
We divide straight line AC in half, put point E and from it we lower a perpendicular until it intersects with straight line B. From point A downwards vertically we lay off a segment equal to segment AE and put point F, from it we draw a horizontal line until it intersects with straight line CD. From point C downwards vertically we lay off a segment equal to 1/2 of the segment AF and place point G, from it to the left draw a horizontal line until it intersects with straight line E. from point A downwards vertically we lay off a segment equal to 1/2 the length of the sleeve + 3cm and place point H From point C we lay down a segment equal to 1/2 the length of the sleeve + 4 cm and place point I. We connect points H and I with an inclined line.
Design of the upper half of the sleeve.
To form the edging of the upper part of the sleeve, we connect points F and G with a smooth line passing through point E. To form the elbow cut from point I to the left, set aside 1 cm and place point J1. Then from point B to the right we set aside a segment equal to 2/3 of the circumference of the fist + 2 cm and place point B1. We connect points B1, J1 and G with oblique lines, obtaining an elbow section. Next, we form the lower cut of the sleeve; to do this, we draw a line from point B1 to straight AB so that it forms a right angle with line B1J1. We put point K. The segment LV1 is the line of the bottom of the sleeve. From point H we lay off a 2cm segment horizontally and put a point through which we draw a curved line from point K to point F.
Design of the lower half of the sleeve.
From point F to the right horizontally we set aside 3 cm and place point F1, from it to the intersection with the bottom line we lower a curved line parallel to FK, we get the front cut of the sleeve. To form the elbow section, from point F1 we set aside a segment equal to 1/3 of the arm circumference + 2cm and place a point L. Then from the line of the front cut along the straight line H we set aside a segment equal to 1/3 of the arm circumference + 1cm and place the letter M. Along the bottom line of the sleeve from line of the side cut of the lower part, lay off a segment equal to 1/3 of the circumference of the fist + 1 cm and put point N. Connect points N and M. Connect points M and L with an inclined line, and continue this line until it intersects with straight line G, put point L1. We connect points L1 and F1 with a concave line, deepening it under straight line F by 1 cm.

This is how, without much difficulty, you can dress your princess in a new stylish coat or model products of any other style (for example, the same as your mother’s). As an example, look at several photos of coats for girls of different ages:
We create a stylish coat for a 2-3 year old girl with our own hands

Needlewomen know how much money can be saved by sewing clothes for children themselves. Naturally, in order for the products to be no worse than those on the market, and sometimes even better quality in terms of tailoring and materials themselves, a certain amount of experience is required. But it's all a matter of practice. Therefore, it’s time to arm yourself with sewing supplies, fabrics, accessories and useful tips on how to sew outerwear, and get to work.
This article will look at how to construct a coat pattern for a girl, the basics at the pattern stage, and also give advice on choosing materials and their processing.
Stage one: taking measurements
In order for the coat to fit well on the child’s figure, it must be sewn taking into account the body type. The good thing about bespoke tailoring is that it always uses measurements taken directly from the person, rather than generally accepted sizing standards. Ideal for a girl should be based on basic measurements such as back width, chest girth and stomach or hip girth (whichever is greater). It is by these parameters that the fit of the product is usually assessed. The item should not be too big at the shoulders, and at the tummy it should be wide enough so that you can wear a warm sweater under your coat without any problems.
Of course, additional measurements will be required, such as chest height, sleeve length, product length, and shoulder width.
Stage two: building the basis for the shelves pattern
Children's coat patterns for girls are based on a rectangle, where the horizontal side is equal to the chest circumference + 5 or 7 cm for a loose fit. The vertical sides must correspond to the length of the product.
- Determine the level of the chest line in accordance with the “chest height” measurement.
- Next, on this horizontal line, mark half of the “back width” measurement + the increase for a loose fit and put a dot. Then determine the size of the armhole. To do this, divide the chest circumference by 4 and plot the resulting value on the drawing from the previously set point.
- The remaining segment will be the front shelf area.
- Below the chest line, approximately 25-30 cm (the exact value can be measured from the chest to the convex tummy or hips), another horizontal line is drawn, on which ½ measurements of the larger girth (hips or abdomen) are laid down.
- Next, in the armhole area, find the middle and place a point from which the side seam will descend.
- On the line of the hips or abdomen, on each vertical side of the rectangle, put ½ measurement of the larger girth (hips or abdomen) + 5 or 7 cm for a loose fit. Afterwards, starting from the midpoint in the armhole area and to these marks, straight lines are lowered, which slightly widen towards the bottom of the product.
- Next, you should again go up to the upper side of the rectangle, set aside 5-6 cm from the upper corner for the neckline, set aside the “shoulder length” measurement from the resulting point and deepen the neckline by 1.5 cm for the back and 5 cm for the front shelf. The shoulder seams for the front are drawn similarly to the back.
- Next, move on to the armhole, where you need to connect the extreme points of the shoulder seams with the previously placed middle. In this case, all sharp corners should be smoothed out. In order to correctly design the armhole, you will need auxiliary verticals: from the point of the width of the back to the top and from the point of the border of the armhole and the front shelf to the top.

Additional model details
Children's coat patterns for girls do not have bust darts, which makes construction somewhat easier. If you plan to sew a product with darts, additional measurements will be required, such as the dart gap, which is measured from center to center of the chest. Half of this measurement is laid down on the drawing along the chest line from the side of the front shelf, and a perpendicular is raised from the resulting point. Along the shoulder line, retreat 3-5 cm to the edge of the shoulder and lower the line to the starting point. Afterwards, the shoulder line is extended to a similar distance and the armhole line is corrected. This coat pattern is suitable for a teenage girl. If desired, the dart can be moved to the armpit area by cutting the paper piece until both lines of the vertical dart line up to form a flat plane on the paper.

Stage three: building a sleeve
The pattern of a children's coat for a girl (she is 3 years old, more or less - it doesn't matter) can be with a one-piece sleeve. This template is constructed according to the “bat” type, where the shoulder seams are extended to the required length and the bottom seam of the sleeve is brought out from the side cut, rounding the part in the armpit area. With this cut, the bottom can be well flared or, conversely, narrowed, as in cocoon coat models.
To build a set-in sleeve template, you will need ready-made shelf patterns. They are folded along the shoulder sections, placed on a sheet of paper large enough for the drawing and a solid armhole is outlined, indicating the joint. The upper edge resembles a circle that needs to be completed and closed. Then, at the junction point, the line is raised by 1 cm. Next, a horizontal line is drawn along the lower border of the circle and, descending along the circumference, the edges of the sleeve cap are nullified. In this case, you should take into account the length of the armhole of the shelves so that the sleeve fits into it without problems.
Stage four: modeling
When the template pattern for a girl's coat is ready, it's time to try your hand at being a designer and outline the model lines. These can be pockets, zippers, inserts, raised seams, embroidery, decorative frills, etc. To make it easier to imagine the final version, it is better to draw a sketch of the product. This will help determine both the size of the flare of the shelves downwards and the length of the sleeve with its model features. The sleeve can be decorated with a bow or made three-quarters, complementing it with a high tie.

Material selection
There is such a large selection in fabric stores that it is sometimes quite difficult to decide which fabric to choose. Here you should proceed not only from the style of the product, but also from the purpose of the outerwear. Either it will be demi-season or winter outerwear. The pattern of a coat for a girl described above is suitable for both options, but differences may be in the allowances for a loose fit, insulation and, of course, the main fabric used. It can be raincoat fabric, cashmere, polar or others
As insulation, you can choose holofiber, padding polyester or padding polyester. For interior decoration, it is better to take a dense lining fabric and separately “figure out” the lining on the sheepskin. This will allow you to wear the item both at above-zero temperatures and in decent frost.

Easy to sew
The manufacturing process is not that complicated in reality, so put aside all doubts and sew. The pattern of a coat for a girl is also quite easy to build, a little diligence - and everything will work out! A little imagination for design, a few touches in the form of raised seams or topstitching - and the product will turn out great. The finished coat pattern for a girl can be used for sewing a summer cardigan and a windbreaker. Adjust the length a little and think through additional details in the hood and cuffs - and a whole collection of children's clothing is ready!
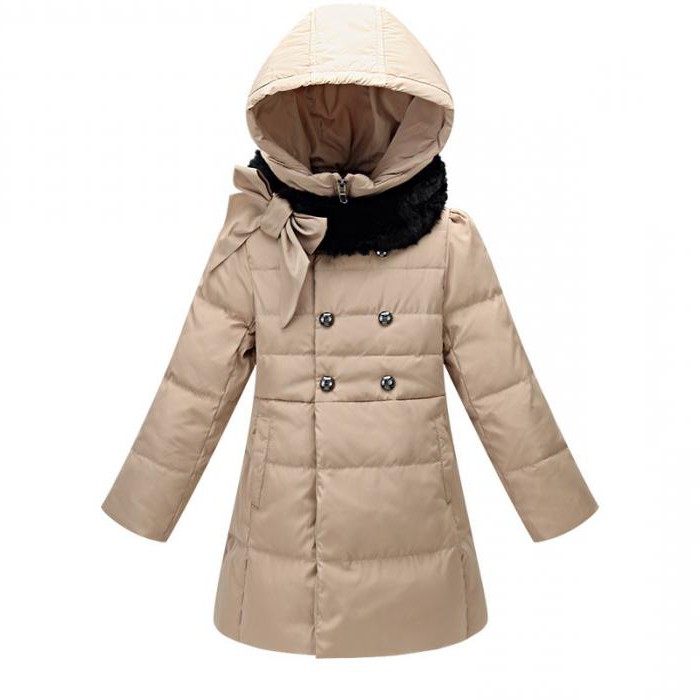
This amazingly cute coat for a girl for the fall is not only very practical, but also very warm, since it is tightly buttoned all the way to the collar! In this coat your girl will not be afraid of any winds.
- Back length to waist………………………..28 cm
- Coat length…………………………………..55 cm
- Shoulder length………………………………………….10 cm
- Half neck girth…………………………………14 cm
- Half bust……………………………32 cm
- Sleeve length…………………………………..40 cm
Constructing a pattern grid
Fig.1. Coat pattern for girls
Draw a rectangle ABCD.
Coat length for girls. Rectangle lines AD=BC=55 cm (coat length according to measurement).
Width of a girl's coat according to measurements. The lines of the rectangle AB and DC are equal to 40 cm (half chest circumference by measurement plus 8 cm for all sizes): 32+8=40 cm.
Armhole depth of a coat for a girl. From point A, set aside 16.7 cm down - point D (1/3 of the half-circumference of the chest according to the measurement plus 6 cm for all sizes): 32/3+6=16.7 cm. From point D to the right, draw a straight line until it intersects with the line BC - intersection point G1.
Waistline coat for girls. From point A, put 28 cm down (the length of the back to the waist according to the measurement) - point T. From point T to the right, draw a straight line until it intersects with line BC, the intersection point is T1.
Back width of a coat for a girl. From point G to the right, set aside 14.7 cm - place point G2 (1/3 of the half-circumference of the chest by measurement plus 4 cm for all sizes): 32/3+4=14.7 cm. From point G2 up, draw a straight line until it intersects with line AB - letter P.
Armhole width of a dress for a girl. From point G2 to the right, set aside 10 cm - point G3 (1/4 of the chest semicircle by measurement plus 2 cm for all sizes): 32:4 + 2 = 10 cm. From point G3 upward, draw a straight line until it intersects with line AB - point P1 .
Raising the front of a coat for a girl. From points B and P1, extend the lines upward by 2 cm, place points W and P2. Connect points Ш and П2.
Coat side line for girls. Divide the width of the armhole G2G3 in half - point G4. From the division point G4, draw a perpendicular down to the line DC - point H. Designate the point of intersection with the line TT1 as T2. Auxiliary lines of the shoulder and armhole of a coat for a girl. Lines PG2 and P1G3 are divided into 3 equal parts.
Coat patterns for girls - building the back
Coat neckline for girls. From point A to the right set aside 5.2 cm (1/3 of the half-circumference of the neck according to the measurement plus 0.5 cm for all sizes): 14/3 + 0.5 = 5.2 cm. From point 5.2 upward set aside 1.5 cm Connect points A and 1.5 with a concave line.
Shoulder slope of a coat for a girl. From point P downwards, set aside 1.5 cm. From point 1.5 (neck) through point 1.5 (shoulder slope), draw a shoulder line 11 cm long (shoulder length according to measurement plus 1 cm for all sizes): 10+1= 11 cm.
Armhole line of a coat for a girl. From point G2, dividing the angle in half, set aside 2.5 cm. Draw the armhole line from point 11 through the upper dividing point of line PG2, point 2.5, to point G4.
Side seam of a coat for a girl. From point T2 to the right, set aside 2 cm. Draw the side seam line from point G4, 2, to the intersection with the line DC, set aside upwards, set aside 1 cm - point H1.
Bottom line of a coat for a girl. Divide the distance DN in half and connect the division point to point H1.
For modeling we need the same basics:
The width of the shelf and the width of the back, in the chest area = OG + 8-10 cm / 4
Next up is this model.
And again we start with the grid. The bottom line H, the top line B - the total length of the coat, the waist line T (dotted line) - from the top down according to the measurement of the length of the back waist, the yoke line K - it is 4-5 cm above the waist line. Draw a line perpendicular to the bottom line, with The left edge of the paper is the middle of the back.
We apply the base of the back to the middle seam of the back, outline it to the yoke.
Our coat is double-breasted, for girls under 3 years old, the half-skid width of a double-breasted product, I suggest taking 6 cm. For older girls, 7-8 cm. Above the yoke, the side line runs diagonally, about 2 cm wider, at the top. Therefore, from the right line perpendicular to the bottom, we set aside the width of the half-skid + 2 cm. We draw a line perpendicular to the bottom, the line of the middle of the central part of the shelf.
.
We decorate the central part of the shelf and the cut of the side. From the middle of the central part of the shelf we set aside the width of the half-skid from the yoke line to the bottom line, in both directions. Draw lines parallel to each other.
On the top line, from the middle of the central part of the shelf, set aside the width of the half-skid + 2 cm, in both directions. We draw inclined lines on both sides. To the left of the center we outline the central part of the shelf, to the right we draw a straight line to the side, with a rounded corner.
Outline the side of the shelf, up to the yoke line.
Draw the bottom of the coat. We measure the width of the lower cut of the back yoke, multiply by 1.5 times, set aside the width from the middle of the back, along the line of the yoke. Along the bottom line we set aside the same width + an increase for expansion. Draw a side line.
We measure the width of the lower cut of the yoke of the side of the shelf. We multiply this figure by 1.5 times, measure the width of the lower side part of the shelf along the yoke line. Along the bottom line we mark the same length + an increase for the expansion of the bottom (as on the back). Draw a side cut.
Deepen the armhole by 2 cm.

The sleeve in this model has a one-piece cuff. Sleeve length = LO + increase in length of outerwear 2 cm + 6 cm cuffs + 6 cm subcuffs + 3-4 cm hem allowance. The height of the cuff can be either greater than this figure or less.
The width of half the sleeve = the height of the back of the coat. Outline the sleeve cap. We design the side sections of the sleeve.
Sleeve width at the bottom = OZ (wrist circumference) + 8-10 cm
This is what the cut details of this coat model look like.
Shoulder, relief seams, armholes, casing - 10-15 mm. The side seams of the front, back and sleeves are 2 cm. The seam allowance is 5-6 mm. We do not make an allowance at the neckline. The hem allowance for the bottom of the coat is 4-5 cm.
Write questions about changing model details in the comments.
And again we start with the grid. Bottom line, top line, waist line, yoke line - 5-7 cm above the waist line. Back width = OG + 8-10 cm / 4
Outline the base of the back, up to the yoke line.
To the right, from the side line, we set aside the width of the half-skid. In this product, 5-6 cm will be enough. Draw a line in the middle of the shelf, perpendicular to the bottom line. We outline the shelf, up to the yoke line.
Deepen the armhole by 2 cm
On our model, the seam of the yoke contains 2 one-sided folds on each side. I assume that the cut at the back is similar. Mark the folds. For example, from the middle of the shelf and back, the first fold is 6 cm and the second fold is 4 cm. And measure the remaining length of the back and front along the yoke line. The width of the fold is not large, 2.5-3 cm
We set aside 6 cm from the center lines of the front and back, add a fold depth of 5-6 cm, then mark 4 cm to the next fold, then mark the depth of the second fold and mark the rest of the yoke cut length. Along the bottom line we make an extension of the lower parts of the shelf and back.

Sleeve with cuff. Sleeve length = LO + 2 cm - cuff (5-6 cm). Half sleeve width = back armhole height. Outline the okat. Sleeve width at the bottom = OZ + 10 cm.
Draw a cuff. The height of the cuff part = 2 x the height of the cuff (5-6 cm), the length of the cuff = the width of the sleeve at the bottom - 4 cm.
The seam allowances are drawn with a pen.
It is necessary to develop good taste and sense of style in children, and even more so in girls, from early childhood. Any mother can sew a coat for a baby; in such a thing the child will feel warm and comfortable.
Coat patterns for girls of different ages can be downloaded and used in your work. Depending on the chosen model, age differences and cut features, the patterns may have certain differences, but, in general, the standard pattern consists of the main parts: back, front, sleeves, collar. A hood or patch pockets are also possible.
Coat patterns for girls under 10 years old
For a little girl, a coat-coat is perfect, which you can sew with your own hands, focusing on patterns. To work, you will need main and lining fabrics, insulation, and original decorations. Fabric calculations should be made in accordance with the size of a child who is 2 years old. All children are different, so even an already developed pattern must be adjusted according to individual sizes.


Today, there are various coat models that you can sew yourself for a 3-year-old girl. When looking for a suitable model, it is important to remember that a child at this age is very active, so the coat should be sewn in such a way as not to hinder the child’s movements. Whatever model is chosen, the main thing is to focus your work on the developed pattern. The pattern of any coat model consists of the following parts: back, front, upper and lower halves of the sleeve and collar.


Autumn coat patterns for girls under 10 years old
An autumn coat model for a 5-year-old child, first of all, should be practical, comfortable and, most importantly, warm to protect the child from strong winds.
When creating a coat pattern for a girl, you should start by taking all the necessary measurements, namely the length of the back to the waist, measuring the expected length of the coat, finding out the length of the shoulder, the half-girth of the neck and half-girth of the chest, as well as the length of the sleeve.
After taking measurements, the pattern of a children's coat for a girl is transferred to paper. First of all, you need to draw a rectangle. The length of the lines of the rectangle should be equal to the intended length of the coat, and the width should be equal to the distance equal to the half-circumference of the chest indicated in the measurements, plus 8 cm. You should also measure the depth of the armhole, mark the waist line and the width of the back, then mark the width of the armhole and the line of the sides. The pattern consists of several parts: the back, the front, a patch pocket is outlined with dotted lines.


For schoolgirls, a demi-season coat can be an indispensable item. For children who are 9 years old, it is important that the coat be of rich colors, perhaps of an unusual cut with interesting decor, but at the same time comfortable and warm.