Processing of the armhole in sleeveless products. Master Class. Treatment of the neck and the armor of a single slide in products without a collar and sleeves. In the Cabinet of Technologies, you also need to follow the rules of safe operation when working on a sewing machine
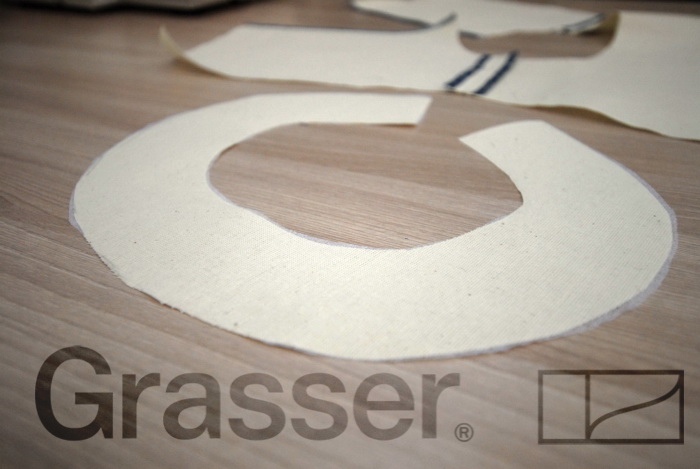
We propose to handle the neck with a slap. The wrap is a detail that completely repeats the form of a certain area of \u200b\u200bthe product. What is it necessary for? In order for the curly cuts of the products beautiful and purely processed, and that the product has a decent appearance. The httop can be treated with a neck, a slice of the waist, the area of \u200b\u200bthe product and the nose of the sleeve, etc.
Today, for example, we will show in detail how to process the neck of the product. You can use our recommendations when sewing such models - Dress number 149, Dress number 83, Dress number 48, Dress number 68. If there is a zipper in the product, then in this case the cut is processed by the slap not quite usually and the mass treatment options. But there is one way we love very much. We hope that he will have to do with you. 1. Prepare the area for cutting the calculation.
2. Determining the wrapper of the required area. For example, the hook of the neck may consist of both one part and be solid, so can and share the backs and transition parts. If the fabric allows, make a solid wrapper. There will be no extra seals. 3. Duplicate Fliselin Cleaner.
4. Creament on overlock an external slice of the wrap.

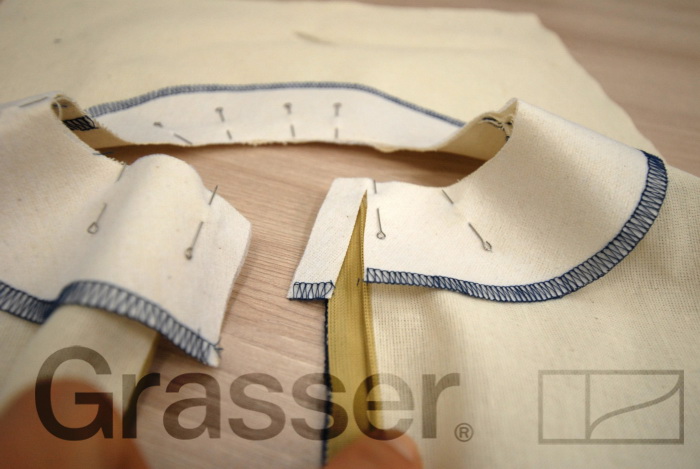
5. We feed the zipper in the middle seam of the backrest. 6. We fold the face of the handle with the face of the product. We rock pins.

7. Cut the width of the zipper of the hint of the wrapper on both sides.

8. We connect the ends of the wrap with the cuts of the middle seam of the back. It turns out a bubble. Do not be afraid, it should be!
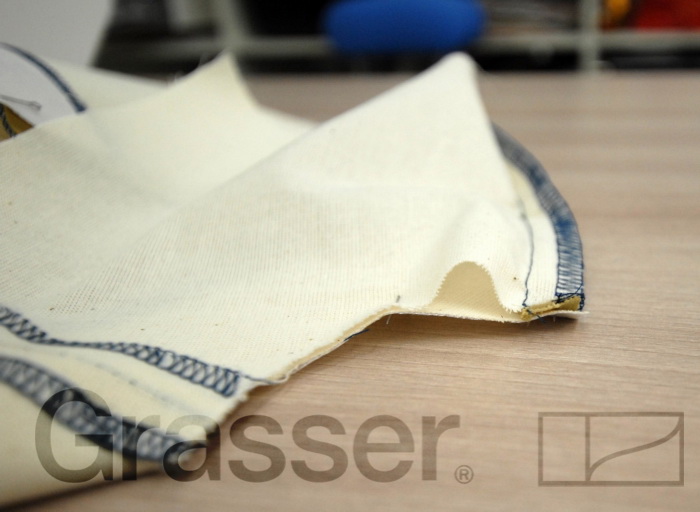
9. We feed the lightning ends to the edges of the slices of the middle seam of the back.

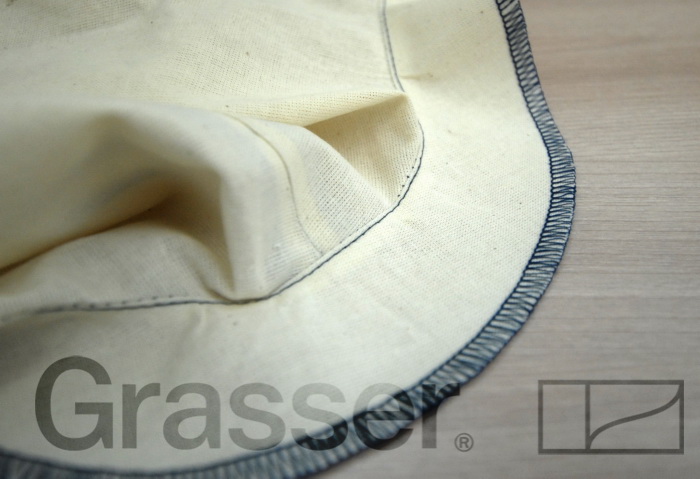
10. Bend all the allowances for the slap. Now the bubble should disappear.

11. Fix the poverty pins.

12. We calculate the neck with a slap.

13. Dry the breakage of the throat of the neck so that the allowance does not interfere with the remipse.

14. Disclosure in different directions a hint and product. We guide the allowance for the slap. Weeping.
15. We deploy a functional line by a lifting by 1 mm from the suture of the apparable. Thus, the allowances will be enshrined on the slap and the wrapper will never get out out. The line you will not be paved from the lightning itself. Therefore, retreat approximately 3-5 cm.

16. Film the wrapper on the product. Weeping. 17. Fix the shuttle stitch with manual stitches.

It is possible dozens of different ways to treat sections. Today we will look at
how to treat a lace dresses of oblique baker
In the example of a dress with lace sleeves, but any other dress can be processed in the same way. Why exactly lace sleeves and such a processing method? Because the armies are shifted through the lace, it should be treated with all accuracy.
By this time, the neckline of the dress is already purely acquired by the lining.
It is necessary to combine the breaks of the dresses and a subcords without distortion. It is easy to do if the lining exhailable in the details of the top either according to the designated pattern of the dress.
You can notice with oblique stitches layers around the armor so that they do not move during operation.
Switch the sleeves.
It is impossible to present oblique beaks to carve yourself, "without fail, it is impossible to submit any purchased beek here. Soft cotton battered or other thin matter. In our example - a delicate silk chiffon.
Spit strips to cut strictly at an angle of 45 degrees. Strip width take more than 3 centimeters. This is gentful and thinner fabric, the wider stripes. I have an initial 5 cm, from which after the iron hardly left 3 cm widths.
Skeid oblique beyk in half. Neither fitting nor special footsteps are needed. We all feel and do their hands, - we have only two armies, and not industrial production.
Gentle fabrics I sometimes praise with a special spray for collars to be obedient in work.


Spelling folded in half the oblique beyk to the slot of the sleeve. Of course, you can make pins, and not to take. But oblique beyk, especially from chiffon, is an unstable substance, so I prefer to be reinforced with a mixture line. Silk threads are easily removed.
From the beef beaks to a line 1-1.5 cm. Monitoring so that the line is paired next to the suture of the suture of the sleeve, for 1 mm. Control on both sides.
Touch the oblique beyon from the side of the subclass, focusing on the suture of the suture of the sleeves. Stitching in the seam appament or 1 mm from the line.
Exactly cut off the unnecessary breakup of the armhole, leaving 4-6 mm to get a thin edging.


Neatly knock the oblique boobs to the allowance
Shake oblique bay cut. Fasten the oblique slap with resin stitches (or pins) on the reverse side. Revenge.


Then pin it with a typewriter. I prefer to do this last operation with manual secret stitches.
Remove threads notes, make WTO. Orange bumps of the armholes start in the side of the sleeve.
In the example of the master class width of the edging amounted to exactly 4 mm. And she is absolutely invisible in the finished dress with transparent sleeves.
This master class is quite simple and short. I did not open any secret way to process the bay bay. The whole secret is in the accuracy and thoroughness of each operation. Do not hurry, do not simplify. And everything will work out.
Processing of the armhole in products without sleeves
Treatment of the Army by Cutecker
Treatment of the armor with a waste, baker, edging
The method of treating the armor in the products without sleeves is mainly determined by the properties of the material (thickness, sweepability, transparency, elasticity) and the model (the presence or absence of a finishing line, finishes, edge along the edge of the armor).
The armies and the neck in products made of woolen fabrics, thick elegant silk fabrics, thick linen fabrics with lavsan are treated with undercurrent furnishings.
The runts in products made of x / b and thin linen fabrics are treated with a double oblique baker (extruded at an angle of 45 ° to the equity direction of the thread folded doubly).
Processing is made to the stratification of lateral seams. In products from linen and dense x / b fabrics, processing is produced after stating the side seams with laying the ends of the bays on each other.
Treatment of the arm and neck in products made of velveteer fabric (vests, sundresses) produce under the cutting of the inner cut and the subsequent crossing of it on the C / M of the secret stitch. Allowed in separate models adjustment on the rapid machine.
Treatment of the arm and neck in products from woolen fabrics and knitted webs (vests, sundresses) with a finishing line of 1.0 cm and produce with subclass furnaces with coating inner cut without subsequent attachment.
The armies in sleeveless products or short-sided stems are treated with a sealing sleeve, an edging seam with one open section, with two closed sections on a machine with a special device, one or two lines on the machine without a special device, as well as using a twice as folded oblique beyk.
Treatment of waste suture.
Before processing, the breaks are connected by side and shoulder sections.
Treatment of the wagon.
This method is most often used in blouses and dresses, where there is a collar or a fantasy neckline of the neck, where it is impossible to apply a single treatment of the neck and a trace of a solid coverage.
The indisputable plus processing by the provisions of the covers is that the armor looks very neatly with the front side of the product. In this case, there are no lines from the face, in contrast to the processing of the bike bays.
The configuration of the sheets is fully coincided with the shelves and backrest.
On the hints never (!) Fucks and unnecessary seams that can be avoided. For example, if there are embossed seams on the model, which starts from the armor, this does not mean that the same embossed seams should be on the tricks. Changing the Details of the Cups of the Proucy, you need to immediately close all the cuttings and reliefs that can be at the product.
The wrapper serves as a means of fixing the shape of the arm and their protection from stretching. In order for the garbage to keep the shape, it is strengthened with a glue material that needs to be selected in thickness and properties under each type of fabric.
Parts of the wrap are folded by the front sides inside, equalizing sections, and the seam width is 0.5 - 0.7 cm. The seams are wearing. The inner sections of the shells are driven towards the inside of 0.5 - 0.7 cm and drain at a distance of 0.1 cm from the adjacent edge. In products made of easily saving tissues, the sections are pre-coated on a special machine.
The furnace is folded with the product with the facial sides, equalizing the cuts, are calculated by the armhole (width of the seam 5-7 mm). On the bringes of the allowances dissect, the wrapper is turned off to the wrong side, straighten and pull out a kant from the armhole (Kant width of 1-2 mm). Kant is fixed, adjusting the cutting of the seam of the exhaust to the slip.
The edge of the wrapper is attached to the allowances of side and shoulder seams with manual or machine methods. In expensive products, the edge of the wrap is sewn to the product with secret steer stitches in several places.
If the ends of the hopper are not steel, the crawling of the armor begins, retreating from the ends of the wrap at 3-4 cm, the unattached ends of the calculation are stepping. Sooch lay out and scrolls the armor on the remaining plot.
The wrapper is rejected by the insole of the product, forming a boiler. Premises in finished form are afforded.
Double bay. The width of the beaks in the crop is 2.5 - 3 cm. It is squeezed by half the length, equalizing the cuts. Calculate the armored by half of the baker, having places from the front side of the product and equalizing the sections of the armies and faces (seam width 5-7 mm). Seam sections on rounded areas wait. Customize the suture of the crawling on the bay (the seam width is 0.1-0.2 cm). Introduce the place on the wrong side of the product with the formation of Kant from the armhole; Customize the fold of the beefing on the width of 0.1-0.2 cm wide.

Single focusing bay. In products, where the edge is provided on the edge of the armor, the single-sided beaker is used for processing. It can be made from both the main and finishing material. The armhole is treated with a socket baker both in the open form (with a unstable side seam) and with the connected side sections. In this case, the beaks are pre-rated on all cuts, i.e. In the ring.
Beak (in products from thin materials, it can be pre-tunted) are placed by the front side to the involving side of the product, the sections are equalized and the arm is equalized (the seam width is 5-67 mm). After turning the faucet and straightening Kant along the edge of the baker's armor, fell and adjust the free edge of the beaks. The finishing line can be laid on the inner edge of the faucet.
The width of the beaks should be the same along the entire length of the armor.Circulating seam processing
To process the armor, the bays are cut off at an angle of 45 ° to the base of the base. Parts of Beach and Ends Stop. The line should pass in parallel the filaments of the base of the seams cut, leaving the allowance of 0.5 - 0.7 cm. The seams are wearing.
When using the machine without special protection, edging in two receptionsFirst, they are damped to the breakage of the armor from the front side, then, ribbing the seam allowance, beaks beyond the purl side, sweep the edge and drag, placing a line in the seam (i.e., with the involving side of the armhole, it takes place over an edge. 2 mm from the inner bend, and on the front side - by edging, by the armor).

The ends of the beaks are allowed to raise simultaneously with side cuts, while the upper and lower edges of the edging in the side seam must coincide, and the seam allowances are adjusted to the product with a double reverse machine line, placing it across the edging at a distance of 5 mm from the seam.
When processing the armor of the edging seam in products from thick materials The inner edge of the oblique beyk is not beyond, the inner cut is preliminarily cooled on the specialist and drain without bending.

When using a special appointment to the sewing machine - edging - the premium will edit in one reception. For this, the strip for edging is filled with a special process and adjust the machine line. In one reception, you can edit the armor and on a universal sewing machine if the ready-made oblique beyk is used. It is settled so that the bottom edge is 1 mm wider than the upper, take the breakage of the armhole, adjust on the upper side at a distance of 1 mm from the inner bend

In products from thin materials for finishing the armhops use circuit seam with double edging, which allows you to not releate the inner cut, flexing it, but simply knock the fold of the double beams. The ends of the double beaks are not allowed. Beach beyond the insertion in the middle of the inside, the cuts are equalized, the cut of one end of the wrap is tailored inside 1 cm and applied on the front side of the target of the bent in the direction of the product, the sections of the faces and the armies are equalized and shedding from the side of the beaks. The width of the seam depends on the model, while the untreated end of the beaks should go for an adjacent disposition of faces by 1 - 1.5 cm. Baika is rejected on the inside of the product, ribbing the seam and forming a kant, kant is fixed with a machine line from the front side This under the line from the wrong should be asked to fold the beaks and the line should be held at a distance of no more than 0.3 cm from the edge (fold). Premises in finished form are afforded.

In products from thin transparent materials, the edge edge edged with a strip of primary or lining fabric in the color, out of oblique. Then the edged edge is rebuilt on the wrong side, the kant is straightened from the armor. Fold fit. The inner edge of oblique beyk is attached to the allowances of the seams.
Bead - a project dedicated to Bead and beaded needlework. Our users - beginner beaders who need prompts and support, and experienced masters who do not think of their lives without creativity. The community will be useful to everyone who in a bead store there is an insurmountable desire to spend the entire salary on the package of lowned beads, rhines, beautiful stones and components of Swarovski.
We will teach you to weave very simple jewelry, and help you understand the intricacies of creating real masterpieces. Here you will find schemes, master classes, video lessons, and you can also directly ask for advice from famous bead masters.
Do you know how to create beautiful things from beads, beads and stones, and you have a solid school of students? Yesterday you bought the first bag of beads, and now you want to weave the bastard? Or maybe you are the head of the solid printed publication dedicated to Beejer? You all need us!
Write, tell about yourself and your work, comment on the entries, express the opinion, share the receptions and tricks when creating another masterpiece, share your impressions. Together we will find answers to any questions related to beads and beads.
Hello, my dear blog readers! Now we will learn processing the neckline and arm Dresses (it may be top), the wrap will be soloked. This is one of the favorite methods of processing Gorlovin at the tailors, it is made simply (although you can not say at first glance), and looks like a product very beautiful and expensive, if you apply this method of treating the neck.

So, you already have a cut out of the upper part of the dress.
We are proceeding.

We sew the side sections of the products, the allowances are irrigated and cozy.


We are processing the glue gasket with a solo-rolled slip. Strip out the parts of the wrapper with the cutting of a sequinos and a 7 mm armhole, after duplication, be sure to make the ONNOR.
ONNOROK - this is such a process when we apply to the duplicated item again the pattern and again we supply it, because in the process of duplication it could give a shrinkage.
It is very important - from which fabric you sew your dress, you need to take into account that, for example, Poplin and staple can give a shrinkage to 15-20 cm on 1 meter of fabric. And it is a lot, and threatens it by the fact that in the finished stitched dress you can simply not fit, and you will have to break it.
Therefore, before opening, do not forget to wash and try with the ferry your dress fabric.
We connect the parts of the slaughter on the side sections and irrigate the allowance:


The lower sections of the hopper are cozy or edged.
We put the garment to face to the product, we combine the sections of the neck and the arm, we take and sew, not reaching the shoulder sections 4-6 cm (See Fig. below) 

Cut the allowances to a width of 0.7 cm and make the lashing in a checker order along the neck and prummam. The wigs are needed in order to when we overtake the product on the front side, there was no tension anywhere.


Soak the wrapper on the front side and make a sequence line (this line comes at a distance of 1 mm from the seam of the stacking of the hopper and the product, it goes along the detail of the wrap, sewing into the slimming of the cutting and fixing them). When you make a sequence line and sore - the wrapper will lie perfectly. Perhaps, in narrow places on the shoulders it will be difficult so slipping the fabric under the needle to make a sequence line, in which case, do the place to which the line will be obtained, and the rest can be used manually.
The shoulder sections of the backrest and handling the products are folded to face, we descend and stitch on the machine, then wean the allowance.
We combine the shoulder sections of the wrapper face to face, also descend, stepping and weakening them.
 Stroke the shoulder seams of the product and wrap. In the form turned on the front side, it should look like this:
