How to make a big ship out of paper. A ship with two pipes. Instructions for creating a simple boat
It is easy to make a toy boat out of a simple sheet of paper and set it sailing along the stream and along the water expanses of the bath. You just need to remember a simple instruction on how to make a boat out of paper, how to fold it in order to get a water-resistant structure. This is a simple, but very exciting thing.
Parents can make paper toys for small children, older children can learn this simple art themselves. A series of video tutorials offers master classes after watching which you can perfectly build entire fleets of paper boats yourself. They get wet over time, but you will have time to make new ones.
The video tutorial details the following steps:
- fold A4 sheet in half, then in half again;
- fold the corners of the sheet to the center;
- we bend one of the remaining strips up and bend the corners, the same thing on the other side.
Next, open the resulting square and fold along the other axis. We bend the corners to the center, but not completely. If the points to which the bend is made are located at different heights, the bow and stern of the boat will turn out to be of different heights, which will look interesting. Then again the square is folded along another diagonal. It remains to open the structure by pulling the opposite ends with your fingers and trim the resulting boat a little.
It can be put on the table, it will be stable. With the same success, he will be able to stay on the water. Now you know how to make a paper boat.
Video lesson:

To make a boat out of paper with your own hands, you need:
- take a sheet of paper measuring 20 x 20 cm and fold it diagonally, then along the other diagonal and unfold;
- bend one of the corners of the sheet to the center;
- fold the sheet several times diagonally.
Next, several small triangles are bent, and a series of bends is made, during which the pipe of the boat and its other elements are formed. To do everything right, you must strictly follow the instructions of the video tutorial. The stern of the boat is folded, and its halves are fixed with glue. This is the only place where the design is not held by the forces of paper bends, but requires the use of glue.
The boat resembles in its form a modern pleasure boat, has a swift appearance and is very stable both on a solid surface of the table and on the surface of the water.
Video lesson:

The proposed step-by-step instruction on the video tells how to make a neat pleasure boat out of paper with swift outlines. On sheet A4, by bending two diagonals, a regular square with diagonal bends is marked.
The strip of paper remaining after the formation of the square is folded in half, the corners are folded on it. The marked square is also folded in half, and its sides are tucked inward. Instead of a rectangle, a triangle is obtained. The whole structure is folded in half, the fold lines are carefully ironed.
This is followed by a whole series of sheet additions, which are easy to reproduce by watching the video tutorial. In the end, the paper construction turns inside out, forming a neat boat with a flat bottom, very stable both on water and on a hard surface.
Video lesson:

Making an origami-style paper ship is very easy. It is enough to take a square sheet of paper, bend it diagonally. Then one of the sides of the resulting triangle is bent as shown in detail in the video. The fold lines are well ironed. Then the square unfolds, and all the fold lines fold in the opposite direction.
Actually, this is where the manufacture of the boat ends. It does not have a bottom, there are only beautiful sides in the shape of a boat's bow. The free edge of the paper triangle depicts a sail unfurled over the boat. Of course, such a sailing boat will not float, but if its back edges are glued together, it can become a beautiful silhouette that can be placed on a table or hung on a thread.
For origami, it is not functionality that is important, but figurative similarity.
Video lesson:

From a sheet of A4 formant paper, you can make a small capacious boat, quite capable of floating on water and even transporting any cargo. A square sheet of paper obtained from A4 size is folded into a rectangle, then each of the halves is folded several times, while the corners are bent, which form the profile of a paper boat.
Different folds form the outlines of the bow and stern, in the end a punt with high sides is obtained. In children's games on the water, such a boat can serve as a good vehicle. She does not get wet for a long time and does not disappoint young sailors.
Video lesson:
If you do not know what to do with your child, then make him a craft in the form of a boat. A toy, like in childhood, can be created overnight, and the baby will get great pleasure. To make a ship, you only need a piece of paper and the sleight of your hands. A little effort and a new fun for the child will be ready.
How to make a paper boat with your own hands
There are several options for how to make a ship out of paper. The manufacturing process will take no more than two to three minutes. To create a toy, you will need a sheet of plain A4 paper or cardboard of the same size. Glue, scissors and other additional tools are not needed, because the origami technique will be used for craft crafts. You can make a paper ship according to the easiest scheme or try to make a steamer, guided by a photo or video.
DIY simple paper boat
A diagram of how to make a paper boat of the simplest variation can be mastered even by a child. To build a toy water transport, you will need a minimum of improvised means: instructions and an album sheet to make the product large, durable and stable. Such a vessel will last a long time on the water, delighting its owner. Paper can be both white and color - each of the options is good in its own way.
You need to fold the craft, following the step-by-step instructions:
- Fold the prepared paper sheet in half.
- The bent side should be folded in half again up.
- Bend the corners at a right angle to the central part.
- Bend each free edge upwards on both sides, and tuck the free corners into the inner part, forming a triangle.
- Then bring the corners at the base of the figure together, getting a square.
- Bend the corners of the square from below to again make a triangular figure.
- Bring the corners at the base of the triangle to each other, forming a square.
- Take the resulting figure by the upper corners and slowly pull it to the sides until the product opens, turning into a boat.

How to make an origami paper boat
Using the origami technique, you can create any existing object. How to make a paper boat from a single sheet, giving birth to ships, boats, twin-tube steamers, Titanic and other ships? Very simple, for example, a miniature yacht, created in stages with your own hands, would be a great idea for launching water. You can take a sheet of one-sided colored paper so that the boat itself turns out to be bright colors, and the sail is white.
Step by step, following the steps, you will learn how to make an origami boat:
- Roll an arrow from a square-shaped sheet, bending it towards the opposite edge.
- Fold the resulting figure in half.
- Bend the hull of the ship, forming a right angle of ninety degrees between it and the sail. Unfold the created figure.
- Press the fold lines on both sides inward and sharpen the front of the boat.
- Bend the pointed bottom inward for balance.

How to make a paper boat with a sail
If you are interested in how to assemble a paper boat, then its scheme will not seem complicated if you have mastered the technique of a simple master class, how to make crafts in stages. A spectacular ship can serve as an original gift not only for a child, but also for an adult who is attracted by the sea and everything connected with it. There are several ways to make a ship with a sail, here is how one of them is done in stages:
- From sheet A4 we make a square, cutting off an extra piece.
- Bend the resulting paper figure in the center and diagonally to form sixteen small squares.
- Bend the sheet from four corners in the central part and connect the two edges to each other and to the center. Do this for all corners.
- Turn the figure over, bend twice diagonally.
- Connect the triangles that are on the right side of the product to each other. They will be the sails.

How to fold a paper boat into a box
It is easy to make a boat not only from an album sheet, but also from thinner notebook paper or newspaper. Such a product will be less durable, but it will be possible to play with it for a while. The ease of making a boat allows you to make such crafts in any free minutes, for example, at a break at school, in order to fun while away your free time intended for relaxation.
How can you make a paper boat? Everything needs to be done step by step:
- Take a square piece of paper and fold it in half.
- Mark a line and bend the workpiece in half again.
- Bend the corners, but only the layer that is on top, bringing it closer to the intended line. Perform similar actions on the other side.
- Bend the bottom corners with a fold towards you, going inward.
- Fold the top layer in half.
- Lay the product in the middle, creating two folds.
- Unscrew the two corners and unfold the created blank.

How to make a steamer out of paper - step by step instructions
A paper steamer can be a great alternative to a traditional ship. It is not very difficult to make it, so you can try the creative work of making a boat with your child. Yes, such a ship is not capable of sailing on water for a long time, but it can perfectly cruise along a fictional sea, competing with ordinary boats. A beautiful craft is sure to interest the child with its original look.
Step by step the steamboat is done like this:
- It is necessary to take a leaf of a square shape.
- Bend each of the four corners to the central part.
- Then you should turn the resulting workpiece in the shape of a square and again bend all the corners to the center.
- Turn the resulting figure over again and again bend all four corners to the center.
- Turn the square over again and again bend the corners to the central part of the product.
- Turn the workpiece over again, but already begin to gradually bend and open two opposite squares.
- The remaining pair of squares remains to be gradually pulled around the corners in different directions.
Learn about other do-it-yourself paper crafts, for example, a swan.

Video: how to make a ship out of paper
You can easily create a boat of any complexity, guided by the master classes presented in the free videos below. They describe in stages how to make a beautiful paper craft in the form of a sailboat, an anchored steamer, a pirate or warship. There are many ways to make a paper boat, so you can choose the easiest model for yourself and create a toy boat.
How to fold a paper boat with two pipes
DIY big paper ship
Hi all! Spring is here, and summer is coming. The most beautiful and warmest time will begin, streams will run and we will all go hiking and picnicking. Children will launch boats, launch into the sky, and we will fry
By the way, a paper boat is excellent, and on May 9th. Therefore, if you are still in doubt, you can use this particular toy and you will have an original idea for a small souvenir.
As a child, I really loved such games in nature, and when I grew up I began to sit out of paper and fold different figures, I really liked this activity. Now we often do such creations with my favorite rascals.
Do you really know the answer to this question? After all, it’s not difficult to fold such a figure, in principle, the main thing is to decorate and arrange it somehow in a special way.

The simplest is the origami technique, I will start with it.
1. Take a rectangular sheet such as A4. Place it horizontally in front of you.

2. Then fold in half as shown here.


4. And then open it to its original position, but the line will be visible.

5. Mark the line with a pencil.

6. Now you need to make a triangle on top.
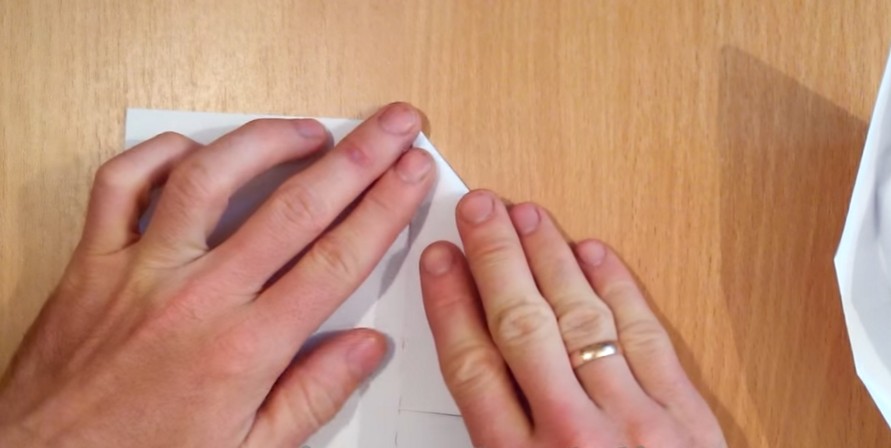
7. Here's what happened. Do everything carefully and to make it symmetrical.

8. Now, bend those ends that have formed.

9. After that, iron with your hands.

10. The resulting corners you need to bend on both sides.

11. Then start opening the intended stencil.

12. You get such a square.

13. Bend the bottom corner.

17. And close as shown here in this picture.

18. On the other hand, also bend.

19. Start uncovering the craft.

20. Pull on the two ends.

21. So the white handsome turned out.

Simple schemes for folding a paper boat
Now you can use another guide to make a bunch of other and brand new models.
1. Take a square sheet and fold like this.

2. Wrap from each corner obliquely to make a triangle.

3. You will get such a figure.

4. Do the next step.

5. And then fold and iron the corners on both sides to the center line.

6. Almost everything is ready, there is little left to do. Namely, expand the figure.

7. With your fingers, open and gently press everything against the walls of the boat.

8. Such an interesting and funny toy turned out, the kids will be delighted. Put your favorite cartoon characters in it and play with your child for health.

If in brief, or in general, you have already learned how to make such a boat, but at some stage you forgot, I am ready to offer you such a small scheme, according to which you will definitely remember, copy it to your desktop so as not to forget))).

You can also make such a boat, it also resembles a closed boat. The chart should be read from left to right. She swims well in the stream and does not sink.


I think that even if a storm happens, such a toy will cope with it.

Do-it-yourself boat step-by-step instructions
Do you like the fairy tale Scarlet Sails? There such a beautiful and graceful ship sailed with such luxurious sails. If you are looking for just such an option, you can watch this video:
And if you prefer to do something simpler, then this instruction will just come to the rescue and will come in handy.
1. Make a square out of a regular sheet and fold it in half to make a triangle.

2. Then unfold it to its original position, and bend the sheet in half.

3. These lines will turn out, one diagonal and the second horizontal.

4. Fold the leaf in half again.

5. And where the diagonal is, bend the ends to this line to get triangles with equal sides.

6. Now fold the sheet of paper in half in the opposite direction.

7. Unbend again to the starting position and follow further instructions.

8. Take the left corner and attach to the center.

9. And then fold in half, and the left corner will have to be bent inward.

10. Do the same with the right corner.

11. After that, you will have to bend the lowest corner of the paper, you get the base, which you hide inside.

12. Here is such a funny toy that will certainly please your mischievous baby or baby.

We make a ship that does not sink in water
I offer you quite interesting models that are made of cardboard. And you can come up with such a miracle yourself. The main thing you need to find is quality cardboard and that it is glossy on the other side. This is usually not sold in the store, it packs all kinds of souvenirs.

Then ask the child to make decorations or decorate for him. In general, make it irresistibly beautiful.

Can be made from ordinary plastic cups or plates.

And, you can, hee-hee of course this is a joke and sail on such a creation on the lake yourself).

It is also a good idea to take a bag of milk or yogurt, that is, a tetra pack, and make such a craft out of it. Don't forget the checkbox.

A great option is to use a plastic bottle in action, it will never sink and such a boat will serve you for a very long time.

By the way, they also make structures from polystyrene foam and other improvised means.

A step-by-step paper boat master class for beginners
Well, I want to touch on the topic and show the smallest kids another option that can be used for kindergarten.
1. Take a square-shaped sheet of paper, you can take plain white or colored paper.

2. Fold it in half to make a triangle.

3. Bend the bottom end to the top, as shown in this picture.

4. Now, where you got the fold line, drag the lower corner up, as if turning it around.

5. Here, the fold line is marked, if suddenly you do not understand.

6. And this is what will come out.

7. You can cut or hide the tip. Here is such a wonderful and cool creation turned out.

Origami boat from A4 sheet
Now let's look at more schemes, for example, how to make a real steamer out of paper yourself easily and quickly.
There is such a scheme, for beginners it seems to me it will be complicated, but still I show it.

I tried to fold it myself, and this is what happened, great and in my opinion not difficult.

The kids decorated it.

Here's another look at the steamer that we did before, only the design is a little different. It turned out two pipes, tu-tu.
By the way, even an ordinary boat can be interestingly designed, take a look, this is the first option.


You can build a boat for two places. How? But how, see the step-by-step instructions and repeat. Isn't it brilliant?

The first was with a sailboat, and the second without it.

Here's another option that caught my eye.

Well, that's all my good and beloved friends! Make a bunch of these creations, play with the kids and smile more often. All creative success and see you soon! Bye Bye!
Sincerely, Ekaterina Mantsurova
Paper crafts are fun. From a simple white or colored sheet, an interesting creation can turn out.
Folding figures, at first glance, is like a child's game. But this is a real art with its own techniques and methods of work, which, nevertheless, can be mastered by every person.
Paper boat from childhood
Every child has folded paper figures at least once. The most familiar and favorite are paper airplanes and boats.
As a child, paper boats were launched into the voyage and were simply used in games. This unpretentious toy gives room for the imagination of the child.
Some were fond of making complex and large models with many small elements.
Anyone can create such a paper figurine. It is enough to know simple instructions.
Instructions for folding a durable boat
In order to fold the craft, you need a paper sheet. Nothing more will be required. And the circuit itself is quite simple. It is enough to carefully understand it and fold the product several times.
 In the future, you can do without a hint.
- It is necessary to prepare a sheet of rectangular paper. The final size of the boat will depend on its size.
The sheet can be white or colored, depending on the wishes. If paper is used, the color of which is only on one side, then it is advisable to fold the color inside. The finished figurine will look more beautiful.
- You need to fold it in half across.
- Place in front of you with a fold up and find the middle of the sheet. To do this, you need to fold it again, but not completely. As soon as the middle is indicated, you can make a light hall.
- At this stage, there is a sheet folded in half, with the middle marked. Next, you need to fold both corners to the center, focusing on the mark.
- Holding the corners, you need to run your finger along all the fold lines. They should become fixed and thin.
- Next, you need to tuck the free edges of the sheet, which remained under the formed triangle. One edge on one side and the other on the other.
- Now the corners of the folded edges must be bent, repeating the shape of a triangle and again fix the fold with your finger. Do this on both sides.
- Now we have a blank in the form of a triangle. If you push the edges of its base, then a pocket is formed inside.
- Next, you need to reduce the corners of the base of the triangle and fold its opposite sides. Now the workpiece has become a square shape.
- It is necessary to grab the upper corners of the square and stretch them in different directions.
- The product is ready.
How to make a paper boat with a child
The description of the folding process may seem long and complicated. But in practice, everything is much simpler and more interesting. In order to interest the child in such an activity, it is necessary to take part in the process. At least at the initial stage.
Folding figures will not only captivate the baby, but will benefit in its development:
- the process helps the development of fine motor skills;
- perseverance and patience are formed;
- imagination develops.
There are a huge number of schemes and figures. They vary in complexity, and you can choose the right option for a child of any age.
 In order to assemble the craft with your child, you must:
- Pre-think about what model is planned to be folded. Prepare its scheme and understand it before the start of the process.
- Prepare a suitable work surface and some sheets of paper (in case something doesn't work the first time).
- You can also prepare colored pencils, felt-tip pens or paints. When the ship is ready, you can decorate it: come up with a name, draw holds, or just paint it.
- When everything is ready, you can get to work. It is necessary to fold the paper, demonstrating to the child the sequence of actions and the technique of execution. The kid in parallel must do his own crafts.
- The finished figure can be decorated to the taste of the child. Then put the "ship" on the water (even at home).
- It is necessary to be patient and not rush the child so that he can calmly figure out a new lesson for himself.
Origami from paper in the form of a boat
Origami is an art form of folding various paper figures. The classic version involves the use of only one sheet of paper, without the use of scissors.
Origami in the form of a boat with a sail can be assembled as follows:
- Fold a sheet of paper along both diagonals alternately, unfold and turn it over.
- Now make folds in all corners and turn over again. The resulting folds make folding the figure easier.
- A piece of paper must be folded in half, and then unfolded back.
- Now you need to wrap the edges of the sheet to the central fold and press them.
- It turns out a rectangular blank. The top and bottom edges need to be bent to the center. Now it's a square.
- Next, the top and bottom need to be straightened back.
- The lower corners need to be lifted up and their corners turned outward to form a trapezoid.
- Do the same with the top.
- Next, you need to grab the upper trapezoid by the central part and pull it up.
- Turn over the workpiece. There is a square in the center. The whole figure must be folded in half along the diagonal of this square.
- It remains to raise the bottom corner and the craft is ready.
 Another model in the form of a boat:
- The sheet must be folded in half horizontally.
- Then make one horizontal fold in the center of the sheet.
- Next, you need to bend the upper corners outward on both sides to the center line.
- Bend the bottom corners towards the center as well.
- Now you need to bend the top layer forward, the bottom back.
- Next, fold the workpiece inward and straighten.
- Bend the corners back and level the boat.
Ship from sheet A4
Most often, an A4 sheet (or landscape) is used for the manufacture of figures. Its parameters allow you to create a ship of medium size and good shape.
It is preferable to use A4 with a density of 80 to 160 gr.
Often a product needs a rectangular sheet (as for a classic boat). In this case, even scissors are not required.
If you need a square sheet, then it is easy to make it from A4 with scissors (for example, as for a two-pipe boat).
Making a big cardboard boat
For the manufacture of a large ship, you can use the same schemes as for ordinary crafts.


 But ordinary paper is no longer suitable here, since such a blank will not hold well.
- Sometimes large figurines are made from newspaper sheets in two or three layers. But even such tricks do not help much. As a result, the craft does not keep its shape and does not look like it.
- For such a product, very thick paper or cardboard is suitable. This material will give rigidity and will keep its shape.
- It should be noted that working with cardboard is more difficult than with paper.
- First you need to take measurements, and then make folds in the right places.
- To fix the folds, a certain physical strength is required. Therefore, the child will need the help of adults.
- Sometimes they make a model of a large ship from thinner paper, and then strengthen it with cardboard figures of the desired shape. They are glued to the ship, and it becomes stable. But it is not recommended to put such a product on water, since the folds will quickly become saturated with water.
- Large ships often perform a decorative function and are an ornament or addition to the interior.
Beautiful sail for a paper boat
A sail is one way to decorate a paper craft. With this detail, the product takes on a finished look.
In this case, the sail does not functionally help you sail faster. Therefore, you need to take care only of its beauty and originality. It does not matter in which part of the ship it will be attached.
- First you need to prepare the base for the sail. If the figurine is small, then a toothpick will do. For a large model, you can use any wooden stick. Or another material is not too heavy for the product.
- The base is attached with glue or mechanically (for example, with threads).
- The sail itself is attached to the top of the base. It can be of any shape and color, from any material: colored paper, material, shiny foil.
- For convenience, it is better to initially attach the sail to the base, and then this design to the craft.
- Care must be taken that the sail does not outweigh and the boat does not fall on its side.


Two-pipe boat for interior decoration
A two-pipe boat (or steamboat) is just as easy to manufacture as the classic version. It can become not only a toy, but also a worthy addition and decoration in the interior.
 In order for the boat to look presentable, you can make it from beautiful, unusual paper. Or decorate the already prepared figure so that it harmoniously fits into the interior.
The process of making a two-pipe boat:
- For this model, you will need a sheet of square paper. If the shape is rectangular, then scissors are also needed.
- A rectangular sheet must be folded, bending one corner diagonally to the opposite edge. Thus, it turns out a square folded in half and the remaining strip of paper, which must be cut off.
- The resulting square must be bent first along one diagonal, and then along the second. This will highlight the center of the sheet.
- Next, you need to bend all four corners to the center. It also turns out a square figure, but smaller in size.
- The workpiece must be turned over with bent corners on the table. And on the resulting surface, repeat the operation again - bend the corners to the center.
- Turn the workpiece over again and bend the corners to the center for the third time.
- Now you need to turn the figure over again. The top and bottom corners need to be straightened. They will serve as pipes for the boat.
- The other two corners (left and right) need to be pulled to the sides and the craft is ready.
 Another simple instruction, and the result is a new boat model with two pipes in the center.
How to properly launch ordinary boats on the water
To launch a finished paper boat on the water, you must first prepare.


 Of course, you can do this without preparation. But such a figure will quickly become saturated with water, lose its shape and sink.
To ensure that the product does not become disposable, you must follow these recommendations:
- use thick paper for making, which does not absorb water well;
- you can melt paraffin or wax and dip the figurine in them. When everything dries, a layer forms on the paper, which will serve as a protection against water;
- do not overload the ship with additional cargo. Sometimes during the game on the boat you can place a figure (captain) or cargo that needs to be transported. If all these items are too heavy, then some of them must be set aside for the duration of the voyage.
Any of the schemes for creating a boat is feasible for both an adult and a child. This is a pleasant and interesting activity for everyone.
You can make such a craft in any conditions. This does not require any special skills or special materials.
A good gift for dad or grandfather by February 23 can be a boat made by a child with his own hands. Of course, this ship does not have to be a holiday gift at all. It can be a simple cardboard craft on a normal day off or a craft made in a craft class. In general, it doesn’t matter what this ship is intended for, the main thing is that your boy, or maybe a girl, wants to make such a miracle sailboat out of cardboard with his own hands. Your child may need your help to make a ship of their own. Find this time for the child and help him in his creative impulse if, due to age, this craft is difficult for him.
Use the patterns to cut out the sides, back, bottom, and deck of the ship from cardboard. Glue them together with tape.


After that, you need to tear or cut into small pieces of paper. It can be either ordinary paper for printers or special corrugated paper for children's crafts. Dilute PVA glue with water in a ratio of 1: 1. Then, dipping each piece in diluted glue, attach it to the cardboard. Thus, cover your craft with 4-6 layers of paper. Once the glue is dry, color and decorate your craft. Make sails out of fabric or cardboard from used toilet paper rolls.


