Decoration with paper pom-poms. How to make paper and fabric pom-poms for a wedding with your own hands - a budget option
For the festive hall, paper flowers made of bright corrugated paper are often used. This decor is becoming more and more popular.
Compared to natural bouquets, decorating a wedding hall with paper flowers is a long and laborious process. But such decorations are good for their uniqueness.
Decorating the hall with paper flowers - 13 ideas
Paper flowers are not made in one day, and to make them for the holiday, you need to start a couple of months before the celebration. Flowers can be used to decorate the ceiling, edges on the sides of the stage on the floor, a festive table, chairs, arches, money trees, as well as a carpet runner, if one is planned.
Elegant flower decoration

Paper color in the decoration of the hall

Wall decoration with colorful paper flowers
- Garland
A very popular decor for a hall or gazebo. They can be used to decorate carpet, chairs, awnings. Garlands hanging from the ceiling in the form of huge flowers, doves, hearts will transform the room. - Wonderful paper pom-poms and balls
Complement the festive decor. They look light and airy. Several pompons of different sizes make an excellent garland. In summer, if the holiday is on the street, tree branches are decorated with pom-poms, scattered on the floor. They make funny photo sessions. - Origami paper flowers
Another type of decoration that creates the right atmosphere. Paper flowers, birds, fans, lanterns, flags and turntables are not difficult to make, but they will bring elements of romance and fabulousness into the interior.
White and blue paper flowers in arch decoration

Multicolored paper flowers in decoration
- Paper flowers and ribbons
Arches decorated with flowers and ribbons look great. You can also decorate cutlery, chairs for guests and various small details of the interior. - Confetti
Small paper flowers, stars that can be scattered in handfuls - this is a bright touch that completes the image of the holiday. - Numbers and letters made of paper
At celebrations, it is customary to use figures of an important date or other inscriptions. Painted cardboard letters do not look very aesthetically pleasing, but if you decorate them with pom-poms or roses, it will turn out very original. Such decor will hide the flaws of unevenly colored cardboard. - Bouquet for the bride
Optionally, you can make it look like a real one, or make one large paper flower that will look extraordinary on wedding photos. For bridesmaids, also prepare original paper bouquets in advance in order to create a wedding arrangement in the photo.
Large paper flowers in decoration

Beautiful decoration with paper flowers

White paper flowers in decoration
- Boutonniere for the groom
If we are to make a complete look, then the boutonniere for the groom should be made of the same material as the bouquets of the bride and her bridesmaids. - Fabric peonies
Not all decor should be made of paper only. Such decorations look good both with fresh flowers and with fabric. Textile itself is an excellent material for decorating interiors. Alternatively, large bright fabric flowers look gorgeous in paintings. Delicate organza peonies will decorate walls, curtains, and a festive table. - Roses from book pages
Making roses from sheet music or book pages is a stylish solution. You can paint the petals with watercolors or cover them halfway with paint. The composition is obtained with a touch of antiquity. - Kraft paper roses
Jewelry of this style will look exquisite when combined with thin transparent textiles. A bedroom, a romantic place for a date, a room for newlyweds will be covered with an aura of mystery and tenderness.
White paper flowers in the decoration of the hall

Hall decoration with paper flowers
- Exotic decor
Add summer colors and create a sunny mood. Bright bouquets can be made from corrugated paper, and they can be used to decorate both walls and any other areas in the room. If the wedding or celebration is in an exotic style, then a garland of paper flowers will definitely come in handy. - Large volumetric corrugated paper flowers
Universal interior decoration. They fit on the floor, on the wall, like garlands hanging from the ceiling. These can be giant lilies, dahlias or peonies with huge buds. They can be used for decoration, and for entertaining games and funny photos.
Fantastic objects of all shapes and sizes can be made from corrugated paper. A large flower will take the entire roll. But then this decor can be used many times as decoration.

Arches with paper flowers

Beautiful paper rose

Large paper flower for decoration
How paper flowers are made for hall decoration
Paper flowers are a suitable substitute for living ones. Rich imagination and patient hands will be able to create unique floral decorations that reflect the mood of the holiday.
A few examples of making flowers with your own hands:
|
Product type |
Materials (edit) |
How to make |
|
Large dahlias |
Colored or corrugated paper, glue, scissors. |
A circle is cut for the base, and square sheets of paper are curled into cones. Then all the cones are glued to the base row by row. It turns out a giant dahlia. A dahlia garland is suitable for a spacious room. |
|
Pom-poms or balloons |
Corrugated paper, scissors, tape, thread or wire, glue |
The roll, without unwinding, is cut across, into three parts. The resulting strip is folded into an accordion. In the middle, the workpiece is tied with a ribbon and all the petals are straightened, and the fluffy ball is ready. For beauty, the edges of the flower are rounded or sharpened with scissors. |
|
Pink craft paper bouquet |
Kraft paper, scissors, awl, glue, varnish, glitter |
A long strip is cut off. Along it, make cuts to the middle on one side, and then on the other. The distance between the cuts depends on the size of the future flower. The incisions are twisted on one side of the strip with an awl to make petals bent in a triangle. And on the other hand, they are glued in the shape of a cup. Then the ribbon is twisted and a rose is formed. From above, the flower can be sprinkled with varnish and sprinkled with sparkles. |
|
Exotic flowers |
Brightly colored corrugated paper, ribbon or thread. |
Several sheets of paper are rolled into a tube and the tubes are inserted into each other. The resulting bundle is tied at the bottom with a tape and each layer is straightened. A garland of exotic flowers will decorate a gazebo or a shed. |
|
Origami jewelry |
Colored double-sided paper, scissors, glue, ruler, barbecue skewer. |
The paper is cut into 8 squares with sides of 10 cm. Fold each square diagonally so that a triangle comes out. Then fold the opposite corners of the triangle to the middle. From the middle, unfold the edges to the outside. We got bags on the sides. They need to be smoothed well, and the protruding corners should be tucked in. Now each bag is folded in half, into an accordion. Glue the opposite edges of the bag. For the stem, the skewer is pasted over with green. And for the middle, take a narrow strip of a different color, cut along one edge and fix it round on the stem. Then glue all the petals around the middle. |

Paper roses for decoration

Decoration with paper flowers of the interior of the hall
How to decorate a room with artificial flowers
Design ideas come during work. Fantasy can tell you how to decorate any surface. Walls, windows, curtains and tulle first. Then think over the most important place for the heroes of the occasion. And of course, pick flowers for the ceiling, stage, photo zone, floor, etc.
Separately attached paper flowers and whole garlands look at the top. Large volumetric decorations, suspended on thin, inconspicuous threads, look impressive, and from below it seems that they are swaying in the wind.
Chopped small flowers or confetti will come in handy on the floor. And for children, make fluffy pom-poms or small bouquets.

Hanging white paper flowers in the decoration of the hall

Large red paper flowers in decoration

Bright paper flowers in the decoration of the hall
Wall decoration with artificial flowers
For the wall, you can make an original panel. Corrugated paper is suitable, from which small white dense flowers are twisted. Cores are inserted into them. A line is drawn on the wall, and flowers are laid out along it, fixing them with glue. Large paper flowers will brighten the dining area. The main thing is not to put them in height and not make them the same.

Hanging paper flowers

Flower options
Simple homemade wall paintings with natural motives will bring a natural eco-style atmosphere. It is easy to make such a decoration on the wall with your own hands. A branch, leaf, wildflowers, or petals are placed on the canvas. All this is covered with spray paint. The branch is removed, but the picture remains.

Pink paper flowers in the decoration of the hall

Paper flowers design options

Decoration with flowers
Decorating the hall with beautiful fabric flowers
Textiles give a special charm to the room. For example, organza peonies will look great on curtains. For such a decoration, you need to prepare a sheet for drawing sketches and patterns, beads, beads, threads, needles and other sewing accessories, matches and candles.
Manufacturing process:
- Circles of different diameters are applied on the sheet.
- Each petal is melted with a candle around the edges. Small petals are best held with tweezers.
- Collect the flower, starting from the largest parts, gradually adding the rest. The core is decorated with beads or beads. To prevent them from falling apart, they can be strung on a thin wire or simply sewn on. Delicate peonies are ready.

Beautiful white paper flowers in the interior

Yellow paper flowers in decoration
Where else can you arrange paper flowers
Arrange peonies in bouquets on a sweet table and in a photo zone. A flower and a note of gratitude for the visit are placed on each plate, this will add a favorable mood to the guests. Bulky flowers as decoration look very impressive on the table if they are spread out in the center over the entire length of the table. Fruits will perfectly fit into this composition.
You should not adhere to the opinion that the more pretentious the decor, the more beautiful. In the design of the hall, you need to adhere to the style, colors of the interior, and the theme of the holiday.
Video: Paper flowers are a new trend in decorating
50 photos of examples of paper flowers in room decoration:


In a festive interior, these decorations look bright, extraordinary and even fabulous, creating a solemn, unique atmosphere, emphasizing the color and style of the room. The indisputable advantage of this type of jewelry is that they are easy and relatively quick to make, require a minimum of funds and efforts from their creator, come in different types, shapes and sizes and can be made from any paper - even from ordinary napkins. At the same time, the hall decorated with garlands, hearts and balls made of pompons will always look elegant and original.
Pompons can not only be hung in the form of bright balls-garlands, they are successfully used for making panels for photo shoots, zoning the space, making numbers, flowers and other crafts and compositions, and in this article we will analyze in detail how to make different types of pompons for the decor of your holiday ...
The main thing in the article
DIY paper pompons: a step-by-step guide with a photo
Traditionally, to make a do-it-yourself pom-pom, a minimum set of tools is required:
The technology for making pom-poms is almost always identical.

DIY corrugated paper pompons: a master class with a photo
 Corrugated paper pom-poms look especially fancy because they have a crinkled texture in and of themselves. Therefore, decorative balls from it seem even more fluffy and voluminous.
For the manufacture of pompons, it is better to choose a corrugation of medium density, since an excessively thin one can break through during the manufacturing process, and too thick will look rough, it will be difficult to mince it, forming a pompom from it.
The pom-pom manufacturing scheme remains the same as in the previous paragraph.

DIY napkin pompons
Even napkins are suitable for making pom-poms, moreover, from this available for each material, decorative balls are obtained the most delicate and airy. Now you can buy napkins of any color, density and texture. Making pompons from napkins is the easiest and fastest way, because this is a ready-made material, where nothing needs to be measured and cut off - the napkins already have a standard size and square shape. The scheme for making pom-poms from napkins is simple: 
- We take 10 napkins, put them one on top of the other.
- We fold into an accordion, trying to keep the same width of the folds.
- We find the middle of the accordion and tie it with a colorless fishing line or thread to match the napkins.
- Round the edges with scissors. If you see the edges are not rounded enough, trim them back by fanning them out a bit.
- We carefully spread each napkin on both sides of our accordion. It turns out a fluffy and delicate pompom.
You can make your pom-poms from napkins even more elegant if you take material of two or more colors, alternating multi-colored napkins with each other, or you can do as in the photo below, making a beautiful pom-pom-flower out of them.

DIY crepe paper pompons
DIY pompons made of silence: video master class
Tish paper is smooth, delicate, rustling like a festive one is perfect for making pom-poms, which are the most elegant, lush and durable. In addition, usually this paper is already on sale in sheets, for example, 25x35 cm and is great for making large pom-poms.
DIY small pom-poms
It is not always necessary to make voluminous pom-poms for decorating a room. There are times when you need to make just small pom-poms, for example, to paste over a number with them, make a bouquet, garland, or some kind of craft out of them, attach them to a suit and for other purposes.
The volume of the pompom will depend on the size of the paper you are using.
To get a small pompom with a diameter of 7-8 cm, take 4 ordinary napkins (standard size 23x23 cm), fold them in two and place them on top of each other.
- Roll the napkins into an accordion, moving along the length of the material, so that you get as many folds as possible.
- Secure with thread in the middle and round the edges with scissors.
- Spread the petals out towards the center and a miniature fluffy pompom is ready.

How to make big pom-poms with your own hands?
For large pom-poms, thin corrugated or tissue paper is best. To make a giant pompom, stock up on a large amount of paper - for such a product you will need a whole package of tissue or crepe paper, with a total roll length of 10 m.The standard width of such rolls is 42-45 cm.

DIY pompons from bags
Today pompons are used in many spheres of life - they not only decorate halls and make all kinds of crafts out of them, they are also actively used in dancing, gymnastics and other leisure activities. Often, children return home from school with the task of making pompons from bags, most often they are used for cheerleading - a sport that combines dance, gymnastics, acrobatics and show elements.
Many girls join so-called "cheerleading groups" primarily in order to wear bright clothes and dance with lush pompoms in their hands. Pompons for cheerleading are made most often from packages, and we will teach you how to make them quickly and beautifully.
How to make do-it-yourself cheerleading pom-poms?
 To make 2 bright, fluffy cheerleading pom-poms, prepare:
- 2 packs of cellophane bags - 2 different colors will be enough, although one is possible;
- Scissors;
- Scotch;
- A wooden or plastic stick.
- Fold the bags one by one, cut off the sharp corners and cut the seams.
- Fold the bags in half, defining the middle.
- Make cuts on both sides without cutting to the fold line. Try to make the stripes the same width. If your task is to make a lush pom-pom, measure the stripes down.
- Fold a stack of bags in half, twist and tape around the stick, making a handle for the pom-pom. Ready!
Pom-poms from garbage bags are especially bright, colorful and lush, the more the size of the material allows you to make them the most voluminous.
How to make the fluffiest paper pom-pom with your own hands?
To make a mega fluffy and voluminous paper pom-pom, you need to take as much paper as possible for it, which is divided into equal parts - squares or rectangles - at least 20 sheets.

The only thing you may have difficulty with is the rounding of the edges of the pompom, scissors are unlikely to cope with such a thickness of layers of paper right away. Therefore, make a stencil according to the size and thickness of your fan, for example, from cardboard, and not all round the edges of the pompom at once, but in parts using the stencil.
What can you make from paper pom-poms with your own hands?
Pompons are good and beautiful both as an independent interior decoration and as part of other decorations and handicrafts. Create original products from pom-poms using our tips and workshops.
Flowers from pompons with your own hands: a master class with a photo
Paper pom-pom flowers can be made in many different ways. The pom-poms themselves already look like blooming lush flowers, but you can enhance this effect even more.
- Take napkins in three colors - 2 of each color.
- Fold in half and then one by one to make a rectangle.
- Make an accordion along the long side of the rectangle.
- Mark the middle and wrap the fishing line tightly.
- The edges can be rounded off with scissors, or you can make the petals triangular.
- Carefully spread the flower petals on one side and the other, bringing them to the center, while the lower part of the pompom will also "go" into the upper "inflorescence" and you will get not a round pompom, but a lush flower.
 Here's another easy way to quickly make paper carnations and even a pom-pom bouquet.
 But in such a simple technology for making pompom flowers, you can create poppies that simply cannot be distinguished from real ones.

Decorating the hall with paper pom-poms


DIY photo zone made of paper pom-poms
Multi-colored pom-poms are a simple, original and very effective solution for decorating a photo zone. Taking a photo against the background of a stand decorated with pom-poms in the style of the holiday will come in handy at a wedding celebration, and at an incendiary youth party, and at a fun children's party.


Diy pom-pom figure
Now it is very important to congratulate children on their birthday, decorating their holiday with a voluminous figure of pompons. Such products look very bright and elegant, raising the spirits of the birthday man and all the children at the holiday. It will be especially touching if the parents themselves make such a magnificent, multi-colored number, and we will tell you how to do it simply and easily.

DIY pom-pom heart
Such an exposition looks very touching and romantic, and the photographs taken against the background of such a photo zone look especially bright and original. Please your loved one with such a surprise, for example, on, or on, but for now - get inspired by our photo ideas.


DIY paper balls pompons
Balls-pompons made using the honeycomb technique look very beautiful and unusual. For such a product, you need to stock up on a fairly large amount of paper and devote at least 30 minutes of your time until you fill your hand, but the result will be worth it.
 You will need:
- tissue paper;
- glue (better NOT hot);
- scissors;
- cardboard (or thick sheet);
- Double-sided tape;
- rope;
- 2 multi-colored pencils.
DIY pom-pom garland
And of course, the pom-poms are just "asking" to be made of them a garland - New Year's, or for any other holiday. This is done very easily, because pom-poms, due to their fluffiness, are quite simple to put on a thread or fishing line using any glue. And how elegant, festive and harmonious it looks, see for yourself.


 An alternative to garlands of classic pom-poms is compositions of bright and playful pom-poms-tassels, on the manufacture of which you will spend a minimum of cost, time and effort.


Crafts from paper pompons: ideas with photos
Ordinary paper pom-poms can decorate your home in a completely unique and original way, and not only during the holiday. Pompons can be used to make absolutely incredible things - original interior items. And children's crafts made from pompons are an affordable and simple option for your child to bring to the kindergarten not just a “duty” souvenir, but an unusual handicraft, especially since even a kindergarten child can make a simple pom-pom. Get ideas from the photos below.


In order to decorate your home for the holiday fashionably and at no extra cost, resourceful people make corrugated paper pompons with their own hands. Scissors, paper and a drop of imagination will help to translate the idea into an original craft. Multi-colored weightless pom-poms are useful for creating garlands, and also serve as props for a photo shoot. Learn how to make beautiful paper pompons in the article.
How to make paper pom-poms with your own hands. Materials required for work
Since our products are made of paper, we will first of all decide what kind of paper we will use to create the pom-poms. Please note that the following types of material are most convenient and "obedient" in work:
- corrugated paper;
- crepe paper;
- tissue paper;
- cigarette paper;
- napkins.
How to make corrugated paper pom poms
All paper pom-poms are made according to the same principle. Let's take a closer look at this method. We need crepe or crepe paper. Today, crumpled paper is actively used to create crafts, although earlier its purpose was of a slightly different nature - lining for hats was laid out with corrugated paper. Crepe is a type of corrugated material with a smaller degree of compression. Crepe pom-poms are soft and airy, while corrugated products hold their shape better. Earlier, children's crafts and elements for carnival costumes were made from crumpled paper, but today they are mainly used to create stylish decorative items: flowers, garlands, interior toys.

Making paper pompons with your own hands is very simple, because in addition to the crepe or corrugated paper itself, you only need scissors and threads. If you are going to hang the finished paper balls to decorate a wall or ceiling, replace the threads with ribbon or long string. Remember that for work, choose strong, evenly colored and bright crumpled paper that does not leave colored streaks on your hands.
Lush paper pom-poms: detailed instructions
So, if all the materials at hand are ready, let's proceed to the creative part of the process. To create an original and catchy decor element, it is best to use multi-colored sheets of paper, first placing them on top of one another. Although some masters claim that it is plain pom-poms that look much more spectacular, so choose colors based on your personal convictions.

First, decide on the size of the finished product. The more luxuriant you see the pompom, the larger sheets cut the corrugated paper. At the same time, take into account that the width of the paper sheet should approximately correspond to the diameter of the finished ball. Next, paper pompons are assembled step by step like this:
- fold the sheets of paper collected in a pile with a transverse "accordion";

- Firmly tie the folded paper several times strictly in the middle with threads or with the dressing material that you have prepared (with a wire or tape, for example);

- now the most creative part of the process is decorating the edges of the roll. Use scissors to shape them as you wish: round the edges, make them wavy or jagged, cut with a fringe;

- let's move on to the most interesting thing - let's "dissolve" our paper bud. First, we stacked the crumpled paper in layers. Now carefully peel off one layer at a time, wrinkle a little and pull to the core tied with thread. Admire your creation!


Take the time and make several of these pom-poms at once. One paper ball is fine, of course, but it won't produce the same amazing effect as a few copies. Ready-made paper pom-poms can be easily assembled into a garland, hung from the ceiling one by one, or decorate an entire wall with them.
Experienced paper craftsmen went further. Check out the awesome flower pom poms made from crumpled paper!
How to make paper pom-poms in silence
To create lush festive pom-poms, as often as corrugated paper, they use tissue paper. Unlike classic crumpled paper, silence is a very delicate material. This is a thin, weightless and surprisingly airy paper, which, according to the masters, is a pleasure to deal with. The material is chosen when they want to decorate a room with very lush and large paper pom-poms.

So, to make a beautiful volumetric ball, let's prepare the following materials:
- tissue paper (about 15 - 19 sheets for a large product, about 7 - 8 sheets for a small pompom);
- scissors;
- strong thread or thin wire;
- satin or other fancy ribbon to hang the finished product.
After completing this step-by-step master class, you will get incredibly beautiful paper pom-poms in silence:
- fold the sheets of paper into a straight stack. If you plan to get a voluminous pompom, we take more sheets. However, keep in mind that the thicker the stack of paper, the more difficult it is to work with the future product. Twist the paper in half and cut it neatly along the edge;

- wrap the paper in "steps" of 2 - 3 cm to the end;

- fold the paper roll in half;

- tie a paper "fan" with a wire or thread exactly in the middle. In the same place, tie a ribbon with which you can then hang the pompom;

- decorate the edges of the "fan" - give them a rounded, trapezoidal or pointed shape;


- To create a pompom, begin to gently separate the paper petals from the edge to the center. Smooth out layer by layer gently;

- when 5 - 6 layers of your pom-pom are flattened, turn it over and separate as many layers on the other side;

- when there are very few unfolded layers left, turn the product sideways and open the last petals;

- this is what a fluffy and cute decoration you get when all 16 layers are spread out.

When hanging pom-poms, do not limit yourself to one color and the same length of ribbon.
How to make a paper pompom in the form of a hemisphere: detailed instructions
If you wish, you can make an unusual pompom that can be used to decorate any surface. For better stability, the paper product is created not round, but in the form of a hemisphere.

You can choose paper napkins for work, but we will opt for paper muffin cups. The latter have become the object of close attention of craftswomen due to their corrugated edges, which gives the decorative element additional volume. The work plan is as follows:
- Fold the muffin pan into several layers so that you have a sharp angle of about 45 degrees. Do the same with all shapes. This will make the petals for the decorative flower pompom.
- Now bring all the petals together: alternately put the edge of one petal on the edge of another, making sure that the sharp corners of the petals converge at one point, and they themselves do not completely overlap each other.
- Use a hairpin or single thread with a needle to fasten the petals together.
- To make the fluffy hemisphere very voluminous, fill the finished circle with a few more rows of petals. Remember that all elements must be strung on a thread (hairpin).

Interior decoration with paper pom-poms
When your workplace is hidden by the foam of ready-made paper pom-poms, it's time to decide what to do with the unusual creation next. For example, paper balloons in silence are a worthy replacement for ordinary balloons, because they can be fixed in many places without worrying that the balloon will burst from careless movement.
Paper pom-poms are attached to walls, ceiling beams, chandeliers, chairs. Medium-sized pom-poms are used to decorate gift gifts like a bow, and mini-pom-poms are a great addition to large lush balls. We offer you some more interesting options for decorating a room using paper pompons:
- As decorative elements, white pom-poms of different sizes will be appropriate for a wedding. Such products are best made from tracing paper. They will look smart both outdoors and indoors.
- When relatives and friends are preparing to meet a new family member from the hospital, colorful pom-poms are also indispensable. Classic balloons burst, which often spoil the overall picture of the holiday, so it is best to "dress" the room in pink, lilac, blue, lemon and mint pom-poms.
- With the help of paper pom-poms, you can decorate a holiday in honor of a child's birthday. Decorate your homemade products with cartoon characters' faces even more cute.
- Themed parties are often decorated with paper balls: blue, blue, white and turquoise pompons will be appropriate for a nautical holiday, against the background of brown and green paper balls you can celebrate Earth Day, and red and black pompons are suitable for a gangster "gathering".
- Memorable photos will be unusually positive and bright if paper pom-poms are included in the frame. So that everyone can take an original selfie against the background of paper decor, they make up a special photo zone with pom-poms.
What to do with handmade paper balls, everyone can think of for themselves. We offer you a selection of photos of paper pompons for inspiration:


When the party is over, don't rush to throw away the paper pom-poms. These products can be easily folded into an accordion again and hidden until the next celebration.
We make paper pompons. Video
The idea of decorating a wedding with paper decor comes to the newlyweds when they plan to achieve an exquisite and romantic design, while saving on the decoration of the banquet hall. Using paper pom-poms of different sizes to decorate the wedding, lanterns floating under the ceiling, the newlyweds will be able to get a unique and extraordinary design for their celebration.
Benefits of paper decor at a wedding
In the process of preparing for the long-awaited celebration, the newlyweds pay special attention to the decor of the institution in which the banquet will take place. The decorated room creates a festive atmosphere, transforming an ordinary room into a romantic and magical place. Modern trends in the wedding industry offer paper decor. This material allows you to create extraordinary, luxurious and beautiful things. If you use paper decorations for your wedding decor, you can be sure of an individual and unique design, which has a number of advantages:
- Paper is considered a budget material for creating holiday decorations.
- You can make such a design yourself even without preliminary preparation.
- With the help of volumetric paper decorations, it will turn out to hide the imperfections of the room.
- If you make flowers out of paper, then you don't have to worry that they will lose their appearance. This decor is made for any wedding, regardless of the season.
- The created design does not require special care.
- The paper decor details are perfectly matched to the color scheme and style of your wedding.
- The design looks airy and light.
DIY paper decor options for a wedding
If you adhere to fashionable wedding trends, and plan to arrange a celebration with a twist, then you need to use paper pom-poms, lanterns, garlands, origami cranes to decorate the hall. Such decorations are easy to make at home without the help of professional florists and decorators. As a result, you will have personalized and stylish handcrafted jewelry for your celebration.

Pom-poms and lanterns
A young couple uses lanterns to decorate the arch, chairs or walls of the banquet hall. This design will be an excellent attribute for a wedding photo shoot. Lanterns can be combined into long glowing garlands and hung from the ceiling, creating the effect of a starry sky. If you plan to diversify the one-color hall with bright decorations, then choose colorful lanterns that will not go unnoticed by the guests.

Pom-poms are a budget option for decorating a wedding. Fluffy and airy decorations will make the wedding celebration stylish and beautiful. With the help of pompons, the newlyweds will be able to decorate the ceiling, arch, walls, columns of the banquet hall. Decorations can be placed singly or assembled in a large panel, which will become a decoration for the background of the newlyweds' table.
The color scheme of pom-poms depends on the chosen shade of the wedding. You can combine turquoise with white or make the decor completely red. Spending 5 minutes of free time, you will receive an original decoration for the upcoming celebration. For the manufacture of pom-poms, corrugated, crepe or tissue paper is used. You also need to prepare scissors and wire. Step-by-step instructions will help you make an original and neat pompom:
- Take paper and cut into several pieces of A4 size. As a result, you will get a pompom with a diameter of about 30 cm.If you plan to create a smaller piece of jewelry, then the paper must be cut into pieces of 20x20 cm.
- Then place the sheets of paper in front of you and fold them into an accordion. The fold on each side should be 2 cm.
- The resulting accordion must be fixed in the center with wire.
- If you want a pom-pom with round edges, then cut the folded ends of the accordion in a semicircle.
- Then gently straighten the edges of the accordion, forming a ball-shaped pompom.
- If you plan to hang the finished decoration on the ceiling, then attach a satin ribbon of the required length to the middle.

Origami cranes
According to Japanese tradition, the presence of origami cranes at a wedding symbolizes well-being and a happy life for a new family. Therefore, newlyweds are recommended to create a similar decor from paper. Making wedding decorations using origami technique, you are guaranteed to get a special design that will be positively appreciated by all the guests present. To create cranes, you will need a minimum of financial costs for purchasing the necessary materials and a little free time for creativity.
The origami made are collected in a long garland and hung in the photo zone for guests or on the columns of the banquet hall. If the wedding is organized in nature, then cranes are used to decorate the ceremony venue, an arch, a tent, or placed on the lower branches of trees. The newlyweds can also use the resulting garlands for a thematic wedding photo shoot.

Invitation cards
To notify guests about the upcoming celebration, the newlyweds are sure to deliver wedding invitations. A postcard announcing the holiday should be made in the same style as the decorations of the banquet hall. If you prefer original options for invitations, then you should use voluminous paper flowers, ribbons, beads in the decor. Having received such a postcard, guests will be intrigued by the upcoming wedding.

Corrugated paper garlands
If your wedding is planned in an inexpensive banquet hall, then paper garlands will help to diversify the interior. With the help of such decorations, nondescript arches, columns, windows are transformed according to the theme of the celebration. Corrugated paper is easy to curl, glue and other manipulations, so you can make jewelry yourself. To create your own designer wedding masterpiece, follow these instructions:
- For one garland, you need to cut 10 circles, 5 butterflies, 20 hearts. The size, color and shape of these blanks depends on your imagination and preferences.
- Then take a long piece of fishing line or tape and connect all the components into one garland.
- Decorate the guest tables or the walls of the banquet hall with the finished decoration.

Video tutorial on making paper flowers
Modern newlyweds are trying to replace traditional decoration with fresh flowers with paper decor. Using this unconventional approach, young couples can get unique wedding decorations. If you are planning to make your own decor for the upcoming celebration, then paper flowers for the wedding will be an excellent addition to the festive decoration. In the video, the specialist will show you step by step how to quickly create roses for the decor of the banquet hall. With the help of manufactured flowers, you can diversify an ordinary room with magnificent compositions.
Photo selection of paper wedding decorations


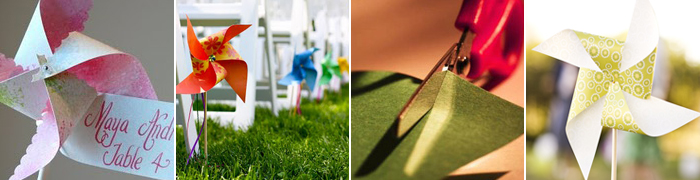
Paper wedding decor is very relevant today. Paper flowers bloom on banquet tables and wedding arches, origami cranes flutter in photo booths, colorful garlands decorate the halls, and figurines of newlyweds on the cake are increasingly replacing paper flags and turntables. Such decor is always pleasing to the eye, and it is also very simple to make, as you can see by studying our master classes.
1. Round fan turntables, as well as panels and garlands of them
A round paper decoration, which is conventionally called a fan spinner (although it does not spin), is very easy to make with your own hands. And it is even easier to find an application for it: you can use the turntables to design a photo zone, and to decorate an arch, and even as a cake topper.

So, we need:
- Thick paper
- Buttons with large holes
- Glue stick or glue gun
- Rope or lace
- Stapler
- Scissors
- Wooden sticks
- Ruler and pencil
- Hole punch (optional)

Step-by-step instruction:
1. Cut the paper into strips and fold them like an accordion. The width of the stripes and the pitch can be varied. Note that the width of the strip is the radius of your future turntable. To keep your stride even, you can mark out the paper with a ruler and pencil.
2. Staple together the edges of the strip.
3. Bend the workpiece as shown in the picture, apply a little glue in the middle and glue a wooden stick into one of the folds to secure the shape. Adjust the length of the stick to the diameter. If the paper is stiff and holds its shape by itself, you can do without sticks.
4. Fasten the buttons in the middle (on both sides) and connect them with a string.
The spinner is ready!

To hang the turntables vertically or tie them into a garland, punch holes in the edge and thread the rope through them. Also, the turntables can be connected to each other with wooden sticks using glue - you get a hard panel.

It is not necessary to decorate the middle with buttons - you can leave it as it is, or, for example, stick small circles of colored paper there.

2. Garlands of paper hearts
A budget and cute idea is to make a garland from scrap materials. You can use these garlands to decorate the bride's room, exit check-in arch, or restaurant entrance.

Materials and tools
- colored glossy magazines
- scissors or heart-shaped hole punch
- sewing machine
Step-by-step instruction
Cut hearts out of magazines. This can be done manually, according to a template, you can cut it without a template - then each heart will be unique. But the easiest way is to use a curly punch in the shape of a heart, you can buy it in scrapbooking stores.


Sew hearts one by one 
The garland is ready!


Other examples of garlands of hearts. Hearts can be cut out of books with text - perfect for a vintage wedding. You can cut them out of old notes, cards, or just beautiful colored paper.


3. Paper pom-poms
Airy, fluffy paper pom-poms are a budget way to decorate a wedding. They are good because they are made quite simply and quickly, and they can also easily decorate a large area. Another plus of such decorations is that they can be used to create a certain color scheme in the decor. In the article you will find examples of using pompons and a master class on making them from crepe or tissue paper.

Paper pompons are universal - they can be used to decorate napkins, bonbonnieres, a restaurant hall, a bride's room, a wedding arch. They will give any element an elegant and festive look.
One of the most common and most effective ways to decorate with paper pom-poms is to hang them from the ceiling at different heights. They will create a festive atmosphere and give a certain color accent to the interior. 


Garlands can be made from pompons.


They can be attached to the wall, make a pattern out of them. You can create a monogram from them with the initials of the young.

Large pom-poms can simply be placed on a sofa, piano, or on the floor.

Small pom-poms can be used to decorate napkins.

An example of decorating a wedding ceremony with paper pom-poms.

If the wedding is being celebrated in nature, you can decorate tree branches with pompoms. You can also make them a bright accessory for a photo shoot.


Paper pom poms can be used as artificial flowers and to decorate a graceful tree branch.

You can decorate your wedding car with them. This option is only suitable for spring and summer weddings. From rain and snow, fragile pom-poms will quickly lose their shape.

The master class will tell you how you can make paper pom-poms yourself.
You will need:
- Crepe or tissue paper or thin wrapping paper
- Scissors
- Fine wire or thread
Step-by-step instruction:
1. Cut the paper into A4 sheets (approximately 20 * 30 cm). For each pom-pom, you need 8 sheets of paper. You can choose a larger or smaller sheet size. The width of the leaf will match the diameter of the pompom.
Fold in an accordion shape with a fold of about 1.5 cm.
2. Bend the workpiece in the middle, in the place of the fold (ie in the middle), tie tightly with wire or thread. If you plan to hang a pompom, make a loop of wire or thread.
Cut the edges of the workpiece on both sides. The picture shows two options - you can cut it in a semicircle or a triangle. The pompom will be either rounded or sharp.

3. Stretch the paper and fan it.

4. You will have such a cute pompom.


4. The simplest vertical garlands
How to make vertical garlands of paper with your own hands, our master class will tell you.

You will need:
Colored paper,
- scissors,
- glue.

Step-by-step instruction:
1. We take a strip of colored paper and make cuts with a step of about 2 cm (we do not cut it to the end, we leave a "stock").
2. Cut a rectangle on the other side between the cuts already made, again not reaching the edge.
3. We get a blank for a garland. If it is not long enough, we make several more similar segments and glue them into one.
4. Stretch the resulting strip.

Vertical garlands are good when there are a lot of them. It is worth hanging them side by side, at a short distance. You can make garlands of different colors or white, depending on the chosen wedding palette. Decor in the form of paper garlands is appropriate not only for a wedding, but also for other holidays, including children's ones. By the way, children will be happy to take part both in the manufacture of garlands and in decorating the premises with them.

5. Paper flowers
An alternative to floristic compositions is thick paper flowers. They look very unusual and stylish. It is not difficult to make them. We will show you a detailed master class on how to make a stylized poppy out of paper. After that, you will learn how to make different paper flowers based on the same technique - from naive daffodils to elegant roses.

Materials and tools
- sheets of plain paper or cardboard for patterns, pencil and eraser
- thick colored paper of several colors
- scissors
- glue (it can be replaced with construction double-sided tape or wire)
Step-by-step instruction
1. Make a pattern for the petals. The size of the petal can be anything, depending on what size you want the flower to be. Circle the pattern and cut out 6 petals.
2. Bend the petal into a fan (accordion) so that the lines converge towards the center.
3. Make an incision at the base of the petal in the center

4. To shape the petal, fold and glue the two halves of the bottom of the petal. (see photo)
5. Glue 3 petals of the same size together.

6. Make another "flower" of 3 petals and put on the first "trefoil", glue them together

7. Let's get down to the core. Cut 2 circles out of yellow and black paper, cut evenly from the edges to the center, and roll the ends inward.

8. Glue the core to the center of the flower.
9. Cut a leaf, glue to a flower

The flower is ready.

Using the same technique, you can make very delicate flowers in pastel colors.

The shape of the petals of these flowers is smooth and rounded.


Also, very elegant flowers in burgundy and purple colors are made using a similar technique.

The shape of the petals can be round or pointed.

The petals of these flowers are not corrugated. The assembly takes place not with glue, but with wire.


Giant flowers can be used as a decoration for tables, for decorating a restaurant hall and for off-site registration, you can make a "bridal bouquet" or decoration for a wedding arch.


An example of an off-site check-in arch made of paper flowers.


6. Turntables on a stick and without
You will need:
- sheet of colored cardboard
- stick - for small turntables canapé sticks are suitable (sold in supermarkets), for larger turntables, you can use sticks to support flowers (sold in flower shops and large building supermarkets)
- button, bead, any decorative element
- scissors
Step-by-step instruction:
1. Cut a square out of cardboard

2. Cut it as shown in the picture.

3. Bend in turn every second corner to the center and glue it

4. In the center of the turntable, glue the decorative element, on the other side, glue the stick 
5. If you want the spinner not to be decorative, but to rotate, then instead of gluing the decorative element, attach the paper part to the stick using a pin with a pearl at the end.


7. Garlands of corrugated paper

To make a garland you will need:
- several rolls of brightly colored corrugated paper (sold at stationery stores)
- scissors
- glue or glue gun
- stick-base for the garland (it can be replaced with wire)
Step-by-step instruction:
1. Cut the paper into strips 10-15 cm wide

2. Fold each strip in half and cut from the edges to the center, leaving 2 cm before the fold.

3. If the length of the strip is not enough (it is less than the height of the arch), glue the end of one strip to the beginning of the other, so that the strips become twice as long

4. Now let's start building a structure that we can quickly install when decorating a wedding, and not attach one garland to the arch.
To do this, you need to attach the garlands to a stick (if the arch is in the form of a rectangle or to decorate the wall behind the newlyweds) or wire (if the arch is in the form of an arc).
Glue the ends of the garlands to the stick / wire in sequence and let dry
5. Now you can wrap all the garlands on a stick so that they do not get tangled during transportation. 
Check out how beautiful the background of these garlands looks!

Garlands of such rich colors will perfectly fit into the style of a Hawaiian wedding.


8. Paper flags and garlands of them
You can diversify your wedding photo session with the help of interesting plates, banners and flags with cute inscriptions. We have compiled a collection of 44 examples of these wedding accessories with different lettering and designs.


