DIY Christmas crafts for kindergarten. DIY Christmas tree toy with children Crafts congratulations for the new year
For children, the New Year is probably the most beloved and expected holiday, in order to make it unforgettable, matinees are arranged in the kindergarten. To prepare for them, you need to do with your child New Year's crafts for kindergarten do-it-yourself 2019. Children will certainly like such toys, and will make the expectation of the holiday even more exciting and enjoyable. Also, this activity will bring benefits, and not just joy, because crafts develop imagination, perseverance and fine motor skills of the hands, we suggest you combine business with pleasure and get to work.
Craft pig symbol of 2019 from socks.
You always have time to throw away old socks, but it’s better to make an interesting craft out of them in the form of a pig. It is quite simple and even a child will succeed, of course, not without the help of adults. First of all, wash the old sock, mend and patch it if necessary, this will even be a plus, because such a craft will be very colorful.
Step by step master class:
- Stuff the sock with synthetic.

- Stuff the sock very tightly so that it is stable. Then cut as shown in the photo above.
- Sew up the sock with the help of threads.


- Next, we put a cut off piece of the sock on the body of the pig. If it is too long, cut off the edges.


- The base is ready, now we need to make ears for the pig. We do this from the rubber neck of the second sock. Carefully cut it off with scissors.


- Turn inside out and sew.

- If suddenly the ear does not hold its shape, you can put a filler in it.

- Sew the ears to the body.

- We sew on buttons instead of a patch and eyes, and our Christmas tree toy in the form of a pig is ready to delight us in the new 2019.

Crafts from cones.
Cones are considered New Year's material, so crafts based on them will be very relevant at this time of the year. We offer from bumps, it's not at all difficult.
For this we need:
- Thick cardboard or wooden stand;
- Plasticine;
- Cone;
- Dye.
We do the work.
- We just take cardboard and make a pedestal out of it, you can also use wood for this.
- We paint the bump green.
- We install the cone on the stand.
- We roll balls from plasticine, in the form of Christmas toys.
- We decorate the Christmas tree with plasticine toys.

You can also make funny gnomes on skis from a cone, for this we need the same materials, just don’t paint the cone green, and roll up not toys but parts of the gnome’s body from plasticine, you can make them skis from cardboard.

Snowman from a cone.
To make a snowman from a bump on skis, take a bump and repaint it white, mold a carrot and other details of a snowman from plasticine and put it on skis.

Christmas tree made of glue with your own hands.
You can make a very interesting Christmas tree from a baking dish, we also need stationery glue and beads, sequin beads. We put all these accessories into the mold and fill it with glue, wait until everything is seized, as a result we will get a very bright and original Christmas tree made by ourselves, no one else will have this.

Simple Christmas trees with their own hands.
For a child, performing complex crafts is not a very suitable activity, because it discourages this activity, so we suggest that you make the Christmas tree simpler so that the child likes it and brings benefits.
Volumetric Christmas tree.
Let's try to make a voluminous Christmas tree with our own hands, the name sounds intimidating, but in fact, it is not at all difficult to complete it, let's try to do it.

We need to make a figure in the form of a cone out of cardboard. Then we glue it with circles, you can simply cut them out of colored paper, or replace them with sparkles, you can show your imagination, or let your child dream up.
You can decorate the cone with sand, buttons, sparkles, it will turn out very original!

Also, such a cone can be wrapped with just green cardboard, and then decorate it to your liking, you can fix the paper with a stapler or ordinary PVA glue.

You can also make a Christmas tree from chenille wire with your own hands, it will look very unusual, almost like a designer one. We decorate it with interesting accessories, and you're done.

DIY Christmas applique in kindergarten
An interesting idea for a New Year's application would be Santa Claus's mittens.
Required components:
- A colored sheet of cardboard, or colorless cardboard and colored paper;
- Pencil;
- Cotton wool;
- Buttons;
- Glue.
Execution of work.
- It is very easy to make such an application. Take a sheet of cardboard, put the child’s hand there or the father’s hand if you want to make a craft in size, like Santa Claus’s hand, and circle it with a pencil.
- Using scissors, cut out the cardboard along the contour.
- If you took colorless cardboard, then just glue red or blue paper on top of it.
- We decorate the mitten with buttons and cotton wool, that's all, the New Year's applique is ready.

Crafts for the new year from plastic plates.
Plastic plates as a material can also be used for New Year's crafts. For example, taking two plates, you can make a snowman. You just need to connect them together, and stick on them parts of the face, and arms with legs, which can be easily cut out of colored paper.

New Year's snowflake from improvised materials.
You can make a beautiful and festive snowflake from an old sleeve, so don't rush to throw away unnecessary things, they can always be used for.
To do this, simply cut the cylinder into multiple parts, and use glue to connect these parts to each other. Then we decorate the frame with any festive material, whether it be rhinestones, sparkles, or green powder.

Do-it-yourself Christmas crafts for a kindergarten are not difficult to do, if a child can’t cope, you can always help him, the main thing is to interest him, and then everything will go easy. And it’s very easy to interest a child in the theme of the new year, we wish you good luck in creating crafts, and happy holidays, see you on our website and all the best!
The New Year is a special holiday, and preparations for it begin several months in advance. To create that very atmosphere of magic and festive mood, it is best to make home decorations and gifts with your own hands - made with love and soul is much more appreciated. In addition, the process of preparing for the holiday in this case becomes much more pleasant and exciting.
DIY Christmas crafts can not only be a great gift, but also participate in competitions in kindergarten or school. And most importantly, for such products you can use any materials at hand.
For making New Year's crafts with your own hands, master classes, training videos and step-by-step instructions will come in handy. Your own imagination will also be a good helper.
Crafts for the New Year from paper
Paper is practically the most affordable material that is most often used in New Year decorations. Even in the kindergarten, each of us cut out snowflakes and made greeting cards. Now there are a huge variety of different techniques for working with paper, thanks to which you can create chic New Year's crafts without a lot of investment.
Here are some DIY craft ideas.
Snowflake origami
Volumetric snowflake

paper lanterns

Carved paper ornaments on glass

DIY quilling

Paper boxes for gifts

New Year's compositions

Applications

Salt dough crafts
Original New Year crafts are made from salt dough. Plus, working with this material is useful for children: it is fun, entertaining, develops fine motor skills and is absolutely safe, unlike, for example, plasticine.

salt dough recipe
To obtain the necessary composition you will need:
- 2 cups of flour;
- 1 glass of salt;
- 1 glass of ice water;
- 2 tsp sunflower oil.
From the finished dough, you can sculpt both simple and complex shapes. In addition, as an additional ingredient, you can add food coloring or decorate an already finished craft. So that the product does not lose its shape, it is dried in the oven.
How to make a Christmas tree toy with your own hands

New Year's toys on the Christmas tree
Salt dough makes wonderful Christmas decorations. It is very simple to create such beauty - you just need to fashion or cut a snowflake, bell or Christmas tree from the dough. Don't forget to leave a hole for the string. Then send the craft to the oven. It is necessary to dry the workpiece at a temperature of 70 degrees. It will take about an hour to fully harden. And when it is ready, carefully apply the drawing with watercolors.
Here are some photos for inspiration.
Bell

Santa Claus from dough

Stars

Flat dough pendants

Snowman

Crafts for the New Year from branches
Tree branches are an unusual material for creating New Year's crafts. From them you can create original and light decorations for the home. For example, we suggest you make a simple wall Christmas tree with your own hands.

DIY Christmas decorations
For the Christmas tree we need:
- tree branches of different lengths;
- leg-split;
- Christmas decorations.
We begin to collect our crafts.
1. Lay out the branches in the shape of a triangle. You can adjust the length with a knife.

Making a Christmas tree with your own hands
2. We cut the twine two times the height of the Christmas tree plus 30-40 cm for the top and knots.

Preparation of materials
3. We begin to tie the branches. We fold the twine in half and place the fold at the top of our Christmas tree. We retreat 5-10 centimeters, necessary for the loop, and tie the first branch on both sides.

We tie branches for the Christmas tree
4. The nodes on each subsequent branch should be offset from the center by a couple of centimeters. After fixing the last branch, we tie the remaining twine ponytails into a bow.

Connection Features
5. We hang Christmas decorations and garlands on branches, and the craft is ready to go to the wall.

Finished Christmas wall decoration
New Year's crafts from fabric do-it-yourself
To create jewelry and gifts from fabric, you cannot do without the ability to sew. But it all depends on the complexity of the product: somewhere basic skills are enough, but somewhere you can’t do without professionalism.

Examples of New Year's fabric crafts
Here is a small selection of easy fabric crafts.
felt house

felt dog

Sheep

Christmas toys made of fabric

In addition, crafts can be made from buttons, threads, cardboard, plastic bottles and any other materials at hand. Turn on your imagination and start creating miracles!
With the approaching holiday of the New Year of the Rat, all kinds of toys and crafts depicting this animal will be relevant. Let's get acquainted, we have prepared a lot of crafts for you.
Cotton pad rat

For example, you can make a cute pig out of the most ordinary cotton pads. Also useful are scissors, gouache, pieces of colored paper or unnecessary fabric, which are glued onto a cotton base creating your own unique little animal. Cotton pads can be pre-painted in the colors we need.
Crochet rat with diagrams and descriptions: we knit the symbol of the year 2020

If you are knitting, then you can make a cute rat as a New Year's toy. Such a rat will be a real candidate for victory in various children's competitions.
To do this, you need to take acrylic or silk threads.
Also for knitting you will need:
- hooks in sizes 1.2 and 1.8;
- needles;
- cotton wool or other filler.
When knitting, you must strictly adhere to the patterns.
Application Rat for children with their own hands

This craft is very simple, but will attract the attention of the child. In addition to colored paper, glue and scissors, we may need felt-tip pens or pencils.
The principle of operation is quite simple - we glue the cut-out details onto the sheet with the image of a pig. To make the applique more colorful, you can draw small patterns on the rat with felt-tip pens.
Drawing "Rat - a symbol of 2020"

For a competition in kindergarten, you can draw a rat as a symbol of the coming year. Any template you like can be printed on a printer or drawn by hand yourself. You can color in any way from paint to colored pencils.
Do-it-yourself felt rat for the New Year: patterns and patterns

Craft stores sell multi-colored felt. This is a wonderful fabric material from which you can sew beautiful crafts. We will also need threads, filler, ribbons and of course patterns.

The patterns are superimposed on the felt and the necessary parts-blanks are cut out. Next, the parts are connected and sewn together. Also, before the last stitches, do not forget to put filler inside. At the very end, all edges are sewn together and decorated with any improvised means: buttons, beads or other materials.
Salt dough rat

There is nothing easier than making a cute craft made from what every housewife has in the kitchen: flour, salt, water. You will also need paint and a brush.
First you need to mix together water, salt and flour to make a dense dough. Next, we form balls from it, which are slightly moistened with a brush and stick to each other in the form of a rat. Using improvised tools, we make recesses in the spout and send the product to dry. At the end of the craft, you can paint.
christmas tree

Another, though this time, an irreplaceable attribute of the New Year is the Christmas tree. I also want to tell you what cool Christmas tree crafts you can make.
Christmas tree from plasticine

For the New Year holidays, you can make plasticine Christmas trees with your child. To do this, we need only three colors: green, light green and brown. Green and light green plasticine will go to form branches, and brown for a pole.

It will not be superfluous if you “hang” multi-colored plasticine Christmas balls on the New Year tree.

We can even fold an unusual Christmas tree out of paper.

In the beginning, we take green paper of various shades, cut small squares out of it and form something like “flowers”. Next, cut out a semicircle of the same color and completely cover it with a thin layer of PVA. Without letting it dry, we glue the prepared flowers as close as possible to each other throughout the semicircle. At the end, we twist the semicircle and fix it in the form of a cone. The resulting cone can be attached to some plastic bottle, pre-painted brown and decorated with pompoms.

For this, plates of small and large sizes are useful. From each plate we form cones of various sizes and stick them on top of each other. At the end of the craft, you can decorate with rhinestones, sparkles or any other improvised means.
Decoration for the new year in the kindergarten "Christmas tree from tinsel"

The Christmas tree will turn out very elegant if it is made of tinsel. It is very easy to make and does not take much time. Cardboard is taken and twisted in the form of a cone. Further, around this cone, tinsel is glued in a spiral from the bottom up. Such a craft will be very strong and it will be possible to hang even sweets in the form of jewelry on it.
Crafts for the New Year 2020 in the form of a Christmas tree-topiary
This Christmas craft for kindergarten can be a real holiday decoration. To do this, you can take a foam cone and thread the wire along the entire height. We bend the upper end of the wire into a spiral. Next, wrap the cone with foil and gently wrap thick green yarn over it. We put the craft in a homemade bucket, fix it with plasticine and close it with cotton wool.
Elegant Christmas tree made of corrugated paper

A very beautiful winter craft will turn out using corrugated paper.
To do this, we make a cone out of cardboard and wrap it with green corrugated paper. Next, you need to make a long segment from another piece of corrugation and cut a fringe on it. After that, completely glue the previously prepared cone with the resulting tape. At the very end, you can decorate our Christmas tree with paper balls, beads or other decorations.

What is New Year's without a Christmas tree? Moreover, a Christmas tree can be made from cones and other improvised means.

To do this, we need a cardboard cone around which we need to glue small cones with the back side. And the higher the tree, the smaller the cones. Then our tree can be decorated with sparkles, tinsel or even rain.

As a material for crafts for the New Year with your own hands, you can use organza. Crafts using this material can immediately claim victory in New Year's competitions or exhibitions.
We cut the green organza into strips, each of which is slightly wider and larger than the other. Next, we connect the ends and make a screed in the center. Then you can take a green cocktail tube on which we string our blanks. Below is the largest and further down. We strengthen the trunk of the Christmas tree in a plastic cup, for example, with plasticine. We decorate the organza with sequins or beads.

Foamiran is a soft foamy material with which you can make presentable crafts for the New Year in the kindergarten.
We need to take a strip of this material 3 cm wide and cut it under the fringe on one side. Further, this strip is attached with glue in a spiral around the paper cone, forming branches. As soon as the product dries, light home-made toys can be attached on top of the foamian.
Symbols of the New Year holidays: original ideas

The following symbols of the New Year are known to everyone. You can’t even imagine what a very beautiful original New Year’s craft can be made from. And so, let's get started.
Santa Claus from plasticine for an exhibition in a kindergarten

What is the New Year without such an important character as Santa Claus? It can be molded from plasticine using the technique of plasticineography.

To do this, take a cardboard circle of the desired size and put a thin layer of blue plasticine on top of it. Next, we begin to attach Santa Claus himself in parts: face, beard, hat, torso, arms, and so on. At the very end, with any convenient tool, you need to create a relief.

You can also make a voluminous soft toy of the main character of the New Year holidays. To do this, you can take a small sheet of thick cardboard and twist it into a tube. From the outside we attach a red fabric. On top of the tube we glue cotton wool in the form of a beard and form a face from any materials at hand.

Christmas snow globe

Each of us has seen a snow globe in the store, which, if you shake it, you can see how a blizzard of snowflakes is spinning inside.
First, we take a glass jar of the desired shape with a lid and figures that can be attached to the inside of the lid using super glue or plasticine. When everything is prepared, pour a quarter of the glycerin into the jar and then distilled water almost to the brim. We mix the solution and then add sparkles and small white plastic that imitates snow.


To make a snowman, it is not necessary to buy anything special.

For example, you can take three ordinary lids and fasten them together in any way. On the inside, you can draw a face with paints. If desired, openwork ribbons, buttons or buttons can be attached to the craft.
Christmas tree decoration "Snowman" from papier-mâché

A papier-mâché snowman will look very impressive on a festive table or Christmas tree. It is easy to make and requires very little time and patience.
We take any starch and dilute it in water so that a solution with a volume of one glass is obtained. This will be our glue. We take a sheet of paper on which the outline of the future snowman is printed or drawn and placed in a transparent file. Then we dip the cotton wool into our adhesive solution, squeeze out the excess and put it on the file along the contour of the snowman. If desired, put a scarf, hat and other details on top of the resulting figure. At the end, dry on the battery and paint in the desired colors.

You can also get a New Year's candlestick from edible ingredients. To do this, knead a hard thick cake from flour with the addition of salt. Then we press a tea candle-tablet in the center and, having received its imprint, we take it back. The resulting shape can be encrusted with rhinestones, beads or other materials. Next, the product is dried. After a few days, the candlestick can be covered with lacquers and tinted with bright colors.

Toy for the New Year in kindergarten from threads

Recently, decorations for the New Year holidays from hollow filament balls have been especially popular. To do this, you can inflate a small rubber ball and randomly wrap it with nylon twine. We coat the twine with PVA and let it dry. Then we blow off the ball and get an unusual frame of threads. We can tint and decorate the resulting product to your liking.
Fancy snowflakes

In this list, we could not help but think of snowflakes. In the usual sense, many represent ordinary cut-out snowflakes glued to windows. We went further and bring to your attention the most unusual snowflakes that you can make with your own hands and surprise everyone.

You can also make snowflakes from plasticine. To get a beautiful and openwork snowflake, you will need several blue balls, which must be rolled into long thin sticks and twisted in the form of shell spirals. Then we wrap one of the spirals around the edges with others and add various decorative inserts from plasticine of other colors.

You can also get a snowflake with a glue gun. To do this, draw the desired snowflake on paper along the contour and leave it for a few minutes to allow the glue to dry. Then the surface of the pattern can be covered with acrylic varnish and sprinkled with silver sparkles on top. Allow time to re-dry.
Snowflake from pasta

The most interesting product before the New Year holidays will turn out even from pasta. It all depends on your imagination. To do this, for example, we take “shells” and collect five-pointed “flowers” from them. Then you can take the spirals, and finish the pattern as you wish.

Then we cover the resulting decoration with white paint and sprinkle with semolina, sugar or salt. At the very end, we can frame our snowflake with a white openwork ribbon.
"Funny snowflakes" from threads

If you want to make original Christmas decorations, then you can opt for yarn snowflakes. They are easy to perform and all you need is sleight of hand and a little patience.
At the very beginning, it is necessary to wrap the yarn tightly around the template, then the threads are cut off at the ends and tied into a knot. 8 beams of the same size are formed and are connected to each other in the center. The ends need to be fluffed. If desired, the snowflake can be decorated with any improvised means.

For the smallest, in kindergarten, I suggest drawing New Year's drawings or postcards. You can also glue beautiful applications. Be sure to include your children in the process. Every child wants to create such a New Year's miracle.
Postcard for the New Year "Christmas tree from braid"

A Christmas tree can also be made using an openwork ribbon. To do this, we take several pieces of tape of various sizes and begin to glue them onto a sheet of cardboard in the form of an accordion. The bottom one should also be the longest one. As the tree grows, the length of the glued ribbons also decreases. Thus, we will get a real three-dimensional Christmas tree with fluffy branches. At the end of the work, you can decorate the craft with buttons or bright beads.

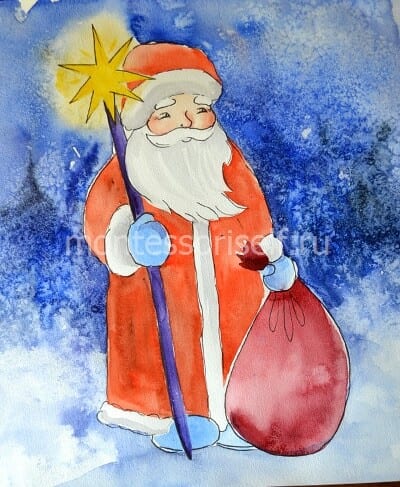
In kindergarten for the exhibition, you can draw Santa Claus, as the most important character of the New Year holidays.

And in order to give the drawing a special atmosphere, it is necessary to moisten a sheet of paper with a sketch with water, apply watercolor paint, then remove excess cotton wool with a cotton pad and sprinkle with salt. This technique will allow the background to acquire "snow crystals". Next, paint as you wish.
Application "Snowman" from cotton pads

Applications do not have to be made from colored paper. Well-known cotton pads are also perfect.
For example, cotton pads can imitate snowballs of a snowman, snowdrifts, or snow-covered tree branches. The remaining parts of the application: snowflakes, houses, tables of trees, can be drawn or glued with colored paper.
New Year's card on a stand

A handmade postcard will be a wonderful craft and at the same time a gift. Such crafts are made in the form of a book, in which absolutely any items can be used for decoration.
The highlight can be voluminous paper figures inside the postcard itself.
Fabric jewelry

Many mothers love needle and fabric, so of course there are fabric crafts for the New Year on our list. There are a lot of them, everything depends on your imagination. We will describe some of the New Year's fabric crafts today.
Felt Christmas tree toys

Using felt and cotton wool, you can make real decorations for school competitions for the New Year, and at the same time they will not be inferior to store ones.

To do this, we cut out two identical halves of the future toy from felt, sew them together and stuff them with either cotton wool or padding polyester. Then you can decorate the toys with sparkles, beads or beads.
Snowman from threads

By the New Year, you can make a snowman out of threads, which in some way will resemble a Christmas tree toy.
For this we need:
- ordinary balloons,
- PVA glue,
- kapron or other dense threads,
- colored cardboard.
We inflate three balls according to the size of the lumps of the future snowman so that they differ in size from each other. Next, we wrap each ball randomly with threads dipped in PVA. After we dilute the glue with water in a ratio of 1: 1 and now completely cover the ball with this solution. We send to dry completely.
sock snowman

A very cute snowman will turn out from the most ordinary white socks.
Also for our crafts it will be necessary to prepare a multi-colored sock. At the very beginning, we take a white sock and cut off his heel to the ankle. We tighten the place of the cut with a thread, turn it inside out and fill it with any filler. When the sock is clogged to the top, we tie the second end.

At the colored sock, we also cut off the heel and the tip under the toes. Next, we take the middle from the cut off sock and pull it onto our bag and tightly tie its lower and upper edges with threads. Thus, we have a prototype of a snowman with three lumps. We put the tip of a colored sock on the head and tighten the top with a thread. So we get a hat.
Now you can start decorating the face and clothes with the help of small buttons. With due imagination, we can get a truly New Year's toy craft.

Reading what unusual beautiful crafts can be made for the New Year, many have already asked the most understandable question: “Why have paper crafts for the New Year not yet been described?” After all, it's easier than ever. Don't worry, we didn't forget, we just played your appetite.
"Volumetric snowflakes" made of paper

Snowflakes can be not only on the street, but also in the apartment itself and at the same time not melt. And if they are made voluminous, then they can become an additional decoration for the New Year holidays.

For such snowflakes, we need glue, scissors, threads and, of course, the colored paper itself.
The sequence of actions should be as follows:
- We cut the paper into squares, bend it diagonally and make cuts 1 cm wide with scissors.
- We unfold the paper and fold the resulting stripes and fix with glue from the center to the edges.
- And in order to achieve volume, we need to change the direction of the bulges.
- So we must glue six squares, which will need to be connected at the lower ends into one snowflake.
- We hook the snowflake by the thread and it is ready to decorate the Christmas tree.

The simplest, but in their own way unique snowflakes. They can be mastered even by a child from 3-4 years old under the supervision of adults.

The most ordinary paper is taken and cut into squares or circles. Next, the resulting figures are folded in half several times and any patterns are cut out with scissors. The more folding stages there were, the more original and complex our snowflake will turn out.

Such crafts can be glued both on windows and hung throughout the apartment by a thread.
Crafts to school from disposable tableware

Here's something you've definitely never heard of before. It turns out that from the simplest disposable dishes you can make a very beautiful and original New Year's craft.
Create Santa Claus from disposable plates

To school for the New Year, you can make Santa Claus from disposable plates, we will definitely need paint and cardboard in white and red. From it we will make Santa's clothes.
First, we cut off a fourth part from the plate - we will not need it. We paint over the bottom of the remaining part with flesh-colored paint - this will be the face. Using improvised means, we glue our character's eyes, mouth and nose. And we cut out and make a cap from cardboard.
Making a Snowman for 2020

To make a beautiful snowman from disposable tableware, we will also need: glue, paper, cotton balls and markers of various colors.
We turn the plate upside down and, starting from the edges and towards the center, glue it with cotton balls. We can color the paper in red and cut out a hat from it. The nose, eyes and mouth can also be drawn using markers.

Christmas is one of the most anticipated events in a child's life. And if you do DIY crafts with him, you will not only teach your child perseverance, but also hard work. And if the toy is made with due diligence, then it can win competitions and become one of the best crafts in the kindergarten or school.
Happy New Year))
New Year's crafts in kindergarten is always an occasion to hold a small competition and organize an exhibition, so the children are happy to bring their crafts for the New Year to kindergarten to show the fruits of their labor to friends and teachers.
There are a lot of ways to make crafts for the New Year in kindergarten with your own hands. In this case, you can use a variety of materials.
Christmas tree for the New Year from plasticine
You can do it for the New Year. We make three balls of green plasticine and one ball of brown.

We turn two green balls into cakes, and one into a cone. From brown plasticine we make a small bar.

We make the edges of the cakes and the cone wavy.

Flatten the green ball a little and place it on the cake.

At the bottom of the other cake we place a brown bar - the trunk of the future Christmas tree.

We attach the green ball to the cone and connect all the parts. We got a Christmas tree made of plasticine. It remains to decorate it.

We decorate the Christmas tree with plasticine balls.

We attach a plasticine star to the top of the Christmas tree. Our plasticine Christmas tree is ready!

Plasticine snowflake for the New Year
You can make a lot of plasticine. Rolling balls of blue plasticine

We roll long sausages from balls.

We roll plasticine sausages in a spiral. We connect seven spirals together, placing one in the center.

We decorate the spirals with blue plasticine.

We supplement the craft with triangles of blue plasticine and white balls.

Plasticine snowflake - ready!

Santa Claus from plasticine in kindergarten
We will do in the technique of plasticineography. To do this, cut out a circle from cardboard. We take blue plasticine and smear it with a thin even layer over the entire area of the circle.

We begin to glue the parts of the Santa Claus figurine. To begin with, we attach a red fur coat, face and beard.

We attach a hat with an edge and a pompom. Glue eyes and nose. We give relief to the beard with the help of a stack.

We attach sleeves with an edge.

We attach green felt boots, mittens and a bag with gifts to Santa Claus. We decorate the fur coat with buttons and a relief edge.

We decorate the background with blue swirls and dots. It turns out a real winter blizzard from plasticine. Santa Claus in the technique of plasticineography - ready. We got a real New Year's picture from plasticine!
 Painting from plasticine "Santa Claus"
 Volumetric paper snowflake
It will be a wonderful decoration for a kindergarten or a room. Mastering the technique of making snowflakes is not at all difficult. We need 10 * 10 squares of white or colored paper. You can use other sizes, then the size of the snowflake will change. Take the first square and fold it diagonally. Then fold the resulting triangle in half.

We make three cuts on one side. They should be approximately the same distance from each other and from the edges.

Glue the two center edges together.

Then turn the workpiece over and glue the other two edges.

We glue the third layer of edges.

Glue together the last layer of edges. We will get one of the rays of a snowflake.

We make six such rays.

Glue them together three at a time. Then we glue both parts of three beams together. You can decorate a snowflake with glitter glue - you get a very beautiful decoration for the New Year.

Watch how to make a three-dimensional snowflake in the video:
3D paper snowflake is the most popular type of paper snowflake this year. Fold the edges of the sheet of paper inwards.

We will need to make several blanks similar to a paper bag without a bottom.

We add these blanks and cut off their corners (you can make them not the same).

From these blanks we add a snowflake, gluing them together.

For a detailed master class on making 3D snowflakes, see the video and article
DIY colored paper garland
It will become a wonderful Christmas decoration. For this craft, we need the brightest colored paper and good glue.

We fold a sheet of paper with an accordion.

We bend the accordion in half in the center. We glue together the two parts of the accordion to make a fan.

We make several of these colored fans.

We glue them together. New Year's garland of colored paper - ready!

DIY garland "flashlights"
We take double-sided colored paper as a basis. Using a template or compass, cut out a circle from a paper sheet. Fold it in half.

And again in half.

We make cuts from one end. Then we make cuts on the other edge, so that they pass between the first. We unfold the circle.

We make the same figure from paper of a different color.

The longer the garland is needed, the more circles we make. Stack them up. Apply a few drops of glue to the outer contour, glue all the circles together.

Now, if we pull the first and last circle in opposite directions, we get a beautiful airy garland.

Santa Claus from a cardboard roll, fabric and cotton wool
In order to make Santa Claus, we take the basis - a cardboard roll. We glue a beautiful dense red fabric to the roll, leaving a part on top. We glue an oval face from fabric or cardboard. Glue cotton wool around the face.

Glue the nose, cheeks and eyes on the face. Decorate the end of the hat with a pompom. Glue a button on the bottom. Santa Claus is ready!

An accordion-folded paper makes a wonderful Christmas decoration - Santa Claus. Both parts of the craft are formed from paper folded with an accordion and tied with a thread.

Then the accordion is straightened and glued on both sides.

Postcard for the New Year "Christmas tree from braid"
A wonderful gift for the New Year will be a postcard decorated with a Christmas tree. The basis of the postcard will be a folded sheet of cardboard or thick paper. We take a small piece of green openwork ribbon.

We glue it to the paper, folding it with an accordion in the upper part.

Make the next piece of braid a little smaller than the previous one. Folding with an accordion, glue it on top of the first braid.

We continue to work laying out pieces of braid with an accordion. We should get fluffy spruce branches.

We fold the last ribbon in the form of a cone and place it on top of the Christmas tree.

We decorate the Christmas tree with decorative buttons and beads. At the top of the Christmas tree we place a star or a small bow of red braid. A bright and simple postcard for the New Year is ready!

Christmas tree from pieces of paper
Another very effective New Year's craft for kindergarten is a Christmas tree made from pieces of paper. We make a semicircle.

Cut out small squares from thin green paper. The craft will look spectacular if you use green paper of different shades. We apply PVA glue to a semicircle of paper. We wind pieces of thin paper on a slightly pointed stick and glue them on a semicircle. We try to stick the papers as close to each other as possible.

We fill the entire surface of the semicircle with pieces of paper.

We turn the semicircle to get a cone. We glue the craft.

We paint a roll of toilet paper with brown paint. We cut the lower part of the roll and bend it.

We fix the cone with pieces of paper on a cardboard roll. We decorate the craft with pompoms. Christmas tree made of pieces of paper - ready!

The Christmas tree can be made from disposable paper plates. We will need large and small paper plates. Cut off one segment from paper plates. The rest is covered with green paint.

We turn a large and a small plate into a cone and glue them together.

We apply glue to the cone from a large plate.

Glue one cone from a large plate on top. Then we glue two small cones on top of each other.

We decorate the Christmas tree with rhinestones, ribbons. Glue an asterisk to the top of the Christmas tree. An elegant Christmas tree made of disposable plates is ready!

Craft for the new year in the kindergarten "Christmas tree from tinsel"
A very beautiful and bright New Year's craft - a Christmas tree made of tinsel. First, we make the base of the craft - we glue the cone out of cardboard.

We fix the tinsel on the top of the cardboard cone.

We begin to wrap the tinsel around the cardboard cone. We fix with glue.

We wrap the cone with tinsel to the very base. The end is twisted or glued. We got a Christmas tree made of tinsel.

We decorate the Christmas tree with sweets, beads, small Christmas decorations. We got a beautiful and delicious New Year's craft!

Salt dough candlestick for the New Year
A wonderful gift for the New Year will be a candlestick made of salt dough. To make it, knead the usual salty dough. We form a fairly voluminous cake from it. We press a small tea candle inside the cake. We need to get a candle print on the test.

We decorate the candlestick with beads and rhinestones. I put it to dry.
 Decorate and dry the candlestick
 We cover the candlestick with varnish.

We can, after coating the candlestick with varnish, sprinkle it with sparkles. In this case, we can not decorate it with beads and rhinestones, it will be bright and elegant in itself.

We got two festive New Year's candlesticks!

Snowflake from pasta
Increasingly popular among children and adults are crafts made from ordinary pasta. You can make a lot of pasta. We collect the middle of the snowflake from five “shells” pasta.
 The middle of pasta "shells"
 Glue pasta "spirals" over the middle. We get a figure shaped like an asterisk. Glue pasta "shells" to the inner parts of the asterisk.

Color the snowflake white. While the paint has not dried, sprinkle the snowflake with semolina, salt or sugar.

We fix a delicate white ribbon on the snowflake. We have a wonderful Christmas decoration! You can hang a snowflake on a Christmas tree or decorate a room with it.

Another spectacular New Year's craft -. Make a cone out of cardboard.

From the bottom, start pasting it with pasta. The best form of pasta for this craft is "feathers". Try to stick the largest pasta on the bottom, and leave the smaller pasta for the top.

After all the pasta is glued, we paint the Christmas tree from a balloon with paint or gouache (with the least amount of water). Glue decorative bows and bells. The beautiful Christmas tree is ready!

Craft "Bullfinch from threads"
Can be made from yarn. For crafts, we need gray, red and black yarn. We knit red and black yarn according to the pattern in the photo.

We put a piece of gray yarn under the red yarn.

We tie gray yarn with red, and we tie gray at the top. We fix the factory eyes and the beak from the seeds. Luxurious bullfinch made of threads - ready!

Christmas tree decoration "Snowman" from papier-mâché
To make a snowman, we need a special adhesive solution. To make it, dilute a spoonful of corn or potato starch in cold water. Pour boiling water into the mass, stirring the mixture. The volume of the adhesive solution is one glass.

We draw the outline of the craft on a piece of paper. This sheet is placed in a file.

Wet a piece of cotton wool in an adhesive solution. We squeeze out the excess.

We lay out the body, head, arms and legs of a snowman from cotton wool soaked in a paste.

Put on a hat and scarf.

We attach the nose.

We dry the craft on the battery.

Let's start coloring the snowman.

We draw smaller details. We draw a face for a snowman, decorate a hat, scarf and boots with patterns.

It remains to attach a thread to the snowman and hang it on the Christmas tree!
 Christmas decoration "snowman"
 Craft for children mittens
Paper application "mitten" is within the power of even the smallest kindergarten students. On colored thick paper or cardboard, we circle the child's hand.

You can make two mittens at once - on the left and right hand.

Cut out the mittens along the contour.

It remains to decorate the mitten. To decorate the mittens, we used buttons and cotton wool, however, everything that is available at home can be suitable: rhinestones, beads, tinsel, sequins, lumps of paper, scraps of fabric, etc.

Left and right glove.
 Application "mitten" for kindergarten
 You can make mittens in the form of a New Year's application.
 Application "mittens"
 From paper and cotton balls, you can make not only mittens, but also a cozy hat.

In the form of a mitten, you can make a gentle New Year's card with a wish for happiness! The card is made in the popular scrapbooking technique.
 New Year's card - mitten
 New Year's toy in kindergarten from threads
New Year's toys made of ropes and balloons are becoming increasingly popular. The craft turns out to be very bright and spectacular, and it is not at all difficult to make it. In order to make a Christmas ball out of a rope, we need: a small balloon, braid, decorative flowers, PVA glue, paint and the rope itself.

Blow up a small balloon.

We wrap it with rope. We cover the workpiece with PVA glue.

After the glue dries and the rope becomes hard, carefully pierce the ball and remove it.

We cover the ball with golden paint.

We collect a small decoration from braid and flowers.

We place the decoration on the ball. New Year's ball of thread is ready!

New Year's clock from a box and paper
From the box and paper you get a luxurious New Year's craft - a clock. To do this, we need to choose a small flat box that is suitable in size. We glue a cardboard blank on it from the front and back (the blank itself will cover the entire surface of the box, only the roof will protrude upwards). Glue the lid and icicles
The finished clock will look like this.

Christmas tree from foamiran
It can be made from a popular material - foamiran. For the Christmas tree, we need green foamiran. Cut it into strips two to three centimeters wide. We cut one edge with a fringe. Foamiran begins to bend and change shape when heated. We slightly warm up our strip on the iron. While the foamiran has not cooled down, we bend the edges, giving the future spruce branches a natural bend.
Row by row we glue the entire cone with strips of foamiran. In the upper part we glue a red star from foamiran. Crafts for the New Year Christmas tree from foamiran
Christmas tree - topiary
The New Year's souvenir fir-tree-topiary looks very nice. At the heart of such a Christmas tree there will be a foam cone, which we wrap with foil. We pierce the cone through with wire. We bend one of the ends of the wire in the form of a spiral. We wrap the cone with thick yarn. Glue two strips of double-sided tape to the cone so that the threads do not slip.

We tightly wrap the cone with threads and decorate it with beads. We fix the Christmas tree in a decorative bucket using plaster or plasticine. To hide gypsum or plasticine, cover it with sisal or colored cotton wool. Craft "Christmas Tree Topiary" is ready!

Christmas tree from organza
Another way to make a very cute Christmas tree is to make it out of organza. Shiny green organza looks very nice. We cut it into strips. Each of the strips should be slightly wider than the previous one. Fold the strips in half and pull them together in the center, as in the photo.

We take the basis of the craft - a green tube for a cocktail. We begin to string organza blanks on it. The first will be the largest, and then in decreasing order.

We wrap the top of the Christmas tree with a beautiful ribbon and fix a bow on it. We fix the trunk of the Christmas tree from below in a plastic cup using plasticine. Sprigs of organza are straightened and decorated with New Year's decorations - delicate sequins.
 Craft in kindergarten - organza Christmas tree
 Christmas tree made of cones
Crafts made from natural materials are becoming very relevant for the New Year, so we want to offer you a very interesting and beautiful master class “Christmas tree made of cones”. We cut out a circle from cardboard and glue the cone - the basis of the craft.
 Cones on a cone We wrap the paper base with threads Postcard with a mouse for the New Year
Then we paint with watercolors of Santa Claus himself and outline the main lines with a marker.
DIY Christmas drawings
Christmas drawings are especially warm. So, for example, a cute angel can decorate your Christmas card.
Children's drawing "Angel" And this angel will become a luxurious picture.
Drawing "angel" Salt dough makes a magical New Year's candlestick. To knead the dough, take the proportions as indicated in the photo.
New Year's candlestick made of salt dough
When the baby brings such New Year's ones, he will surely surprise his comrades and teachers.
Patterns for cutting for the New Year
Template for cutting "Santa Claus" Crafts for the New Year in kindergarten reviews:
Thank you) Happy New Year everyone!
Cool crafts! (Svetlana E.)
And we also made one of the crafts for the competition) We don’t know if we will win, but we really like it. We made a Christmas tree out of felt) (Alexandra V)
Traditional festive mornings are just around the corner. A prerequisite for the upcoming Christmas fun is a green Christmas tree, which you want to see bright and elegant. It is better to make intricate Christmas decorations for the New Year with your own hands together with children. Kids love to sculpt, cut, paint on their own, so everyone will like homemade jewelry.
How to make a Christmas tree toy for a kindergarten with your own hands
The flight of your imagination and the interesting vision of children will give originality and brightness to Christmas tree decorations. For creativity in the apartment or in the country you can find unnecessary old things, cardboard, any paper, threads, ropes, beads, beads. With the hands of adults and children, they will turn into a funny Christmas decoration.
New Year's decorations for kindergarten should be made of safe materials that do not injure the child's fingers
Use bright colors to keep kids interested. You will also need glue, scissors, paints, pencils, wire, self-tapping screws. Do not forget to prepare the ropes to hang toys on the Christmas tree.
From paper and cardboard
There is no limit to fantasy: fairy-tale characters, Christmas trees, balls, snowflakes, hearts, figures of birds and animals.
- The easiest toys to make will turn out to be beautiful and even, if previously made from plain paper prepare stencils. According to the stencil, the contours are outlined on the prepared cardboard with a pencil, in the upper part of each “cardboard hero” a hole for the rope is pierced with an awl. Finished figures are cut out with scissors, painted on both sides or pasted over with colored paper, decorated with sparkles, beads, artificial snow. Products are enlivened with funny muzzles.
Paper lanterns are easy to make even for small children.
- BUT from multi-colored paper you can make lanterns with your child. A rectangular sheet is folded in half along the length. Not reaching the opposite edge of the folded sheet by 1 cm and from the sides by 2 cm, transverse cuts of the same width in the form of strips are made with scissors from the side of the fold. The rectangle unbends and folds into a longitudinal tube, the edges of which are glued together. Additionally, a hollow narrow tube is inserted into the finished flashlight as a frame. A thin paper strip-pen is attached to one side.
- Volumetric stars easy to make for little kids. 2 identical stars are cut out of thick paper. With scissors for each star, a cut is made from the top of one beam to the center. Then, with opposite ends along the cuts, one star is inserted into the other at a right angle. So it turns out one voluminous star, which needs to be colorfully decorated.
- Multicolored openwork snowflakes are cut out of foil, paper or paper napkins according to special patterns.
Made of felt and fabric
Any plain or colored scraps of old clothes, hats, berets, pieces of leather, fur, cotton wool, buttons, buttons, loops are suitable for such toys. Discuss with your child what toys you will be making. Make a base pattern and fantasize whether it will be animals, birds, men or houses, stars, flowers, trees.
BUT old socks with holes can also be used for snowman crafts, tumblers, nesting dolls, dolls. Sew up the hole and fill the sock up to 1/3 the length of any cereal. Separate the head from the body with a thread, tightening it tightly. Fill the body of the toy with grits too. You can add "legs", "handles" - a funny doll is ready. Draw a face with felt-tip pens or sew on button eyes, nose, mouth.
cones
In autumn, prepare Christmas or pine cones in advance in the forest. They will be a real decoration for the forest beauty. Cones can be varnished, colored foil, silver or gold paint, decorated with cotton wool, sparkles, ribbons. Make a hole for the rope at the top with a self-tapping screw. From the cones you can make little men, snowmen, flowers and much more. Come up with it with the kids.
Christmas tree made of cones
Rattle balls
Cases from Kinder Surprise will be suitable, but you can take one-time plastic cups. They need to be cut to 3-4 cm high, filled with 2-3 pebbles or dry beans, beans, bolt, which can make a sound. For strength, pre-lubricate the inside with glue and dry. Insert the cups one into the other with the bottoms out and glue. Decorate the surface of the toy to your taste.
DIY Christmas tree decorations with children for school
It is interesting on the eve of the matinee in the evening to make New Year's toys to school with your own hands. Decorations are added to the variety of crafts for kindergarten, which are more difficult to make.
- The egg tray will serve as a good material for decorative items, it is similar in properties to clay. Tear it into small pieces and soak overnight in water. In the morning, squeeze out the resulting mass, add a little PVA glue to it and mix thoroughly, leaving no air bubbles. Now you can start sculpting as if from ordinary plasticine. Just do not forget that such "plasticine" hardens quickly, so the sculptures are made immediately. Such crafts dry on the battery for a long time. Finished products can be decorated in different ways using paints, sparkles, ribbons and the like.
- From burnt out incandescent light bulbs, funny nesting dolls, snowmen, little men are obtained. Multi-colored ribbons are tied around the narrow part or glued. The lamps themselves are varnished, painted, decorated with confetti, sparkles, cotton wool.
- Medals can be made from metal or plastic bottle caps. Use an awl to make a hole in the side of each lid for the tape. Color the “medals” with gold, bronze and silver paints, or red, yellow, green. Use paint cans for convenience. The covers can also be connected, then you get little men. From several covers you can make flowers, snowflakes.
All these crafts will be appropriate for various creative tasks of the school, for example, for the DIY toy event for the Christmas Tree contest.
DIY crafts for the New Year
More ideas
Fairy lights. Suitable for them are different pom poms from old baby hats. You can buy something similar in the "Craft Supplies" store or make pompoms yourself. To do this, a circle with a diameter of 3-4 cm is cut out of cardboard, a hole with a diameter of 0.5 cm is cut inside it, something like a flat wheel is obtained. Any knitting threads are taken, wound on the resulting wheel in several layers through the hole. The more threads are wound, the more magnificent the pompom. The threads are cut along the upper edge of the wheel around the entire circumference, the resulting bundle is pulled together in the center and fixed. Pompoms made of colored threads look more interesting.
You can also take snowflakes, cotton balls with pasted sequins, unnecessary beads, beads, chains for making garlands.
Instead of pom-poms, make candy garlands "chupa chups", homemade gingerbread cookies, real paper-wrapped sweets by tying strings to them, or make decoy sweets from colored paper, foil.
The finished material is put on a thick thread or fishing line at the same distance from each other, like the bulbs of a real garland, and hung on a Christmas tree.
Garlands and snowflakes decorate windows, walls, ceiling in the hall where the matinee is held. Also, when decorating the room, you can hang pictures of New Year's toys made by children with their own hands.
Children and adults get great pleasure from joint creativity, and the holiday will be remembered for a long time. Happy New Year.
https://youtu.be/P8Dv8vC-LQM?t=48