What to do with corrugated cardboard. DIY crafts from corrugated cardboard. We disassemble the packaging schemes for a small gift in the form of a mouse made of cardboard with our own hands
Corrugated cardboard, as a material for crafts, has gained great popularity relatively recently. But in a short time, he fell in love with many masters who use him to work in different techniques. Making from corrugated cardboard is not at all difficult, and as a result, beautiful three-dimensional figures of animals, birds, people, and plants are obtained. Even young children can easily make simple applications and crafts from corrugated cardboard.
Corrugated cardboard is used to make packaging boxes that can be used for crafts. But it is better to buy special sheets of corrugated cardboard in different colors or material already cut into strips.

What crafts are made from corrugated cardboard:
- Christmas decorations;
- Wall panels;
- Applications;
- Caskets;
- Stands for stationery;
- Fixtures;
- Aircraft, tanks and other military equipment;
- Houses, castles and other buildings;
- Scenery;
- Toy furniture;
- Photo frames;
- Volumetric figures;
- Gift packages;
- Greeting Cards.
The list can be continued indefinitely, it all depends on the imagination of the master, who wishes to bring to life all his interesting ideas. Even a huge spaceship or rocket made of corrugated board will look amazing.
Corrugated cardboard is often used to make crafts using the quilling or scrapbooking technique. Thanks to its multi-layered texture, the patterns are more interesting.
Volumetric corrugated cardboard crafts for children: basic details
The main elements for almost all volumetric figures are made in the same way, and then a house, an owl, a butterfly or a tank is assembled from them. Blanks are made in advance, so that later the craft can be easily and quickly assembled.

What are the basic elements:
- Disk;
- Oval;
- Dome;
- Cone;
- Petal;
- Zebra.
The disk and the oval are made almost identically: a thin strip of corrugated cardboard is tightly twisted in a spiral, and its tip is glued with PVA glue. But when twisting the oval, you must first retreat 1 - 1.5 cm. The petal is made in the same way, only the cardboard should not be wound tightly, but more freely and then squeeze the figure from one edge with your fingers. The zebra is glued together from 3 - 5 multi-colored strips and folded like a disk, but the free edge is cut in the form of a ladder. The dome is a disk with layers displaced in the form of a hemisphere, which must be fixed with glue after giving the necessary shape. The cone is made in the same way and is also smeared with glue.
By squeezing the disk from different sides, you can get a rhombus, an eye, a crescent and other shapes.
Do-it-yourself volumetric crafts from corrugated cardboard step by step: useful tips
Many children love cartoon characters, so they can be offered to make Smeshariki, Luntik or Prostokvashino characters out of corrugated cardboard. If you can’t imagine what the characters made of corrugated cardboard will look like, then you should find pictures on the Internet and try to make a figurine from nature. Having made one hero, making the rest will not seem too difficult.
One of the easiest crafts is a pig.
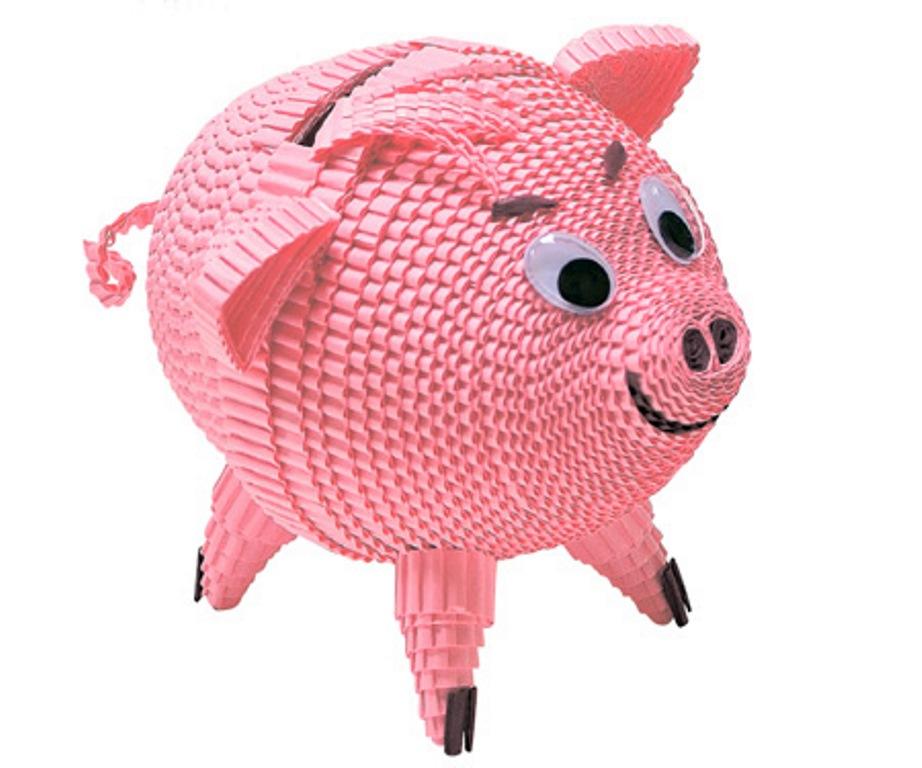
For its manufacture you will need:
- Corrugated cardboard in pink or any other color;
- colored paper;
- Glue with a brush or glue gun.
The order of work step by step:
- We make a body from two domes made of disks of the same diameter. We take strips for them at least 2 meters long. We glue two domes with a glue gun or glue.
- We make the legs from four discs of a smaller diameter (strips about 50 centimeters long). We glue them and squeeze them a little so that the legs are slightly convex. This form must be fixed by smearing with glue.
- Ears are excellently obtained from disks similar to legs, but we make a triangular shape.
- For a patch, we take a strip of corrugated cardboard 50 cm long and form a disk.
- We connect all the elements together and glue the eyes cut out of colored paper.
A pig can make a wonderful Christmas toy if you attach a thread to it and decorate it with snowflakes cut with a figured hole punch.
Do-it-yourself flat crafts from corrugated cardboard: a master class for beginners
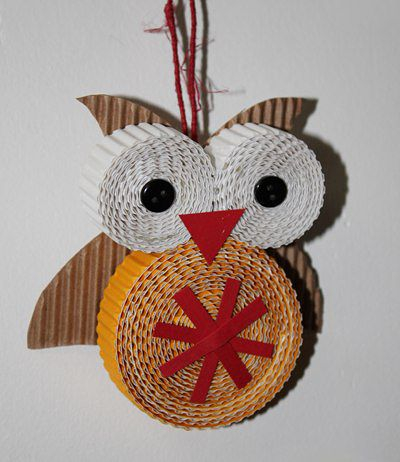
If volumetric figures from corrugated cardboard cannot be made the first time, then you can start honing your skills on simple crafts using the quilling technique. An owl is especially good, for the manufacture of which no complex details are required.

Step by step master class:
- First, approximate outlines of the future craft are drawn on a cardboard sheet.
- From a strip of corrugated cardboard, about two and a half meters long, a disc is rolled up and glued onto a sheet.
- From two discs smaller in diameter than the body, owl eyes are formed and glued to cardboard. Then you should stick pupils from buttons or special plastic blanks.
- A triangle is formed from a small disk and glued in place of the bird's beak.
- From different elements, you can assemble a tree branch and stick it on cardboard, or you can leave it as it is.
You can not stick the owl on cardboard, but attach it to an impromptu swing made of wire or branches and hang it on the wall to decorate the interior.
Simple Corrugated Cardboard Applique: Making Recommendations
To create an interesting picture, you do not need to have any special skills and abilities. Children of any age can make a simple application. For the younger ones, it is desirable that the complex elements of the craft be cut out by the parents, and the older ones are put on this task on their own.

What is needed for the application:
- Cardboard sheet;
- Simple pencil;
- A sheet of colored corrugated cardboard;
- scissors;
- Glue stick or PVA.
First you need to sketch a preliminary sketch of the picture in order to decide where the houses, trees, clouds will be. Then you need to cut out the necessary details. First, the background is glued, and then the rest of the elements.
Details can be cut both along and across the strips. They are glued in random order.
How to make a corrugated cardboard cat house
Children enjoy making homes for pets. An easy-to-make and beautiful cat house can be made from old boxes or sheets of packaging cardboard.

Things needed for work:
- Stationery knife;
- Corrugated cardboard sheets;
- A simple pencil and compass;
- PVA glue with a brush.
A circle with a diameter of 30 centimeters is drawn on cardboard. It will serve as the foundation. Next, 5 rings of the same diameter are cut, but the width of each will be 4 centimeters. The diameter of each subsequent batch of five rings is reduced by five millimeters. The smallest template will be 18 centimeters in diameter. The latest blank is made in the shape of a circle. Then all the rings are glued to the base, gradually reducing the diameter. When the structure dries, the entrance cuts with a clerical knife.
Inside, the house can be covered with a soft cloth or equipped with a scratching post.
Master class: corrugated cardboard crafts (video)
Corrugated cardboard makes great gifts for any occasion: a postcard, photo frame, picture or photo album. The main thing is to carefully treat the work, and follow the manufacturing technology. Then, in a very short time, you can move from simple crafts to more complex ones.
Details and techniques for working with corrugated cardboard
Disk
Twist a strip of corrugated cardboard tightly, glue the end of the strip.
Oval
Roll the strip of corrugated cardboard like a disk, but back off from the beginning 1 cm or a little more.
Petal
Roll a strip of corrugated cardboard like a disc, then unravel it a little and pin it on two opposite sides. Glue the end.
Zebra
Zebra is a disk twisted from 2-4 multi-colored corrugated cardboard strips. glue the strips in the form of steps, then twist the part. Cut the ends of the strips with a ladder, as shown in the figure, and then glue them to the part.
Dome
Twist the disk and form a dome. shifting the layers so that a hemisphere is obtained. Then, from the inside, grease the entire surface of the part with PVA glue, which, after drying, will fix the resulting shape. Or cross-cross the "dome" with a glue gun so that all layers of the part are captured.
Cone
Twist the disk of the desired diameter, form a cone out of it. Fix the shape with PVA glue or a glue gun, like a dome.
Corrugated cardboard crafts for children - examples of work
Piglet
1.
Body. Twist 2 discs of strips 2.5 m long each. form disks into domes. Fix this shape with glue from the inside.
2.
Legs. twist a disk from a strip 50 cm long, glued together from 2 strips of a contrasting color, 25 cm each. Make the disk slightly convex and fix this shape with PVA glue from the inside. Do the same for the front legs.
3.
Ears. From a thin strip 0.5 cm wide and 50 cm long, twist the disk and form an ear. Do the same for the other ear.
4.
Assembly. Glue all the details with a glue gun. Make eyes. Decorate the ears and cheeks with colored paper figures made using a figured hole punch. 
frog
1.
Head is done in the same way as a piglet.
2.
Eyes are made in the same way as the head, only each hemisphere is twisted from a strip 50 cm long, and the lower part is white or yellowish. make pupils out of black paper.
3.
torso- twist the disk from a strip 3 m long. form a cone about 8 cm high. fix the form from the inside.
4.
Paws- Glue 2 strips 50 cm long in a contrasting color with the smooth side. form the fingers in the form of loops and fix the shape from the inside.
5.
Assembly- Glue all the details with a glue gun. Decorate the frog with buttons. 

For sunflower cut a petal out of a 1.7x3.5 rectangle of yellow corrugated cardboard. Make 17 of these petals. For the center of the flower, twist 2 strips of yellow and brown 0.5x50 cm each. Form a low dome and fix it.
sunflower assembly: Cut out a circle with a diameter of 4 cm from cardboard. Glue a stick along the radius to it and petals around the circumference. then stick on them with a shift the second layer of the petal center stick on the center of the petal.
Cut out leaves from green corrugated cardboard and glue them to the stem.
Flower- the petals are made like this - twist the disk from a strip of about 5x25 cm. lightly pin it in one place. glue the end. Make 5 petals. For the middle, twist a disk of 2 strips of contrasting colors, 0.5x12 cm each - make 2 such parts.
flower assembly- glue the petals together, glue the stick-stalk between 2 petals, glue the core in the middle - on both sides. for leaves, take a green strip 0.5x25 cm and form a leaf with glue, glue it to the stem.
Content
Crafts from the simplest cardboard look no worse than expensive designer decor. Finding material is easy in any home, and in the store it is not too expensive. So arm yourself with material, scissors and glue and let's create stylish things. At the very bottom you will find a video tutorial and tips on working with cardboard.
Christmas tree decorations
Cardboard crafts for the New Year can be the easiest to make, but very cute for decorating a house or a Christmas tree.
To create a Christmas tree decoration, we need:
- scissors;
- thick cardboard (you can use an electronics box);
- watercolor paints;
- brush;
- simple pencil;
- twine;
- dry straw;
- beads / pearls / rhinestones;
- ribbons/bows.
First you need to decide what exactly you want to make out of cardboard: a cookie man, a Christmas tree, a deer, a star, a snowflake. Now you need to draw a future craft either immediately on the material, or first on a draft, and then transfer it to cardboard.
Now the blank needs to be cut out, and then with the help of paints and decor, give the Christmas tree toy a complete look. Let's see what can come out:

Next year is the year of the dog, so the New Year's figure has already been determined.

Use twine to decorate a cardboard horse

And a few more toys based on dense material with twine:

Use gold spray paint:

decorative tree
This decoration is from the category of voluminous cardboard crafts for the New Year. Dense material acts here as the basis, and for decoration you will need the following materials:
- twine;
- colored paper;
- beads;
- bows;
- Christmas tree beads;
- threads;
- paints.
Everything is elementary simple - you need to twist a cone from the main material, which will act as the basis for the Christmas tree. Use a glue gun to secure the decor to the cardboard.


Use colored twine to make such an interesting Christmas tree
By the way, pasta, peas, nuts, beans and other materials can be used as a decoration for a cardboard Christmas tree.

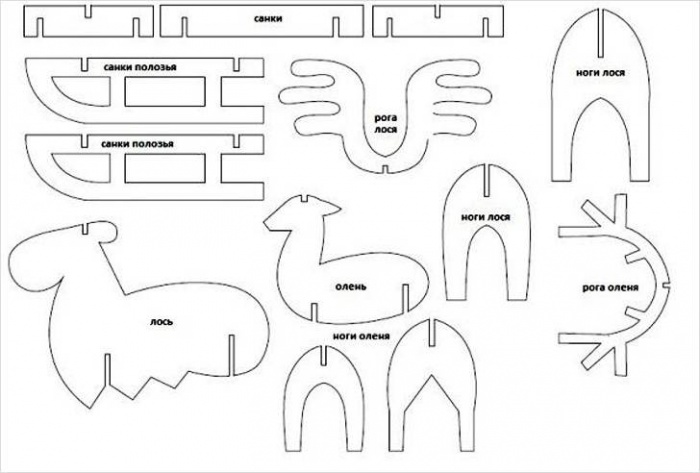
Deer made of cardboard
A beautiful and stylish craft in the form of a Christmas deer head can be hung in the hallway or living room. For such a large cardboard craft for the New Year you will need:
- thick cardboard (box);
- tailor scissors;
- paints;
- brush;
- fir branches;
- cones and other decor.

First you need to draw a template for the future deer: separately draw the head, horns and base for the wreath. Fold the box flat and attach the template to the fold. It should work out so that the nose of the deer will be the connecting link of the two parts of the head.
Now draw in the plane of the horns, which will then need to be inserted into the grooves of the head.
Connect the parts and, if necessary, glue with glue. Now take care of the wreath. From the same material, you need to cut a “donut” of medium width, on which you will glue spruce branches. It remains to completely connect all the details and find a place for the Christmas deer.
You can make a huge interior composition with a deer and a sled.

For such a composition, templates of parts will be required, which you will then assemble together. Volumetric cardboard crafts for the New Year look very impressive.
Corrugated Cardboard Crafts
Corrugated cardboard itself is a very beautiful material and original Christmas decorations are obtained from it. Use corrugated cardboard ribbons and create Snowmen, Santa Clauses, different animals, Christmas trees and other decorations:

Use glue, scissors and paint to bring your crafts to life:
Let's try to create a Christmas tree from corrugated material step by step. You can buy it at a specialty art store or use industrial cardboard.
First you need to cut the cardboard into strips of medium width, twist them into circles and fix them with glue. Make enough circles to connect them into a Christmas tree: the bottom row will consist of 4-5 circles, and then in descending order.

And to make such a bell, you need to take one long strip of red corrugated material and twist it into an oval. Then lightly squeeze the sides of the workpiece to give the desired shape. Now we make a bell mold from a separate strip and glue it to the oval. It remains to attach a bead and a rope.
Making decorations out of white cardboard
What crafts from white cardboard for the New Year can be done? Use this material to create interesting "snowy" Christmas decorations that can be placed on the windowsill.

It is necessary to cut out Christmas trees according to the template and connect them with a stapler to each other. In the middle, you can put a battery-powered garland and the New Year mood will be provided for the whole year. And with the help of a simple template, you can create a whole New Year's town from white cardboard. Use nail scissors, PVA glue and a stapler to create a Christmas craft.

You can not glue the houses, but arrange them on a chest of drawers in a plane:

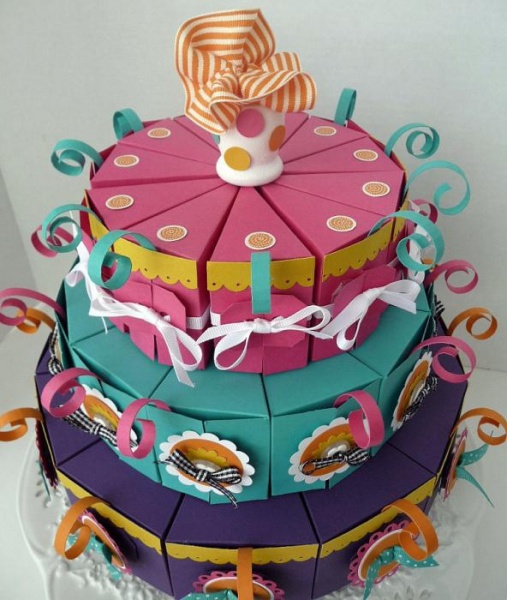
How to make a "cake"
You can present a gift in an original way or make a "cake" with New Year's predictions using this material. What will be required:
- thick cardboard;
- scissors;
- pattern;
- beads;
- tapes;
- bows;
- colored cardboard or paper.
First you need to print the template:

One template equals one piece of cake. The more pieces you have, the bigger the cake will be. You need to bend the part along the fold line and secure the part with the help of "hooks". The finished cake can be decorated with quilling details, beads, felt toys, Christmas tree beads. In each of the pieces you can put a wish for the New Year.

Such a cake can be presented to the children for the New Year, putting a small surprise in each piece.

You can make several tiers of cakes of different styles. The first tier will contain, for example, 6 large pieces, the next 10 small ones, and the next 12 very narrow ones.
At first glance, it seems that there should be no difficulties, but this material will be easy for you to give in to if you work with it correctly:
- use only sharp scissors or a clerical knife so that the edges of the cardboard are neat;
- use the grooves and gaps to connect the parts. The grooves can be pre-lubricated with PVA glue to keep the structure stronger;
- use a non-writing ballpoint pen to mark the fold lines. In this case, the cardboard will bend beautifully and not roughly;
- if you use colored cardboard, then select felt-tip pens by color so that you can paint over the folds of the product;
- do not give up needlework if the craft does not work out the first time. Start with something simple, see how cardboard behaves in your hands. And then take on the more difficult work.
We are sure that you will prepare very carefully for the New Year and create coziness and a fairy tale at home with the help of DIY crafts.
And as usual, at the end of the article we offer a video master class on creating interesting crafts. This time we are watching a lesson on how to create a Christmas tree from corrugated material:
Post Views: 170
Having shown quite a bit of imagination and imagination, a huge variety of crafts can be made from the simplest materials. From a very early age, kids are happy to take part in creating bright and original applications, and a little later, with genuine interest, they make volumetric figures.
One of the most malleable materials from which many interesting and original products can be made is corrugated cardboard. Working with him drags on for a long time and delivers a lot of positive emotions not only to kids, but also to their parents. In this article, we will tell you how to make corrugated cardboard crafts for kids and offer some ideas for creating original decorations.
How to make crafts from corrugated cardboard with your own hands, step by step?
Creating various products from this material is not an easy task. Despite this, it is very popular among those who like to do something with their own hands. Most often, boys and girls create crafts from strips of corrugated cardboard in the form of animals and favorite characters from fairy tales and cartoons.
With the help of the following detailed instructions, you and your child can easily make a cute Cheburashka:
- Prepare 4 yellow and 1 brown strips of corrugated cardboard to create the face of our Cheburashka. Twist them, squeeze them out and glue them inside with hot glue. In the same way, prepare the future nape of 5 brown stripes.
- Similarly, make 2 elements of the body. The front will have 3 yellow stripes and 1 brown, and the back will have 4 brown stripes.
- Connect the two parts of the head together, as shown in the figure, and glue them together with a strip of paper.
- Connect the 2 elements of the body in the same way.
- For one leg, you will need 2.7 strips of brown corrugated cardboard. Twist them, slightly squeeze and glue. Repeat again to create the second foot.
- The glued paws should look like this. Glue should be at the bottom.
- Each pen will require only one strip. Count 8 edges of the corrugation, fold and give the desired shape, resembling a drop.
- For one ear, take 3 yellow and 2 brown strips. Twist them in the same way as for creating other elements, then lightly extrude and glue from the convex side - this will be the back of the ear. In the future junction with the head, press the parts a little with your fingers.
- Carefully connect the elements to each other. The largest ball - the head - should be located on top. Glue it to the body, and then attach the two legs from the bottom.
- Glue the ears to the almost finished toy, detail the facial features the way you like best, and add any decorations, such as a bow. A magnificent animal named Cheburashka is ready!


In order not to waste time on the selection of the necessary materials, very often they purchase ready-made kits for creating crafts from corrugated cardboard using the quilling technique. In them you will find several strips that you will need in the process of work, suitable glue, as well as decoration elements. In addition, the package of such sets almost always includes detailed instructions, with the help of which even a small child can easily make a bright and original toy without much difficulty.
Similar corrugated cardboard crafts can be a great New Year's gift, especially if you have a symbol of the coming year. In addition, using this material and the technique that is popular today, you can make incredibly beautiful Christmas tree decorations, garlands, as well as New Year's figurines of snowmen, Santa Claus and the Snow Maiden.
 |
 |
 |
 |
 |
 |
 |
 |
 |
We will tell and show you how to make such a funny puppy from corrugated cardboard.
To create a dog craft, you will need multi-colored strips of corrugated cardboard, scissors and PVA glue. In our case, these are strips measuring 1 cm by 48 cm. The colors of the strips are white, brown and blue
.jpg)
You will also need plastic eyes and a nose.
Step-by-step process of making a dog from corrugated cardboard
We glue 2 strips of brown color, glue the tip. Spin the disk.
.jpg)
Form a hemisphere with your fingers.
.jpg)
Similarly, we glue 2 strips of white color, glue the tip. Spin the disk.
Form a hemisphere with your fingers.
.jpg)
We glue the hemispheres with glue.
.jpg)
We glue them together.
.jpg)
We glue 2 strips of white color, glue the tip. Spin the disk.
Form a hemisphere with your fingers.
.jpg)
We glue the ears. To do this, glue ½ strips of white and 1 strip of brown. We count 11 edges from the brown side, twist the oval. Glue the end. We form the ears.
.jpg)
We glue all the details of the muzzle. Add a nose and eyes.
.jpg)
We make the body.
We glue three strips of blue paper and 3 strips of white paper in length and twist disks out of them.
.jpg)
We give both disks the shape of truncated cones. Glue inside.
.jpg)
We glue these parts together. We glue the junction with a blue stripe.
.jpg)
Glue the muzzle and body.
.jpg)
Making the lower paws
We glue together ½ strip of white and 3/2 strips of brown.
We form a disk from it. There should be two such disks.
.jpg)
We form a drop by squeezing the disk on one side with your fingers.
.jpg)
We glue the fingers and the heel on the base, which we cut out of white corrugated cardboard.
.jpg)
We twist the disk from 3/2 strips of white color and squeeze it out lightly with our fingers. There should be two such details.
.jpg)
Glue the foot and heel together.
.jpg)
Glue the lower paws to the body of the dog.
.jpg)
Making the upper paws
From a ½ strip of blue, we twist the disk and squeeze out a cone with our fingers.
.jpg)
From ½ strip of white color, count 5 ribs and twist a tight oval. These need 2 ovals.
.jpg)
Glue this oval into a blue cone.
.jpg)
The upper paws are ready.
Glue them to the body of the dog.
.jpg)
Our dog is ready.
.jpg)
.jpg)
Good luck with your creativity!