DIY flower arrangements from corrugated paper. DIY paper flowers. The simplest schemes and templates for making paper flowers. Do-it-yourself flowers from napkins

Flowers and bouquets made from crepe paper have a number of practical advantages. Firstly, they are much more durable, do not fade and retain their shape and appearance for a long time. Secondly, they are not inferior in their beauty to compositions from living plants. How to make crepe paper flowers? Currently, there are a large number of ways.

Single petal method

Incredibly beautiful flower arrangements from crepe paper can be made using a method in which the flower is assembled in stages. One petal after another is planted on the base. In addition, each element must be given an individual shape before being attached to the stem.

To make one of these flowers, they take corrugated (crepe) paper and floral wire to create stamens. Then cut out the required number of petals and leaves. It is necessary to form the petals and attach them to the stamens with floral tape. Their form can be very different. It depends on the type of flower.
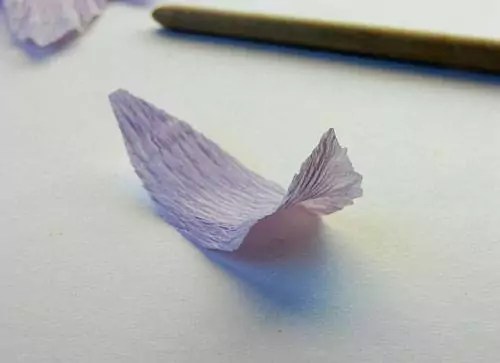
Petal attachment

To give the petal a concave shape, you need to pinch it between your thumbs and forefingers. Then gently stretch from the center to the edges. In order to curl the petals, you can use a pencil. To fasten all the elements together, you need to use floral tape and wire. Make it easy and simple.

The tape must first be wrapped twice around the stamen. Then, when adding petals, pass it through the base of each of them. Flowers made from crepe paper will keep their shape longer if the stem is sheathed in a dense layer from top to bottom, smearing invisible areas with glue. Especially those places where the leaves are then attached.

Giant flowers made from crepe paper

Mostly used floral arrangements of cream, pink, apricot or pale olive hue. Although bright variegated colors can also look harmonious. It all depends on the occasion and the theme of the holiday. An ideal gift and an excellent decor tool (for example, for a wedding) can be hand-made giant crepe paper.

For the composition you will need: a thick ribbon of green or deep olive color wrapped in paper, glue, a round pencil. From paper you need to cut 5 small petals, 15 heart-shaped petals, 3 leaf shapes. As a rule, it takes about 2 hours to make DIY crepe paper flowers. But the time and effort is worth it. The most interesting thing is that no matter how hard you try to make all the flowers the same, they are still unique and inimitable.

We make a rod, a bud and fasten the leaves

In order to make a thick and flexible stem, you need to fasten three stem wires together. This must be done with floral tape and glue. A good tip: keep a damp towel nearby to wipe sticky fingers and not stain all the beauty. To make a flower bud, five small petals are used. First you need to tightly wrap one petal around the stem. When adding the remaining 4 elements, you must also rotate the rod for even distribution.

Next, use the method of individual petals to attach 15 large parts in the shape of a heart. This process requires focus and can be quite tiring. However, a small mistake due to the desire to do everything faster can spoil all the efforts made so far.

When adding the last petals, it is advisable to look at the flower from above. Only then can you see small flaws. And place the remaining petals where they will look most organic. The leaves are attached to the stem in a checkerboard pattern with adhesive tape, floral tape and glue. Before using the finished composition, you must give it time to dry completely.

fairy peony

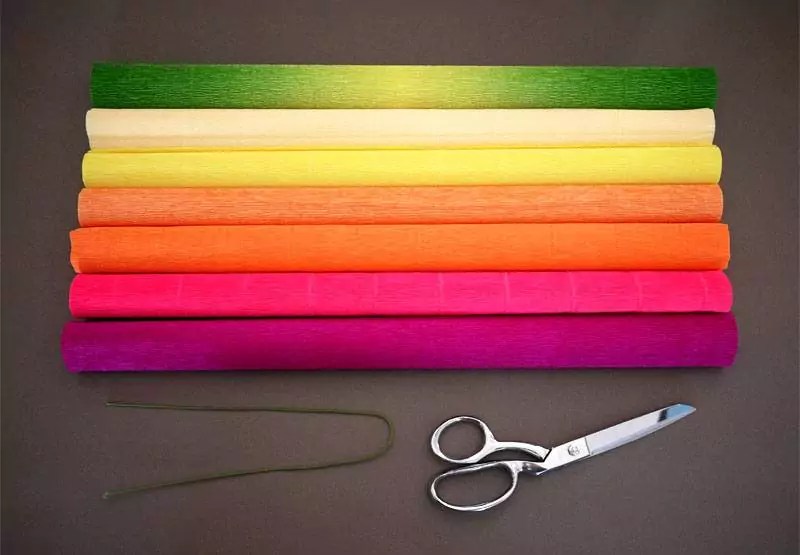
Crepe paper peonies are flowers that can vary in shape and color. When creating a multi-colored fairy plant, you will need tools and materials such as crepe paper of several colors, scissors, floral tape. Working with these materials is fun and quite easy. The main advantage of crepe paper is durability. In addition, it can be stretched, giving the desired shape. We present to your attention a master class: how to make flowers from crepe paper. Namely, huge multi-colored peonies from a fairy tale.

Step by step master class

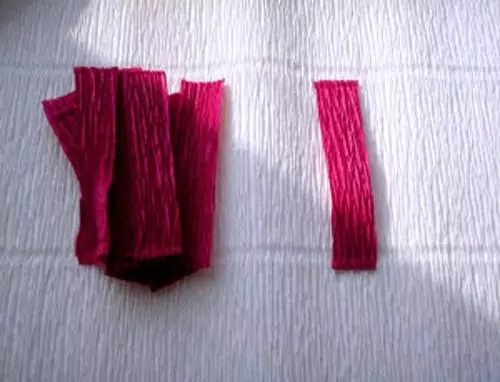
To make flowers from crepe paper, you first need to lay out the sheets in layers and fold each of them into an accordion. The thickness of the folds is about 3 centimeters. These folds should run along a natural, horizontal line. Secondly, each colored stack must be fastened with a thin wire or any other connecting element.

To give the flower depth, you need to reduce the length of each strip by about 1 centimeter. Use scissors to cut off rounded and pointed ends. And don't worry about too much precision. Irregularities will make the flower look even more natural. Next, you need to fasten the clips to the center of each pack.

How to make the composition natural?

After that, you need to, so to speak, cut the edges of all paper bundles with scissors, while leaving the middle untouched. And put them on top of each other. At the same time, the largest sheets should be at the bottom, and the shortest ones at the top. Starting from the middle, it is necessary to alternately raise the side lobes: first short and then in ascending order. Slowly and carefully you need to straighten all the stripes from each color layer.

You may need to adjust some of the petals. But the flower will naturally still take on its own unique shape. Gorgeous handmade crepe paper flowers can be used as a gift or decor element for any room. Further, it's up to your imagination. You can attach stems to them, glue them to a real tree or bush, or decorate a chandelier. In a word, you are able to come up with a lot of other original options.

  1. When cutting such paper, it is important to consider its structure and make sure that the cut will be along the grain.
  2. The upper part of the flower is usually very heavy. Therefore, it is important to use additional support with three leaves, through which the entire bud will be held together with the stem.
  3. Floral tape will benefit and hold better if glue is periodically applied to the ends of the petals and leaves.

Flowers made of crepe paper, created with your own hands, will give a lot of positive emotions. Especially if you cross certain boundaries and conventions. What a great way to diversify a wedding photo shoot using unnaturally huge, but surprisingly cute and romantic roses or peonies.

With their help, you can build beautiful bouquets, garlands, wreaths and other original flower arrangements that can decorate any celebration. from crepe paper you can enliven the festive table and add a little brightness to everyday gray everyday life.

Bouquets are not only given, they are also used. Often, a large number of flowers are required to decorate various festive events. You can create inexpensive and beautiful ones from corrugated paper with your own hands. Such decor does not fade with time and can be stored for a long time.

Read in the article

Advantages and properties of corrugated paper

To make original jewelry, corrugated paper is used, which has certain advantages:

  • this one is available and offered in stores;
  • such material is packed in rolls, which makes it possible to store it for a long time;
  • it is easy to use, to create a composition you only need scissors;
  • workpieces are interchangeable, parts are easy to connect and prepare again;
  • the material is distinguished by a variety of textures and shades.

How to make beautiful DIY crepe paper flowers

Do-it-yourself corrugated paper flowers are easy to assemble. In this case, different manufacturing methods are used. Various blanks from cut strips of paper are used. There are special instructions to help create original .


Stages of creating a rose with your own hands from corrugated paper: step by step

Roses from this material are made in different ways. In this case, various compositions or simple flowers are obtained, which are placed in a vase.

To make a flower from corrugated paper, you need to prepare paper of the desired color palette, pieces of wire, scissors, sheets of cardboard, a pencil and special glue. The step-by-step process is described in the table:

Image Step by step process

Separate petals are drawn on cardboard, which should be of different sizes. When using different flower will look better.

The material is folded in the form of an accordion. Petals are cut out according to the attached blanks. Rose leaves are also made. A small indentation for the bud is made in the blanks with the fingers.
Separate segments are cut from the wire. In this case, one end is bent with pliers for the core of the bud. Then the middle of the wire is wrapped in a small petal. The lower part is glued to the stem blank.

Gradually, a bud is formed. In this case, the petals are glued from small to large sizes.

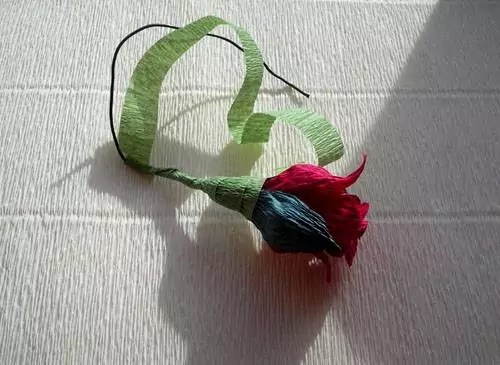
With the help of a ribbon, a corrugated strip or a green thread, you need to wrap the base of the bud. Then the stem is wrapped and prepared leaves are glued from it. The material is finally fixed with glue.

Leaves and petals unfurl.

Several flowers are made, which are installed in a vase or in a variety of wicker baskets. If only buds are needed for decoration, then the stem part is cut off.

You can make a rose in another way, in which the product is completed in a few minutes. It is necessary to cut a strip of corrugated paper of great length. Its width should be 8-10 cm. One edge is processed like a pie edging. The edges of the strip are pinched with fingers along the entire length. Then the strip is folded into a bud, and the edge is glued to the finished product. The made bud is wrapped in a green thread. Finished elements are mounted on a wire blank. At the same time, a whole bouquet is performed in one and a half to two hours.


Related article:

The correct application of this technology, described in the article, will be useful for creating products with unique aesthetic and functional characteristics with your own hands.

An interesting option is the creation of corrugated paper with your own hands. This design can be made from improvised materials in a couple of hours. They are made to decorate interiors and to decorate banquets.

paper peony technique

From this material you can create a beautiful peony. This will require paper of various shades, paper clips for fastening, wire, thread and scissors.

The table shows the sequence of work.

Image Process of creation

From multi-colored rolls it is cut off on a sheet of the same size.

The elements fold into an accordion, but the width should not differ.

The accordion clings with a paper clip. The edging of individual elements is cut in the form of petals. You can also simply cut the corners to make triangles.

The middle parts of all blanks are connected and stacked in size. All sheets are collected in one assembled element and rewound in the middle.

A comment

Design studio "Uyutny Dom"

Ask a Question

“When creating a peony, you can use 5-7 shades. In this case, a smooth transition from pale to saturated tones is created.

Related article:

It will be easier to show talents if you carefully study decoupage for beginners step by step. This article provides detailed instructions that will help you reproduce technology at home without errors.

How to make a sunflower

When deciding how to make flowers from corrugated paper, it is worth trying to make a sunflower. In this case, you need to prepare a material of black, brown and yellow colors, a PVA solution, pieces of wire and scissors.

Petals should be oblong and with sharp tips. Leaves should be the same. Then all actions are performed according to the instructions:

Image Stages
A strip is cut out of a sheet of dark shade. The longer it is, the more magnificent the flower will be.
Small incisions are made on the larger side. In this case, the width between them should not be more than 4 mm, and the length of the cut should be about 1 mm. To speed up the procedure, the strip can be laid in several layers.
The created blank must be twisted into a tube and wrapped with a dark thread. It is necessary to straighten one edge to create a core.
Then the petals are fixed with glue. The core is turned upside down and the petals are attached to it in a circle. Several rows of yellow petals are made, and then green petals are formed.
A rectangle is made of green tones material, which closes the wrapped core. The rectangle is glued with one part to the green petals, and then twisted around the wire blank.

You can prepare leaves in advance, which are best made wide. They are attached to the wire along with the winding of the stem.

original tulips

From tulips, you can create an original bouquet of corrugated paper. For work, you need to prepare corrugated paper, pencil, cardboard, scissors, wire, thread and PVA glue.

The creation of tulips includes the following steps:

Image Job

A petal is depicted on cardboard and cut out. From paper, you need about 5-8 petals.

The petals are laid out separately. All elements need to twist the tips.

The edges of the petals need to be stretched a little and the base should be shaped like a cup.

All details are distributed in a circle. This forms a button. At the bottom, all the petals are twisted and fixed with an adhesive composition.

The flower is attached to the end of the wire, which is used as a stem.

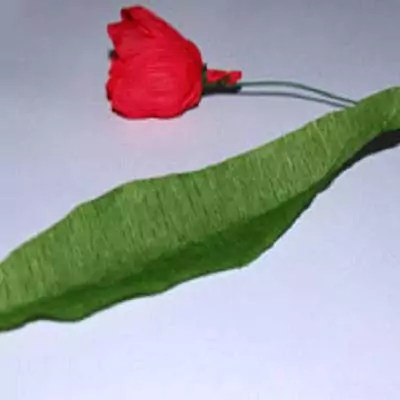
A strip is cut out of green paper, which is wrapped around the stem. The cut sheet is slightly bent and glued to the stem.

Helpful information! You can try to make tulips out of paper and sweets. To do this, sweets in foil are selected, they are attached to the wire, and then the petals are attached on top.

Creation of a lily

Lilies are also created according to the type of bud collection. Their master class of corrugated paper flowers is complex.

The process includes certain steps:

Image Stages

Preparing paper yellow, green and lilac. You will also need paint, glue, a piece of wire, a brush and scissors.

Petals are cut out of rectangular blanks.

The ends of the parts are stretched and then twisted with a pencil.

At the base of the petals, spots of a dark shade are applied with watercolor paint. In this case, dark blue and brown should be mixed.

The stem is made of wire. The corrugated paper is then straightened and wrapped around the wire.

Pestle is made on the stem

The stamens are made from yellowish paper. At the same time, the workpiece is cut off and cuts are made along its entire length. The resulting elements are twisted.

Anthers are made from glue and semolina. A drop of adhesive solution is applied to the tip of the stamen, and then dipped into semolina. Completed parts are painted.

Leaves are made from thin blanks of green paper. They are given a curved shape.

Stamens are glued to the pistil. Then three petals are attached, and after that the rest.

A smooth transition is made to the pedicel of the flower. Leaf blanks are attached with glue.

Candies attached instead of pestles look unusual. They are wrapped in foil and attached to the stem blank.

Candy Corrugated Paper Color Options

With the use of beautiful flowers from corrugated paper, you can make a bouquet with sweets with your own hands. This will require sweets, corrugated paper for flowers and stems, wire, scissors and glue.

Image Stages of work

A rectangle is cut out of paper, which is folded in half and rounded on the side. Candy is wrapped around this detail. To give the product a beautiful shape, the paper in the center is slightly stretched. One end is secured with a rubber band.

To make a stem, the wire must be attached to the base of the flower. For this, a silicone gun is used. The stems are cut out for the flower. They can be made larger, then the product will turn out to be more magnificent. The central part of the element also needs to be stretched, and the edges twisted.

Petals are attached to the bud using threads, rubber bands or adhesive. Leaves are cut out of green paper, which are fixed at the base.

To complete the image, the base can be wrapped with green corrugated paper.

Chocolates can be placed in the middle of the paper parts. Crepe is twisted around the sweets, and a piece of wire is wrapped in green corrugation. A beautiful bow can be tied over each candy. All buds are attached to specially prepared skewers. Such flowers can be put in a decorative package and tied with a ribbon.


A corrugated paper Christmas tree is made by analogy with flower petals

It refers to simple toys. To do this, five sheets of paper of different colors are folded together. Then an accordion is made from them, and the middle is wrapped with wire. The sheets need to be fluffed, and the edges cut off in a semicircular shape. Rib sections are attached with glue. Finally, a thread must be attached to the top of the product. Such toys can be connected in or hung on windows and other places.


Making flowers from corrugated paper with your own hands is not easy enough, but if you are guided by the master classes that craftswomen share with each other, you can easily cope with the task. In this review, we will introduce you to this original type of needlework, talk about the intricacies of choosing the perfect materials and share ideas on how to make crepe paper flowers and how to include them in the interior.

What is corrugated paper and how is it used in decoration?

If ordinary paper appeared many centuries ago, then its corrugated sister is much younger. It became widespread in the second half of the 19th century in England. At that time, linings for hats were made from thin, soft and pleasant to the touch paper in a small fold.

Corrugated paper flowers for beginners

The simplest buds can be made with children. They are also suitable for those who are just starting to master the basics of this skill. You will need:

  • corrugated paper (for this type of flowers, you can use one or several colored sheets);
  • sharp and thin scissors (manicure will do);
  • toothpick;
  • glue;
  • cardboard circle.

First of all, you need to cut out 12 circles from paper.


Advice! It will be more convenient to use a cardboard template, a coin, or any other flat, round object.


We begin to attach ready-made petals to a small round piece of cardboard in a circle: first we glue its outer edge with five petals, then glue four more inside and the last three in the center.


The final touch is the manufacture of the core. To do this, cut a strip of corrugated paper about 3 cm wide and fold it lengthwise. Then, at regular intervals, cut it so that a small fringe is formed, which needs to be slightly fluffed. Wrap the fringed strip around the toothpick in a spiral so that you get a fluffy center of the flower, fix it with glue and attach it to the existing petals. Ready!


You always want to decorate the most significant day somehow in a special way. Finished decorations are quite expensive, and if you decorate a large hall with them, it will cost a pretty penny. Today, a fairly large number of ways of needlework. Flowers can be made using quilling, beading, cold porcelain and even wool felting. But all these options are time-consuming and require certain skills in the technique. Original do-it-yourself corrugated paper flowers can be made in just 30 minutes. It always looks fresh and creative, plus easy recycling can be added to this.

In such decorations there are several important advantages that knock them out to the leaders:

  • the minimum amount of cash costs for the necessary materials;
  • flowers can be made so realistic that it is almost impossible to distinguish them from living ones;
  • material can be bought at almost any stationery or needlework store;
  • extraordinary beauty can be obtained without specialized tools and the construction of complex schemes;
  • quick disposal is especially relevant when decorating large halls or rooms;
  • will be a great gift or decor element for any celebration;
  • even a child can make this kind of jewelry.

Even with all the abundance of DIY methods, corrugated paper flowers have been and will be at the peak of popularity. A wonderful way for self-expression and the embodiment of the most daring fantasies.

Preparatory work

Before proceeding to the sacrament of flower production, you must first of all supply yourself with all the necessary arsenal in advance. Corrugated paper is best purchased in rolls rather than sheets. The roll has a large enough footage, which is enough for a whole heap of buds, flowers and petals.

Paper is recommended to select more natural shades, unless, of course, as planned, the final work should look natural and natural. For buds, leaves and stems, you should take several colors, in this case, you can play with the shadows. Then the flowers will look more "alive".

For the stem, you need to take a thin pliable wire, a floral sleeve or any other materials.

You will also need thick cardboard for cutting blanks, glue and sharp scissors. Not necessarily, but you can prepare a fishing line or strong silk threads and a breadboard knife.

Work best with good lighting, it can be both natural light and fluorescent incandescent lamps.

Important! If there are small children or animals in the house, it is safer to work on a high table rather than on the floor.

flower making process

At the initial stage, many needlewomen are faced with the question: how to make flowers from corrugated paper and where, in fact, you need to start. Of course, each craftswoman has already developed her own technology and some little secrets. However, nothing is impossible for those who want to reach the heights of professionalism.

The most complex technologies always come down to the simplest steps:

  • First, you need to draw the desired patterns on cardboard. For a more realistic flower, you should prepare several templates of different sizes and slightly different shapes.
  • The more paper petals there are, the better. In this case, we can recall the beautiful rose flower, which consists of a huge variety of petals of various sizes.
  • After the cardboard blanks are ready, you can start cutting them out of paper.
  • Once all the petals are prepared, you can start creating the flower itself. To do this, you need to take 5-7 of the smallest petals and tie them tightly at the bottom. Thus, a tight bud is formed. For strength, you can glue the bottom part with glue.
  • After the bud is ready, you should attach each petal separately with gentle movements, slightly stretching the upper edges. By performing these actions, the petal is given a natural wavy shape.
  • After all the petals have been collected into a finished flower, it can be safely "planted" on the stem.
  • The stem, like the flower, should look like a natural one. This can be easily achieved with ordinary wire and green paper. It is necessary to measure the desired piece of wire or floral sleeve and decorate it with prepared corrugated paper, fabric, or even paint with acrylic paints. Then attach the leaves and thorns, if the flower implies their presence. The finished flower "sits down" on the stem with glue. Since the wire and floral sleeve are movable, they can be given absolutely any shape and bend.

    How to make realistic peonies.Bystep instruction

    Peony is a magical flower that is traditionally a symbol of purity and love. A cute bouquet can be a great gift for a wedding or for the birthday of a beloved friend. Peony flowers in nature are quite large in size. For a bouquet of flowers, you do not need to make a large number of heads, 7 pieces will be enough.

    If you want to achieve a shade close to the natural color, you can take snow-white or milky paper and give a few strokes of pink, orange or peach acrylic. You can make delicate peony flowers from corrugated paper with your own hands in just 20-30 minutes.

    At the first stage, the rectangles should be carefully cut out according to the template and slightly rounded, thereby giving a natural roundness to the petal.

    To make one peony, you need to prepare 10 strips for small petals, 10 strips of wider paper for large petals, and several strips of different sizes of green paper for making leaves. To give a realistic shape to the peony, it is necessary to cut the petals into a slightly oval shape with a small stem, and the leaves are slightly pointed towards the top.

    peonies - process

    After all the shapes are cut out, with gentle movements, the petals need to be slightly stretched in width and height, until the petal visually approaches the natural one. Next, give the petal a bulge from the outside, thus giving it some volume.

    Important! When stretching the petals or leaves, you must avoid using nails, otherwise the tenderness and fragility will be spoiled by unwanted lines.

    Then the process of "folding" the bud begins. To do this, take a few of the smallest petals and tightly wrap one and the other. When wrapping, make sure that each subsequent layer overlaps the seam of the previous layer. Thus, gradually, the petals are stacked on top of each other in layers. When the flower has been collected, its base should be fixed with a thread, fishing line or glue. Since a peony is a carelessly disheveled flower, you can safely tear some of the petals of the finished product slightly and then stretch the edges again.

    In total, it takes about 25 petals to make one peony. Sepals are made from green paper. It is necessary to prepare about 10 green leaves, after shaping, wrap the finished peony with them.

    In order to make the flower more voluminous and lush, at the initial stage, a round candy or a formed foil ball is placed in the core.

    It should be remembered that natural flowers in nature do not have perfectly smooth edges and lines, so the less accuracy in the bud, the better.

    Master classfor making delicate lilies

    The royal lily flower is sensuality combined with majesty. Volumetric flowers made of corrugated paper always attract attention. This is not only a good addition to the main gift, but also a great decor element for any holiday or event.

    In the example below, it will be described step by step how a wonderful lily can be made from ordinary corrugated paper.

    For work you will need:

    • paper of light lilac, yellow and green shades;
    • watercolor, gouache or acrylic paints;
    • glue or glue gun;
    • wire for the stem, about 30 cm;
    • brush and sharp scissors.

    If the paper is in a roll, then it is necessary to cut off a strip from it, 7 centimeters wide. From the resulting segment, cut into small rectangular blanks, which should be given a rounded shape of lily petals. Then, the edges need to be stretched a little with the fingertips, for greater naturalness, and twisted a little with scissors or an ordinary pencil. Make a recess in the middle of the petal, thus giving it a natural roundness.

    When the petals are completely ready, the magical process of reincarnation begins. To do this, you need to mix brown and dark lilac colors and draw natural dots at the base of the petal with the resulting tone. For more naturalness, the dots should be thicker at the base and practically disappear towards the middle.

    The stem is made of wire. The desired piece of wire is cut off and decorated with a thin strip of green corrugated paper. Before wrapping the wire with paper, it is recommended to stretch it properly. This is done so that all unnecessary stripes and folds disappear.

    On any edge of the finished stem we make a pestle and form a stigma with hot glue. For persuasiveness, you should paint over this place with green paint.

    The stamens are made from yellow paper. A small even square is cut out of the roll. We cut strips along its entire length, but leave the base intact. Then it is necessary to twist each strip with twisting movements and treat the tip with a drop of hot melt adhesive. After all the work has been done, dip the made stigmas into semolina, paint over with acrylic or chocolate-brown gouache and let dry.

    Leaves for lilies have a rather elongated shape. It is necessary to cut long rectangular strips of green crepe paper, slightly stretching and folding them. We glue the stamens to the pistil and add three petals of lilies to the finished structure, placing them slightly above the tips of the anthers.

    After that, glue three more petals over the joints of the previous petals and twist the edges of the finished flower again.

    The final stage is the "installation" of the finished lily on the stem, the addition of petals and fixing with drops of glue.

    Corrugated flowers with candies

    Each needlewoman, having reached a certain level, wants to do something extraordinary and memorable. No holiday or solemn event is complete without sweets and flowers. Modern craftswomen decided to combine these two components into one and call this direction suite design.

    Corrugated paper flowers with sweets came into fashion not so long ago, but they have already managed to win a fairly large number of the public with their eccentricity and creativity. Today, through your PC, you can get acquainted with photos and videos with a huge number of master classes on making an unusual bouquet. A detailed step-by-step description will help to translate all your bold ideas into reality. The main thing is not to be afraid to experiment. Only in this case will you get bouquets that are worthy of decorating not only birthdays, but also weddings.

    To make a bouquet, you will need chocolates, preferably round and in a wrapper. This will greatly facilitate the task during the formation of the flower bud. Paper can be taken in absolutely any color, here you can give free rein to your fantasies. Squares should be cut out of the corrugation, rounded off and petals formed by stretching and stretching the finished canvas.

    The next step is to cut the squares of the baking film. A candy is wrapped around the finished square and a small tail is left at the bottom, which is then wrapped with a beautiful thread or gold-colored ribbon. The finished workpiece is gradually, layer by layer, “wrapped” with petals, immediately giving the shape of a natural flower. It is necessary to try so that the first layers completely cover the candy, but the subsequent ones may already be half-open.

    A chic bouquet is carefully formed from ready-made flowers. This is done in different ways. You can “plant” each flower separately on a pre-prepared wire, you can use skewers, a foam ball, a plastic bottle or polyurethane foam. After the bouquet has been completed, it can be decorated with satin ribbons, various laces, beads, stones or rhinestones. Such an original gift will definitely leave behind indelible pleasant memories.

    To create a spectacular bouquet, you can not stop at one type of flower. It can be a wide variety of combinations of daisies, roses, daffodils, poppies, tulips, orchids and so on.

    giant flowers

    Large do-it-yourself corrugated paper flowers can be made for any holiday. Such decoration will always look festive and unusual. Flowers of a gentle shade can decorate a romantic party or a wedding celebration. Huge, but at the same time fragile, as if made of porcelain, can give the holiday even more atmosphere.

    For a children's birthday, products of bright and flashy colors are suitable. They will become indispensable not only in decorating the festive photo zone, but also in photo shoots. Gorgeous growth flowers made of corrugated paper will be able to "greet" guests at the entrance. With such a huge bouquet, you can adequately meet your beloved wife from the hospital or give it to a girlfriend.

    Step-by-step process of making a large rose:

    • on thick cardboard, draw a petal pattern in the form of a heart and a droplet;
    • cut out of paper according to the pattern 15 large hearts and 5 petals in the form of droplets;
    • each cut petal should be well stretched up and to the sides, giving it a natural and natural shape;
    • for petals in the form of droplets, it is necessary to beautifully wrap the edges with a pen or pencil;
    • at the petals in the form of a heart, we make wavy bends with a pencil only on the sides;
    • for the stem you will need a piece of ordinary soft wire, which must be decorated with floral tape or green corrugated paper;
    • the formation of a bud should begin with small petals, after gluing them to the stem with a drop of glue;
    • after the base is formed, droplets are glued to it in turn, and then hearts;
    • from a long strip of green paper, a sepal is cut out with small teeth;
    • the finished sepal is fixed around at the base of the bud, fixed with green adhesive tape or a drop of glue.

    At this stage, the rose is completely ready. In order to make leaves, oblong molds should be cut out of green corrugated paper. After that, put the edge of the decorated wire in the middle of the finished sheet, after wetting it with glue. Then fold both halves of the sheet so that the wire remains hidden inside the petal, and unfold the remaining edges of the paper back.

    At the final stage, the leaves are attached with adhesive tape to the stem and decorated with corrugated paper or a few strokes of acrylic paint.

    Giant corrugated paper flowers can magically turn the most ordinary holiday into an enchanting celebration.

    How to make DIY crepe paper flowers

    You always want to decorate the most significant day somehow in a special way. Finished decorations are quite expensive, and if you decorate a large hall with them, it will cost a pretty penny. Today, a fairly large number of ways of needlework. Flowers can be made using quilling, beading, cold porcelain and even wool felting.

    I would like to recommend you the most an exquisite Dutch rose shop wherebuy roses Almaty as easy as pie. Because it's so convenient. You can go to the site and use the clear interface of the online store. Choose and order the number of chic flowers you need and a huge selection of bouquets. We are waiting for you!

    Further, continuing the topic: all these options are laborious and require certain skills in the technique. Original do-it-yourself corrugated paper flowers can be made in just 30 minutes. It always looks fresh and creative, plus easy recycling can be added to this.


    In such decorations there are several important advantages that knock them out to the leaders:

    • the minimum amount of cash costs for the necessary materials;
    • flowers can be made so realistic that it is almost impossible to distinguish them from living ones;
    • material can be bought at almost any stationery or needlework store;
    • extraordinary beauty can be obtained without specialized tools and the construction of complex schemes;
    • quick disposal is especially relevant when decorating large halls or rooms;
    • will be a great gift or decor element for any celebration;
    • even a child can make this kind of jewelry.

    Even with all the abundance of DIY methods, corrugated paper flowers have been and will be at the peak of popularity. A wonderful way for self-expression and the embodiment of the most daring fantasies.


    Preparatory work

    Before proceeding to the sacrament of flower production, you must first of all supply yourself with all the necessary arsenal in advance. Corrugated paper is best purchased in rolls rather than sheets. The roll has a large enough footage, which is enough for a whole heap of buds, flowers and petals.

    Paper is recommended to select more natural shades, unless, of course, as planned, the final work should look natural and natural. For buds, leaves and stems, you should take several colors, in this case, you can play with the shadows. Then the flowers will look more "alive".


    For the stem, you need to take a thin pliable wire, a floral sleeve or any other materials.

    You will also need thick cardboard for cutting blanks, glue and sharp scissors. Not necessarily, but you can prepare a fishing line or strong silk threads and a breadboard knife.

    Work best with good lighting, it can be both natural light and fluorescent incandescent lamps.

    If there are small children or animals in the house, it is safer to work on a high table than on the floor.


    flower making process

    At the initial stage, many needlewomen are faced with the question: how to make flowers from corrugated paper and where, in fact, you need to start. Of course, each craftswoman has already developed her own technology and some little secrets. However, nothing is impossible for those who want to reach the heights of professionalism.

    The most complex technologies always come down to the simplest steps:

    1. First, you need to draw the desired patterns on cardboard. For a more realistic flower, you should prepare several templates of different sizes and slightly different shapes.
    2. The more paper petals there are, the better. In this case, we can recall the beautiful rose flower, which consists of a huge variety of petals of various sizes.
    3. After the cardboard blanks are ready, you can start cutting them out of paper.
    4. Once all the petals are prepared, you can start creating the flower itself. To do this, you need to take 5-7 of the smallest petals and tie them tightly at the bottom. Thus, a tight bud is formed. For strength, you can glue the bottom part with glue.
    5. After the bud is ready, you should attach each petal separately with gentle movements, slightly stretching the upper edges. By performing these actions, the petal is given a natural wavy shape.
    6. After all the petals have been collected into a finished flower, it can be safely "planted" on the stem.

    The stem, like the flower, should look like a natural one. This can be easily achieved with ordinary wire and green paper. It is necessary to measure the desired piece of wire or floral sleeve and decorate it with prepared corrugated paper, fabric, or even paint with acrylic paints. Then attach the leaves and thorns, if the flower implies their presence. The finished flower "sits down" on the stem with glue. Since the wire and floral sleeve are movable, they can be given absolutely any shape and bend.

    How to make realistic peonies.Bystep instruction

    Peony is a magical flower that is traditionally a symbol of purity and love. A cute bouquet can be a great gift for a wedding or for the birthday of a beloved friend. Peony flowers in nature are quite large in size. For a bouquet of flowers, you do not need to make a large number of heads, 7 pieces will be enough.

    If you want to achieve a shade close to the natural color, you can take snow-white or milky paper and give a few strokes of pink, orange or peach acrylic. You can make delicate peony flowers from corrugated paper with your own hands in just 20-30 minutes.

    At the first stage, the rectangles should be carefully cut out according to the template and slightly rounded, thereby giving a natural roundness to the petal.

    To make one peony, you need to prepare 10 strips for small petals, 10 strips of wider paper for large petals, and several strips of different sizes of green paper for making leaves. To give a realistic shape to the peony, it is necessary to cut the petals into a slightly oval shape with a small stem, and the leaves are slightly pointed towards the top.


    After all the shapes are cut out, with gentle movements, the petals need to be slightly stretched in width and height, until the petal visually approaches the natural one. Next, give the petal a bulge from the outside, thus giving it some volume.

    When stretching the petals or leaves, the use of nails must be avoided, otherwise the tenderness and fragility will be spoiled by unwanted lines.

    Then the process of "folding" the bud begins. To do this, take a few of the smallest petals and tightly wrap one and the other. When wrapping, make sure that each subsequent layer overlaps the seam of the previous layer.

    Thus, gradually, the petals are stacked on top of each other in layers. When the flower has been collected, its base should be fixed with a thread, fishing line or glue. Since a peony is a carelessly disheveled flower, you can safely tear some of the petals of the finished product slightly and then stretch the edges again.

    In total, it takes about 25 petals to make one peony. Sepals are made from green paper. It is necessary to prepare about 10 green leaves, after shaping, wrap the finished peony with them.

    In order to make the flower more voluminous and lush, at the initial stage, a round candy or a formed foil ball is placed in the core.

    It should be remembered that natural flowers in nature do not have perfectly smooth edges and lines, so the less accuracy in the bud, the better.


    Master classfor making delicate lilies

    The royal lily flower is sensuality combined with majesty. Volumetric flowers made of corrugated paper always attract attention. This is not only a good addition to the main gift, but also a great decor element for any holiday or event.

    In the example below, it will be described step by step how a wonderful lily can be made from ordinary corrugated paper.

    For work you will need:

    • paper of light lilac, yellow and green shades;
    • watercolor, gouache or acrylic paints;
    • glue or glue gun;
    • wire for the stem, about 30 cm;
    • brush and sharp scissors.

    If the paper is in a roll, then it is necessary to cut off a strip from it, 7 centimeters wide. From the resulting segment, cut into small rectangular blanks, which should be given a rounded shape of lily petals. Then, the edges need to be stretched a little with the fingertips, for greater naturalness, and twisted a little with scissors or an ordinary pencil. Make a recess in the middle of the petal, thus giving it a natural roundness.

    When the petals are completely ready, the magical process of reincarnation begins. To do this, you need to mix brown and dark lilac colors and draw natural dots at the base of the petal with the resulting tone. For more naturalness, the dots should be thicker at the base and practically disappear towards the middle.

    The stem is made of wire. The desired piece of wire is cut off and decorated with a thin strip of green corrugated paper. Before wrapping the wire with paper, it is recommended to stretch it properly. This is done so that all unnecessary stripes and folds disappear.

    On any edge of the finished stem we make a pestle and form a stigma with hot glue. For persuasiveness, you should paint over this place with green paint.

    The stamens are made from yellow paper. A small even square is cut out of the roll. We cut strips along its entire length, but leave the base intact. Then it is necessary to twist each strip with twisting movements and treat the tip with a drop of hot melt adhesive. After all the work has been done, dip the made stigmas into semolina, paint over with acrylic or chocolate-brown gouache and let dry.

    Leaves for lilies have a rather elongated shape. It is necessary to cut long rectangular strips of green crepe paper, slightly stretching and folding them. We glue the stamens to the pistil and add three petals of lilies to the finished structure, placing them slightly above the tips of the anthers.

    After that, glue three more petals over the joints of the previous petals and twist the edges of the finished flower again.

    The final stage is the "installation" of the finished lily on the stem, the addition of petals and fixing with drops of glue.


    Corrugated flowers with candies

    Each needlewoman, having reached a certain level, wants to do something extraordinary and memorable. No holiday or solemn event is complete without sweets and flowers. Modern craftswomen decided to combine these two components into one and call this direction suite design.

    Corrugated paper flowers with sweets came into fashion not so long ago, but they have already managed to win a fairly large number of the public with their eccentricity and creativity. Today, through your PC, you can get acquainted with photos and videos with a huge number of master classes on making an unusual bouquet. A detailed step-by-step description will help to translate all your bold ideas into reality. The main thing is not to be afraid to experiment. Only in this case will you get bouquets that are worthy of decorating not only birthdays, but also weddings.


    To make a bouquet, you will need chocolates, preferably round and in a wrapper. This will greatly facilitate the task during the formation of the flower bud. Paper can be taken in absolutely any color, here you can give free rein to your fantasies. Squares should be cut out of the corrugation, rounded off and petals formed by stretching and stretching the finished canvas.

    The next step is to cut the squares of the baking film. A candy is wrapped around the finished square and a small tail is left at the bottom, which is then wrapped with a beautiful thread or gold-colored ribbon. The finished workpiece is gradually, layer by layer, “wrapped” with petals, immediately giving the shape of a natural flower. It is necessary to try so that the first layers completely cover the candy, but the subsequent ones may already be half-open.

    A chic bouquet is carefully formed from ready-made flowers. This is done in different ways. You can “plant” each flower separately on a pre-prepared wire, you can use skewers, a foam ball, a plastic bottle or polyurethane foam.

    After the bouquet has been completed, it can be decorated with satin ribbons, various laces, beads, stones or rhinestones. Such an original gift will definitely leave behind indelible pleasant memories.

    To create a spectacular bouquet, you can not stop at one type of flower. It can be a wide variety of combinations of daisies, roses, daffodils, poppies, tulips, orchids and so on.


    giant flowers

    Large do-it-yourself corrugated paper flowers can be made for any holiday. Such decoration will always look festive and unusual. Flowers of a gentle shade can decorate a romantic party or a wedding celebration. Huge, but at the same time fragile, as if made of porcelain, can give the holiday even more atmosphere.

    For a children's birthday, products of bright and flashy colors are suitable. They will become indispensable not only in decorating the festive photo zone, but also in photo shoots. Gorgeous growth flowers made of corrugated paper will be able to "greet" guests at the entrance. With such a huge bouquet, you can adequately meet your beloved wife from the hospital or give it to a girlfriend.


    Step-by-step process of making a large rose:

    • on thick cardboard, draw a petal pattern in the form of a heart and a droplet;
    • cut out of paper according to the pattern 15 large hearts and 5 petals in the form of droplets;
    • each cut petal should be well stretched up and to the sides, giving it a natural and natural shape;
    • for petals in the form of droplets, it is necessary to beautifully wrap the edges with a pen or pencil;
    • at the petals in the form of a heart, we make wavy bends with a pencil only on the sides;
    • for the stem you will need a piece of ordinary soft wire, which must be decorated with floral tape or green corrugated paper;
    • the formation of a bud should begin with small petals, after gluing them to the stem with a drop of glue;
    • after the base is formed, droplets are glued to it in turn, and then hearts;
    • from a long strip of green paper, a sepal is cut out with small teeth;
    • the finished sepal is fixed around at the base of the bud, fixed with green adhesive tape or a drop of glue.

    At this stage, the rose is completely ready. In order to make leaves, oblong molds should be cut out of green corrugated paper. After that, put the edge of the decorated wire in the middle of the finished sheet, after wetting it with glue. Then fold both halves of the sheet so that the wire remains hidden inside the petal, and unfold the remaining edges of the paper back.

    At the final stage, the leaves are attached with adhesive tape to the stem and decorated with corrugated paper or a few strokes of acrylic paint.


    Giant corrugated paper flowers can magically turn the most ordinary holiday into an enchanting celebration.