Nice to do your hair. How to do hairstyles for long hair yourself is easy, fast and beautiful. Weaving with kanekalon
Not every woman is ready to spend several hours in front of a mirror combing and styling her hair, so you need to learn how to create beautiful and light hairstyles in a few minutes. There are many styling options for every day that will not take a woman much time. With them, she will always look well-groomed and stylish.


Tools and materials
You don't have to purchase sophisticated salon styling tools to get your hairstyle everyday. All the necessary tools and materials are in every apartment.
To create a light hairstyle you will need:
- comb and brush;
- hair bands;
- decorative hairpins;
- curling iron or curling iron;
- hairpins and invisibility;
- styling sprays, foams and mousses;
- fixing varnish.

Easy hairstyles: ponytail with loop

Hair gathered in this way will complement a romantic summer look.
Advice!This charming hairstyle will look most impressive on long hair.
High beam
Traditionally, it is believed that a bun is a detail of a strict office style. But this is not the case. A light and graceful high bun will destroy the stereotype.


Advice! A high ponytail will adorn short, chubby girls: it will make them visually taller and open up their faces.
This hairstyle is versatile: it is suitable for work in the office, and for going to a restaurant, and for a gala event. A few easy movements will turn an uncomplicated bun into a luxurious evening style: you just need to add accessories or sparkles - and a great evening look is ready!


Bundle "Spanish knot"
"Spanish knot" is a simple and elegant hairstyle that will favorably emphasize the delicate oval of the face and a long neck. The Spanish Knot looks great with natural makeup and casual wear. A shiny bun and sleek hair will make a woman irresistible, no matter what outfit she chooses.
 Another simple everyday hairstyle is the Spanish knot, suitable for owners of long hair.
 - Wash your hair, let it dry slightly, then spray it with a conditioner.
- While the hair is still wet, make a ponytail out of it. It should be located at the very base of the neck, along the lower border of hair growth.
- Braid the ponytail into a tight braid.
- Twist the braid with a figure eight and secure it with invisible ones. This will be the node.
- Comb through hair again from parting to knot with a fine-toothed comb. Sometimes a toothbrush is used for this purpose. Whichever option you choose, remember - the surface of the hair should shine.
- You can spray on your hair to create a wet look and shine.
A low bun at the base of the neck and a shiny hair surface will help create a smart casual look.
Advice!You can wrap the braid around the elastic several times. This option will suit young ladies with long hair.
 A variant of the Spanish knot with a wrapped braid around the elastic
 Greek bunch
This is another kind of low beam. Unlike the Spanish knot, a Greek bun does not require perfect smoothness. It implies frivolous carelessness and disheveledness.

- Comb your hair and part it right in the middle.
- Separate the strands at the temples on both sides and twist them into bundles, moving towards the back of the head.
- At the back of your head, connect the bundles with the rest of your hair and hold them together with an elastic band to create a low ponytail.
- Loosen the elastic slightly so that the hair does not fit snugly against the head, and poke a hole at the base of the tail.
- Start curling your hair from the ends to the base. When you get to the elastic, tuck the curled ponytail into the hole.
- Secure the hair with invisible hair and varnish.


It's okay if a few strands break out or fall unevenly: this will only add charm to the hairstyle.
Scythe "Rapunzel"
Ever wanted to feel like a fairy princess? So take the first step - braid a lush fantasy braid. At first glance, it seems that the hairstyle is extremely difficult to perform, but it is not. You will spend no more than 20 minutes, and the result will be amazing!


- Comb your hair and part with a vertical parting. It should be located not in the middle of the head, but on the side: the right side is slightly larger, the left is smaller.
- Leave two loose strands in the bangs to frame your face nicely.
- Separate the curl on the right side so that it is next to the parting. Divide it into three strands.
- Braid a spikelet. To do this, alternately transfer the strands from left to right and vice versa, each time picking up additional free curls. Don't pull the braid too tight.
- Twist the loose strands near the face with a curling iron so that several gentle waves form on them.
The finished hairstyle can be left in its natural form or supplemented with accessories and even fresh flowers.

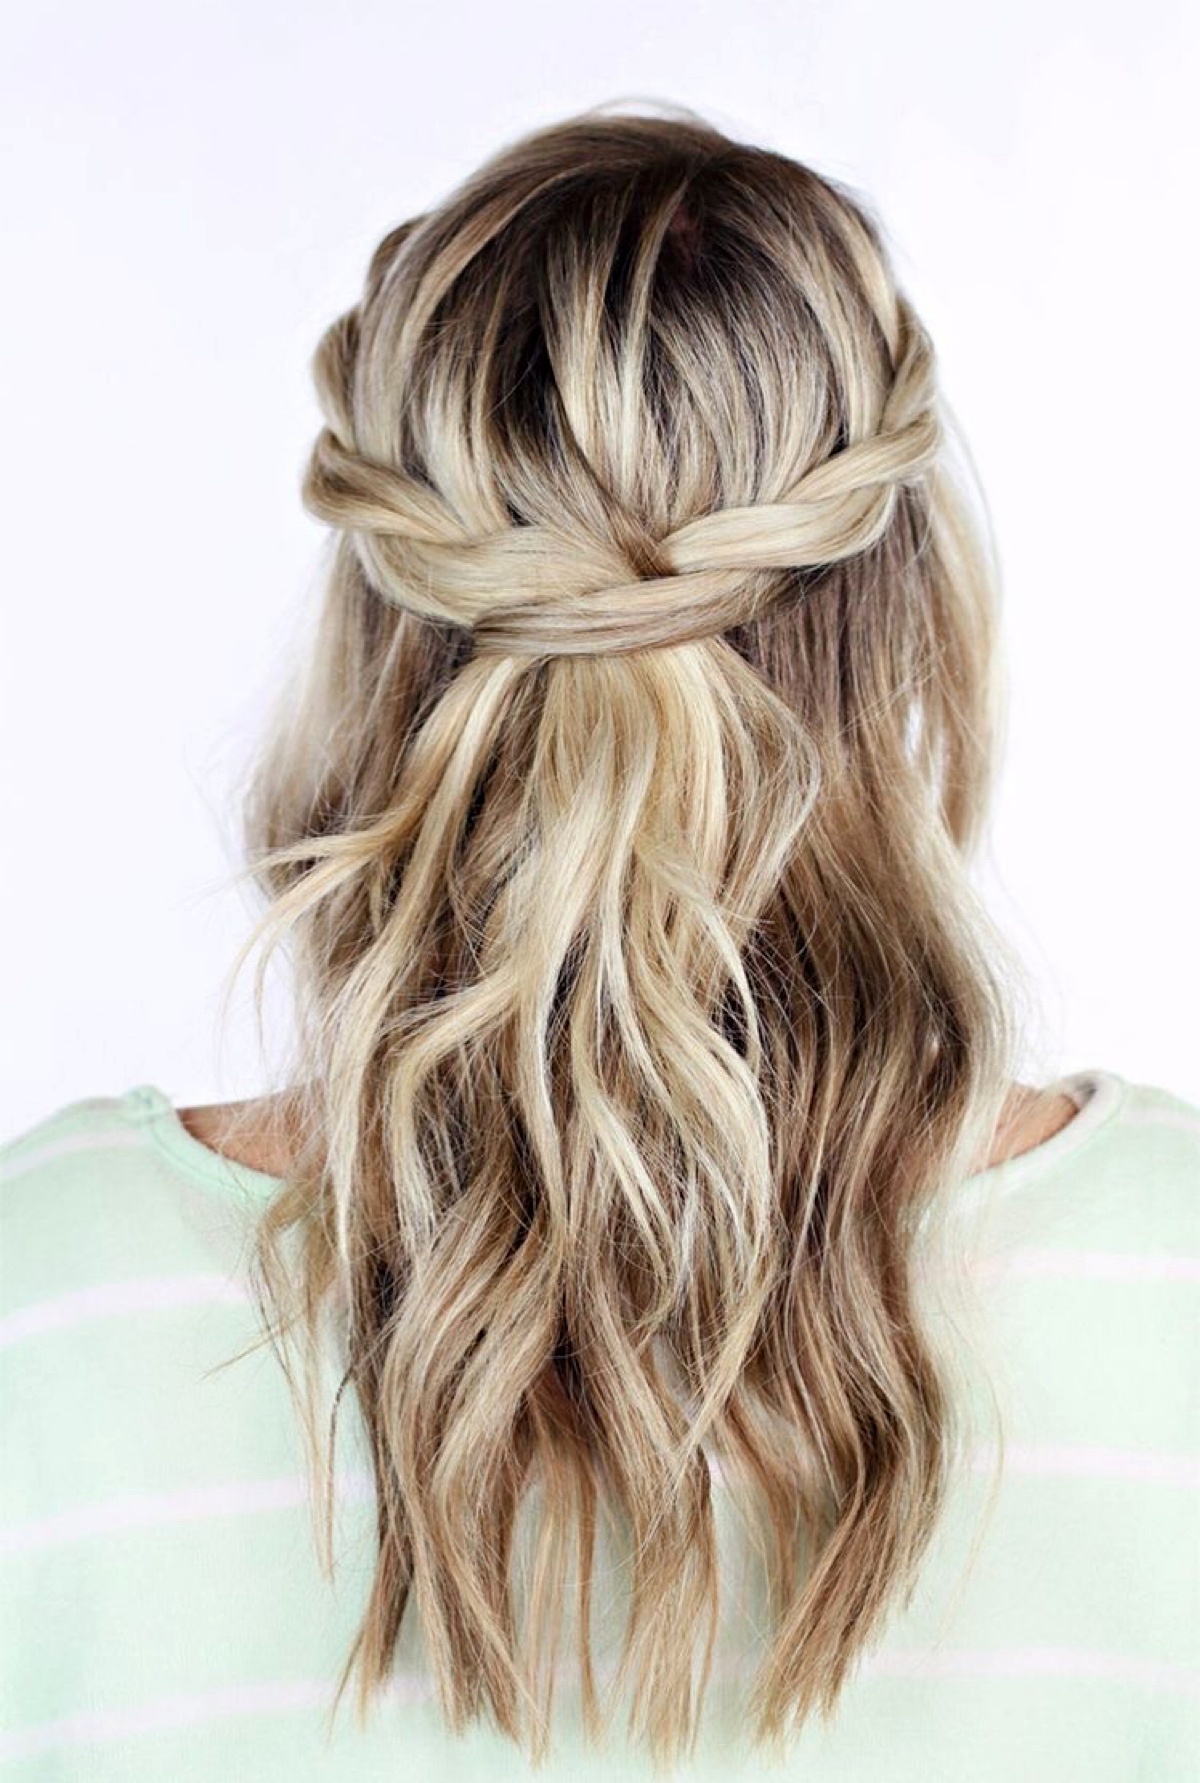
Hairstyle "Malvina"
This is one of the most versatile and easy-to-use hairstyles. It allows you to leave your hair loose, but does not allow it to tangle and tangle. There are many modifications of the famous "Malvina", but the most attractive hairstyles are brushed.


- Comb through your hair and separate one section at the crown of your head. Twist it into a tight bundle, secure it with invisibility.
- Comb all the hair around the bundle thoroughly.
- Lay them on top of the rope so that it is completely hidden under the combed strands.
- Using your fingers, lift the fleece and secure it on your head using invisible hairpins or a beautiful hair clip.
Advice!"Malvina" with a discreet hair clip will perfectly complement an office outfit. If you add an original accessory, with such a hairstyle you can safely go to a gala event.


Boho hairstyle
Braids and picturesquely tousled hair are the main elements of boho hairstyles. Of course, on long hair, such styling will look the most organic, but this does not mean that owners of medium-length hair will not be able to pamper themselves with fashionable novelties. Try a simple boho-style hairstyle with braids and you will find that there is a rebellious girl in you, who does not accept the tight frames of classic fashion.


- Comb your hair and part with a straight part in the middle of your head.
- On the left side, where the parting begins, separate a thin section of hair. It should be closer to the top of the head. Braid it into a thin plait.
- Separate another strand on the left and make a second braid. Pigtails should be close. Fasten them together with an elastic band.
- Separate a section of hair from the very face and fasten it with pigtails too. You should have a composition of one strand and two braids, the tails of which are fastened together.
- Do the same on the right side. Try to keep the braids and strands on both sides symmetrically.
- Cross both elements at the back of your head and pull together with an elastic band.
 Quite simple, but no less interesting hairstyle
 Every modern woman always tries to look beautiful and well-groomed, wherever she is - at home, at work, at school or on a visit. However, the lack of time does not always allow you to visit beauty salons as often as you would like. Therefore, the question of how to do my own hairstyle becomes especially relevant. This can be dealt with quickly and easily with professional advice.
How to style your own hair
To keep the hairstyle well, the hair must be clean and well-groomed. Taboo - oily roots, split ends, indistinct color and dullness. Healthy shiny hair is a guarantee of excellent styling, even if its owner cannot boast of the thickness and length of hair.
On average, hair length increases by one centimeter every month. For those who grow them, trichologists recommend trimming the tips at least once a quarter so that the strands look neat.
The hairstyle should emphasize the external beauty, and it is important to select it depending on the type of appearance and the shape of the face.
There are computer programs that will help you choose a hairstyle from the uploaded photo. The color of the hair, its length, condition (thin or thick, straight or curly, dry or prone to oily) should also be taken into account.
Various hair care products and styling products will be of great help in creating your own image. You should use only proven professional brands or folk remedies that have proven themselves well.
Before using a hair dryer, curling iron or iron that damage the hair structure, you must use thermal protection. It is imperative to take care of the condition of your hair in hot weather and cold weather.

- Foam or mousse. They are used to add volume to the hair and to make the hair stronger. Apply foam or mousse on wet, clean strands, after drying them slightly, then lay them with a hairdryer or curlers. Foams of weak hold hold fine hair well, and strong ones hold thick or curly hair.
- Gel. It is recommended to use it to style lush "recalcitrant" hair, using it on a ready-made style to highlight or smooth individual strands. It is allowed to apply the gel to both wet and dry hair. Can be achieved with the help of the gel for the illusion of wet hair. It is worth choosing high-quality products without alcohol, which are quickly absorbed and strengthen hair from the inside.
- Wax. Indispensable for curls, especially in wet rainy weather. Having treated the hair with wax, you can achieve their softness, "obedience". The strands acquire a lively healthy shine. The wax is suitable for creating smooth, well-fixed hairstyles.
- Varnish. The final touch in modeling a hairstyle, when you need to fix an already finished styling or adjust it. Experts insist on the use of fortified varnishes with protection from the negative effects of the environment. Some contain medicinal herbs that give the ends protection from splitting, and the hair itself - strength and elasticity. The composition of varnishes should not contain alcohol, which can cause allergies and damage the hair structure, hairdressers warn.

Varnishes differ in the degree of fixation; the tube usually has an inscription which hair they are suitable for. Super strong fixing varnishes are usually used for long-term styling. Apply them at a distance of 25 cm from the head for an even spray. High-quality varnish does not stick hair and is easily removed by brushing.
Romantic styling for medium and long hair
Any girl knows how to create a romantic image. Armed with the necessary items and styling products, you can quickly and easily do your own hair.
Greek styling
This hairstyle has several variations and requires the use of hairpins and a special bandage:
- The hair should be combed with a natural comb to prevent electrification, and divided into a straight part.
- Put on a wide or narrow bandage on your head and successively, starting from the front, wrap the strands under it.
- Secure with hairpins and hairspray.
 How to do your own hair quickly and easily
 You can diversify this styling with bundles woven from individual strands. Washed and dried hair with a styling agent applied to it should be wound on curlers, braided or a "spikelet" from their part, and the rest should be twisted with bundles and tucked under a bandage from your own hair.
Low ponytail with a flower
A hair flower can be a festive styling option. The hairstyle is based on a ponytail tied at the back of the head:
- On the side, you need to select a small strand and braid it into a pigtail, in the process of this, the strands need to be pulled out of the already braided part.

- Lightly sprinkling the pigtail with varnish, twist it from the tip to make a flower resembling a rose.
- Use invisible or hairpins to stab the flower at the base.
- Wrap the loose remaining strands and lay them in the form of curls.
Curls
To create curls, you need to wind long strands on large or medium curlers or a conical curling iron, holding it vertically. Before you start creating curls, you should treat the strands with a persistent fixative, since long hair is usually heavy and styling does not last very long on them.
The twisted strands can be carelessly disassembled with your fingers and laid with varnish, or you can lift and pin them with a beautiful hairpin, tie them in a tail, releasing individual curls. You can leave your hair straight by winding some strands and fixing them with varnish.

Curls on medium to long hair can be created with:
- ironing;
- hair dryer;
- forceps;
- curlers;
- papillotes;
- Thermo curlers.
To wind with an iron or curling iron, divide the strands into zones and twist them one at a time at a short distance from the roots. It depends on the diameter of the curling iron whether large or small curls will turn out.
Clean, damp hair should be wrapped in curlers, dried with a hairdryer or naturally, disassembled with your fingers, and fixed with varnish. Papillots (soft foam curlers) can curl small curls. These curlers can be left on your head overnight - they do not interfere with normal sleep.
Hot rollers are plastic and have a paraffin core. They are more gentle than electric tongs or irons. Curls, obtained with the help of heat rollers, last longer than curled with a curling iron or iron. Another way to get curls is small pigtails, which you can braid before going to bed from all your hair, and in the morning unravel and comb.
Light waves
Curlers (regular or thermo) of medium size cope with their creation easily and quickly, having which, you can not puzzle over how to make your own hair. After the hair has been wrapped, dried and removed the curlers, you should separate them with your fingers, smooth them and, sprinkling with varnish, secure with hairpins.

Brushing is a way to create light waves using a hair dryer and a round comb. Each strand should be carefully removed from the brush and treated with varnish, then beat all the hair with your hands. You can braid your hair in small braids and iron it over it. Untwist the braids, disassemble the waves with your fingers and spray them with varnish.
Romantic bundle
A bun of long or semi-long hair looks advantageous both on weekdays and on holidays, stylists say. A smoothed bun looks especially elegant: the hair is straightened, gathered in a ponytail and smoothed with a comb. The tail is twisted in a spiral, wound up and secured with hairpins. It can be sprinkled with varnish, and the hair on the head can be smeared with gel.

The bundle also comes with side braids hidden in its middle, with two thin rims worn on the head, and with a voluminous roller under the hair.
DIY evening hairstyles for long hair
Making your own evening hairstyle is easy and quick - not as difficult as it might seem. The main thing is that the overall image is harmonious, so that everything is combined - outfit, hairstyle and makeup. Complex styling is in harmony with simple and laconic dresses, and for outfits decorated with various decorations and details, it is better to choose simple hairstyles.
French ghoul
An elastic band and invisibility are necessary to create a French ghoul:
- Having tied the tail, you need to separate the strand from above, and comb the remaining hair, fixing it with varnish.

- From the bottom, braid a French braid, pulling the strands to make it more voluminous.
- Fasten the next lower strand under the tail, wrapping the remaining hair inward to make a bun. Secure it carefully.
- Spread the top strand of the tail over the bun to make it look smooth.
- Invisibly fix the ends under the bundle. Lay the scythe over the bun.
Women's hairstyle from braids
Such hairstyles suit absolutely all owners of luxurious hair. There are such types of weaving:
- Russian;
- European;
- eastern;
- design.
Every lady has known since childhood how to do her own hair easily and quickly, using a traditional Russian braid. There are many variations on the Russian braid theme: smooth, voluminous, disheveled, asymmetrical, with or without parting. 1 of its variants is a "spikelet", where instead of the usual 3 alternating strands, 2 are used with the alternate addition of the following.
French braid differs from the "spikelet" in that the strands do not weave one above the other, but fit inside:
- Weaving begins with a small bun disassembled into 3 parts, adding strands so that all the hair is gathered at the end.
- Weaving should start from the crown and lead over the entire head in the form of a crown, it can be direct and reverse.
 French braid "vice versa"
 Weaving in Greek presents a combination of sleek hair and a hoop-like braid. 3 strands are taken closer to the parting, adding small strands to them, with which the "hoop" is fixed on the head.
Oriental braids are distinguished by the whimsical forms and the presence of adornments in them:
- To braid the braids, the hair is divided into 2 strands, each of them is twisted in one direction, then the strands are cross-weaved in the opposite direction.
- Harnesses can be combined with loose curls, side braids, ponytails.
Afro-braids weave from the back of the head to the temples. They can be spread over the shoulders, or you can weave thick braids out of them, tie a tail. Zizi are woven with artificial strands; curly - curls are twisted in a spiral.

To weave "French waterfall", you need to braid 1 or 2 braids, starting at the temples and ending at the back of the head, while each lower strand should freely descend onto the back.
For creating "Baskets" hair should be collected in a ponytail at the crown, then, starting from the temple, weave a French braid, alternately adding strands from the ponytail and free-lying hair.
Styling for going out
Festive styling involves curls falling over the shoulders, curls raised upwards or combed to one side, beautifully gathered at the back of the head. Accessories are selected for them - tiaras, inlaid hairpins and hairpins. It is enough to wind the hair on an iron, curling iron or curlers, comb it to the side or back, lift it, secure it with a bright hairpin - and the evening look is ready.

For those who love perfectly straight hair, iron it using a heat protection serum.
To straighten the hair without leaving marks, you need to start straightening the hair from the roots. The timeless retro styling implies highly styled hair tied in with a ribbon.
The "French twist" or "shell" is a very elegant hairstyle for the evening. The hair should be divided into a side parting, twist all the strands into a tourniquet and pin it up, fixing it with invisible ones. Such styling looks original with bangs combed to one side, laid in waves, or, conversely, with raised up and combed.
Festive bundle
There are many options for such styling. For example, a double bun, before creating which you should wash your hair and lubricate it with gel so that the strands do not knock out of the hairstyle. After drying, make a parting and tie 2 low tails, of which form 2 bundles, securing each with hairpins. Decorate the bunches with hairpins or flowers.

A high lush bun can be decorated with curls from curls. You can use a roller or hairpiece to add volume. A bun can be created from hair divided into equal strands and twisted into flagella, which are then gathered together and fastened with hairpins. You can complete the festive look with a bundle with the help of accessories: combs, headbands, hairpins, clips, decorative hairpins.
Youth hairstyles
Fashion-conscious girls prefer loose hair or hairstyles that you can easily and quickly create yourself, as well as transform one into another.
Brushed ponytail
How to diversify the ponytail and make your own hairstyle easily and quickly? To create a ponytail with a voluminous top, the hair is divided into 4 parts.

The upper one is combed, the lower one is tied into a tail, the side ones are wound on tongs, and then all the parts are fastened at the base of the tail so that the top remains voluminous.
High bow
This is one of the most stylish hairstyles of the season:
- To create it, the hair should be collected in a high ponytail, separate the 4th part and fold it over the forehead.

- On the remaining strands, fix the elastic in the middle, dividing them into 2 parts. Comb them for volume, form a bow and secure it with invisible ones.
- Comb the front strand and, throwing it back, also fix it with invisibility and varnish.
Such a bow can be done on the crown or on the side.
Delicate curls
The fastest way to style with curls is to tie the hair at the crown of the head in a ponytail, which you wind on a curling iron, and then remove the elastic. For Hollywood curls, the strands are twisted with tongs from the face, beat with your fingers and sprayed with varnish.

Long hair is easiest to curl in layers, dividing it into 3 sections and starting to form curls from the middle layer. To fix the curls, use foam and varnish.
Simple bundles for every day
The bun is a classic hairstyle, very easy to perform. At the same time, it is elegant, suitable for both formal and casual looks. It is easy to make: just collect all the hair, twist it at the back of the head and pin it.
Pigtail bun
- Hair should be collected in a ponytail, secured very tightly with an elastic band and leaving 1 strand under the pigtail.
- Wrap the hair from the tail around the base, fasten it, weave a pigtail from the remaining strand and wrap a bun with it.
- If the curls are not voluminous enough, they should be combed.
Ponytail
This is ideal for those with long, curvy hair.

There are several types of this hairstyle with which you can look stylish:
- Lightly combing the upper strands over the forehead to the crown, you can form a high tail.
- The base can be wrapped with a lock of hair or a ribbon.
- Variants with bangs, which can be combed or styled in different ways, are played very nicely.
- You can tie the tail on the side or wind it with tongs, curlers or a special curling iron-corrugation.
Tails are braided, with "lanterns", voluminous, with bows, multi-tiered. Ribbons, bows, scarves, decorative and natural flowers are used to decorate them.
Sloppy bunch
The romantic image creates a slightly sloppy bun: apply mousse to the surface of the head, wind the hair, put it in a ponytail, and then, highlighting one strand of hair,

You can create a wavy bun by winding the strands on large curlers, collecting them in a ponytail and hiding the elastic under the ends of the hair.
Hair ornaments
Hair accessories:
- Headbands. They are simple, monochrome, subtle, serve to maintain the hairstyle. Decorated with rhinestones, bows, feathers, openwork, rivets, the headbands are created to go out into the world.
- Flowers - decorative and lively. Decorate hair of any length.
- Hairpins. Simple-looking ones can be worn daily, and decorated with beads, sequins, rhinestones - as an evening option.
- Combs. Usually they are a companion of festive hairstyles, they look great on straight and curly curls.
- Invisibles and hairpins. They ceased to perform the function of maintaining the hairstyle, turning into an object of decoration.
- Ribbons. With their help, you can create any look - from hippies to hairstyles in the Greek style.

- Rubber bands. They are used not only for convenience, but also for modeling hairstyles.
- Veil. The perfect complement to an outfit for a party in a certain style.
- Tiaras. They are used as a wedding and evening accessory.
How to look perfect? Professional stylists note, first of all, a stylish hairstyle and advise you to take care of your hair carefully. It will not be difficult for a modern woman to do her own hair easily and quickly. The main thing is not to forget the positive and positive attitude at home.
You can diversify the styling with various accessories, each of which can become an everyday option or turn an ordinary look into a solemn and festive one.
Video: how to make a beautiful hairstyle
10 easy hairstyles you can do for yourself:
Evening hairstyles for self-execution:
Hair care starts with cleanliness and health, and ends with creating a beautiful hairstyle. The image of a modern girl is no longer conceivable without styling, so every time the masters of their craft try to come up with something new and interesting. Unfortunately, not all masterpieces can be repeated without the help of a stylist. However, there are also options that are easy to do on your own.
Step by step instructions for hairstyles
Today I would like to talk about the simplest hairstyles, whose creation will take you no more than 5 minutes. But this does not diminish their elegance and attractiveness in any way. The offered hairstyles are suitable for both everyday wear and special occasions.
Jasmine tail
This hairstyle is one of the ponytail varieties so beloved by all girls. It will not be difficult for you to make this styling. All you need to do is secure the hair in a ponytail at the crown of the head with an elastic band. An elastic band with imitation of natural hair looks very original. If you don't have such an accessory, you can take one thin section of hair from the base of the ponytail and wind it around the elastic a few times. We hide the tip of the strand under the elastic band from below. Thus, our base is ready. Next, we need thin elastic bands to proportionally separate the tail. Decide in advance how many parts your hairstyle will share. After that, comb the topmost area and secure it with an elastic band. Do the same with the rest of the hair. For medium-length hair, two or three divisions are suitable, for long curls, their number can increase significantly.
jasmine tailBunch of braids
Both the bun and braids have always been and will be the most demanded elements of a woman's hairstyle. Laying on the crown accentuates the beauty and grace of the neck. In addition, she magically transforms the girl's gait. With the help of a beam, you can feel like a ballerina or a model. How to make this hairstyle yourself? There is nothing tricky here, and you can repeat this styling in just a couple of minutes, which is very important in the morning.
We fix the hair in a ponytail at the back of the head with an elastic band. Next, we divide it into two equal parts. From these parts we braid two ordinary braids and fasten them at the tip with a very thin elastic band. Then we begin to simultaneously twist the hair around the elastic, directing them towards each other. With a thin elastic band in the color of the hair, we fix all the ends to the base. Some girls prefer to use hairpins, although, in our opinion, an elastic band is more reliable.

Elegant hairstyle
This option is perfect for evening outings to the theater and restaurants. However, for a casual look, this hairstyle is also appropriate. To do this, we collect the hair in a ponytail at the back of the head and fix it with an elastic band. After that, we divide the hair into two parts at the base of the elastic and pass all the hair into the resulting gap. Thus, we have very beautiful curls on the sides. We lightly comb the tail and also pass it through the gap. You can fix this hairstyle with hairpins with rhinestones.

Side tail
This ponytail option is indispensable for summer. A very romantic styling that looks especially advantageous on long hair. Gather all the hair on your side and tie it in a knot as shown in the photo. After that, make another knot and secure the entire composition with a thin elastic band. The hairstyle is ready. Don't forget about different hair ornaments. This hairstyle can be complemented with small flowers.

Oblique bezel
The last option that I would like to talk about today is the bezel. This hairstyle allows you to leave your hair loose, and a small braid prevents hair from covering your face and getting into your eyes. The oblique bezel looks especially beautiful with bangs. To create this hairstyle, you only need to braid the braid from one side. Place the resulting braid over the forehead and fix it at the opposite end with an invisible one.

You can also watch a training video with which you can learn another very beautiful and simple hairstyle.
video tutorial In summer, circumstances oblige us not only to lie on the beach, but also to go to work, take walks and dates. If you can put on a cool, light dress on your body, then the hair is more complicated. The high air temperature forces girls to look not only for stylish, but also quick ways to remove their hair. We offer 55 options for hairstyles of different styles that you can
Scythe
If you think that a classic braid is too trite for a summer walk, here are some fairly simple but stylish options that will be a great alternative to the traditional hairstyle.Option 1
First, part on one side and start braiding from the opposite temple. Move diagonally, weaving strands from the crown and forehead. As a result, you will get a stylish asymmetrical and not at all hot summer hairstyle.Option 2
This is a very simple and quick technique that will help refine the classic braid a bit. First of all, tie a not too tight tail with a thin, inconspicuous elastic band. Make a gap over the elastic in your hair and thread the ponytail through it. Then, braid your hair with any technique you like. Thus, a simple everyday hairstyle is ready.
Option 3
This hairstyle looks great on long hair. First, tie a not too tight tail on the side. Make a gap over the elastic and pass all your hair through it. Relax a few strands to add volume. Just below, tie another elastic band and repeat all the steps again. The number of sections depends on
Option 4
To get such a sloppy, but stylish braid, you need to wind your hair in light waves and do a pile on the top of your head. Then braid the braid using whatever technique you are familiar with. When the braid is ready, pull it in different directions to add volume. At the end, divide the hair into two parts, tie it in a knot and secure it with an invisible hair on the inside.
Option 5
Separate one side strand at each temple (above the level of the eyebrows). Braid them. Grab a curl next to each braid and secure them at the back of the head with an elastic band or hair clip.Repeat the steps, separating the strands near the ears. Braid them, grab adjacent curls and secure at the back of your head. The rest of the hair can be left loose or braided.

Option 6
Part your hair with a side part. Separate the lock at the ear and braid with any technique. Don't braid too tight. Secure the end of the braid with a transparent elastic band. Release the strands from the braid to add volume. The final touch: spray the hair with varnish. This option will look most successful on curly hair. If you have straight curls, spend a couple of minutes curling with your curling iron.
Option 7
Part the side. Part the strand at the parting and start braiding, grabbing the hair that frames your face. Use any technique. When you reach your neck, change your braiding technique and weave the remaining hair into the main braid. When you're finished braiding, slide the elastic over the end of the braid. Release the strands, which will make the hairstyle seem more luxuriant. Finally, spray the hair with varnish.In the photo below you can see the combination of a simple braid and a fishtail. It looks very impressive.

Option 8
A quick and easy hairstyle that even a first grader can handle. Despite all the ease of weaving, the end result is styling that others will find extremely difficult.So, divide your hair into three equal sections. We braid one braid from each part, the ends of which we fix with small elastic bands. Now we take one braid and roll it up into a ball. We fasten it with hairpins at the base of the back of the head. We make balls from the remaining braids.
This hairstyle has only one drawback: the true Rapunzel will have to tinker, braiding their curls. But the owners of medium length hair will cope with braiding in a matter of minutes.

Option 9
An inverted braid seems extraordinarily difficult, but in reality everything is very simple. The braiding technique is surprisingly simple and with its help you will create a unique hairstyle in a couple of minutes.First level: separate one strand above the forehead and make a ponytail. To prevent the ends of your hair from interfering with your work, wrap the ponytail at the top of your head and secure it with a clip.
Second level: grabbing the side curls, we make a second tail. At the same time, we retreat a little from the first tail. Now we remove the clip. We divide the first tail into two halves, between which we draw the second tail. We put the tip of the second tail up and fasten it with a clip. We leave the ends of the first tail at the bottom.
Third level: grab a strand a little lower, connect it to the free ends (from the first tail). We make the third tail. Remove the clip, divide the ends of the second tail into two halves and pass the third tail between them. We fasten the third tail with a clip on the back of the head. We leave the ends of the second tail at the bottom.
We repeat the steps as needed. When finished braiding, secure the end with an elastic band. The final touch: gently release the strands, starting with the very first. The higher the strand, the more volume we give it. It is not necessary to braid your hair all the way - the hairstyle will look gorgeous even with three levels.

If you are looking for a simple but original summer hairstyle, an unusual ponytail will be a great option, both for everyday life and for an evening walk.
Option 1
To do this hairstyle, first twist the hair at the ends a little. Tie the tail with a thin elastic band. Make a gap in your hair and thread the ponytail through it. If necessary, curl your hair a little more or use your fingers to separate curls to add volume.
Option 2
For this hairstyle, the hair should be straight, so use a flat iron if necessary. Then, divide your hair into two layers: top and bottom. Gather the top layer of hair with a thin elastic band at the back of the head on either side of the head. From the bottom layer, weave a braid on the opposite side. The thickness of the braid depends on your personal wishes. Ponytail the elastic around the tail and secure the end with a small hairpin.
Option 3
To create a more elegant ponytail, you will need hair foam or wax. Part it evenly (center or side, whichever suits you best) and gather your hair on one side. Apply foam to them and divide into two equal strands. And then just tie a knot twice in a row. Secure with a thin invisible elastic band directly under the knot, and twist the ends of the hair a little or make a light bouffant.
Option 4
To make such a stylish ponytail, which is perfect for any kind of summer events, you will need a curling iron or iron, hairspray, invisibility and a little time. First, curl your hair at the ends. Then divide them into 4 parts: at the back of the head, at the crown and on both sides at the temple, and tie them with elastic bands so that they do not mix with each other. Take the hair from the crown and comb it a little from the inside, and then twist it with a flagella and secure it with invisible ones. Repeat with the hair at the temples. When the hairstyle is ready, sprinkle it with varnish, for reliability.
Option 5
Very romantic summer hairstyle. To do it, part your hair in two along the parting line. Braid on both sides of the braids, which converge from the temples at the back of the head. Tie them together with a thin elastic band. Then separate a thin strand from the tail and braid. Wrap an elastic band with it and secure with an invisible inner side. Comb the tail a little with a comb or curl it with a curling iron.
Option 6
The ponytail is one of the most popular and versatile hairstyle trends in the world. This option is very fast and original. First, curl your hair at the ends and then part it in two. From the hair at the top of your head, start to weave a loose braid, weaving all the strands into it along the forehead line to reveal your face. The braid should end at the back of your head, and then lift up the rest of your hair and pull it together with a thin elastic band. To hide the elastic, you can wrap a strand of hair around it and secure it with an invisible inner side.
Option 7
Another easy and quick way to make an elegant ponytail. Curl the ends of the hair to create light waves. Then divide them in two. Comb the hair on the crown a little and tie it high with a thin elastic band. Gather the rest of the hair a little lower and also tie with an elastic band. To create more volume at the top of your hair, loosen up a few strands at the crown.
Option 8
This is a great way to transform a regular ponytail into an original hairstyle in a few minutes. Tie all of your hair into a ponytail at the back of your head. Separate a small strand and wrap around the elastic to hide it, and secure with an invisible inner side. Then tie another elastic band just below. Make a gap in the resulting sections and run your hair through it. Tie another elastic band just below and repeat the procedure. The number of sections directly depends on the length of your hair. To make the tips look natural, twist them a little with a curling iron or iron.
Option 9
Divide your hair into 3 sections (center and 2 side sections). Secure each section with a rubber band if you are doing your own hair. This will prevent your hair from tangling. Roll the center strand into a rope and wrap it around the side ponytail on the right. Separate one curl from the left strand. Roll it into a tourniquet and wrap the right tail. We also wrap the remains of the left strand into a bundle and wrap the tail around it. We fix the hair with an elastic band.This hairstyle has several advantages. Firstly, we do not need to observe clear symmetry (uneven strands give a chaotic gloss). Secondly, the absence of parting allows you to mask some defects: unpainted roots, dandruff, or too thin hair.

Hair band made of ... hair
This is the easiest and most original way to replace a regular headband and remove hair from your face on a hot day.Option 1
First, part your hair in two. Gather the hair at the back of the head with an elastic band so that it does not interfere, and proceed to the strands at the front of the face. Part on either side and start braiding, weaving strands into it along the forehead. When the “headband” is ready, let go of the hair at the back of the head and enjoy the original hairstyle.Option 2
Part a small section of hair at the neck and braid it into a thin braid. Wrap it around your head and secure it with an invisible one on the opposite side. This hairstyle looks great on curly hair.
Option 3
Part it evenly and separate two strands from both sides of the head. Weave them into pigtails, not too tight, and tie at the ends with invisible elastic bands. Connect them together at the back of the head and fasten them with invisible ones.
Option 4
Having separated the strand in the area of the bangs, we make a bouffant. Separate one curl near the ear on the right and form a flagellum, twisting the hair away from us. Secure the end with a transparent rubber band. Take the invisibility and fasten the tourniquet at the back of the head, closer to the left side.We repeat the actions on the opposite side: we separate the strand at the ear; we form a flagellum; we fix the tip with an elastic band. We put the second flagellum under the first one and fasten it invisibly.

Hairstyle in 30 seconds
If you are running out of time and you are in a hurry to an event where you need to be smart, these options are for you!
Option 4
Divide your hair into three sections. The average should be larger than the rest. Weave a volumetric braid out of it and roll it into a knot using bobby pins or hairpins. Roll the strand that is on the left into a bundle and run around the knot counterclockwise (bottom). Wrap the strand that remains on the right around the hair in a clockwise direction (through the top). Secure with invisibility or sprinkle with varnish.
Option 5
To do this hairstyle, you need hairspray, invisibility and a little time to practice. First, fluff your hair with your hands to get good volume, and coat generously with varnish. Then, gather your hair together and wrap it inward to form a shell. Secure your hair with invisibility. You can leave a few loose strands to add some subtle casual hairstyle.
Option 6
This is a very easy way to make a nape knot. First, tie the ponytail and divide it into two equal strands. Twist each strand clockwise with a tourniquet. Then start weaving the strands together (counterclockwise). Tie the tourniquet at the end with an elastic band and fold it into a knot at the back of the head, securing it with hairpins.
Option 7
Tie the ponytail at the back of your head, not too high. Make a gap above the elastic and pull your hair into it. Then, gently roll up the tail with a shell and secure with a hair clip or other accessory.
Option 8
To make a hair bow, you need a thin elastic band, invisible ones and 1 minute of time. First, tie a knot high on the crown of your head and divide it in two. Skip the tip of the tail in the middle and secure with an invisible back. This hairstyle is also called "Lady Gaga style bow".
Option 9
This hairstyle will take longer than the previous ones. You will need a foam donut and hairpins. Tie a high ponytail, put a "donut" on it and hide the hair under it one strand at a time, securing it with hairpins for reliability. At the end, the hairstyle can be decorated with a bow or other accessories.
Option 10
Curly "donuts" look much more interesting than ordinary round pieces if you like bunches of ballerinas. These "donuts" can be bought in specialized stores or ordered online. The technique of execution does not differ at all from the classical options. Hair must be plugged behind the "donut".
Option 11
Pull your hair into a ponytail high at the crown. Divide the tail into two halves, wrapping each with a flagellum. Now fold the harness around the elastic. We twist them tightly and in opposite directions (left - to the right, right - to the left). Secure the hairstyle with invisible hair and fix with varnish.
Option 12
Part your hair in half. Take the first strand, separate the curl at the forehead. We twist the curl away from ourselves, starting at the forehead and ending behind the ear. We tie the first ponytail low at the back of the head. We do the same with the second half of the hair. And now it remains to twist the bagels. Ready!
Perhaps the easiest way to escape the heat in summer and at the same time create a sophisticated hairstyle is a Greek headband.
Option 1
Slip the Greek headband over the crown of your head and thread small strands of hair under the elastic. You will have a perfect hairstyle in just a few minutes.
Option 2
This is a more complex example of how you can use the Greek rim. You will need two headbands for this hairstyle. Slip one under your hair, and then back the back of your head. The second - put it on the crown and wrap the strands under it. Voila!
"Malvinka"
One of the fastest and cutest hairstyles we know from an early age, thanks to Malvina, a girl with blue hair. The main difference between this hairstyle: the hair is loose, the upper strands are pinned high at the back of the head.Option 1
A great way to diversify your look if your hair is barely touching your shoulders.Separate the strand over the bangs and floss. We put a roller under the lock and fix it. Velcro curlers can be used as a roller. They stick better to the hair. We grab the side curls and (together with the combed strand) we fix them on the back of the head with an elastic band. Using any thin object, stretch the hair a little from above, giving it volume. A Chinese stick or an ordinary hairpin will do. It is better to pull the strands with your fingers on long hair, but not on short.

Option 2
Separate one strand at each temple (above the ear) and secure them to the back of the head with an elastic band. Under the first strand, we grab a curl, draw it over the tail and start it behind the first strand. We repeat from the opposite side: we grab a curl, hold it over the tail and start it under the lock. We connect the ends of all four curls with an elastic band. It turns out a pretty heart.
Option 3
Using a hair straightener, curl the ends on a few side strands. Separate one strand at the top of the head and comb it into a bouffant. To keep the strand in place, spray it with hairspray. Having styled the combed strand, pin the hair with a barrette, making a "malvinka". Ready!A great option for a romantic date, going to the theater and even for a wedding.

Option 4
Grab a wide strand (from forehead to ear) at each temple. Secure the strands at the back of the head with an elastic band, masking it with a thin curl. Randomly, in no particular order, braid a pair of fine braids. For more bloopers, you can curl the ends of your hair a little.
Option 5
Separate a strand at each temple and make two flagella (turning the strands away from you). Connect the flagella at the back of the head by tying them with an elastic band. From the loose ends of the plait, braid using your favorite technique. For example, ala "fish tail".
Emphasis on accessories
With the help of ribbons and scarves, you can turn even the most ordinary ponytail into a work of art. Someone might think that hair with a scarf resembles a collective farm style. And he will be wrong! It is fashionable and beautiful - even Hollywood stars flaunt in branded scarves skillfully tied to their hair. In summer, a scarf will protect you from the scorching rays of the sun. It also has other advantages: with the help of a well-laid scarf, you can hide hair imperfections, regrown roots, gray hair or a rare parting.Option 1
Loose and comb your hair. Tie a knot around the middle of the scarf. It can be a regular or decorative knot, according to your taste. Place the scarf over your forehead (so that the knot is slightly sideways). Tie a double knot at the back of your head and hide the ends of the scarf behind the base of the fabric.
Option 2
Love trendy pin-up looks? Then you will like this option.Divide your hair into two sections: back (crown and nape) and front (forehead). Pull your hair back into a bun You can pre-braid it in a braid to give your hair a hold. Twist the hair in front into a tourniquet, put it in a bagel and secure with invisible ones. A final touch: tie a cute scarf or shawl over your head.

Option 3
Another great version of the image of "pin-up girls". Create long bangs by separating a section over the center of your forehead. Collect the rest of the hair in one or more tails (the ends of which are curled with a curling iron). The most important stage is the formation of the bangs. It is the large bangs that are one of the distinctive features of this style. We wind the front strand on the curling iron. Give it the desired shape and spray with varnish. Behind the bangs we tie a small polka-dot handkerchief with a bow.
Option 4
The popularity of The Great Gatsby rekindled interest in 1920s American culture. And, of course, this interest has not bypassed the world of fashion. Ladies of that era, going to a party, preferred short hair, and long curls were removed under a flashy headband. However, the headband was also worn on short hair. In addition, the hair was often curled. If you love visiting Mafia clubs or jazz bars, then retro styling will come in handy. Let's take a look at one of the ways to create this hairstyle.Comb your hair to the side and wear a glamorous headband. We pass the hair through the bezel - strand by strand. Voila! We advise owners of short hair to smooth the curls with gel and (where can we do without it?) Put on a headband!

Among these hairstyles, you are guaranteed to pick up several for yourself
Girls with medium length hair are very lucky - many luxurious compositions can be made with such hair. It is very easy to create a hairstyle for medium hair yourself and it will not take too long. Various curls or braids that you have seen in the pictures on the Internet are quite possible to create with your own hands. So how do you style yourself?
On wet strands
Of course, you should not go out with a wet head, but sometimes there is no other way out, for example, after visiting the pool or gym. What to do in this case and what composition can you create on your head?
"Fish tail
If you have a little free time, you can make a fishtail with your own hands. To create it, you need to take two small rubber bands.
How it's done:
- Divide it into two equal parts.
- Take a small strand on the left side, move it to the center and add to the right side.
- Repeat the same steps on the right side.
- Weave all the curls.
- Commit.
- You can also stretch the strands slightly for extra volume.
This composition can be done both at home with your own hands and in the salon, if you need a quick and accurate result the first time.
Low bun
Another chic do-it-yourself hairstyle option is a low bun. To create it, you will need several invisibility and an elastic band.

The process takes place in three stages:
- Collect the hair in a low ponytail.
- Twist and roll around the base (if it doesn't work, then you can fix the tail).
- Hide the ends of the hairs and secure the hair with hairpins.
This composition is perfect for thin and weak hair. If you want to perform it on thick hair, then you should choose the option not with one, but with 2-3 buns.
For Sport
A modern girl is able to set aside several hours for sports, even on the busiest day. Good fitness clothing builds confidence and makes your workout comfortable. However, those with medium to long hair should consider what to do with their hair so that it doesn't get in the way during exercise.
Tiered tail
To complete this hairstyle, you will need 7-10 small elastic bands and some free time.

Process of creation:
- Take a small strand on the top of the head and secure it with an elastic band.
- Collect the strands at the temples, connect with the first strand and secure everything with an elastic band.
- Collect curls at ear level and connect with the previous ones. Secure.
- This procedure should be repeated along the entire length of the hair.
Dutch braids
To create, you need to take 2-4 invisibility and 2 small elastic bands.

Execution process:
- Divide the hair into 2 equal parts and fix 1 part with a clip.
- Divide the second part of the hair into 3 small strands and braid. At the end of weaving, fasten the curls.
- Repeat the same procedure with the other part of the hair.
- Cross the braids together and fix using the pins at the opposite spikelet.
This hairstyle is suitable not only for sports, but also for going out for a walk. It is easy to perform, so you can do it yourself.
On every day
Extraordinary composition

Process of creation:
- Divide the bangs into 2 equal parts. No need to curl or straighten curls - the natural look is much better;
- Take a small part of the bangs (about 5-10 cm) and braid the braid;
- The same procedure should be repeated with the other part of the bangs;
- Wrap your head in pigtails towards the back of the head.
To work
This option is perfect not only for publication, but also for daily use. A distinctive feature of the hairstyle is that it is very easy to do it yourself, without even looking in the mirror.

- Gather the hair in a low ponytail and fix with an elastic band.
- Divide the hair at the base of the tail and skip the hair into the resulting gap.
- We apply the tail to the base (you need to put your palm to the base so that the hair is superimposed on it).
Fancy tail

Process of creation:
- Divide the curls into 3 equal parts.
- Collect the middle part in the tail.
- Braid from each part (it should not be very tight).
- Lay the braids in bunches, fixing them with hairpins.
- Assemble the middle braid into a bun, scrolling around the base.
Romantic gulka

Execution process:
- Curl the ends with a curling iron.
- Collect the hair in a high ponytail.
- Separate one strand from each side.
- Braid two braids from these strands.
- To stab the locks with invisibility (this is necessary so that they do not interfere).
- Make a fleece on the head.
- Lay the strands in a free bundle and fix it all with hairpins.
- Remove invisibility and carefully wrap it in pigtails around the bun.
- Hide the remaining ends under the bundle and secure with pins.
Side tail
This option is indispensable during the summer. This hairstyle looks perfect on very long curls.

To complete the composition, you need only 1 elastic band. Execution process:
- Gather the hair on the side and tie it in a knot.
- Next, make a couple more knots.
- Secure.
Do not forget about jewelry for curls. This composition can be supplemented with a small flower.
Holiday
For evening
In order to do this styling, you need to take a thick elastic band or a roller, cut across.

Process of creation:
- Apply a roller to the end of the hair.
- Roll up the roller, moving up to the roots.
- Fix the resulting composition with hairpins.
- The holes that are visible on the sides should also be covered with curls.
- Secure with hairpins.
- The composition can be completed with a comb.
The publication
If you can't get the hairstyle shown in this video, don't be discouraged! There is also a simpler option:
- Collect the hair in the lower ponytail.
- Pull the elastic and put the strands into the hole.
- Fix the structure using pins.
For the ball
Execution process:
- Collect the hair in a high ponytail.
- Fasten the base of the ponytail to the curls and wrap it back.
- Place a roller and curl the tail.
- Gently stretch the bun on both sides.
- Secure the edges with pins.

A bundle for a holiday
Process of creation:
- Create a low ponytail, position to the side.
- Leave a small strand at the temple.
- Wind the strands with an iron or curling iron.
- From all the curls, make rings around the base, fastening with invisibility and hairpins.
- Wind up the side strand.
- Twist it and place it around the bun.
In order to create a beautiful hairstyle, you need to show a little imagination. The main condition for choosing is simplicity in creation, elegance and sophistication of the final result, as well as, of course, its relevance for each specific situation. And of course, the hairstyle should be comfortable for you, so that your day is not overshadowed by unpleasant experiences.