Box with paper cardboard hands. Master class on creating a box with drawers. Video: DIY cardboard box
You don't have to buy expensive jewelry boxes or organizers to store jewelry and small accessories. It is enough just to make a cardboard jewelry box with your own hands. Most homes have wrapping paper, small pieces of lace, beads or beads and other materials that can be used to create an original box.
Required materials and tools
Components for crafting:
Shape of the cardboard box
Simple rectangular or square
A do-it-yourself box made of cardboard for needlework is formed from a box and paper tubes. First you need to choose a suitable base for the box - for example, a shoe box. It is better to take a base for the bottom about A4 sheet size or less, so it will be easier to go through the finishing process. 
To form the tubes, you will need glue, knitting needles. For weaving, you can use straws made of plain paper for printing, unnecessary press and magazines. The finished cardboard box can be painted with acrylics or left as it is.
It is advantageous to use colored paper for the printer: it has an extensive color palette.
The process of making a cardboard box with your own hands does not take much time. First, you need to glue the vertical tubes outside the box, which serve as guides. You need to glue in the interval of 4-6 cm - it all depends on the size of the box. Further, the tubes are bent to the side faces, and then inward.
A sealed cardboard, suitable in size, is glued to the bottom, which will hide the place where the tubes are fixed. Then the tubes are intertwined around the circumference of the base. The lid also folds down.
Round box
For needlewomen, the round coil left over from the scotch tape is an expensive material. This base can be used in different types of needlework: decoupage or scrapbooking, decorate with coffee beans, beads, beads, jewelry stones, stick on leather or fabric. To make a box made of round cardboard with your own hands, it is advised to use interwoven cardboard. 
First you need to attach the reel to the cardboard and draw three circles along the inner diameter and two along the outer diameter. Circles with a smaller diameter are glued together, it is recommended to use Moment glue. Sand the finished element with sandpaper and glue it to a circle of large diameter, placing it in the central part.
As a result, a lid will be formed, which will hermetically close the box.
If there is a need to process the edges with sandpaper. The box layout is ready. It is allowed to decorate it to your taste with different beads and decorative stones in any needlework technique. The lid can be made slightly protruding: you need to enlarge one of the circles with a large diameter. This will make the box easier to open.
Heart shaped box
The heart-shaped box is perfect as a wrapper for a surprise for Valentine's Day. First of all, you need to cut out a heart-shaped element from the cardboard - this is the bottom of the box, the dimensions of which will predetermine the parameters of the box as a whole. Then you need to cut a wide strip of cardboard with teeth on one side. Stick the strip to the bottom. Collect the other side in the same way. 
You need to glue the two halves of the walls and attach them with paper clips, wait for the glue to dry. Decorate the inside and outside of the box with paper with different textures or ornaments. Glue two pieces of fringe to the base - they will act as curtains on which the lid is held. Then cut out the second heart, this will be the top cover. It needs to be glued to the curtains.
Decorated paper should be glued in the same way. Then, to your taste, you need to decorate the cardboard box in the shape of a heart. As an option, lace can be glued along the contour. Decorate the top with flowers, beads, ribbons, etc.
How to make a lid for a box

We decorate the box with fabric
To decorate a cardboard box with your own hands, you can use not only an old press or wallpaper, but also decorate it with fabric. With the help of a wrap, it is possible to glue the box with cloth. Such a thing can serve as a separate present, as well as an organizer for saving small household items, for example: toys for children, home decor items, sewing accessories.
Materials and accessories that are indispensable for covering the box with fabric:
- Box. When choosing, it is allowed to apply the rules described above for working with the press, magazines, wallpaper.
- The very fabric of which you will sheathe the box.
- Specialized glue, scotch tape.
- Sharpened scissors.
- You may need an awl in work, as well as a strong cord (you need to choose the color of the fabric).
In order to do everything accurately and get an excellent result, you need to follow the recommendations:

Soft box made of cardboard and fabric
The box with your own hands can be made of compacted cardboard and pasted over with a cloth. Make the lid with padding polyester - it will be soft. Such a box is perfect for saving jewelry, materials for needlework. The parameters of such a box are 18 cm by 9 cm. Also, you can enter your own value, based on what you will use it for.
To create you need:
- thick paper,
- matter,
- filler,
- glue,
- stationery,
- paper tape.
You need to draw a circle of the required diameter on thick paper and cut it out. Cut rectangles for the sides. 
Instructions:
- Form a box with adhesive tape and clamps.
- Paste the box over.
- Glue the bottom of the box with a cloth.
- To seal the side edges, cut a rectangle out of not very thick cardboard and glue it over with a cloth.
- Cut the lid out of the cardboard and glue the side. Put the synthetic winterizer on the lid and glue it with a cloth.
- Glue the edge of the cover with an additional piece of paper with a cloth.
Needle casket
To create a needle box you need:
- White fabric in peas.
- Satin ribbon.
- Scotch tape reel.
- Consolidated cardboard.
- Glue gun or regular quality glue.
- Scrapbooking paper.
- Stationery.
- Fillers.
Instructions for shaping a needle box made of cardboard with your own hands:

The needle casket is almost ready - it remains to decorate:
- Glue the red satin ribbon on top, bottom and sides.
- On a white fabric in scarlet peas, circle the coil.
- Sew the canvas, leave half unstitched.
- Cut off the parts so that the seam does not come apart.
- Turn on the front side.
- Insert the cardboard circle into the fabric.
- Put some filler inside.
- Glue the bottom of the fabric with cardboard.
- Add more filler, tuck the top of the fabric, glue it to the cardboard.
In order to decorate the cover of the needle bar, make a bow from the tape and glue it to the cover.
Master class on creating a box with drawers
You can make an excellent box with retractable drawers with your own hands from available resources, for example, cardboard or matchboxes. Only tiny rings will fit in ordinary matchboxes, but if you buy tourist or fireplace matches, you can make a full-fledged box.
Required items to create a box:

Formation will take very little time:
- matchboxes, without a layer of sulfur, glue together;
- glue thick cardboard outside;
- surfaces that are visible to decorate with wallpaper or film;
- fasten decorative buttons on the fishing line or wire using an awl.
Decorate with beads, designs, bows if desired.
Box in the form of a doll sofa
Instructions for making a box in the form of a doll sofa:

Step-by-step instructions for the organizer box
To design an organizer box, you must have:
- an untreated wooden box;
- velvet fabric;
- high quality glue;
- brushes.
Tools needed to create an organizer box:

Instructions:
- Stain the wooden box, everything that has not been absorbed must be wiped off with a rag.
- Using a drill, you need to drill a hole in the center in order to fix the handle
- Cut out two pieces of fabric slightly smaller than the bottom and lid of the box. Then you need to cut another piece in half. Next, you need to lay a short piece of fabric on a long one, sew to make a pocket. Secure the velvet fabric and organizer inside the lid and at the bottom of the box.
Box in the form of a book with a cache
Instructions for making a cache-box:

Making a shabby chic box
Components for making a box:

You need to cut a pattern from a decoupage napkin, then divide it into layers. Cover the entire area of the pre-made cardboard box with paint. Dry with a hair dryer and leave to dry completely. Rub the box with a candle in places where there will be scuffs. Be sure to rub the corners with a candle. Cover the box with white acrylic primer and dry.
Rub the box with sandpaper to create a worn effect. Attach the decoupage pattern to the box, apply glue on top. Allow to dry, paint over the edges of the pattern with a brush with your own hands. Dry and varnish.
Ideas for decorating a homemade casket
A cardboard box with your own hands can be easily decorated with anything, suitable: beads, old unnecessary jewelry, decorative stones, buttons, etc. Get creative, you can look at various decorating options online for inspiration. Do not be afraid to do something of your own, the main thing is that it is done from the heart.
There are many variations of creating a beautiful cardboard box at home. Have you decided to do something interesting with your own hands? Choose the option you like and go for it.
Video: DIY cardboard box
How to make a cardboard box with your own hands, see the video:
Master class on how to make a cardboard box with your own hands:
A homemade cardboard box is a great way to present a gift to a loved one. It can also be used as a jewelry box or a beautiful "container" for storing photographs. Today we will tell you how to make such an accessory with your own hands.
We have selected three step-by-step video instructions for you, with the help of which you can easily master the manufacture of this box. Master classes are similar, but each of them talks about boxes that have certain features. The principle of making the base is not very different, so choose the box for its appearance.
What do we need?
- watercolor paper
- cardboard for the base (you can take a cover from an old book)
- thick paper
- PVA glue
- clothespins
- decor elements
It is not necessary to use watercolor paper, but it is preferable. The fact is that such paper adheres perfectly to cardboard and has a beautiful appearance. If you don't have one, take a napkin and follow through.
Option one: vintage style cardboard box
This craft will be an amazing gift for a woman of any age. The product looks no worse than an ordinary wooden box.
The manufacturing scheme is quite simple, but the accessory turns out to be quite durable. You can add a beautiful antique metal decor to the cover to make the box look even more beautiful.
Option two: a box with a lock
A great idea for making a functional beautiful box.
Inside, additional compartments and partitions can be made to organize its internal space. These boxes are especially popular with modern girls.
Option three: a box with a key
Such a cardboard box will appeal to those who are going to keep some secret papers in it.
Put letters from fans, photos of dear people, or just money in the box (why not?).
As you can see, all these ideas are very easy to repeat. You won't spend even an hour making any of these boxes. Unless, of course, you think about too complex decor (for example, decoupage). Try it again - you won't regret it!

Any souvenir or important trifle needs good packaging. A box, an original bag or an unusual casket is perfect for this role.
One of the simplest options is a do-it-yourself cardboard box. But even such a craft can look amazing!
Stylish, simple and very beautiful. Such a cardboard box will become a worthy setting for your souvenir, or even the souvenir itself, in which it is convenient to store various trinkets and small items.
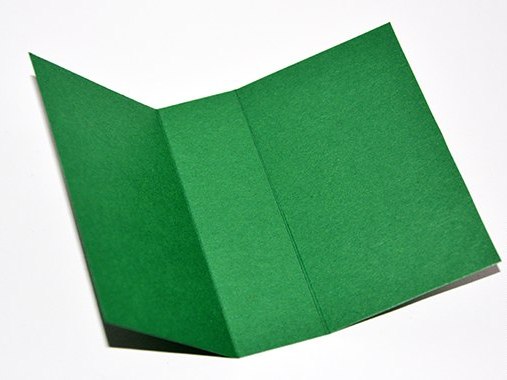
At the beginning of work, we need a diagram with a sweep and cutting of future crafts. You can see it in the picture below. We print it out or just trace it onto a piece of thick paper or cardboard. The fold lines are marked in black, the cut lines in red.


We cut out the workpiece according to the template, make the necessary cuts and bends. Next, glue the resulting template. We will have a finished craft frame.
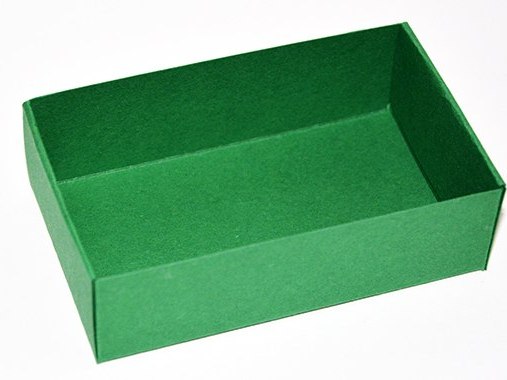
Now, from the same piece of material, or you can take a darker shade, we cut out another blank - the lid and bottom of the box made of cardboard. Note! The length of the new workpiece consists of the width of the bottom and cover of the workpiece, the height of the craft plus a small protrusion. Look at the photo, everything will become clear from it.
We glue the cut out part to the bottom and side, and close the lid on top. For the craft to be "locked", use a thin ribbon or beautiful lace, as shown in the picture.

The main part of the craft is ready. You just have to decorate and decorate it in accordance with the holiday, or your own wishes.
To decorate our cardboard boxes, beads, mini appliques, and other decorative elements that may be at hand are great.
There are many ways to make caskets from scrap materials for storing small items, jewelry or gift wrapping. One of the most popular and affordable materials is cardboard. A cardboard box can be of any shape and with any decor. Any beginner can do such a craft with his own hands; this does not take much time.
We make a simple rectangular cardboard box with our own hands
We cut out a cardboard pattern according to the scheme that can be seen below. Choose the sizes depending on the purpose of the box. A small box is suitable for jewelry, and a larger one, for example, for needlework.
After the workpiece is cut out, we proceed to the assembly. Let's analyze the manufacture of the box step by step.
- We fold the cardboard along the lines.
- We glue all the joints. It is better to choose high quality instant glue or PVA. In addition, a good option would be to glue the parts with tape.
- Decorate the cardboard base with wrapping or other decorative paper. You can use scraps of beautiful wallpaper.
- Be sure to leave fold allowances when cutting paper.
- We wrap the paper and glue it to the inner sides of the box first. We glue the inner walls and bottom with other paper.
- We decorate the box to our taste with any paper elements, flowers, lace, beads and beads, etc.
This beautiful and romantic little thing can also be made very quickly from scrap materials.

- Cut out two heart-shaped blanks from thick paper or cardboard.
- We also cut out 2 rectangles for the side walls. One of the sides will have teeth for gluing.
- We use instant glue for assembly, it is the most durable. We glue both rectangles.
- We glue the second heart from the bottom, closing the teeth.
- We decorate the box with decor. Imitation lace will look good.
- We make the lid of the box in the same way.
- We complement the work with decor in a romantic style - beads, flowers, butterflies, etc.

- Details made of thick binding cardboard, 8 pieces: two each 16x4cm, 17x11.5cm and 10.8x4cm, one each 16x11cm, 17x3cm.
- A piece of fabric 30x60 cm.
- Details from padding polyester in sizes: 40x4cm, 17x11.5cm, 17x3cm.
- Decorative scrap paper 30x30 cm.
- Lace strip 30x2 (3) cm.
- Decor elements to your taste.
- Glue "moment" dries quickly.
- Ruler and pencil.
We begin our master class with making the base. We glue the details for the walls to the bottom. We glue the lower ends of each part with glue, apply, align and press well for a few seconds. If the glue is good, it sets quickly. Small inconsistencies will be covered with cloth and paper.
While the craft is drying, prepare paper and fabric for the base. If the scrap paper is with a picture, we take into account its future location when cutting out parts. We work according to these schemes:

Before gluing any parts, be sure to try them on; at this stage, errors can be corrected.
The most accurate way is to cut with a clerical knife and an iron ruler.
It is tedious to draw along the fold lines with a non-writing rod or stick, this makes it easier to bend.
The fabric should be slightly moistened and ironed, straightening all possible folds. Cut out details: 7x56 cm and 23x33 cm.
On the side surface of the box from 3 sides (excluding one long one) we glue a synthetic winterizer. You don't need a lot of glue here, just a few drops or double-sided tape is enough.
Glue a narrow long strip of fabric on top. We start from the middle of the back side. More glue is needed here.
Without pulling the strip tightly, we lay it around the entire perimeter, the ends should converge exactly at the back. A few drops of glue can be applied to the synthetic winterizer. A small overlap is more of a plus than a minus. Glue the second half of the strip on the back.
We fix the edges of the fabric. First, turning the work over, glue the protruding parts to the bottom. First we glue the long, then the short sides. The bottom will be covered so a lot of glue can be applied.
Before bending the fabric from above, cut it with scissors at all corners, not reaching 1-2 mm to the edge of the cardboard. We glue the same first long, then short parts.
We glue the inner surface with scrap paper, having previously tried it on. First, we glue the strips to short walls, then to long ones, and lastly to the bottom. The base of the box is ready.

We work with the cover. We glue the synthetic winterizer to the rear side and top (cover) walls. We lay out the workpiece on a piece of fabric.
We leave a gap of 6-7 mm between the parts. Turn over, leaving the synthetic winterizer at the bottom. We fix the corners by gluing them to the base. After that we glue the long and short sides. The cover is ready. You can try it on.
Let's start decorating the box. We glue the lace ties, marking directly on the cardboard, the frame (or other chosen decoration) on the lid.
Pull the threads inward and tie, secure with tape. We glue the last piece of scrap paper, running along the fold with a scissor handle. We glue the edges especially carefully.

We glue the base of the box and the cover, applying glue to the bottom. We pay attention to how the back wall lays down. After the bottom dries up, glue the side part.
Related videos
For those who want to disassemble the making of boxes more clearly and get new ideas for creativity, we have prepared a selection of video master classes:
Every woman at least once in her life has come across a situation when her favorite small trinkets have nowhere to store. Someone solves the problem by conducting an audit in the house. But you can do with "little blood", without depriving yourself of the accumulated wealth - to make a box out of cardboard with your own hands.
Crafts made of cardboard - original hobby with a distant history. In the modern world, few people own this art, however, twenty years ago it was the most popular way to have fun on a boring, rainy evening. The boxes were made not only from new cardboard, but also from old postcards or magazines.
The most interesting thing is that despite the incredibly beautiful appearance of the finished product, the manufacturing process is very simple. To create a paper box does not require special skills or knowledge, it is enough to collect all the necessary materials - and you can start.
Preparatory stage
 On the Internet, you can find many ready-made blanks for creating a cardboard box. They only need to be printed and assembled. But it's much more interesting to create a blank on one's own... You have to show your imagination and a little ingenuity, but the result is worth it.
Before proceeding with the creation of a blank, you need to decide on the method of fastening the parts:
- Gluing;
- Assembly;
 The set of basic materials.
However, techniques can be combined using both gluing and assembling for a single product.
The finished box can be additionally decorated applique or flowers made of satin ribbons. It all depends on your taste and the purpose of making the box.
Gallery: cardboard box (25 photos)


Box by gluing
 So, let's get down to the main question of the article: how to make a cardboard box? Consider the simplest option- glued cardboard box. The capacity and purpose of such a product depends on your needs.
We need:
- Thick cardboard;
- Two tetrapacks for milk (one tall, the second medium-sized);
- Clothespins;
- PVA glue;
- Super glue;
- Scotch;
- Kraft paper;
- Scissors;
- Two small magnets;
- Wood beads;
- Materials for decorating the product: beads, ribbons, fabric, flowers, fringes, etc.
Let's start the master class:

 In such a product, you can store various women's little things or materials for needlework. The original way to use is to keep in a box clock... For fashionistas who have a large number of these wrist accessories in their wardrobe, such a box will be a real salvation. Watch mechanisms will be protected from dust and accessories will no longer be lost, being always in one place.
The assembly method is the simplest possible. To complete it, you need to find on the Internet and print a ready-made template on thick paper. Then, using scissors or a utility knife, cut out the shape and assemble. After assembly, the product can be decorated with any decorative elements. This option for creating a casket is ideal as a gift wrapping.
Original box for money
 To store money, many use various hiding places which can be easily purchased at any gift shop. But why, if you can make a money box with your own hands? The original piggy bank will reliably hide your savings and decorate the interior.
To create a storage box money we need:
- Book (it will serve as a cache);
- Stationery knife;
- PVA glue;
- Glue brush;
- Kraft paper;
- Pencil;
- Ruler.
Let's start the master class:

The product can be used as packaging for valuable gift, for example, luxury watches. Having made several compartments in the box, it can be turned into a storage for small items. Or make a curly hole, then such a box is ideal for storage memorabilia.
Cardboard box
 Another easy way to create a cardboard box with your own hands is to use a ready-made box. For the master class we need:
- Simple cardboard box;
- Magazine clippings;
- PVA glue;
- Pencil;
- Ruler;
- Thick cardboard;
- Lace or rope.
Getting started:

 By the same principle, you can do casket with compartments or drawers. Only in this case, it is necessary to braid the box after connecting all the parts. It is not difficult to do this kind of work. Print schema the caskets you like, cut out and collect the details.
When the product is assembled, start attaching the tubes to the underside of the box, avoiding the front side. Hide the top and bottom sides of the product under sheets of thick cardboard. Treat the outside of the drawers in the same way, hiding the ends of the tubes inside the compartments. The finished box can be decorated kraft paper, ribbons, patches or applique.
Beautiful paper crafts will always be relevant... Such products can be used for your own needs or presented as a gift. After all, handmade gifts have always been valued above purchased trinkets.