Templates leaves cones acorns for garlands. Master class “A garland of autumn leaves. Crafts from leaves and cardboard
Outside the window, the golden time of autumn is in full swing, which means it's time to decorate everything that surrounds us in autumn style. Autumn-style decorations include: yellow leaf paintings, autumn bouquets, autumn decorative wreaths, etc.
In this article, the website news portal has prepared for you another good option for decorating the interior - an autumn garland. And it is best to engage in the manufacture of the garlands proposed in our article in the company of your beloved children.
autumn garland
Garland of autumn leaves
Garland of autumn leaves

Many people make garlands from real fallen autumn leaves, and we suggest you use ready-made templates and make autumn leaves from colored paper yourself.
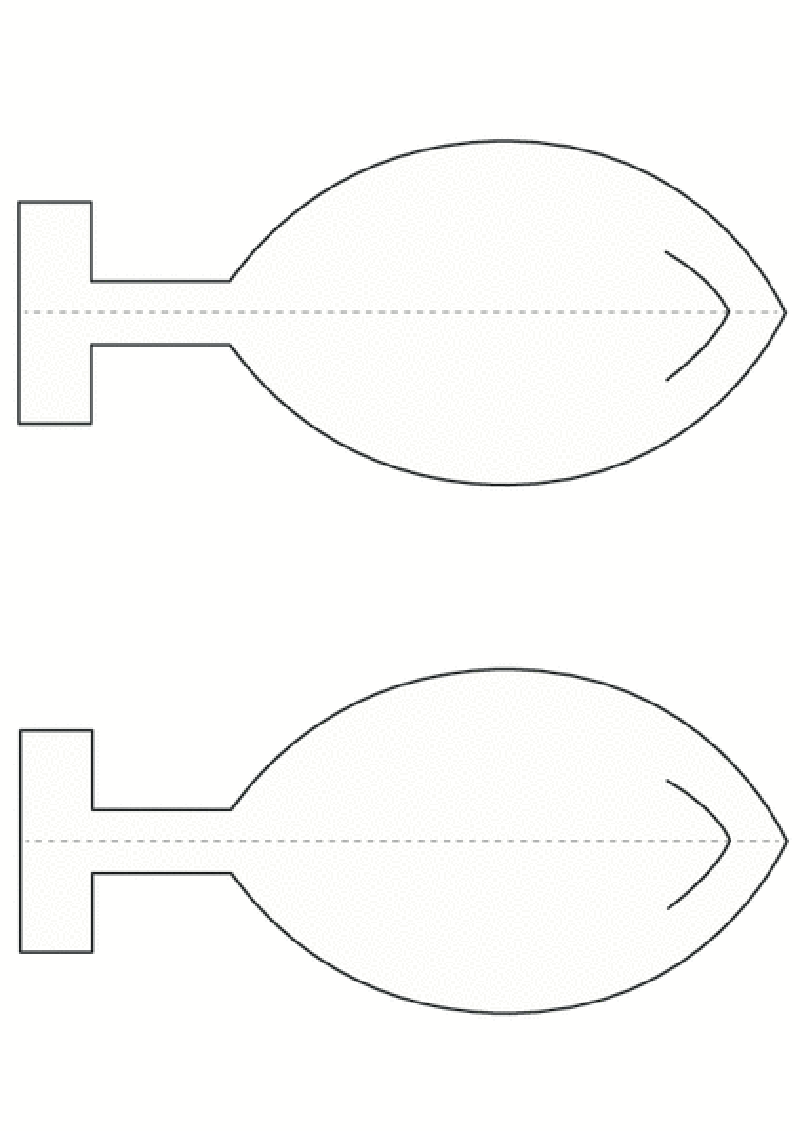
So, print the proposed template. Then carefully cut it out.

Using the template, cut out as many colorful leaves as possible from colored paper.
Draw a vein on each leaf with a black marker.

Connect the leaves together using the holes in the paper leaves and protruding ponytails.

Hang ready-made paper garlands of autumn leaves from the cornice, window frame, doorway, ceiling or hang on the walls. You will get a bright and original decoration.

DIY autumn garland
Garland of apples

Autumn is harvest time! And of course, tasty and fragrant apples are included in the list of fruits that are harvested in the fall. We propose to make just such an unusual apple garland!
For crafts, you will need one apple, paints and paper.

Cut the apple in half! Coat the inside of the half well with paint, and then apply it to white paper. Use half an apple as a stamp.


Decorate the finished apple prints with a green tail, which you draw with a brush. Now cut the apples with scissors and connect them together with a needle and thread.
autumn garland
walnut garland

And one more version of an unusual autumn garland! This time you will need the following materials: walnuts, paper clips, green fleece, paints.
Make a loop out of a paper clip and attach it to the walnut.

Cut out small green leaves from green fleece and attach them to a paper clip.


Walnuts must be dyed red.

As a result, miniature apples should be obtained from walnuts.

Using a paperclip loop, hang the apples on any tight rope, thread, tinsel or elastic band.
Such garlands of artificial autumn leaves look great at some distance from the wall, around flat chandeliers and lamps in the center of the room, and also as curtains in doorways. Another similar garland can be hung over an unused large dining table right up to the table surface so that it conditionally divides the table top in half along its entire length. Colorful fabric leaves cascading down from the ceiling create the most breathtaking, magical fall look.
To you will be required:
- Artificial (you can also try real ones - see below) autumn leaves of different colors and preferably shapes - made of fabric;
- Sharp scissors;
- Strong (silk or silk-like) threads of a pale autumn shade (any of the palette, better than beige or muted gold - more inconspicuous);
- Large needle;
- Stationery, or ornamental, or hot glue (any glue that is transparent after drying, which will not spoil the fabric);
- Mastic for posters (for wall mounting it is safe for wallpaper and whitewashing - “Poster putty”), wall brackets, small suction cups or any other point method convenient for you to hang light things from the ceiling (not required if you hang a garland like a panel on wall - you can use a wooden beam for the upper base of the panel, on the chandelier itself or nail the garland to the door jamb at the top);
- Roulette;
- Decoupage glue as needed and desired (for real leaves).
1. We buy sets of artificial leaves in needlework supermarkets, home and garden stores or various Runet stores. You can also purchase easily disassembled garlands. Choose leaves from fabric of any density, you can with small plastic parts, you can even plastic or plastic coated. But the last 2 options are not suitable for curtains, because they will scratch the skin and cling to hair and clothes. So, if this is a garland, we cut ourselves a lot of individual leaves with small cuttings.

You can try to work with real leaves, but they are too fragile when dried, and being strung “alive” on a thread, they quickly curl up into dull rolls and turn brown. Here you can try to experiment with decoupage glue, covering it in 2-3 layers (drying each layer completely before applying a new one) all sides of the leaves, both “live” and dry (very carefully so as not to damage), then you MAY have something it will work with real fallen leaves. But for curtains, natural leaves, of course, are also not suitable.
2. Using a tape measure, measure the distance from the ceiling to the desired length of each level of the garland, write down the data obtained. If you decide to hang a garland over the festive table, it is optimal that it ends 30-45 cm before the countertop, so as not to get into the food and not interfere with the communication of the guests. Do not forget that the garland should not hang over the lit candles and close to them - start a fire!

3. Cut the required number of threads (depending on the density of the garland) according to the lengths obtained in paragraph 2. The color of the thread should be such that it practically disappears purely visually, being suspended already with leaves. When threading into the needle, leave a short tail of at least 10 cm, since such a thread slips out of the needle very easily during this work.

4. For each thread, depending on its length, we string 4-5 leaves through the center of the latter. Try to immediately determine the point approximately in the center of the sheet, on which it will be balanced suspended. Change the distance from the upper end of the thread to the first leaflet and between the leaves on the threads so that the garland does not turn out to be monotonous with wide stripes-empty "holes" along the entire length.

In the place where the thread is in contact with each leaf, apply a drop of suitable glue from below (under the leaf) so that all the leaves are more or less securely fixed in place. Before lifting and hanging the garland, leave it on the table overnight - until the glue has completely dried.

5. If, in order to hang, you have to transfer the finished garland to another room, take your time and be careful, because the leaves are VERY easy to tangle, besides, they are not well fixed on the threads so that they can be quickly and easily untangled. It is best to pack each individual thread with leaves in a separate bag, a large envelope or wrap it in a roll in wax paper before moving around the house or, moreover, transporting it to another building.

6. We fix the garland on the ceiling in any convenient way. The easiest and most harmless thing (for the ceiling - it will not leave any traces after itself and is easily removed at the same time) is to use the modern mastic described above in the list (you can buy it on eBay): it is plucked off the bar, rolled into a ball and the upper tip of one thread is placed in it with leaves.

7. Then the ball with the tip of the thread is simply pressed against the ceiling - and that's it! Will keep! Do not forget to make equal large gaps between the threads, because the leaf fall is not very thick. But you can use any other method of mounting to the ceiling. By the way, remember that suction cups fall off pretty quickly from almost any surface, even if there is almost no weight on them.

After hanging about 4-5 threads, step back from the garland and see if you like how it is distributed in space. In the picture below, 20 garlands of the same length are suspended. Hanged - cut off all the ends of the ropes hanging down after the last leaf on each garland. And if there is a purely aesthetic reason, you can cut some garlands even higher, cutting off the last 1-2 leaves.
Add-ons:
- At other times of the year, instead of autumn leaves, you can use artificial rose petals made of fabric or snowflakes;
- If you have a certain frame hanging above the dining table (with lighting, dishes, etc.), it is easiest to hang such threads on the frame;
- No matter how hard you try, a couple of threads from a garland will still get tangled and / or damaged. This is life, accept this fact with universal calmness, and unravel the threads VERY slowly and carefully!

Oksana Stol
Hello everybody!
Today I will show you how easy and simple it is to make a garland of autumn leaves using the origami technique for interior decoration.
Required material:
Paper A -4 color
Glue stick
Scissors
Template for maple leaves
Ruler and pencil
Making the first leaf
1. Take two sheets of paper at once and fold in half

2. Draw a diagonal and cut along the line

3. We open our blank like a book (it turned out a triangle) and fold it into an accordion, about 1 cm wide.

4. In the middle of the accordion, we tie a long thread and glue


Making the second leaf
1. Draw two sheets of paper folded in half according to the template at once


3. Fold our workpiece into an accordion

4. Tie the thread and glue

5. These are the leaves we got

Making the third leaf
1. I fold two sheets of paper in half at once, draw a diagonal and draw the necessary "teeth"

2. I do the same as the other two leaves. I fold it with an accordion, tie it with a thread and glue it.
3. I got such a leaflet

We collect all the leaves in a garland and decorate our group or music room.

Crafts from autumn leaves will help to decorate the interior of the house. Accuracy in their manufacture and knowledge of a few secrets to preserve this fragile beauty will help make such jewelry durable. In these master classes, we offer you several instructions on how to properly process the leaves and how to make garlands and wreaths of amazing beauty from them.
Leaves waxing

The beauty of autumn leaves is undeniable. Their bright, saturated and warm colors are able to please the eye in any crafts. The only problem is that this beauty is short-lived and the leaves crumble over time, change their color, and the crafts created from them have to be thrown away. But there are ways to preserve the leaves and their bright rich color. One of them is wax.
materials
To wax the leaves, you will need:
- autumn leaves;
- wax or candles;
- aroma oils;
- wooden spatula;
- two metal containers;
- wax paper.
Step 1. The very first thing you need to collect the leaves. Despite the fact that you need dry ones for work, you can choose only slightly dried ones, which are still able to bend without breaking or crumbling. Leaves try to choose clean, whole and preferably different shades.

Step 2. Be sure to process all collected leaves. Clean them of dust, dry and straighten. You can clean the leaves with a dry brush or a damp cloth. And you can even them out by simply putting them in a book or newspaper and pressing them down with another book on top. After a couple of days, the leaves will be ready for further work. Please note that for the convenience of work, the leaves should be with petioles, they do not need to be cut.
Step 3. Lay the finished leaves on the table so that they do not touch each other. It will be more convenient for you to work this way.

Step 4. Take two metal containers of different sizes. The smaller container should be such that the sheet is vertically immersed in it completely. Fill a large bowl with water and drop a small bowl into it. So you get the design on the steam bath. This is exactly how the wax will need to be melted. You can take any wax, ordinary candles are also suitable, but without dyes.
Step 5. Melt the wax by stirring it with a wooden spatula. Add a few drops of aromatic oil. This will give a pleasant smell to your future crafts. For this master class, drops of cinnamon oil were used. Meanwhile, lay out a sheet of waxed paper on the table.
Related article: Beaded orange tree: do-it-yourself weaving pattern with photo

Step 6. Take a dry autumn leaf by the petiole and gently lower it into the wax. The sheet should be completely covered with wax, hold it in a container for a while, remove it from it and let the excess wax drain.
Step 7. Lay out the finished leaves on wax paper one at a time. It is necessary that they do not touch each other. Leave the leaves in this form until the wax has completely solidified.

Leaves are ready! Now you can use them to create garlands, wreaths and other fall crafts. These leaves look original, suspended from the ceiling on a nylon thread. Such a synthetic thread is almost invisible and creates the illusion of beautiful autumn leaves floating under the ceiling. You can pass the thread through the petioles using a needle. Having thus strung a garland of the desired length, secure it.

DIY leaf garland

Light and floating garland will bring the feeling of real autumn leaf fall into the house. Creating such an illusion of lightness with your own hands is not as difficult as it seems at first glance. You can use this garland anywhere: at the entrance to the house, under the ceiling of any of the rooms, or by attaching them to a chandelier with a concise design.
materials
To make a garland of leaves with your own hands, prepare:
- leaves;
- fishing line;
- wax paper;
- masking tape;
- hot glue sticks;
- thermal gun;
- scissors.
Step 1. Gather the leaves. For this garland you will need the same leaves, whole and similar colors. Their size may vary. Try to keep the leaves already dry, straight and clean.
Step 2. Prepare the leaves before work. Be sure to clean them of dust and cut the petioles a little. Arrange the leaves in groups according to size.

Step 3. Decide on the place where your garland will be located. Measure the desired height of the garland. Cut a piece of wax paper the same size.
Related article: How to sew a mitten
Step 4. Lay the wax paper out on a work surface. It must be absolutely flat. It could be a table.

Step 5. Take the fishing line, fasten its free end to one side of the wax paper. Stretch the fishing line to the end of the cut sheet and secure it with another piece of masking tape on the other side. Cut the line.

Step 6. Place prepared leaves face down on waxed paper. The fishing line should pass from above from the back of the leaves. Lay out the leaves themselves in size from largest to smallest. Between them, make small indents.
Lay out the very first sheet of the garland thread, indenting a few centimeters from the edge. This free piece of fishing line will come in handy for attaching the garland. Keep this in mind when deciding on the length of the garland.
Step 7. Secure the fishing line with the leaves by gently dripping hot glue on them.
Wait for the glue to dry completely and remove the masking tape. As a result, you will get one thread of a garland with leaves floating in the air. Based on your own ideas, in the same way, make the number of similar threads you need. To attach them to the chandelier, simply tie the end of the fishing line around it.

To make the garland last longer, you can additionally prepare the leaves before work by treating them with wax or decoupage glue.

Wreath of autumn leaves

Another way to decorate a room, table or front door during the autumn season is with a handmade wreath of autumn leaves. Children can use a similar craft to decorate their crafts for school or kindergarten. The undeniable advantage of this master class is that the base of the wreath is made, which you can then complement with other decorative details in the autumn spirit.
materials
To make a wreath, prepare:
- ice cream sticks;
- dry autumn leaves;
- thick colored paper;
- scissors;
- glue;
- PVA glue.


