Vest from old jeans girl. Fashionable denim vest with your own hands
A do-it-yourself denim vest (patterns, detailed instructions, tips for decorating - that's what we'll be talking about today) is an exciting activity for the benefit of yourself. Fashionistas always strive to stand out in a crowd of people, but with the rapid development of democratic companies and mass markets, this has become an almost impossible task. And is there a way out of this situation? Of course have. You just need to go through your wardrobe and get out of the closet old things that you will no longer wear. Today the focus is on old denim shirts, denim trousers, stretched T-shirts with prints and out-of-fashion evening dresses.


A little about the material
Today we will talk about not the most delicate and light fabric. It appeared at the beginning of the last century, when, in the midst of industrial development, ordinary workers began to experience an acute shortage of clothing that could protect against the negative effects of chemical compounds. In the mid-60s, designers turned their attention to this rough material and presented several collections of trousers. Gradually, the assortment of outfits and styles has greatly expanded, and now women of fashion flaunt in denim skirts, vests, shirts, shorts, sundresses and overalls.


 But few people know that such changes were influenced by far from eminent couturiers, although their merits in this should not be underestimated. The key role was played by representatives of the world famous subculture "hippies". They did not want to part with their favorite pants, so they were periodically shortened, transforming them into shorts, then into skirts. It was they who taught us how to shred worn things so that they make really durable and stylish outfits that can last for several more years.

Variety of options
Today, there are many ways to breathe life into well-worn denim jackets and trousers with holes from hiking in the countryside. We will begin the description of the master classes with the simplest option.


Cut off the sleeves
It is very easy to transform a shirt into an original vest. It is enough just to pick up scissors and separate the sleeves from the product. If you want, you can adjust the length and get rid of the collar. Stylists do not recommend processing the edges, it is better if they remain shaggy.


Let's say you have already completed all of the above steps. So, you just have to decorate your hand-made with an extravagant outfit. Here are some ideas for makeover:
- Take a worn T-shirt and cut off the ornament. It can be an image of a sad cat, the Eiffel Tower, an interesting inscription or an emoticon. In general, the choice of pattern depends only on you and on your desire to say goodbye to your favorite top forever. Now attach the workpiece to the back of the vest and sew along the contour on a sewing machine. To prevent others from seeing the seam, make an edging of beads or stones. Do you want to take out the typewriter? Apply special glue to the wrong side and press it firmly against your outfit.

- Applications. This simple way of decoration has been familiar to women of fashion since Soviet times.

Advice! Floral arrangements have come into vogue this year. Don't miss the opportunity to make your look feminine and unique!
- Lace inserts. Buy the right amount of material from a specialty store, cut into thin strips and decorate with them the back or front, or better, both. This will add a bow of coquetry and mischief.

- Thorns. A bit shocking, but very good when the vest is made for young girls. Highlight your shoulders, collar or pockets with them.

- Basque. If you have an unnecessary evening or summer dress, feel free to cut a piece of fabric from it, give it the shape of a flounce and sew it to the belt. This contrasting decor will accentuate the waist and make your silhouette look slimmer.

Jeans patterns
Inspiration can be found in fashion magazines and online resources. Now we will describe in full detail one of the options that is suitable for everyday use.
- Before getting to work, wash the workpiece well, iron it and open it.

- Pick up a small crayon or sharp bar of soap. Position the back template in such a way that the seams of the legs fall on its center.
- Place the front shelves mirrored.
- Circle all the details and start cutting out the future product.
- Now get down to finishing the edges. You can use an overlock, and sew the seamy side with a regular stitch. This will give the outfit an aesthetic appearance.
- Sew fringed stripes on the armholes.
- Fasteners can include zippers, buttons and hooks.
- Sew side and shoulder seams.

Fashionable hand-made with pockets
You have probably already guessed that the main element will be the details cut from the back of the trousers. Take out whatman paper or old newspapers from the cabinet, we begin preparatory work:
- In the area of the buttocks, draw an equilateral heptagon. There should be pockets in the middle.
- Long strips are sewn to the workpiece. They will serve as shelves, so it is recommended to make the upper part narrower.
- Attach a narrow rectangle to the back of the model. This will be the back. Use an elegant bow as a decorative element. You can also attach a strap or buckle.


Advice! Since the back will remain almost completely open, wear T-shirts and longsleeves under the bottom. Alcoholic T-shirts and tank tops will not work as they also expose the shoulders.
Important preparations
Before you start experimenting with boring outfits, you need to carefully prepare. You have no idea how exciting and fun this process is. Choosing the right decor in stores, looking at showcases with models, looking for inspiration in magazines and the Internet is a real pleasure for those who are tired of everyday routine and dream of plunging into a creative hobby with their heads. First, prepare all the necessary attributes:
- Shabby things. As mentioned earlier, you can use absolutely anything - from evening wear to home T-shirts and tops. Naturally, you can't do without a denim jacket or trousers. You can buy lace, guipure, chiffon and other types of fabric in the store.

- Threads. They should match the color of the base materials. But sometimes you can move away from the usual patterns and use strings of contrasting colors.

- Needles and safety pins (3-4 pieces).

- Scissors, rulers, soft meter tapes.

- A3 sheet of paper.
- Pencil, felt-tip pen, or marker.
- A bar of soap or crayon.

Advice!Today, unexpected combinations are coming into fashion. Corduroy and velvet are in trend this year. They give the product incredible chic and luxury.

- The threads you choose must be strong. This will help keep the vest's excellent aesthetic qualities for longer.
- Use nail scissors or a razor blade to carefully open the material.
- If you sew an elastic band to the wrong side of the back, it will accentuate the beauty of your waist.
- When large trousers are used as disposable clothing, it is enough to simply cut off the joints.
- First, you will process the parts by hand. Only after trying on it will be possible to connect the elements using a sewing machine.
- Handle decor carefully. In some cases, glue is used and it is important that no traces of it are visible on the fabric.


What to wear with?
Let's say you have already created your creation. Now it lies on the desktop and pleases you with its beauty. Most likely, the question has already arisen in your head: "With what to wear a masterpiece, created by your own hands?". And before we say goodbye to you, our dear readers, we will consider this topic in detail.
- Here's a perfect combination for every day: a new vest (by the way, no one else has such a second one), a stylish T-shirt and fashionable glasses.

- A look in the spirit of glamorous urban chic: an oversized T-shirt with animal motifs, a short denim skirt and a waistcoat.
- A strict black jacket and tapered trousers. Shortened options can be paired with chunky flat boots with lacing and studs.

- Long sleeve V neckline, beautiful ballerinas, moccasins, loafers and squadrons. You can also opt for chunky platform ankle boots or cowboy-style boots (the undisputed trend of the coming year).
- Long maxi dress, sandals and accessories with floral print.

- A horizontal striped sundress and your hand-made are a great ensemble for walking around town and out into the countryside.

- Bright jumpsuit and large wedge shoes.
Buttons and rhinestones
Naturally, you need decorative elements to decorate your outfit. They can be “peeled off” from an old dress or bought at the nearest store. The choice of shiny stones must be approached with the utmost seriousness.
For example, here it is appropriate to talk about pretentiousness. Too large items will look very defiant, and wearing them on yourself is not a great pleasure. And if you really like such a decoration, do not sculpt it wherever there is free space. It will look gross. It is enough to select one or more elements.


Now about the colors. Today, a huge number of options are presented to the attention of customers. First, open your closet and determine the number of combinations that will form images with a vest. Highlight the prevailing shade and feel free to go to the store. Now you know exactly what you need.


 There are also metal rivets and buttons. They, like nothing else, harmoniously fit into the overall picture with denim. The latter, by the way, are very difficult to attach, so it is better to give preference to graceful buttons. Here you can reveal all your decorator skills. Let a large skull flaunt on the back, and a stand-up collar is indicated in front.

A hand-made vest is a stylish addition to any women's wardrobe. This versatile piece can be used almost anywhere - during the morning commute to work, to nature, to a meeting with friends, to the beach and on a romantic date. Believe me, you will always look great with her!
Although denim is one of the most durable materials, almost all jeans will wear down over time in specific areas. However, in general, they can remain almost new. You shouldn't rush to throw away such jeans, because you can create many very interesting things from them. For example, sew an original bedspread for a bed in a children's room. Or covers for sun loungers in the garden and a cape for a hammock. It turns out very stylish and quite modern.
Denim also makes excellent upholstery for furniture. Chairs and sofas with side denim pockets look especially nice, in which you can put books, magazines, TV remote control, telephone, glasses and various small things. Such furniture will look appropriate in the living room, in the children's room, and in the country.
But look at how funny the owl turned out to be, which can decorate almost any interior.

Denim makes great handbags, summer slippers, kids toys, and fashion accessories. Everything turns out to be very stylish and looks great. And now - a master class on making such a fashionable vest from old jeans with your own hands.

The back of the vest has an open back.

And on the front, it can be decorated with spikes or rivets.

Sewing vests from old jeans

First, we cut out a part of the material from the jeans with the back pockets.

Remove the seam by dividing the piece of fabric into two equal parts.

We measure the width of the resulting flaps.

We measure the same width on the leg.

Cut off a large piece of material from the leg, which will go to the upper front of the vest.

We do the same with the second leg.

Now we sew the lower and upper parts of the halves of the future vest.


We proceed to cutting out the straps of the correct geometric shape.


We carefully carry out all the necessary markup.


That's it, now you can start cutting out the straps.

First, we cut out the first one.

Then we put it on the second one and fix it. We cut out the second.

Everything, both patterns are ready.

Now we turn the edging and sew the halves of the vest around the perimeter.

Now they are almost ready-made.

Now you need to make a belt, which will hold the whole vest. We take another piece of the leg.

We turn the fabric on the sides and sew.

Sew the belt to both halves.


This is how it will look on the back.

Now we need to sew the straps from both halves of the vest at the top so that it can be worn around the neck.

We measure the distance, sew.

Cut off the excess.

The seam is ready.

This is how everything looks assembled. The vest is actually ready, it remains to decorate it.

We make such a beautiful bow on the belt.

This is how the vest looks from the side.

And so - in front.

And here is our vest made of old jeans in all its glory. The elements of the fittings with which we decorated it are especially clearly visible here.
A do-it-yourself denim vest is done quickly, and the result is stunning
DIY denim vest, sewing patterns and creating decor is not just a pleasant pastime, but also a stylish addition to everyday outfits. Such a thing, made with your own hands, can be worn to a party, a walk around the city or to the cinema. Indulge in the pleasure of turning old, worn jeans into a fashionable wardrobe item!


A little about fabric
The history of denim originates at the beginning of the last century. In the era of active development of industry, there was a sharp need for durable fabric for workers' workwear. Jeans and became a material that was actively used for sewing factory uniforms. Later, in the 60s, designers drew attention to denim, creating universal trousers. But the famous denim shorts and short skirts were promoted to the masses by members of the hippie movement. Representatives of this subculture did not want to part with worn jeans and came up with a cut of the trousers. Self-made skirts in those years could be seen at any disco or beach party.


Now, denim items are actively used to create any fashionable look. The fashion for this fabric does not subside for a minute. And if men are accustomed to wearing only denim trousers and shirts, then women's wardrobe is bursting with all kinds of skirts, shorts, sundresses, overalls and vests of different cuts and styles. The last thing, by the way, is very popular, because with a denim vest, even the most dull and boring bow, consisting of black trousers and a plain top, can look bright and beautiful. I am also pleased with the fact that the pattern of a vest made of denim can be made with your own hands, it is enough just to get a sewing kit and outdated jeans from the closet.


Important preparations
First, you need to prepare the "ground" for the upcoming creation of a masterpiece of street fashion. The following materials and items should be on the table in front of you:
- old jeans or store-bought fabric;
- threads (it is advisable to choose a tone in the color of the material);
- needles;
- safety pins - 3-4 pieces;
- scissors;
- ruler and soft measuring tape;
- chalk or a bar of soap;
- paper;
- pencil.


All is ready? Then we take a simple pencil in our hands and begin the first stage of a fashionable operation - design development. Take the creation of the project seriously, because you will use this blank to create patterns. Think over the style of the product and its cut, and based on your own preferences, splash out the idea on paper.
Simple denim pattern
To create a unique vest, you can buy fabric at the nearest store or get old things from the closet. Why will the item be unique? Self-made clothes are always originality and originality, and you are guaranteed not to see the same vest on someone you know.


When buying denim in a store, the main thing is not to overdo it. With a standard width of 1.5 meters, a meter of jeans is enough for you. But before going for the material, we recommend that you take a look around: if you did not have time to throw out your old, worn trousers or shirt - it's time to use them! Get them out of the box with unnecessary things urgently, and we will reveal to you the secrets of creating patterns for a denim vest with our own hands. So let's go!
To create an exclusive hand-made product, you will need the following measurements:
- estimated length of the product;
- chest girth;
- Waist;
- shoulder length.
If you don't have the skills to take measurements, your favorite T-shirt can come to the rescue. Just attach it to the paper and outline the contours with a few centimeters added on the sides. So the vest will lie freely and not create inconvenience when moving. If you want to make patterns for a denim vest for a girl with your own hands of a non-standard shape, change the boundaries of the future project in accordance with in full agreement with your own imagination and preferences of the teenager.


Crafting a vest from purchased fabric
- From the 7th cervical vertebra, set the measured length down.
- Draw the neckline, taking into account a 2 cm offset along the shoulder line.
- Make a 1.5 cm depression for the back armhole and shelf.
- For the shoulder cut, step back 7 cm from the top of the neckline.
- Draw a line for the edge of the side (parallel to the center of the shelf at a distance of 2 cm).
- From the top of the neck, lower 5 cm and draw a cut line.
- Decorate the bevel of the side and the bottom line of the shelf. The pattern is ready.
Cut out the created project and transfer it to the fabric. Outline the edges with a bar of soap or white chalk. Connect all patterns with safety pins. To begin with, you can walk along the connecting lines with a needle, and then secure the result with a sewing machine. If you wish, you can leave the edges without edging - fringe is still in vogue.

This style is perfect for creating an ensemble with a denim skirt, flared denim trousers, bananas. You can also wear a vest with a T-shirt with an interesting pattern and short shorts.
We sew a vest from old jeans
If you are thinking of throwing old denim trousers in the trash, which have been gathering dust on the top shelf for several seasons and "eyes" your eyes, do not rush to implement hasty decisions. Take them out of a nook, wash and dry. The blank for the vest is ready!


- Take a ruler in your hands and start drawing a pattern. Take the back of your trousers with pockets as a base.
- Draw a shape with seven corners on paper, cut out. Transfer the blank to the denim. Do not forget about the 1.5 cm allowance, it is necessary for the connecting seams.
- Baste the seam allowance by bending it inward.
- Sew the topstitch, loosening 5–7 mm around the edges.
- Make a second pattern in the same way. As a result, you should have two side blanks for a vest with pockets.
- Start processing the legs. You need to cut two harnesses for the vest. First, measure the required distance from a point on your chest to your neck. Transfer the indicated length to the jeans, adding a few centimeters for the seams. Make patterns so that the width of the workpiece gradually decreases towards the neck.
- Next, attach the wide edges of the material to the base of the vest, pin them with pins or sew with threads. Sew the edges with the sewing machine.
- Try on the product. Adjust the neck length if necessary.
- Now sew two straps together.
- Fold up the edges, and back off 5-7 mm and sew the seams on the typewriter.
- We make the back. This will be a narrow band connecting the sides of the vest. Measure the width of the back, and cut off the desired piece of fabric, taking into account the seam allowances. Be careful. The width of this part should coincide with the length of one of the sides of the heptagon, with which we made the base of the product.
- We process the edges of the back. The vest is ready, all that remains is to make the decor.


After taking all the steps listed, you are guaranteed to receive an exclusive item that you can decorate as you wish. We'll talk about how to decorate clothes made with our own hands later, but for now let's move on to studying step-by-step instructions for converting an old denim jacket into a new trendy vest.
Cutting out an old denim shirt
If you have a long-outdated jeans shirt lying around in your closet, you can give it a second life by making a spectacular vest. In most cases, this does not even require needles and threads. Simply cut or open the sleeves - a new item at your disposal. Here you don't even need to process the edges, the fashion for fringe never weakens.


If you are not satisfied with the length of the product, you can cut it to the desired size. Put on the workpiece and mark the required distance. Cut off the excess - the vest is ready.


Decorating a new vest
If you have already managed to use the above recommendations, now you should have a finished denim product in front of you. To make it unique, you need to decorate the vest in any way you like:
- Stones and rhinestones... This piece of jewelry can be purchased at any craft store. Just mark the decor with a pencil, drip textile glue onto the fabric and lay the stones. Press down slightly with your fingers and leave the product alone until the adhesive is completely dry.
- Lace. Such decor will always be in trend, be sure. Lace can be sewn over jeans or made into a connective fabric between garments. The stores now offer such a wide selection of this flirty material that you can choose the option you want for any ensemble in which the vest will be used.


- Bows and ribbons. Such delicate decor is used for sewing clothes for teenage girls. Bows made of the same fabric as the vest can become a more "adult" option.
- Scuffs and holes. You can use a blade to create "designer" holes. Gently run it over the surface of the fabric, and gradually the threads will begin to break and expose the weave.
- Applications. Now the seamstress has a wide selection of applications and patches that can be glued to a future vest. Those who have the skills of embroidery can make a flower or an interesting ornament on their own using a floss.


- Rivets and spikes. These accessories will help you create punk rock clothes. A spike can be used to decorate any item of clothing from shoulder pads to collar.
- American flag. Sew a piece of such fabric with stars and stripes to the back or one of the side parts - the effect will be stunning!
The case, as you know, is afraid of the master. And if this master has some secrets, the job will be completed faster, and the result will exceed all expectations. Want to know tips for sewing a denim vest? Well, okay, we persuaded, we tell:
- In order not to suffer for hours over the "dismantling" of old denim trousers or a shirt, use a razor blade and nail scissors.
 In order not to suffer for hours over the "dismantling" of old denim trousers or a shirt, use a razor blade and nail scissors
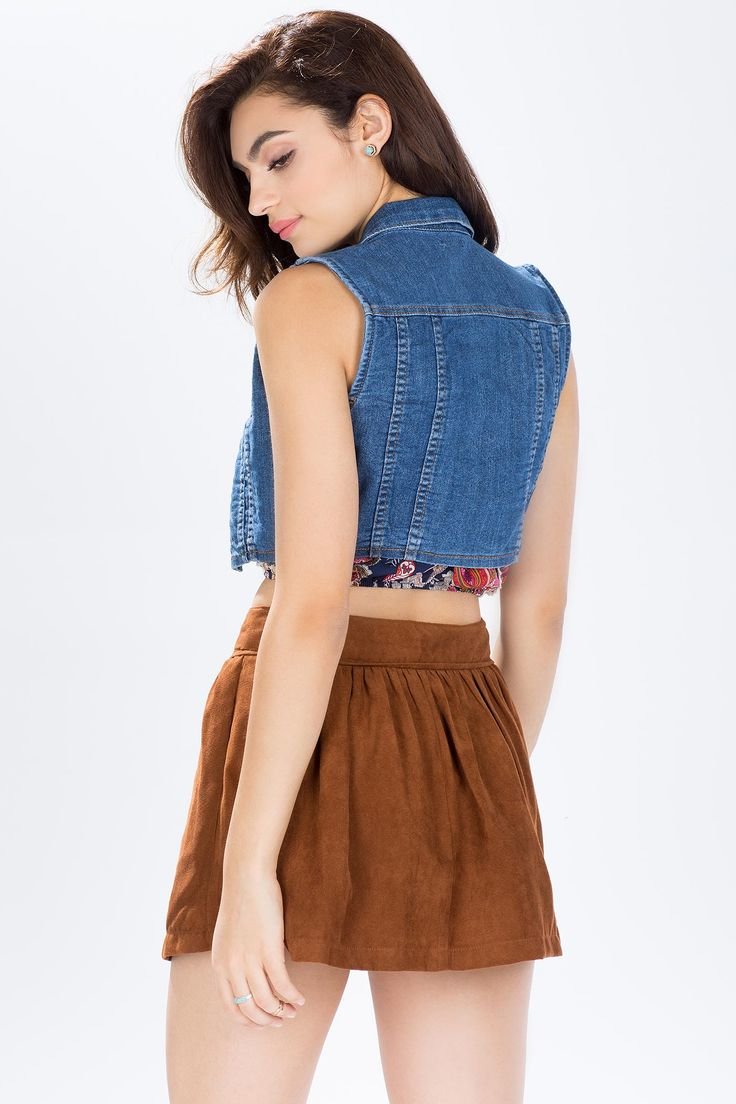
- When using oversized jeans as the starting material, you can simply cut off all the seams for simplicity and convenience. The small model will have to be cut.
- Try it on in front of a mirror before stitching all the pieces together. Only after you have made sure that the vest fits properly, connect all the parts with strong seams using a sewing machine.
What to wear with a new vest?
Here, after a few hours of efforts and creations, you see a new ultra-fashionable vest in front of you. Now it remains to decide what things can be combined with the product. At the end of this article, you will learn what to wear, how to combine and how to complement the new image.
The vest can be supplemented with a sheath dress - A new vest can complement a look with a solid top with straps, leggings and white sneakers. You can add a stylish baseball cap and a shoulder bag or backpack to this bow.
- A denim skirt, a loose T-shirt with bright ornaments and a vest - a casual urban look is ready!
- A strict black turtleneck and tapered black trousers. Isn't it an option, huh? An indispensable item for everyday looks
There are a lot of options for combining a denim vest, so there is no doubt that you will not be able to use your masterpiece for its intended purpose. Imagine, do not be afraid of bright and unusual ideas, strive to get away from patterns and standards - only a creative approach and a desire to be fashionable will help you create a really worthwhile thing!
Instructions
Prepare a paper pattern. For this, use a finished product, the contours of which should be transferred to paper, or a pattern from a sewing magazine. Choosing a ready-made pattern from a printed edition, take your own measurements in order to accurately determine the size according to the table given in the magazine.
Open the jacket with a razor or scalpel. If the jacket is made of leather and the seams are taped, iron them on the wrong side with gauze. Then fold back the edges. If the size of the details of the pattern allows you not to touch the seams, then cut out new elements without first dissolving the jacket.
8. Join the cut pieces of material. Bend a piece of 20x15 cm so that it is 10x7.5 cm, right side out, or overlap 2 pieces of 10x7.5 cm, joining the corners, seamy side in. Attach 9 x 7.5 cm pieces of fabric face up to the right and left sides of the larger piece, and join the corners.
9. Attach the small pieces to the sides of the large piece with pins.
10. Sew the top edge of the long piece to secure small pieces.
11. Pin the small pieces along the sides and bottom edge through both layers of the long piece of material.
12. Sew the right, bottom, and left edges of the fabric, securing the seams at the corners with additional stitches.
13. Cut off excess threads.
Related Videos
When buying a thing, it is very important to correctly identify it. the size... But what if you buy, for example, a warm jacket in the summer - do not wear a sweater just to appreciate how comfortable the combination of two things is. It is even more difficult if you do not see the thing at all, for example, you order a jacket via the Internet.
Instructions
First of all, look at all the outerwear you have, indicated on the label. Pay particular attention to the things that work best for you. If you see a lot of numbers on the label, don't be alarmed. All of them indicate only in different size tables. Russian 46 size, as a rule, corresponds to international M, German 40 (in everyday life it is called European and is considered as "-6" from Russian).
Some measurements can be taken to determine the size. Measure your height: stand with bare feet close to the wall, stand in your usual position, do not strain or relax unnecessarily. Draw a perpendicular line from the top of the head to the wall and put a small mark, measure the distance from the mark to the floor. Growth indicator is especially important if a person of non-standard physique, for example, is very tall and at the same time thin. There are markings indicating height, for example, 178/90 or LT.
Russian size is determined by the girth of the chest. Wrap a measuring tape around your chest at the widest part, preferably if you are wearing thin or underwear. Determine the size from the table, for example, a girth of 100-105 cm will correspond to size 50, and 80-84 will correspond to size 40.
The size is better rounded up, a loose fit is better than when the thing is back to back. Indeed, in winter, we dress under not only thin. In the end, the jacket can be stitched back a little.
Measure the length of the sleeve as well, many manufacturers indicate this parameter on the website or in the catalog. Sleeve length is measured from the center of the neck (back) to the wrist, bend slightly when measuring.
If you're trying on a jacket in a store, bend your elbows too. See if the sleeves are pulled up. Bring your arms outstretched in front of you as if you were hugging yourself - should not be too tightly stretched from behind at the level of the shoulder blades.
A vest is a very practical and fashionable piece of women's wardrobe. The fitted vest will emphasize the femininity of the figure, the delicate trimming of the blouse, and will warm you in cool weather. You can try to sew this useful thing yourself, for this you just need to build a pattern for a stylish vest without a collar on the basis of a standard pattern for the figure, cut it out and sew the details.

You will need
- - pattern of the base;
- - ruler;
- - pencil;
- - chalk;
- - the cloth.
Instructions
Compose dresses according to your measurements. Save this standard pattern and should always be handy for those who love to sew. Mark the length of the vest with a horizontal line 5–8 cm below the waist.
Take the backrest drawing. Make the sprout deeper and wider. From the sprout along the line of the middle of the back, set aside 6-10 cm and draw a horizontal line, this will be the yoke line. From it along the armhole, set aside 1.5–2 cm down, connect the resulting point with the middle of the yoke line.
Take the drawing of the front. Expand the neck. Add a 2–3 cm allowance for the buttons. Use a smooth or straight line to connect the half-crotch for the buttons and the neckline on the shoulder cut. Draw the line of the yoke, for this measure along the line of the armhole, the neckline and the left side of the dart 6-9 cm and connect the points obtained with a straight line along the ruler.
Add relief lines. To do this, halve the yoke line from the dart to the armhole. Connect the marked point with the upper point of the chest, continue the line to the dart at the waist. Draw the bottom of the front with a smooth curve.
Number all the resulting parts so as not to get confused when cutting.
Cut the patterns along the relief and yoke lines.
Lay out the pattern details on the fabric. Ensure that the direction of the share thread matches the pattern, for the front and back, the share thread should go vertically, for the yoke it can be both vertical and horizontal.
In addition to the two front pieces and one back piece, cut out the trims for the fastener, armholes, sprout and neckline, as well as the bottom of the vest. If you will be sewing a waistcoat with a strap, also cut a stripe 4–5 cm wide and 35–40 cm long.
A denim vest is a wardrobe item that makes it easy to create an unusual and stylish look. It is great for walking in combination with a T-shirt or dress. For the office, you can combine a vest with a snow-white blouse. In addition, this season is very relevant "double denim" - when the bottom and top of the ensemble are made of denim. Hence, a vest can make a pair of jeans.
A denim vest pattern can be easily built from a dress pattern.
- From the 7th cervical vertebra, lay down the required length. Draw the relief of the backrest.
- Increase the neckline by 2 cm along the line of the shoulders, the cut of the shelf and back, and by the floor, cm along the line of the middle of the back. Draw a line for the neckline.
- Deepen the backrests and shelves by 1.5 centimeters. From the top of the neck, you need to postpone the length of the shoulder cut - 7 cm.
- Parallel to the middle of the shelf at a distance of 2 cm, draw a line for the edge of the side. Draw the bevel of the side and the line of the bottom of the shelf.
- From the top of the neckline, set aside 5 cm and draw a cut line. This must be done in order to transfer the dart to the bulge of the chest.
The pattern is ready. Now you have to sew an elegant feminine vest.
A vest can be made from old jeans... As a rule, knees and walking places are very worn out in this thing, but we do not need them at all.
You will need the top of the jeans - the one just below the crotch and the entire upper part with a belt.
- Measure yourself from the base of your neck to your waist, or even lower if you want a longer vest. This measurement is the length of the future product. Measure this length on your jeans, starting from the top of the waistband and down (you'll be just below the crotch seam). Don't forget to add another 2cm down for future shoulder seams.
- Carefully open and remove the zipper and the slope under it, but do not damage the fabric of the fastener itself - the front of the future vest. Cut off excess tabs on the belt. Open the crotch and back seams. Leave the belt at the back, release only the bottom of the strap, which is above the back seam.
- You will get 2 unstitched blanks - the right and left parts of the legs with a whole side seam and a common belt. Cut off the worn areas (crotch).

- Take the backs from which you cut off the excess (with a new seam line) and sew - this is the middle seam of the back of the vest (we will sew a seam, as it goes on jeans, using part of the saved top allowances). Don't forget to sew back the bottom of the strap and the section of the waistband.
- Fold the structure so that the back is facing you and the belt is at the bottom (i.e. turn the pants upside down). Draw lines for the neck and shoulders, as in fig. Cut out taking into account the allowances. Cut the shoulders straight from the front and back (cut both layers of the legs at the same time).
- Now make a front cut. Draw a straight line from the top of the shoulder to the buckle, as shown in fig.
- Sew side seams for armholes - 30.5 cm (shown - 12 inches). The parts near the waist will remain unaffected - the side seams of the vest.
- Slightly round the cuts of the neckline, cutout and armholes - you should get smooth transition lines, as in the very first fig. finished vest.
- Tuck up all open sections (armhole, neckline, front cutout) and finish the same way as on jeans - with double stitching. Sew the shoulders. All is ready!