How to sew a cap with closed ears. Do-it-yourself knitted hat: master classes with step-by-step photos and video lessons. Headdress with ears
Making crafts from cereals with your own hands is much easier than it seems at first glance, it is interesting for both children and adults. The main advantage of cereal crafts is originality, because even adults will consider the finished work, peering into the details. Not everyone will be able to guess what material was used, especially when looking from afar. If the picture made with cereals hangs alongside the standard pictures, it will look brighter and more memorable.
Idea advantages
Originality is not the only reason to teach a child to do such crafts. Today, many parents from childhood teach children to use gadgets, so that they quickly master the technique, while mental development suffers, which directly depends on fine motor skills of the hands. Simply put, children are not accustomed to working with small details, because of this, their ability to learn and develop is rapidly declining.
Especially often such problems arise for families living in apartments, in such conditions children may not even have the opportunity to play in the sand. Caring parents understand how important it is to take care of the development of the child, so the idea of making crafts from cereals attracts them. A pleasant plus of this activity is that the finished work is a great option for a gift to grandmothers, grandfathers and other relatives, so that a child learns from childhood to please others.
Psychologists say that children with whom parents do handicrafts from an early age tend to learn new things faster in the future, to perceive information, and to develop. Even in adulthood, they will be helped by the perseverance, hard work and diligence acquired from childhood.
Where to begin?
First you need to make sure that the child is at the age when such an activity will be not only useful to him, but also interesting. Forcing children to do something together at a very young age is dangerous, as it can drown the desire to spend time with their parents in the future.
There is no specific age limit. Every kid has a moment when he begins to be actively interested in drawing: a pack of blank paper can be enough for a day, while the young "artist" marks the wallpaper and other furniture in the house. This is the time to channel the child's energy into creative development.
At the same time, children who go to kindergarten and primary school also have a need for the development of fine motor skills and perseverance. It happens that a child seems to be an uncreative person - nothing connected with drawing arouses his interest. Then the parents have to invent something, an original idea will be crafts from cereals.
The first thing to start with is to choose the right cereal. It is better not to be guided by the principle of "what is not a pity", but to think about how it will be more convenient for the child to work.
The main rule for choosing a material is that the smaller the better.
Using one cereal will be boring, so after coming up with an idea for a drawing, you need to choose different options. You can paint the selected material in different colors, some people like to paint semolina. You also need to prepare a flat surface, it can be a part of the table or a tray, a dish, or another flat vessel.
Templates
Preparing a template is a parent's task, because the child will not be able to cope with it. The final appearance of the finished work will depend on the chosen and drawn template. It is important that the drawing consists of large parts, it is necessary to calculate that there are no more of them than the available variations of different croup.
Advice
The easiest way is to pick up a drawing from coloring pages or children's books than to come up with one yourself. Most coloring pages designed for children under 3 years old contain just simple pictures with large details, they can simply be redrawn.
Together with the choice of a template, you need to prepare a base, it can be anything:
Of course, the more complex the base, the more difficult it is to apply the pattern, so if you are practicing the craft for the first time, it is best to use thick cardboard. Such a base will need PVA glue and a brush to apply it.
An alternative to gluing the cereal is to press it into the clay. This technique also looks bright and original, but still, for the first time, it is better to do with gluing, and then experiment.
How to do it?
Let's look at an example of how to embody the ideas of the applique pattern. The whole process of making crafts consists of several stages:
Choosing and printing a template... This method of preparing a template is the simplest; on the Internet you can find many simple drawings with large details and print them. You can use other methods - redraw, and if you have artistic inclinations, even draw by hand, but it is important to try to keep the contours and lines as even as possible.
Blow off the remnants of cereals that accidentally fell on the drawing, leave it to dry... This may take about 10 minutes, if a lot of glue was applied, then more.
After that, you can use paints, this should be done if the cereal was not initially painted over, but there is such a need. It is also convenient to paint small details with paints.:
- eyes;
- buttons.
It is best to use acrylic paints.
After the work is completely dry, it can be hung in a frame or used as a decor in a children's room.
Advice
The most simple cereal to use is semolina. It is easy to paint, it is easy to apply, it adheres well to the little fingers of the child.
From cereals and pasta
Pasta is a great craft tool. Many people use them for various decorative purposes, for example, decorating a Christmas tree, making candlesticks, and many other crafts. And all because the variety of forms of pasta allows you to do this.
Such crafts are performed according to the same principle as just from cereals. To begin with, a template is selected, then the parent determines which parts of the picture will be made with cereals, and which with pasta. Then, with the help of glue and a brush, first large, then small parts are painted one by one, the prepared material is glued.
However, some types of pasta are difficult to glue due to their weight, so the material chosen for the basis of such an applique must be durable, plain paper will definitely not work, and if you choose cardboard, then it is hard. If you cannot glue the product, you can sew it on. Pasta in the form of wheels, spirals looks beautiful, you can simply grab them with a few stitches of a needle and thread.
Of course, parents do this part of the process, especially if the children are very young. If the child is already entering school, then doing such a craft may be a suitable excuse to teach the child how to use a needle. Usually pasta is attached to the finished drawing at the very end of the work.
The advantage of pasta is that it is easy to paint it in the desired color. Therefore, when doing a cereal craft, think about what you can decorate in it and try using pasta for this.
If you've chosen a puppy template, why not add a leash with a "badge" wheel-shaped macaroni leash, or why not use them to button the snowman.
Advice
Many stores sell colorful pasta - they look great for crafts.
Crafts-ornaments for hair from pasta
Pasta can be used not only with cereals, but also as the main material for work. It is as if pasta manufacturers are specially developing a beautiful design so that craftsmen can use them not only for cooking.
Hair ornaments with pasta look especially original. Few people will guess how they were made, but no child will definitely have the same accessory. There are several options for using pasta to make jewelry:
1 Hoop... All you need to do is buy a single-color bezel, it should not be too thin so that the pattern can fit on it. The pasta in the form of spikelets glued along the entire length looks beautiful, especially if they are pre-painted in silver or gold.
2 Crown... Using the same solid color bezel, you can make a crown for a little princess. To do this, you need to select several types of pasta; it is convenient to use wheels of different sizes. You need to design the form in advance, and then glue them in rows.
3 Small hairpins... A suitable form of pasta for this is bows, they can be decorated in any color, even with patterns. After that, the bow is attached with glue to the invisibility or a small hair clip so that it is not visible.
You can prepare several hairpins for different outfits. Under a blue dress with white polka dots, make a bow of this color, under a striped one - a striped one, and so on. The young fashionista will be delighted with such an abundance of jewelry.
Pasta accessories
Not only hair jewelry can be made from pasta. Everything that girls love to wear, beads, bracelets, earrings, can be made of this material. How much joy the child will have if the parents do not just buy jewelry in the store, but take the time to make it on their own with the children.
The easiest way to make beads is from pasta of such a shape, which is strung on a thread. You can use different types by painting them in different colors. It is important that the thread is strong, if it is thick and looks ugly from under the "beads", you need to match it in color or just dye it.
Beads with pasta in the form of bows look beautiful. It is impossible to string them on a string, therefore such work is more painstaking and takes more time.
Advice
Each bow must be tied in the middle with a thread, fastened to a knot, then move on to the next.
Beads and bracelets can be made by combining pasta with regular beads. You can arrange not only one thing, but a whole set, complementing it with a hairpin in the same style. Such sets of "jewelry" look stylish and original.
Christmas crafts
The easiest way to use cereal for New Year's crafts is to make New Year's cards with your child, which he can give on his own behalf to relatives and friends. To do this, you need to choose a simple pattern for a picture on the New Year's theme, print, transfer to cardboard, and arrange with cereals.
A common idea is a Christmas tree. You can draw it yourself without using a template. Selected small cereals must be painted green in advance, allowed to dry and used for drawing, in this case it consists of one large part. You can decorate the Christmas tree with beautifully shaped pasta, for example, bows.
Small crafts that can be hung on a wall, window, Christmas tree look original. To do this, you need to cut out New Year's figures from cardboard. You can make many different designs and hang them together like a solid garland. Good options would be:
- mitten;
- skates;
- felt boots;
- Christmas decorations.
It is easy to draw and cut along the contour of all these shapes, and you can decorate with cereals in different ways, because each of them is one continuous detail. For example, a mitten can be made "fur" from rice, and the rest - from any other cereal. If there are many children in the family, such an idea would be especially good options, because each child will be able to show creativity, sometimes parents themselves wonder how much little dreamers can come up with.
Christmas decorations from cereals
The typical glass Christmas tree decorations are a thing of the past, and there are many creative ideas that can be used. One of the most popular is the use of cereals... For many, it is surprising that it is possible not only to decorate a finished ball with it, but to make it from scratch.
Such a craft will not take much time, if at first glance the idea seems complicated, just try it. Manufacturing takes place in several stages:
- We take a newspaper, roll it into a ball. How much material to take depends on the size of the expected toy. If you are doing it for the first time, you should not immediately make a large one, but you do not need a very small one either - it will be inconvenient to hold it in your hands.
- We give the ball the correct round shape using threads. To do this, you just need to start winding them in a circle, periodically changing direction, as if rolling into a ball. When the shape is even, we fasten the ends of the thread, making a small knot.
- We prepare the cereal, which we will use for decor, pour it into a plate. Buckwheat toys look smart.
- Spread PVA glue on top of the threads with a brush, wrap it in a plate. If there are empty places to which the grains have not attached, grease them with dotted glue and add them with tweezers.
- We take a spray paint, preferably golden in color, spray the toy, leave it to dry. It is desirable to match the color of the spray to the color of the cereal used, gold looks good on buckwheat, silver on rice and semolina.
You can choose any animal, imagine what kind of cereal or pasta of a certain shape will be able to make it. All you need is to turn on your imagination, consider a picture of an animal, think about what its fur, body shape, and other features look like. Consider, for example, a hedgehog based on puff pastry, but using this idea, you can come up with your own options:
- Cooking salted dough: 1 glass of salt and 250 water at room temperature are taken for 2 cups of flour. We knead the dough, give it the desired shape. This is easy to do, since softened salty dough looks like plasticine.
- For needles, oblong-shaped pasta is best suited - let's take spiral ones. Let's paint them silver with a spray paint. When they dry, needles can be made.
- Visually draw a line that separates the muzzle from the body, grease the edges of the pasta with glue, put a "needle", slightly press down. We begin to move from the muzzle, since if the last row turns out to be uneven, it should not be visible.
- We paint over the rest of the test with silver spray paint, make eyes, nose, mouth. To do this, you can also take pasta - small stars, if you do not paint them, they will stand out so well. You can also take beads by placing them on glue.
You can decorate such a hedgehog as you like: make him a pasta bow, put some small craft on needles, or just make it colorful.
It is known that the development of a child's fine motor skills directly affects his speech and mental development, therefore, in order for a child to develop correctly, you need to constantly occupy his playful hands with something. Today we will make crafts from cereals and seeds. They are textured, they are different, they are small and are excellent for the development of motor skills. One problem is that seeds and cereals do not stick well to ordinary paper glue, they will fall off, so we glue it on plasticine or use glue "for wood and plastic". Beans, beans, rice and buckwheat, peas, sunflower and pumpkin seeds - any seeds and cereals that match our picture in color and size will be used.
Where to begin
If this is a craft - an applique or a relief on a flat surface, you need to prepare that very surface. Draw the contours of the craft on a sheet of cardboard. We spread everything inside the contour with plasticine. The larger the seeds, the thicker the layer of plasticine. Now you can neatly, one at a time, stick cereals or seeds. Pour small cereals onto the surface to be covered, and then slightly press into the plasticine.
They also decorate vases and pencil holders with seeds and cereals. Then you will need to stick around a tin or glass jar with plasticine, and then stick the seeds on it.
Cereals and seeds craft ideas


When the craft is ready, we will cover it with varnish, and it will not lose its appearance longer.
To create a frame you will need:
- suitable cereals - lentils, buckwheat, rice. You can also experiment with dried beans, beans, coffee beans, etc.
- corrugated cardboard
- glue of the "liquid nails" type (undiluted PVA is suitable for small cereals) - colorless varnish, preferably aerosol type.
- tools: paints with a brush, scissors
The process of creating an autumn frame from cereals:
First of all, carefully cover the workplace with oilcloth or newspapers.
Sort through the cereal to remove any darkened or damaged kernels.
Take a thick corrugated cardboard and cut out the base of the frame from it (however, you can glue ordinary cardboard in several layers, bringing it to the required volume with PVA glue). 
Paste the edges with paper (Figure 3). Attach a loop, for which the frame will be further hung on the wall (Fig. 4). 
Place the blank frame on the support and carefully glue the rump or other appropriate materials to it (Figure 6-8). Do not spare glue, coat thoroughly.
Leave the frame to dry completely (during this period, you cannot move it or try to remove excess grains). After the front part of the frame has dried, glue its sides with a rump. 
After that, the frame must be painted with spray paint to match the base. This should be done outdoors.
Each zealous housewife in the kitchen has a small supply of various cereals. But, not all young mothers know that cereals and seeds can be used not only for food, but also as material for creating applications.


In today's master classes, we want to tell you about how you can make unusual applications using natural materials. Working with cereals will help kids develop fine motor skills., perseverance, attentiveness and, of course, will bring them a lot of positive emotions!
You can even make crafts from semolina with children studying in the younger group of the kindergarten.  Children aged 3-4 years are quite capable of drawing a drawing they like with glue, and then filling it with semolina.
To learn more about how to make a wonderful winter landscape with your own hands with your child, you can watch a small educational video clip.
Having carefully studied the step-by-step lesson, you can independently make any application from decoys on the theme of winter. And your child will get a unique chance to feel like a real magician and learn how to create snowdrifts even in hot summer!
Applications of animals from cereals and seeds
If semolina is mainly used for crafts on a winter theme, then other cereal products may well be used to create various animals, birds, flowers and even mushrooms. If you are interested in what needs to be done in order for the applique made of cereals and seeds to become one of the main decorations of the children's room, we invite you to study several MK.
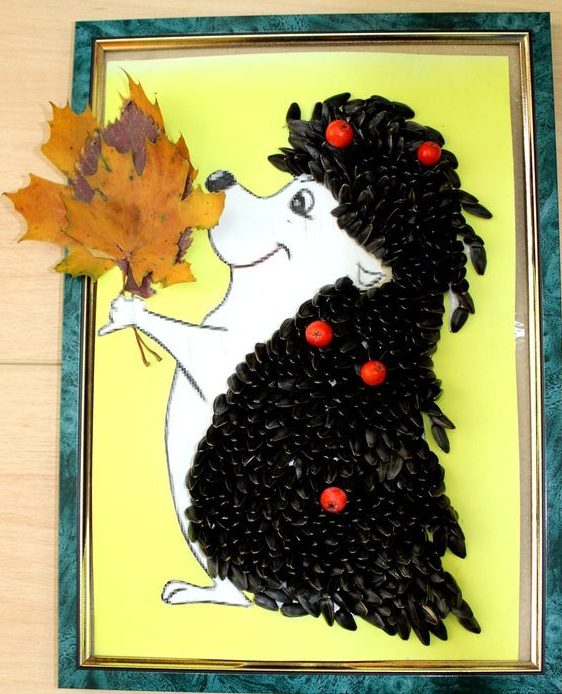
Application from cereals "Hedgehog"
To make such a wonderful craft yourself, you need to prepare in advance:
- glue;
- millet;
- buckwheat;
- a dense sheet with a hedgehog drawn on it.
Work description:
- The creation of the picture will be step-by-step, so first you need to glue the hedgehog's face with glue.
- After that, you need to pour millet on top.
- Then you need to glue the body and pour a layer of buckwheat on top.
- When the adhesive is dry, the excess material can be gently shaken off.
Various templates can be used to form a hedgehog:


Using template images, you can make a hedgehog not only from cereals, but also from seeds. So, for example, in kindergarten classes, using buckwheat, poppy, peas and caraway seeds, you can make a hedgehog with two mushrooms:
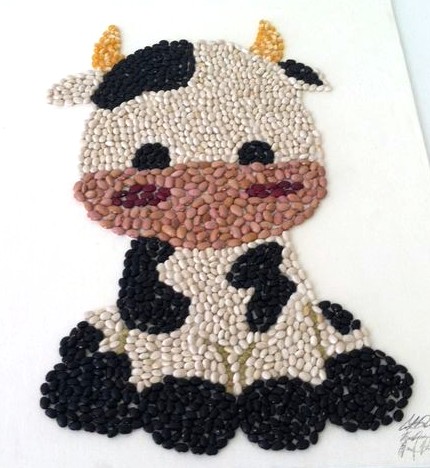
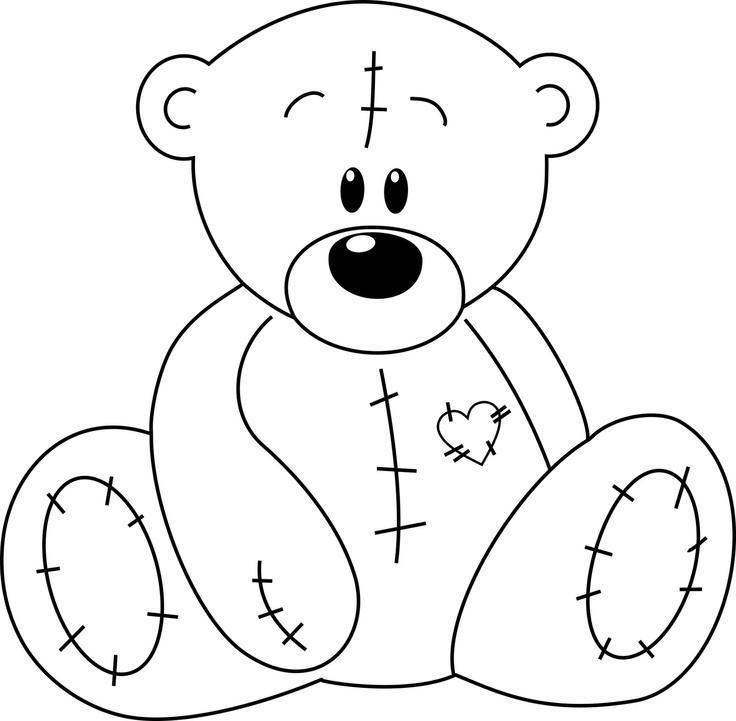
Cereal bear applique
Before you start creating a teddy bear, prepare:

Step-by-step instructions for making a funny bear cub:

When creating a teddy bear, you can use the following types of templates:

"Turtle" cereal applique
To form the applique you will need:

Scheme of work:

Applique from cereals "Giraffe"
Instructions:

Applique from cereals "Nimble sparrow"
From cereals for children, you can form not only pictures with the image of various animals, but also birds.
So, for example, to make a sparrow you will need:
- peas, buckwheat, rice;
- "PVA";
- brush;
- thick cardboard;
- pencil sketch with sparrow.
Lesson for beginner masters:
Golden chicken from cereals
Technique of execution:
Chicken pattern for cereal applique
Video: Corn Duck
Application of cereals and seeds "Sunflower"
Educational lesson for children in the middle group:

Video: We lay out letters from cereals and seeds
Mushrooms-friends in cereal applique
Despite the seeming simplicity, the application with mushrooms is rather complicated. Therefore, we recommend that you start performing it together with the children studying in the older group.


Master class on making applications from various types of cereals
Kudryashova Arina, 6 years old, pupil of the senior group of MBDOU No. 35 in the city of Kovrov
Supervisor: Vanyeva Anna Yurievna, teacher-psychologist of MBDOU kindergarten number 35, the city of Kovrov.
Description: I bring to your attention a master class on making applications from various types of cereals. The master class is designed for older preschool children (5-7 years old), as well as for their parents and teachers. It can be used in the joint work of the educator with children.
Purpose: small applique can be used as a gift card, A4 applique can be used as an interior decoration.
Target: teach a child how to make appliques from various types of cereals.
Tasks:
1. development of fine motor skills of hands and hand-eye coordination;
2. education of perseverance, accuracy and diligence;
3. development of creativity and aesthetic taste of children;
4. development of positive emotions and self-confidence.
Necessary materials: various cereals (buckwheat, millet, rice, peas), colored cardboard, scissors, glue, a napkin and a picture on a summer theme.

Templates:


Manufacturing process:
1. First you need to choose what color the background of the picture or postcard will be.
2. We take a blank picture on a summer theme (we will have it a butterfly), cut it out and glue it on colored cardboard of the selected color.

3. Before "painting" a butterfly, it is necessary to determine what kind of croup will be laid out for its individual elements. In our master class, the inner part of the butterfly's wings is pasted over with millet, and its body, antennae and the outer part of the wings are glued with buckwheat.
4. We coat the inside of the butterfly wing with glue, pour millet on it and gently press it on top with a napkin. We keep it like this for 1 - 2 minutes. Then pour the unsticked cereal back into the glass. We proceed to pasting the second wing.

5. We take a glass of buckwheat and begin to glue the outer edges of the butterfly's wings.

6. Then, with the same croup we glue the torso and antennae of the butterfly.

7. So we made a butterfly applique from millet and buckwheat.

As a blank picture, you can use various drawings (flower, sun, bee). Let's make an applique with a flower in exactly the same way.
1. Take a picture of a flower.

2. Cut it out and glue it onto colored cardboard.

3. Grease the sunflower hat with glue and glue it with buckwheat.

4. Then carefully glue the flower petals with millet. Do not forget to press the pasted over with a napkin so that the cereal sticks better.

5. We glue the stem and leaf of the sunflower with peas. The application is ready!