Basic knots and patterns. Easy macrame patterns for beginners
Openwork patterns from flat knots: In order for them to be light and almost transparent, they must be made from an even and smooth thread (without lint), for example, from cord line, linen threads, strongly twisted wool. The knots of openwork patterns are usually staggered to form a grid. It is convenient to braid voluminous objects with such a grid: vessels, planters, lampshades, as it is easy to give it any shape, reducing or increasing the distance between the nodes.
Checkered grid of double flat knots:
For the sample, prepare 5 meter threads, fold them in half and hang them on the base - 12 ends are obtained (the number of ends should be divisible by 4 - this is the number of threads in one knot). In this pattern, the nodular and working threads change places after each row, so they are consumed the same way. The ends should be approximately 3-3.5 times longer than the product.
1st row on every four threads, starting from the left, tie 1 double flat knot it turned out 3 knots. tie the next four threads 1 knot each, placing them on the same level 2 knots have formed (the last 2 threads remained untied).
3rd row put into work 2 extreme threads left in the 2nd row, and weave 3 knots (like the 1st row). Continue weaving, leaving equal gaps between the knots.
To prevent the mesh from slipping on the pillow, pin the knots with pins this will help to avoid skewing the rows. It is better to fix the knots of the odd row every 5-7 rows. An even web of mesh is often combined with another texture. The most primitive flat cords against the background of the grid become more expressive. In order to weave various fragments into the mesh, for example, a large common double flat knot, it is necessary first of all to draw a sketch of the wicker thing and determine the size and location of the knot. As a rule, it is entered into a rhombus from free working threads.
Weave the mesh to the top of the rhombus; where the rhombus is marked, do not tie the knots: first one knot (the top of the rhombus), in the next row below it 2 more in a checkerboard pattern, then 3 knots and so on until you get the desired width of the rhombus.
After that, tie a large common knot. The thicker the bundles of threads left for the knot, the more effective it is. Be careful not to warp it; the centers of the rhombus and the node must match. With a pin, straighten the threads under it and weave the lower half of the rhombus, gradually including 2 extreme threads in the work.
The rhythm of flat knots is easily rebuilt into geometric shapes: hexagons, rhombuses, triangles. This feature is used when creating a new texture. The weaving technique is simple. For example, if you need to finish the thing with a corner, then at the beginning and at the end of each new row do not knit 2 extreme threads, and then the row will become 1 knot less than in the previous one.
So, weave until 1 knot remains
If a hexagon is performed, then, on the contrary, they start with one node:
1 double flat knot is tied on the four middle threads, the threads are distributed under it by 2 and, adding 2 more free ones from the edges, 2 double flat knots are tied under the first knot in a checkerboard pattern. In the next rows, 2 threads are also attached to the left and right, and as a result, the canvas expands after each row by 1 knot. Having completed the upper half of the figure, weave the same lower one (according to the corner principle).
Netting:
It is performed by crossing the working threads in each row. The length of the working threads is 4-6 times longer than the nodular threads.
Mesh Edge:
The structure of the double flat knot allows you to weave a net without hanging threads on the warp. Instead, pins are used: the threads are folded in half, pinned with a loop up to the pillow, and double flat knots are tied on every four threads. The edge of the mesh is openwork, even or jagged.
Macrame is one of the most popular types of needlework, which is based on weaving various knots. The macrame technique is used to make various planters, lampshades, women's jewelry, curtains, chair covers, napkins, and so on.
materials
Weaving macrame is a hard work that requires special attention and patience. Not all beginners know what materials are best used for macrame technique. Schemes for beginners will help you figure out how to weave a beautiful thing in stages. First you need to choose a non-slip thread, such as cotton or a thick clothesline.
For the manufacture of jewelry and accessories for clothing, floss, linen, woolen iris are used. Things that are made of leather cut into thin strips look very interesting.
Macrame products
Decorations for the interior are woven from thick threads: ropes, cords, synthetic threads, fishing line. Variegated threads for macrame are not suitable, they look fuzzy. An excellent addition to such needlework, you can use beads, beads, wooden rings, balls, sticks.

The product will keep its shape better if you use a thin wire, you can color it. First, a frame is prepared from the wire, and then threads are hung on it. A lot of girls and women are interested in the question of how to weave macrame.
On a note
When working with silk threads or twine, you need to moisten your fingers. Cloth gloves should be worn when braiding stiff ropes. It is better to boil hard natural threads before use - they will be softer and more elastic.
When working, they unwind, so that it is easier to weave from them, you need to grease them with glue or tie knots, and in synthetic ones, melt the ends over the fire.

When pre-calculating the consumption of material, it must be remembered that the working thread becomes 4 times shorter when knitting knots, when weaving with double flat knots - 6-8 times, when weaving a mesh - 3-3.5 times.
What is needed for weaving macrame
When working with thin threads, a pad is needed, which is filled with sifted sand or foam rubber and covered with a soft cloth. For beginners, you can use the soft seat of an old chair, a foam board, as well as a wooden board (20 * 45, 20 * 35, 15 * 30 cm), on which cotton wool 6-8 cm thick or a layer of foam rubber is placed and then covered with fabric.
For such work, scissors, decorative pins, PVA glue, “Moment”, needles with a large eye are still needed.
ABC macrame
First you need to learn the names of the threads that are used in macrame. The weaving pattern is simple if you know some tricks.
Carrier thread - in macrame, this is the thread on which all the threads for a given product are hung. Knotted thread or warp - knots are woven around it. It must be pulled tight, otherwise the knot will not work. Working thread - knots are tied from it around the base, its length should be 30 cm. Additional thread - is additionally woven into the product, despite all previously hung.
Methods for attaching threads
If you want to do macrame, weaving patterns are detailed below.
Facial fastening of threads with a lock. Fold the working thread in half, lower the loop down for the warp. The resulting two ends of the thread are lowered down onto the warp and into the loop. The horizontal bar of the loop should be on the face of the set.
Purl fastening of threads with a lock. The working thread is also folded in half, but looped up under the warp. Then the loop is lowered down onto the base and both ends are passed into it. The crossbar of the loop will be on the wrong side.

Extended facial thread attachment. The thread is folded in half, strengthened with a lock on the base on the front side. Then the threads are separated: they take the right one, insert it up under the base, then down onto the base and into the loop; Repeat the same steps on the left as on the right. Such fastening of threads is used for a dense row of knots, between which the carrier thread is not visible. If you make a larger number of turns with each end of the threads, then the fastening will be even tighter.
Extended purl fastening of threads with a lock. Fold the working thread in half and fix it on the base with a lock inside out. Then the right thread is brought up to the warp, down under it and into the loop. Do the same on the left.
Uneven thread fastening is used when making a chain. In this case, the working thread decreases 4 times faster than the knotted thread.
Main knots
Herculean knot. Two threads of 10 cm are placed vertically on the pillow, the ends are separately fastened with a pin. The right thread is brought under the left, and the left - from the bottom up and into the loop. Then the knot is tightened.
Knotted chain. Take two threads. In turn, each is either working or nodular.
Rep knot. It is knitted from left to right, and from right to left.
Rep knot from left to right. A knotted thread is laid in front of the working thread, the working thread is thrown over the knotted thread on the left side and passed to the nodular thread, then the working thread is again thrown over the nodular thread, but on the right side, the end of the thread is pulled through the formed loop. The coils are aligned and tightened. This macrame technique, the scheme of which is described above, can be used to make any interesting thing.

The rep knot is knitted from right to left in a similar way, only first the working thread is thrown to the right, and then to the left.
Triple horizontal knot. Knit a horizontal knot with a working thread on a nodular thread. Then the spent thread is placed again on the knotted thread and inserted into the loop down. From such knots, you can weave patterns in the form of rhombuses, zigzags.
Diagonal rep knot. Three threads are taken, they are hung on a knotted thread and a diagonal knot is woven. With the left hand, they hold the first knotted thread on the right, placing it diagonally. The second is thrown to the right through the knot and pulled forward, up to the knot on the left and down into the loop, the knot is tightened. With the third thread, they do the same as with the second one using the macrame technique (the diagram will help you figure it out).
Double flat or square knot. Weave it most often on 4 threads (2 working and 2 nodular). The leftmost thread is thrown over two nodular ones (they are located in the middle), the right one is passed over the left one and then under the nodular ones and pulled out over the left working thread. The left half-knot is formed.
Place the rightmost thread on top of the knotted ones. The left one - over the right one, is passed under the nodular ones and brought out from above the right thread. The right half knot was formed.
From two such half-knots, a double flat knot is obtained, and when a half-knot is repeated, a twisted cord can be obtained.
checkerboard. By tying double flat knots in rows and leaving a distance between them, you can get a checkerboard.
Weaving macrame also implies a number of auxiliary knots: simple, knot "horizon", knot through the hand, tatting, Chinese, capuchin, tie and Armenian.
Beginning of work
Before you start working with macrame, you need to hang the working threads on the knotted thread. There are many different hanging methods:
braided ring. In order to make a sample, you will need only 10 threads: one thread is one meter long, two are 1.6 meters long, three are 0.3 meters long, four are 0.15 meters long. One thread should be laid vertically on the pillow, pinned in the middle. From the center in each direction you need to set aside 10 cm.

The second thread should be carefully folded in half and applied from the wrong side to the middle part of the first thread. Next, you need to weave a chain of square knots 20 cm long. The chain needs to be folded in half, the ends of the first thread are connected together. After that, you should tie a flat knot in the following sequence: second - first - second.
Next, you need to fix the threads using the "trap" technique. The last thread should be folded in half and laid with a loop down. The third thread needs to be wrapped around the first thread, 7-9 turns should be made. After that, it is necessary to pull the loop for the two ends located on top.
Macrame: master class
In order to make a beautiful little thing, you will need a frame from an old lampshade, it must first be covered with a new fabric. How to weave macrame for a lampshade?

It is necessary to take a rope with a diameter of about 3 mm and cut the threads 6 times longer than the lampshade itself. The threads should be folded in half and hung with an extended purl fastening on an additional thread, which is equal in circumference to the upper part.
The threads should be divided into groups of 4 each and weave flat chains of three double flat knots. On a horizontal thread, it is necessary to weave all the ends from the chains with rep knots - now a border has formed.
In order to weave the central part of the lampshade, the ends should be distributed in this way: 12 ends for fragments from double flat knots. The four middle threads must be braided into flat chains. Josephine knots are laid out on bundles of free threads under diagonal brids.
The lower part of the lampshade should be woven into the ends that remain, you need to secure using the macrame technique. The scheme of weaving the lampshade will help to do the job correctly and competently. Beautiful original lampshade is ready to use!
Patterns on glass
You will need:
- sample;
()
Patterns on glass
You will need:
- sample;
- "tubular" vase (candlestick);
- stand for cake on a high leg;
- glue with a thin tip;
- glitter or sugar to simulate a frosty pattern;
- artificial snow for a snowdrift;
- candle.
Print the template, adjusting its size to the candlestick. Fold the template into a tube and insert it inside with the pattern outward, securing the top with paper tape. Apply glue to the drawing. Then, holding it over a bowl, sprinkle the drawing with "snow". Work quickly so the glue doesn't dry out. Remove the template and allow to dry completely overnight. Place the candlestick on top of the cake stand with the candle inside. Spray a snowdrift of artificial snow around.
The beauty is that using this method, you can create your own unique frosty pattern. You can write a congratulation or just draw snowflakes.
| 0 | 0 | 0 |
Weaving macrame knots. Tatting.
In order to perform it, we bend the working thread into a loop with our right hand, with the left hand we wind the thread onto the base and pull it into the loop, with the right hand we pass over the thread that formed the loop and we put it under the base, with the left hand we thread it into the formed loop. If this rule is formulated shorter, it will turn out "above the base, and into the loop, under the base and into the loop." Repeat this rule to yourself, and learn how to tie this knot. The loops can be made quite small, as on the left in the photo, or you can make large air loops, as on the right. These loops are called pico, they decorate the pattern very much, making it openwork. But in order to weave a pattern with pico, a large length of working thread is required, 4 times longer than for a regular tatting knot.
| 0 | 0 | 0 |
How to make a macrame bag
Materials:
Brown soutache, 10 skeins
- Wooden hoop with a diameter of 16 cm
- Wooden beads pendants
- Small wooden beads,
- pieces of brown suede
- Total price of the product
Tools:
tapestry needle,
- nail polish,
- textile glue
1. Separate the hoop to make two handles. Wind the skein of thread into a ball and weave a chain of double looped knots on round warps (see Fig. 4). Knock the chain as tightly as possible and tighten the knots tightly to completely close the tree. Enclose two-thirds of the circle of the hoop.
2. To weave the fabric of the bag, prepare 80 threads 5 m long 24 threads - 6 m each. Use 52 threads for each side of the bag. Fold each thread (from 52) in half and hang with a bartack knot over the remaining unbraided place on the handle (see Fig. 5) Use longer threads (6 pieces each) around the edges.
3. Weave 26 chains of double flat knots, taking 4 “ends” for each (see Fig. 2). Start weaving from the center strands and make 6 medium chains of 5 knots. Add one knot on each next chain so that at the beginning of weaving the base of the bag, the line is horizontal. Prepare the second pen in the same way.
4. Work 3 rows of tight checkered weave (see grid description) with double flat knots (see fig. 3). Next, increase along the edges of the canvas by 1 additional thread through the row (see the formation of the corner in the mesh bag master class) Complete 15 rows in total. Fold the blank handles and continue weaving in a circle. Weave for, bag base 48 rows.
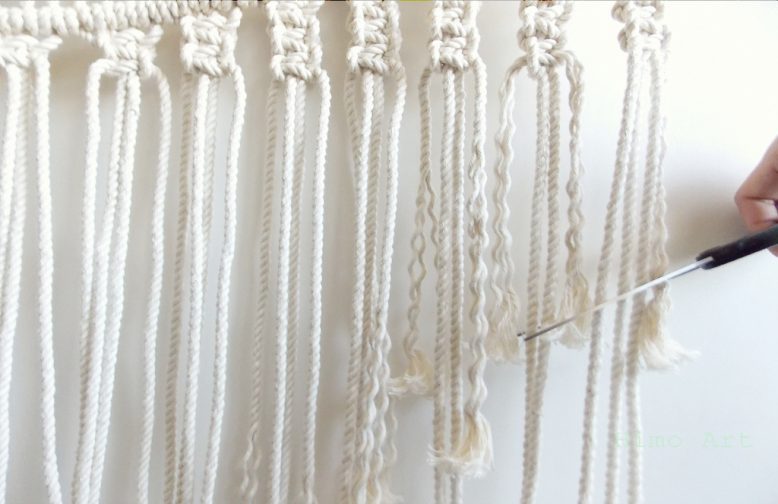
5. Turn the bag inside out and sew the bottom with braiding thread using a large eye needle. Cut the threads 3-4 cm from the seam.
6. Decorate your bag with suede flowers. Glue the petals with textile glue and sew the core, decorating it with small wooden beads
7. Use thin strips for fastening. glued to the back of the flower
8. Decorate the other side of the bag with a row of wooden beads. To make the soutache go through the hole easily, smear it with nail polish and let it dry. Pass the thread through one bead and needle. Make a “forward needle” stitch by passing the needle through the holes of the weave. Sew the rest of the pendant beads in the same way.
> For weaving macrame, which consists entirely of knots, very strong threads are required, which in the process of work will not fray or break. Then the macrame knots will stand out on the surface, making the pattern more distinct and emphasizing the beauty of the product. Therefore, the thread you choose should be tightly twisted and evenly rounded. Cotton, linen and mixed threads of dense torsion, thin synthetic cord or soutache are best suited.
> Thread consumption depends on its thickness. If the thread is thick and hard, then it will take much more to complete the knot than thin and soft - accordingly, more will be needed for the product. Keep this in mind if you take a thread that is different from the one used in the master class
| 0 | 0 | 0 |
ABC MACRAME FORMATION OF KNOTS
A variety of knots are widely known: weaving, sewing, tie knot, sea knots. Each of them performs a corresponding function. upon careful examination of the junctions of the weaving threads, it can be determined that they are formed with the help of loops and knots. Performing loops and knots in a certain sequence, they create a pattern using the macrame technique.
A knot is formed by intertwining two threads. There are single and double knots. Simple - the threads are intertwined only once, double - twice.
FLAT KNOT
A flat knot is formed by four threads, of which the middle two are fixed, so their length corresponds to the length of the product plus 5-6 cm for ease of use. The two extreme threads are four times longer than the middle ones. The thread is folded so that one end is 1/5 and the other 4/5 of the length, the place of the inflection is fixed on the main thread (Fig. 5).
One knot is formed by two weaves, once on the left side, another time on the right. Both middle threads are pulled straight, the leftmost one is placed above the middle threads and under the right one (Fig. 6A).
The right thread is placed under the middle threads and is threaded diagonally from the bottom between the left and middle threads (Fig. 6B). The second time weave similarly on the right side. The end of the thread located on the right is placed on the middle and under the left thread (Figure 6C), and the thread located on the left diagonally from the bottom is threaded between the right and middle threads (Figure 6D).
The knot is pulled tight. For ease of assimilation, it should be noted that in this knot, the thread that comes out from under the knot is always placed on the middle threads (Fig. 6D).
Forming a knot to a knot, we get a straight lace, as shown in the picture (Fig. 7).
The flat knot is one of the basic, most common types of knots. It can be the basis of the background pattern or the central node in relation to other nodes in the formation of the pattern.
TWISTED CHAIN
In this case, the extreme thread is placed above the middle ones only on the left side (Fig. 8A), and the thread located on the right is always threaded diagonally from below. A twisted chain is formed, which twists to the right. In the process of weaving, the chain should twist freely; after twisting, the thread should again be taken from the left (regardless of whether it was the right or left thread before).
The second option - the chain winds to the left, this is achieved by placing the rightmost thread above the middle ones only on the right, and threading the leftmost thread all the time diagonally from below (Fig. 8B).
Figure 9 shows right-hand and left-hand chains. In this case, the extreme threads are 4 times longer than the middle ones.
Made of coarse cords, such a twisted chain can be used to create door curtains, when choosing thin threads, the chain is used for pendants and other products.
If, however, the length of the threads is insufficient, the elongation should be carried out in such a way that it is least noticeable.
| 0 | 0 | 0 |
It is easy to get confused in a huge amount of information on how to weave Macrame panels on the wall with your own hands. We will help you systematize this knowledge, teach you how to read Macrame weaving patterns and create a panel sketch on your own. We will introduce you to several workshops on making panels for beginners and not only, and we will also show examples of using Macrame in the interior.
Examples of Macrame panels on the wall
There are many examples of the use of wicker panels in interiors. Pay attention to how beautiful and modern they look.


Very often there are panels not only rectangular, square, but also round.

Weaving panels in the style of Macrame is one of the areas of textile weaving.
Panels can and should be not only aesthetic, but also functional. The prototype of the old military banners is a panel with a pocket in the shape of a pentagon. This is the simplest option, but sometimes there are more complex products. You can decorate the kitchen with such a panel, and use the pocket to store spices and seasonings.

In the bedroom, an original decoration will be a panel on the wall near the bed, which will add zest to the interior of the room.

A very popular panel is still the beloved owl, as a symbol of wisdom and good luck.

What material is needed for weaving panels using the Macrame technique? Everything that is used for weaving and other products in this technique, and this:
- hemp, linen, paper ropes;
- flat braid;
- cotton threads.
You can also use photographs of already created panels to navigate them and create your own.
Christmas tree, snowflake - the theme of New Year's macrame, and flowers - summer. In autumn, a herbarium of beautiful leaves will inspire creativity.
To make a sketch, you can learn how to use graphic editors such as Photoshop, Corel Draw, GIMP. You can create a unique panel design on paper using fantasy and simple Macramé knots.
Whichever scheme you choose, you must strictly follow the weaving sequence and the accuracy of all Macrame knots. After all, a product made clearly and slowly will become a decoration of the house and the pride of the one who created it.
An example of one of the patterns applicable for weaving panels is a border of rhombuses made with rep knots:
Macrame panel in the interior
In what interior styles will Macrame panels be relevant? Since this art came to us from the ancient East, the decor will be most harmonious in oriental interior styles.
It will look just as good in a room decorated in the Boho style.
Panel in Boho style
In romantic interiors:
Brighter decor
And white, beige products will look great in a Scandinavian style.
And perhaps, over time, Macrame will become a profitable business for you, because now Macrame panels are successfully sold at various fairs and online sites for the sale of hand-made goods.
See how diverse and beautiful the world of Macramé is!
Do-it-yourself Macrame wall panel (master class for beginners)
We will introduce you to the sequence of making a simple do-it-yourself Macrame wall panel. The work is easy and the result is amazing.
We will need 60 m of clothesline and a few wooden beads to decorate the product.
We fix the holder for the panel.
We cut the rope into 16 parts of 3.5 m each. Fold it in the middle and tie it to the bar, securing the rope with a knot in front. Do not forget to tie one short rope to the bar for hanging. She will not take part in weaving.
The first row is fixing. We attach the thread to the bar.
The horizontal brid is ready.
Then, starting from the left side, we knit a brida diagonally.
Sometimes we add beads as desired, stringing them on ropes.
Knitting pattern
Complete range
And again we knit knots diagonally, but from right to left.
At the end of the work we weave simple double ones on 4 threads, gradually increasing their number.
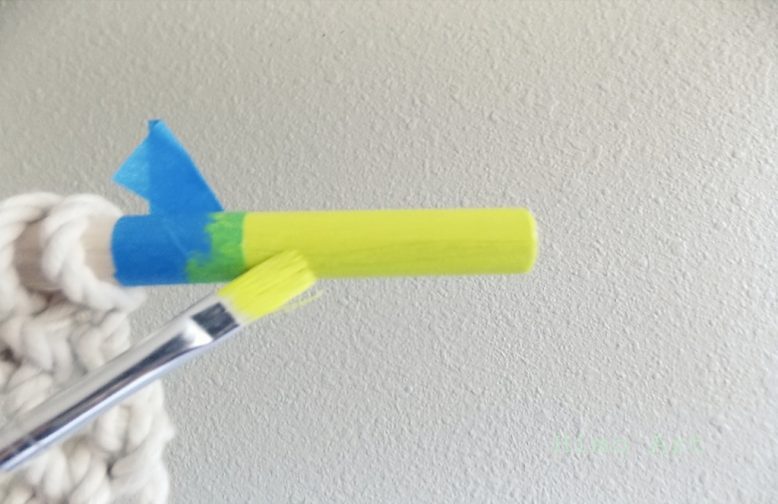
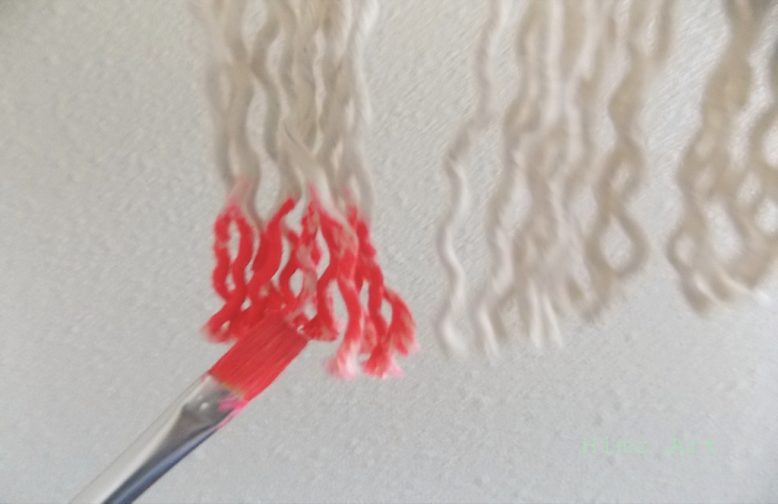
And to make the panel look brighter, add some paint!
A little color...
… never hurts!
The work is done. We make a mount and hang our Macrame panel on the wall. And we love the result!
Macrame owl panel (step by step master class)
(Translated by Diana Silantieva)
Starting this work, you must learn how to perform the following Macrame knots:
- knot in front
- "checkerboard" of double flat knots
Material for work
- 10 m of ordinary cotton thread No. 10;
- two beads for the eyes;
- two small wooden sticks;
- brush and wood-colored paint for coloring;
- PVA glue;
- electrical tape for attaching the work to the work surface.
First stage. Thread attachment
Cut the thread into 10 pieces of 1 m each. Attach a knot on the front side of the work on a stick. Secure the tips of the stick to the work surface with electrical tape.
Second phase. Weaving the top of the head
We weave a “checkerboard” of double flat knots on 8 medium threads, capturing a pair of threads from the extreme knot of the previous row on each side.
Working with the first two threads, using them as a basis, perform looped knots, alternately working with each of the next 8 threads.
It is necessary that the "bulge" of the node is on the front side of the product.
Repeat exactly the same on the right side of the owl. The nodes should be mirrored with respect to the left side.
Third stage. beak weaving
The beak of an owl is carried out on four central threads. Weave a chain of 4 flat knots. Next, you need to apply glue to the ends of the fourth threads on both sides. When the glue dries, trim the ends of the threads at a slight angle. String one bead on each of these two strands.
Bend the chain of double flat knots so that it arches forward. Then make a berry knot. The beak is ready.
Fourth stage. Weaving the bottom of the head
So that the owl does not sag on the sides, be careful when weaving further.
We continue to work from the center, using the threads No. 9 and No. 10 (used earlier for the beak) as the main threads, we perform loop knots, alternately working with the threads on the left. Loop knots should be performed so that the "bulge" of the knots is located on the wrong side of the product. Do the same on the other side, only in a mirror image, using threads No. 11 and No. 12 as the main ones.
It is important! Be sure to adjust the thread tension so that they do not sag. So the owl's head will look neat.
Then weave a “checkerboard” of double flat knots, adding two threads on each side in each subsequent row. The owl's head is ready.
Fifth stage. Weave the wings of an owl
We form a chain of 6 double flat knots on the last 4 threads on the left. Do the same on the four extreme threads on the right.
Sixth stage. Execution of the torso
Weave a "checkerboard" of double flat knots on 12 medium threads. Repeat weaving 3 times, (total 6 rows of "checkerboard").
Connect the wings of the owl to the body by tying one row of double flat knots, grabbing pairs of threads from the two chains of knots that make up the wings. Weave another row of "chess".
In the center of the owl's body, using threads No. 7-10 and threads No. 11-14, we perform two double flat knots.
Next, we perform knots near the second stick, using threads No. 6, 5, 4, 3. Repeat the same action using threads No. 15, 16, 17, 18. These looped knots form claws, and the stick will serve as a perch.
Using all 20 strands, tie a row of double flat knots.
Seventh stage. We knit the tail of an owl
Weave the tail with a “checkerboard” of double flat knots, capturing one pair of threads on each side along the course of weaving.
Eighth stage. Owl decoration
When finished, steam the owl. Color the sticks if desired, moving the owl to the side. Cut parallel to the tail of the thread at an angle.
You can also weave separately large round eyes, paint them in emerald color and sew to the main fabric. And instead of pupils, you can use black buttons.
Svetlana Dvornikova shows the whole process of weaving the Owl panel in 2 parts:
Video tutorials on making panels using the Macrame technique
To help you even more understand the weaving of Macrame panels with your own hands, we want to introduce you to some video tutorials on this topic.
Panel in the style of Boho weaves Lyubov Lopantseva:
Simple stylish decoration from Marusya DIY:
Asya Woo shares small and affordable wall decor ideas and a master class on creating a panel in a decorative ring:
So, for the manufacture of panels using the Macrame technique, attention, imagination, patience and precise implementation of instructions for weaving knots are necessary. Compliance with these conditions is a guarantee of excellent results! Good luck!


To learn how to weave knots, you need several threads 1 m long and one thread for the warp 30 cm long.
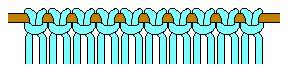
Attach the base to the pillow horizontally with two pins. Let's take two threads 1 m long. Fold each of them in half and loop through the base. We lower both ends of the thread down to the base and thread it into the loop (Fig. 1).
Having fixed 2 threads on the basis, we get 4 ends (Fig. 2).
First flat knot. We distribute the 4 ends as follows: the two middle threads 2 and 3 are the warp threads, the two extreme 1 and 4 are the right and left working threads.
We take the right working thread with our right hand, we wind it on the warp and under the left working thread.
We take the left working thread with our left hand, we bring it under the warp and from below into the loop formed between the warp and the right working thread (Fig. 3, a).
Twisted chain left hand . Based on the first flat knot, you can weave a twisted chain. We tie the first flat knot and repeat this work 3 more times. Got 4 flat knots. If we now carefully look at the work, we will see that the group of knots has slightly turned "sideways" to the left. Now rotate the work 180" to the left. Make the first 4 more flat knots and rotate the work 180" to the left again. So, turning the work every 4 knots, we get a left-handed twisted chain.
Make sure that no warp threads are visible when weaving the chain (Fig. 3, b).
Second flat knot. We fasten on the basis of 2 threads (we get 4 ends). We already know how to distribute these threads: 2 medium - warp threads, 2 - extreme - working threads.

We take the right thread with our right hand, we wind it under the warp and on the left working thread (Fig. 4, a). Then we take the left working thread with our left hand, lay it on the warp and drag it into the loop formed between the warp and the right working thread.
Twisted chain right hand . Based on the second flat knot, a twisted chain is also possible, but it will twist to the right. Let's make 4 second flat knots and turn the work to the right by 180". Repeat this operation 3 - 4 times and get a right-handed twisted chain (Fig. 4, b).
In order to be able to draw a diagram of the product, it is necessary to designate each node graphically.
Since the flat knot itself is not used anywhere, we will not designate it separately, but we will give the designation to twisted chains:
L ∞ - left-handed twisted chain based on the first flat knot;
P ∞ - right-handed twisted chain based on the second flat knot.
A fraction is placed next to it, the numerator of which means the number of nodes within the turn, and the denominator - the number of turns of the twisted chain. For example, P ∞ 4/3 means that you need to weave a right-handed twisted chain for three turns, four knots in each turn, i.e. tie four second flat knots, turn work, tie four more second flat knots, turn work a second time and tie four second flat knots one last time and turn work.

square knot. The combination of the first and second flat knots gives us a new knot - a square one.
We fasten on the basis of 2 threads. We tie the first flat knot, then we tie the second flat knot on the same basis and with the same working threads (Fig. 5). We get a double flat knot, which we will refer to as a square knot. A sign of the completeness of the knot is a lock on the right.
On fig. 6, a shows a square knot with a lock on the left; here a second flat knot is tied, and then the first.
The symbol for a square knot is ㄥ.
The number next to the square knot designation indicates how many square knots need to be woven in this row. For example, ㄥ 10 means to make 10 square knots in one row; if the sign is preceded by the letter q, for example q ㄥ 10, then you need to weave a chain of 10 square knots. The number of square knots in the chain can be counted by locks (Fig. 6, b).
Common square knot . If in an ordinary square knot we see two warp threads and two working threads, then in a common square knot these proportions are violated. Here the number of working threads and the number of warp threads are distributed depending on the nature of the pattern.
Let's make a sample. We fix three threads on the base and get 6 ends. Let's distribute them as follows: threads 1, 2, 5, 6 - workers, 3, 4 - warp threads (Fig. 7, a). We tie a common square knot based on two threads with four working threads.
We fix on the basis of 4 threads (we get 8 ends). Let's distribute the threads as follows: threads 1, 8 - workers, 2, 3, 4, 5, 6, 7 - warp threads. We tie a square knot based on six threads with two working threads (Fig. 7, b).

"Chess" . These are square knots connected in a checkerboard pattern. For the sample, we fix on the basis of 8 threads (we get 16 ends).
1. On every 4 threads we tie a square knot (Fig. 8, a). We get 4 square knots in the first row.
2. Put the first 2 threads aside and tie a square knot on the next 4. Next we tie 2 more square knots. The last 2 threads remain untied. Thus, in the second row we get 3 square knots.
3. Weave this row as the first.
4. The fourth row is like the second.
If you want to quickly draw a work you like, some new solution, you sketch it all graphically - drawing corners and circles is easier and faster than drawing complex drawings of knots (Fig. 8, b).

"Berry" . On the basis of a square knot, you can get a three-dimensional knot called a berry.
We fasten two threads to the base (Fig. 9). We get four ends. Weave three square knots. We take the warp threads, lift them up and drag them through the base of the first square knot inside out. We lower it down, lay the warp threads in place. We tighten the base so that the third knot lies on the first. We fix the berry with a square knot.
Berries can be woven in a checkerboard pattern. Let's make a sample to consolidate the material covered.
We fasten on the basis of 8 threads. Weave a sample according to the scheme (Fig. 10). We read the diagram: against the background of square knots, weave a berry knot in a checkerboard pattern.
Pico in a chain of square knots . Between the square knots in the chain, you can make a picot, it will add airiness to the product. For the sample, we fasten on the basis of 2 threads (Fig. 11).
1. Tie 1 square knot. We take a cardboard 2 cm wide, apply it to the threads under a square knot and weave another 1 square knot.
Between the knots, the threads remain untied.
2. Having connected the chain, holding the base, we pull the knots up. Working threads form two beautiful loops. This is pico.
You choose the size of the pico at will, depending on the thickness of the thread and the length of the chain.

Knot "chameleon" . This technique consists in changing the threads when the warp threads become working, and the working threads become the warp.
For the sample, take 2 threads of different colors. The method of attaching threads is shown in Fig. 12.
We distribute the threads as follows: the threads of color A are working, and the threads of color B are the base.
Tie 1 square knot. Now let's swap the warp and working threads (Fig. 13). Tie 1 square knot in color B.
You can weave 10 square knots of color A, and then swap the threads, and the second half of the chain will be color B.
This technique is also used if the working threads are used up and their length may not be enough until the end of the work.
In general, it is useful to remember that the working thread shortens four times faster than the warp.
Square Knots Diagonally . In order to make a rhombus or an inclined line from square knots, you need to learn how to weave them diagonally.
For the sample, we fasten on the basis of 6 threads (we get 12 ends). Next, we perform the pattern in the following sequence (Fig. 14):
1. On the first 4 threads, we tie a square knot A.
2. On the last 4 threads we tie a square knot B.
3. We take the right extreme thread from knot A and the left extreme thread from knot B and tie a square knot on the middle 4 threads, taking them as a basis.
4. We repeat the work of paragraphs. 1 and 2.
5. The last 2 threads on the right and left do not work. We tie a row of 2 square knots on the central 8 threads.
6. We tie a square knot on the central 4 threads. The rest of the threads are free. Half rhombus closed.
7. In order to start a new diamond, you need to place square nodes diagonally from the central node. We take 2 left threads of the central knot and 2 new threads on the left, we tie a square knot under the central knot on the left. We take two right threads of the central knot and 2 new threads on the right, tie a square knot under the central knot on the right.
8. To get an inclined line of square knots, you need to take 2 threads from the knot above and 2 new threads. This technique is clearly visible in the figure. In the center of the rhombus is a common square knot. Continue to work on the drawing.
Thus, you can weave a belt, a handle for a bag, trim for a dress, a bookmark for a book, etc.
The square knot is complex . After you have learned how to weave a simple and common square knot, a complex knot will seem very easy to you.
For the sample, we fasten 3 threads (we get 6 ends). We tie a square knot (Fig. 15) on the central 4 threads (2, 3, 4, 5). Taking the central 4 threads as a basis, we tie a square knot with threads 1 and 6. Below we tie a knot on the central 4 threads.

Web knot . We fasten on the basis of 6 threads (we get 12 ends).
1. Weave a square knot on threads 5, 6, 7, 8 (Fig. 16).
2. Leaving threads 6 and 7 at the base, weave a knot with working threads 4 and 9, and then with threads 3 and 10, 2 and 11, 1 and 12. We leave the spent working threads behind the work. Then we repeat the whole process.
Knot "gourmet" . This knot is usually woven from a silk thread of soft tones and semitones. When weaving, the thread must be tightly tightened. Gourmand creates a wonderful background for the pattern, if weave it in a checkerboard pattern.
This knot is woven very simply. We fasten on the basis of 4 threads (we get 8 ends). In the first row, we work with two groups of threads, 4 in each. We tie flat knots in the following sequence: 1st, 2nd, 1st. And so we tie one and a half square knots.
Weave the pattern according to the scheme (Fig. 17).

Node "fluff" . In order to weave a fluffy scarf, trim for a dress or a pillowcase on a sofa cushion in the macrame way, you need to master the technique of weaving this knot.
For the sample, we fasten on the basis of 2 threads (Fig. 18).
1. We tie the second flat knot.
2. We stretch the base onto a pencil and tie a square knot, tightening it tighter.
3. We repeat the work from step 1.
Thus, a terry cloth is obtained.
Spider pattern . We fasten on the basis of 4 threads (we get 8 ends).
1. We tie two square knots side by side (Fig. 19).
2. Tie one square knot on the central threads.
3. Below, under it, we tie another square knot on the same basis, but with other working threads - 2 and 7.
4. Below we tie a knot with threads 1 and 8.
5. We repeat the work from step 1.
Knot "hermit" (Hercules knot) . The execution of this knot is similar to the execution of a square knot, with the difference that it does not have warp threads. Tie it on two working threads.
On two threads, a hermit knot can weave a chain (Fig. 20). If you like it, you can weave such a chain on 4 threads. For the sample, we fasten 1 thread on the basis (we get 2 ends).
1. We bring the right thread under the left one (Fig. 21). We lead the left thread from the bottom up into the loop.
2. We lay the right thread on the left. We lead the left one from top to bottom in the loop. Got a lock on the right.
If we repeat the work in a mirror image, then the knot lock will be on the left.

Japanese knot . The Japanese knot can be included in the composition of the panel, in the drawing of a bag, belt, napkin. It can also be used as an independent pattern in a pendant, bracelet, sandals, etc.
1. We tie a hermit knot on threads 2 and 3 in the center of the circle (Fig. 22).
2. Thread 2 is brought under thread 1, thread 3 is looped over thread 4.
3. We bring threads 2 and 3 to the place where the circle ends, using them as a basis; we tie a square knot with threads 1 and 4.
Rep knot. This is the second most important node in macrame. It is interesting in that, depending on the direction of the warp thread on which it is tied, the knot will be called horizontal, diagonal and vertical.

horizontal knot . For the sample, we fasten on the basis of 3 threads (we get 6 ends). Thread 1 (Fig. 23) on the left is the base. The remaining five threads are working.
1. We take thread 1 with our right hand, put it on the working threads from left to right. We fix the place of the bend of the base with a pin. Hold the warp thread horizontally with your right hand, slightly pulling.
2. We take the first working thread 2 with our left hand, throw it over the warp to the left, carefully lay the thread, pulling the warp.
3. We lead the working thread 2 forward, up to the warp and down into the loop.
4. Tighten the loop. So, we tied a horizontal knot.
5. Now threads 3, 4, 5, 6 are working. We each tie a horizontal knot on the base (on thread 1).
6. Knit one row of horizontal knots from left to right.
Let's turn the base, stab the place of the turn (Fig. 24) and knit a horizontal row from right to left.
7. Hold the base with your left hand, pulling it slightly. We take the first working thread and throw it over the warp to the right. Bring forward, up to the base and down into the loop. Gently tighten the knot, pulling the base. So we knit the remaining four threads.
Symbol for a horizontal node<->.

diagonal knot . For the sample, we fasten on the basis of 3 threads (we get 6 ends).
1. On thread 6 (Fig. 25), taking it as a basis, we knit a series of horizontal knots from right to left.
2. We take thread 1 as a basis. Hold it at an angle to the first row and tie a diagonal knot on it with thread 2.
As you can see in the figure, when knitting an inclined row, some part of the thread remains untied. We will call this part of the thread a bridle. Brides in an oblique row do not need to be pulled tight so that they do not warp the design of the product.
Rhombus from diagonal knots . For the sample, we fasten on the basis of 7 threads (we get 14 ends).
1. Divide the number of threads into two parts (7 threads in each part).
2. We take threads 7 and 8 as the basis for the two sides of the rhombus (Fig. 26).
3. First weave the left side. Hold the thread 7 at the desired slope from the center. We start from the middle. We tie the first knot with thread 8, then we tie the knots, respectively, with threads 5, 4, 3, 2, 1.
4. Now let's get to work on the right side. We take thread 8 as a basis. We tie the first knot (at the top of the rhombus) with thread 9, then we tie the knots, respectively, with threads 10, 11, 12, 13, 14. This is how the rhombus was opened.
5. Before closing the rhombus, we pin the lines of rotation of the base with a pin (Fig. 27). Now we have to keep the base tilted towards the center. We start working from the corner. Brides are not stretched.
6. All threads of the rhombus have been worked out. The warp threads met. It is necessary to close the lower edge of the rhombus. Now one of the warps becomes the working thread, and the second becomes the warp. We tie a diagonal knot on the basis.
7. To fix the base of the rhombus, you can: a - swap the bases, i.e. make thread 7 the basis for the right side, and thread 8 for the left (Fig. 28); b - on thread 7, knit one diagonal knot with thread 8, then the upper corner of the rhombus will be sharp.

We will talk about complex patterns inside a rhombus below. Now let's look at the simplest of them.
Grid . Inside the rhombus, you can make a grid, i.e. darn the diamond field with working threads. For the sample, we fasten on the basis of 6 threads.
1. Open the rhombus.
2. We intertwine the threads of the right and left sides (Fig. 29).
3. Now we weave the working threads of the right side of the rhombus onto the base of the left side.
We tie the working threads of the left side of the rhombus to the right side. Here the threads need to be pulled, then the mesh will turn out beautiful.
"Window" . For the sample, we fasten 6 threads (we get 12 ends).
1. We take threads 6 and 7 as a basis (Fig. 30). We open the rhombus.
2. Strengthen the top of the corner with a pin and proceed to close the rhombus. But here the first working thread will be thread 8 on the right, and thread 5 on the left. Then, respectively, threads will be working: on the left 4, 3, 2, 1, and on the right 9, 10, 11, 12.
3. Thus, when all the threads work out in the above order, we get an open rhombus field with a beautiful edging.

"Souvenir" . Here, the entire diamond shape is filled with rows of diagonal knots.
For the sample, we fasten on the basis of 6 threads (we get 12 ends).
1. Divide the number of threads in half and open the rhombus, taking threads 6 and 7 as a basis (Fig. 31).
2. We knit each next row on a new basis. In the second row, we take threads 5 and 8 as the basis, in the third - 4 and 9, in the fourth - 3 and 10, in the fifth - 2 and 11. Moreover, we leave the basis of the previous row untied in the next row.
3. Before starting a new rhombus, we knot the last working threads of the right and left groups, because the threads of the two halves do not connect anywhere along the entire height of the rhombus.
The "souvenir" pattern can be used when weaving a belt.

Pattern "flower" . In order to weave a flower, first of all, you need to determine its pattern and size. Make a drawing rapport. Attach it to your work pad. If you are weaving a floral ornament, then you need to shift the pattern for each flower so that it is under work all the time.
For the sample, we fasten 8 threads (we get 16 ends).
1. Divide the number of threads into two groups (8 threads each).
2. We work with a group of 8 threads. We take the first thread as a basis and weave the upper contour of the petal, repeating the curved line of the pattern (Fig. 32).
3. We take the second thread as a basis (now we have it first) and weave the lower part of the petal.
4. We work with the right group of threads. We take thread 16 as a basis and weave to the left, repeating the contour of the petal.
5. Weave the lower edge of the petal on thread 15.
6. In the center of the flower, we fix the threads with a knot.
7. When performing the second half of the flower, we work from the center. The basis is: threads 8 and 9 for the upper edge of the petals, 7 and 10 for the lower edge.
Lattice pattern . The principle of weaving is the same as the "flower" pattern, with the difference that in the lattice all the lines of the base are absolutely straight (Fig. 33).
This pattern is very popular in macrame. It is used when weaving bags, borders for napkins, lace.

Leaves pattern . This pattern creates a beautiful lace fabric. It is better to weave from thin threads. For the sample, we fasten on the basis of 10 threads (we get 20 ends).
1. Divide the number of threads into 3 groups (we get two groups of 8 threads and one with 4 threads).
2. The first group of eight threads. We take thread 8 as a basis (Fig. 34) and weave one row of diagonal knots to the left.
Under the work should put a drawing of a leaflet.
3. Weave the lower part of the leaf on the base - thread 7.
4. The second group of eight threads. We take thread 16 as a basis and weave one row to the left.
5. The third group of four threads. Weave half a leaf.
6. Second row. As can be seen from the figure, the second row of leaves is woven at an angle to the first row. In the second row, change the number of threads in groups: the first group of four threads, and the other two of eight.
7. The first group of threads. Weave half a leaf.
8. The second group of threads (four threads from the first leaflet and four threads from the second).
Thread 5 is the basis for the upper edge of the leaflet, thread 6 is for the bottom. Weave the second leaf on the third group of threads. In this pattern, you need to make sure that the leaves of each row are parallel to each other.
Chain . For the sample, we fasten 1 thread on the basis (we get 2 ends).
We take thread 2 as a basis (Fig. 35) and knit a diagonal knot with thread 1, then we take thread 1 as a basis and knit a diagonal knot with thread 2. So, each time changing the purpose of the thread, we weave a chain of the desired length. At the same time, we make sure that the distance between the nodes is the same (1 - 2 mm).

Boucle . If you want the woven fabric to be dense, use a boucle pattern.
For the sample, we fasten on the basis of 4 threads (we get 8 ends). We distribute the threads in pairs: 1, 3, 5, 7 (Fig. 36) working threads, and 2, 4, 6, 8 - warp threads.
1. We tie 1 diagonal knot on each base with a working thread (based on 2 - working thread 1, based on 4 - working thread 3, based on 6 - working thread 5 and based on 8 - working thread 7). Knitted the first row of boucle.
2. In the second row, we change the purpose of the threads: the working threads become the warp, and the warp threads become the workers. Here we also tie a diagonal knot on the basis (on the basis of 1 - with a working thread 4, on the basis of 3 - with a working thread 6, on the basis of 5 - with a working thread 8).
This technique makes it possible to weave any shape: triangle, square, rectangle.
Vertical knot . For the sample, we take 3 threads (Fig. 37). On one of them we attach the other two. We lay the warp thread horizontally, and fasten the working threads at the right end (the left end of the warp is free for work), weave one row of horizontal knots on it. Now we have the end of the base on the right.
1. We change the purpose of the threads: the warp, the end of which we now have on the right, is the working thread, and the 4 ends of the two reinforced threads that were working in the first "row" are 4 warp threads.
2. We tie on the right, on the first vertical base (thread 4) 1 knot.
3. The next warp is thread 3, and the working thread is the same. Tie a second vertical knot. We also work with warp threads 2 and 1.
On fig. 38 shows the work from left to right.

color pattern . A technique that makes it possible to weave a beautiful pattern, plot drawing or facsimile is called a color pattern. This technique consists in a combination of horizontal and vertical knots when weaving, and there are two or more tones of threads in the work. A two-tone pattern looks good in weaving. You can use cross stitch patterns here.
For the sample, we take three threads of color A (6 ends) and 1 thread of color B (Fig. 39).
1. We take the thread of color B as a base, fasten 3 threads of color A on it and knit one row of horizontal knots.
2. We knit the first two threads on the left with a horizontal knot.
3. Change the purpose of the threads: we take thread 3 as a basis. On it we knit a vertical knot with a thread of color B.
4. We knit the remaining 3 threads with a horizontal knot on a colored basis.
Before you start weaving a color pattern, select the tones of the threads and distribute them over the pattern. Weave the background with a horizontal knot, and the pattern with a vertical knot.