How to weave a cat from rubber bands. How to weave a cat out of rubber bands: examples of different techniques. Weaving a cat from rubber bands without a machine
Not a single occupation gained such fame among the younger and older people as weaving from rubber bands - lumigurumi. Rainbow Loom Bands have become an indispensable material for needlework, as both adults and children have the opportunity to work with them. The cost of packaging rubber bands is quite low. In addition, from them you can easily weave products of various shapes and volumes. Previously, mainly bracelets were created from rubber bands, but now there are more and more patterns for weaving various figures and toys. For example, we will show how to weave a cute cat from small bright rubber bands.
You will learn how to weave a funny cat out of rubber bands on your own by reading the lessons presented in this article.
How to weave a cat out of rubber bands on the machine with your own hands
First of all, we will tell you in detail how to make a simple cat figurine. To work, you will need a crochet hook and irises of such colors in which you wish to create a future figure. It is better to choose natural coat colors. You can weave a pussy in dark red colors or a Siamese breed in snow-white and dark shades. For this work, you will need 117 dark, 8 snow-white and 2 greenish rubber bands. You will also need a machine. Turn the equipment so that the main row rises above the extreme ones, and the open sides of the columns look at you.
Weaving should start from the tail, which consists of 8 double loops: you need to put on 8 pairs in 1 line, as shown in the photo. At the end, you need to twist the elastic band 4 turns. Twist the formed ponytail. Then you need to throw it from the machine onto the hook, carefully holding it with your fingers.

Build the hind legs: attach 3 rubber bands for the 1st and 2nd columns, then 2 pairs of 2, and again 3. Throw at the end in 4 rows. In the same way, make another foot, weave and remove from the loom.
Make the front paws: attach 4 pairs of elastic bands, and then wind 3 more pieces into 4 turns at the end. Make another paw, weave and remove from the device. Start making the head and muzzle as shown below.
Having made all the details, connect them and remove them from the machine.
We make a pencil nozzle in the form of a cat in a master class
This lesson will help you master the technique of weaving a figurine that you can put on a pen or other writing device. Such a funny and cute little animal will cheer you up while studying or working. To make it, you will need 10 light, 96 brown, 12 black and 1 orange rubber bands. Prepare the loom by placing the rows so that the center one is higher than the others and the holes on the pins are facing you.

Make a cat's face by grabbing a pair of rubber bands without twisting them into a figure eight. Attach elastic bands in the form of triangles in front of the muzzle. Make 2 ears, attach them to the head. Make 2 eyes using rubber bands or beads. Attach the neck and body.

Throw on a pair of irises for the tail. Continue to weave it with a crochet or slingshot to make it longer. Make paws and fasten them together so that you can put the figure on a pencil.
Throw triangles across the body and weave the finished figure. Remove from machine.
How to make a three-dimensional cat figurine quickly and easily
Following this master class, you will learn how to weave a voluminous cat, which will fit as a good toy for a baby. The product is made on the Monster Tail machine. First you need to choose the main colors for the main figure, for the eye, nose and stripes on the fur. Here is a detailed instruction.
First, create blanks for the eyes from green, dark and primary colors. Then make the base for the cheeks. Weave the spout blank. Make a pair of ears by collecting them on a hook. Connect 3 pairs of elastic bands, twisting the eight, as shown in the picture.

Attach the blanks of the cheeks to the weaving, and then the spout. Discard the bottom layer of elastic bands by passing it through the top and pointing inward. Add irises to 2 empty columns of the machine. Attach the eyes to the figure, catching the ends of the rubber bands in a circle, and remove the bottom row.
Throw on 2 more rows, adding elastic bands in turn, then attach the eyelet. Remove the finished head from the machine. Attach new irises to make a ponytail. Remove from machine.
Now make blanks for 4 paws, each with 7 rubber bands. After that, reinforce the cat's head on the loom again and attach the paws, attaching them in a circle at the free ends. Remove the bottom layer of weaving. Then weave according to the established pattern. Add 2 more paws, a tail, and braid to the very end of the body. Remove the finished toy from the machine and make a mustache for the pussy. So the 3D cat figurine is ready.
Many other cat weaving patterns, using special devices or without a machine, you can see in the video below.
Video on the topic of the article
Not a single occupation gained such fame among the younger and older people as weaving from rubber bands - lumigurumi. Rainbow Loom Bands have become an indispensable material for needlework, as both adults and children have the opportunity to work with them. The cost of packaging rubber bands is quite low. In addition, from them you can easily weave products of various shapes and volumes. Previously, mainly bracelets were created from rubber bands, but now there are more and more patterns for weaving various figures and toys. For example, we will show how to weave a cute cat from small bright rubber bands.
You will learn how to weave a funny cat out of rubber bands on your own by reading the lessons presented in this article.
How to weave a cat out of rubber bands on the machine with your own hands
First of all, we will tell you in detail how to make a simple cat figurine. To work, you will need a crochet hook and irises of such colors in which you wish to create a future figure. It is better to choose natural coat colors. You can weave a pussy in dark red colors or a Siamese breed in snow-white and dark shades. For this work, you will need 117 dark, 8 snow-white and 2 greenish rubber bands. You will also need a machine. Turn the equipment so that the main row rises above the extreme ones, and the open sides of the columns look at you.
Weaving should start from the tail, which consists of 8 double loops: you need to put on 8 pairs in 1 line, as shown in the photo. At the end, you need to twist the elastic band 4 turns. Twist the formed ponytail. Then you need to throw it from the machine onto the hook, carefully holding it with your fingers.

Build the hind legs: attach 3 rubber bands for the 1st and 2nd columns, then 2 pairs of 2, and again 3. Throw at the end in 4 rows. In the same way, make another foot, weave and remove from the loom.
Make the front paws: attach 4 pairs of elastic bands, and then wind 3 more pieces into 4 turns at the end. Make another paw, weave and remove from the device. Start making the head and muzzle as shown below.
Having made all the details, connect them and remove them from the machine.
We make a pencil nozzle in the form of a cat in a master class
This lesson will help you master the technique of weaving a figurine that you can put on a pen or other writing device. Such a funny and cute little animal will cheer you up while studying or working. To make it, you will need 10 light, 96 brown, 12 black and 1 orange rubber bands. Prepare the loom by placing the rows so that the center one is higher than the others and the holes on the pins are facing you.

Make a cat's face by grabbing a pair of rubber bands without twisting them into a figure eight. Attach elastic bands in the form of triangles in front of the muzzle. Make 2 ears, attach them to the head. Make 2 eyes using rubber bands or beads. Attach the neck and body.
Throw on a pair of irises for the tail. Continue to weave it with a crochet or slingshot to make it longer. Make paws and fasten them together so that you can put the figure on a pencil.
Throw triangles across the body and weave the finished figure. Remove from machine.
How to make a three-dimensional cat figurine quickly and easily
Following this master class, you will learn how to weave a voluminous cat, which will fit as a good toy for a baby. The product is made on the Monster Tail machine. First you need to choose the main colors for the main figure, for the eye, nose and stripes on the fur. Here is a detailed instruction.
First, create blanks for the eyes from green, dark and primary colors. Then make the base for the cheeks. Weave the spout blank. Make a pair of ears by collecting them on a hook. Connect 3 pairs of elastic bands, twisting the eight, as shown in the picture.

Attach the blanks of the cheeks to the weaving, and then the spout. Discard the bottom layer of elastic bands by passing it through the top and pointing inward. Add irises to 2 empty columns of the machine. Attach the eyes to the figure, catching the ends of the rubber bands in a circle, and remove the bottom row.
Throw on 2 more rows, adding elastic bands in turn, then attach the eyelet. Remove the finished head from the machine. Attach new irises to make a ponytail. Remove from machine.
Now make blanks for 4 paws, each with 7 rubber bands. After that, reinforce the cat's head on the loom again and attach the paws, attaching them in a circle at the free ends. Remove the bottom layer of weaving. Then weave according to the established pattern. Add 2 more paws, a tail, and braid to the very end of the body. Remove the finished toy from the machine and make a mustache for the pussy. So the 3D cat figurine is ready.
Many other cat weaving patterns, using special devices or without a machine, you can see in the video below.
Video on the topic of the article
We offer three video lessons on weaving cats or kitties from Rainbow Loom colored rubber bands.
Materials:
- Machine Monster Tail;
- rubber bands of the required colors (50 pieces);
- hook;
- extra hook.
If you took a Siamese cat as a sample, then you need to take white and black elastic bands. If you want to weave a tiger, you will need orange and black elastic bands.
Weaving a cat begins with a tail. Then we make paws, front and rear. Now we make the body of our cat. We connect the body with the muzzle, weave the neck separately. We finish the body of the cat, connect it with the tail. Weave in the eyes and nose.
We prepare the ears separately. We attach them to the head. Now it's time to attach the legs. First, the hind legs are shorter. Then we attach the front paws. We crochet all the details. We straighten the finished cat so that it can stand without support. We hide the extra loops, draw a stripe in front of the eyes with a black marker.
3D cat
Materials:
- 600 rubber bands;
- Filler;
- Beads: 8 pink, 51 gray, the rest are black.
The weaving of this cat starts from the head. First we make the ears, we clamp the last loop on each ear with a clip. Then we make the legs. Knitting requires utmost attention, since the weaving is quite narrow, you will need to try not to lose the loops. In order not to get confused, we lay out the rubber bands, as shown in the video, in piles, and do not forget to use clips.
After the four paws and two ears are ready, we proceed to weaving the head and body of the cat. We weave beads, which will then be eyes. We attach the ears to the head, sew them on while weaving, and not after the cat is ready.
When the head is ready, we return to the spout, take two black rubber bands, tear them apart, make a mouth, do not forget to tie a knot on the wrong side of the head so that the mouth does not fall apart later. We continue weaving. On the 13th row, we attach the front legs, at the same time we fill our cat with filler, we also put the filler in the legs. Then after a few rows we attach the rear legs.
It remains to sew the tail. We fill the cat with the remaining filler, we knit the last rows. We sew on the antennae from three black rubber bands. If you want the cat to sit, you can use clips for this purpose.
You will need a monster tail machine and 50 orange rubber bands, some pink, green and black.
We start work with the cat's head.
Weaving a cat from rubber bands without a machine
Materials:
- 117 black rubber bands;
- White rubber bands - 8 pieces;
- Green rubber bands - 2 pieces;
- Hook.
Weaving a cat is possible without a machine, for this you need a hook and rubber bands. All work will be located on one hook. First we knit the tail, then the legs, knitting the feet of our cat with the help of white rubber bands.
rubber band cat It will be a great key ring, and you can also hang it from your mobile phone. Such a craft conveniently clings to a pencil or pen, but still you should not go to school with such school supplies, because they can distract from the educational process. and rubber bands are not allowed to be brought to school in some American cities, where children were so engrossed in a new kind of creativity that academic performance declined, and conflict situations often arose.
Of course, if you learn how to weave a cat out of rubber bands in the family circle, you will definitely have fun, parents can help children learn new techniques, suggest some difficult moments of weaving, but first you need to watch a video master class, and then prepare all the necessary materials to create an original figurine. And for the first time, you can follow the author of the lesson to repeat rubber band weaving - cat, video will definitely not let you get confused in the process.
As always, you can choose the color scheme at your discretion, and if you have a cat at home, you can make a small copy of it by choosing rubber bands in the color of its color. By the way, if you take a combination of orange and black, then you will no longer have a cat, but a cute tiger cub.
How to weave a cat from rubber bands
To learn new technology, how to weave a cat out of rubber bands, it is necessary to use the machine, as a rule, all complex volumetric figures are woven using a special plastic plate with pegs, which allows you to create neat loops. Weaving on the loom is also convenient because it allows you to navigate the change in the colors of the rubber bands and not get confused where your figure should have a nose, eyes, neck, torso and paws. After all, you probably want your cat to have “socks” on its paws and a white tail tip, green eyes and a black nose.
If you are creating for the first time cat made of rubber bands on the machine, then you can also choose a one-color option, where only the eyes, tongue and nose will stand out on the main color, it is also better not to use black, while others are more contrasting, and if you want to dilute the color palette, then make paws, ears in a different shade and ponytail.
Rubber cat without a machine it is unlikely that an inexperienced master will succeed, since it is quite difficult to remember the weaving pattern and make neat loops without using a special tool. And as soon as you take a closer look at the video tutorial of weaving using a machine, you will once again be convinced that this tool is simply necessary for that master who decided to seriously get involved in creating baubles and other original rubber accessories.

Now let's get straight to the question. how to weave a cat from rubber bands on a loom, and first of all we will discuss what materials we need for this. First, which must be positioned so that its central row is higher than the outer ones, i.e. shifted up (to the left, if placed horizontally on the work surface). To create a figurine, it must be placed vertically on the table, so that the recesses in the columns look “at you”. Be sure to pay attention to where the notches are directed, so that you do not encounter inconvenience when hooking the loops with a hook and removing them from the posts, because if you position the notches differently, it will be very problematic to create loops correctly, respectively, and high-quality, neat weaving will not work.

Rubber band weaving: cat
Do not immediately be afraid of complex schemes, because if you have a high-quality master class, then to complete the craft, you just need to follow all the instructions of the master and repeat all the steps step by step. Rubber band weaving - cat, doggy or hamster - can be mastered very quickly, and soon you will make stylish souvenirs for all your friends. And also take care of the fittings, in order to make a keychain or pendant for a phone out of a figurine, you will need a keychain ring that conveniently clings to keys or a special thin cord that can later be fixed in a hole in a mobile phone case.

If you looked " Rubber band cat video”, but you still have questions regarding certain stages of the craft, be sure to ask them in the comments so that experienced craftsmen share their experience with you. Most likely, together you will cope with the difficulties of the creative process that every novice craftswoman has.
Parents whose children are seriously interested in creating various figurines and baubles must first explain to them the safety precautions, because this harmless material can be a hassle. Firstly, children should know that rubber bands should not be taken into the mouth, as the material may contain toxins, and, secondly, the ring can be accidentally swallowed, which is also unsafe.

Recommended age for familiarization with the process, how to weave a cat out of rubber bands on a loom, this is 8-14 years old, for older teenagers this hobby may already be uninteresting, and preschoolers can only perform products in the presence of their parents.
When you already knew how to make a rubber cat, you can pay attention to other master classes collected on our website, for example, you will find a lesson on creating flowers.
It is necessary to approach the question in a completely different way, how to weave a cat out of rubber bands without a loom, because if you do not use a special tool, you can only create a flat figure.
Weaving from rubber bands is gaining popularity among young mothers. Now these are not only bracelets for little girls, but also a storehouse of toys for children with their own hands. Want to make a kitten for a child, but no ideas? We will talk about how to weave a cat out of rubber bands in this article, because it is as easy as shelling pears. To make crafts look more realistic, you should choose natural shades of rubber bands: white, brown, beige, black, gray.
Weaving on the loom
The first method clearly shows the process of weaving a cat on a loom. Each detail is worked out separately.
1) First of all, the tail of the figure is created. On one row of the machine, two rubber bands are thrown on adjacent columns: from the first to the second, from the second to the third, from the third column to the fourth, etc. If there is a desire to make the tail a noticeable tip, then you should take a different color of the last gum.
Depending on the desired length of the tail and the size of the entire product, we choose the number of loops: the tail is shorter - 5-6 loops, longer - 7-9 loops.

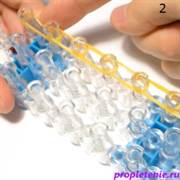
One elastic band is wound on the last column in 4 turns. From the inside, we pull a pair of lower elastic bands on the hook and throw it on the previous column. The tail is ready. Insert a toothpick or some kind of plastic stick into the first loop. It is necessary so that the product does not bloom when removed from the machine. The finished part is dragged onto a stick, put aside while other details of the cat are being performed.


2) Fewer loops are required for the hind legs, four will be enough. Three elastic bands are thrown on the first and second columns, two loops on the second-third and third-fourth. The last loop is also created from three loops to make the cat's foot look denser and thicker. One elastic band is wound on the final column in 4 turns. Further weaving is identical to the tail. From the inside, the lower loops are stretched and thrown to the previous column. Finished paws, like the tail, need to be moved to a separate stick or pencil.


3) Since in this scheme the cat goes in a semi-seated form, the front paws need to be made longer in shape, by five loops. The process is identical to the hind legs. We again remove the finished paws on a separate stick.

4) The most difficult stage is the main part of the cat's body. Weaving begins with the head of the animal. It is better to deploy the machine vertically towards you. On top of the machine, from the upper left column, a pair of elastic bands is thrown onto the first middle column, and from the middle one onto the right. Next, on each pair of columns, two rubber bands are pulled.


In the second row, we repeat the process: two elastic bands from the left to the central column, from the central to the right. It is better to use rubber bands in a different color to highlight facial features, for example, the area around the eyes. And also from the side columns of the second row of the machine, two elastic bands will go to the central column of the second row. You should get the shape of a rhombus. Two elastic bands of the first shade are thrown over the two central columns of the rhombus.


Again, two loops are thrown on each vertical pair of columns, and the bottom row is closed to the center with double rubber bands. The shape of the head is outlined.


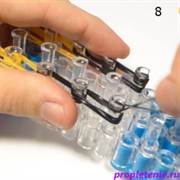
Three pairs of elastic bands are thrown vertically, and from the sixth column two pairs of elastic bands are also thrown on the sides. From the same side there are two rubber bands to the seventh central column, closing a kind of circle.


Three loops depart from the side columns, each double. On the extreme lower columns, the compartment closes. Eight on the left and right double loops are thrown on the middle column. On the open central columns in this part, two elastic bands of the main color of the body are thrown. And all the details begin to intertwine.


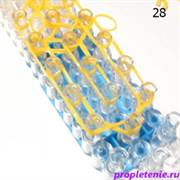
The assembly of the cat begins by attaching the tail to the two lower center columns. One end of the loop, on which the tail hangs, clings to the lowest rod, the second to the previous one. The tail can be tucked down for convenience.


Now you need to throw one elastic band of the main color, twisted twice over the last three triangles.


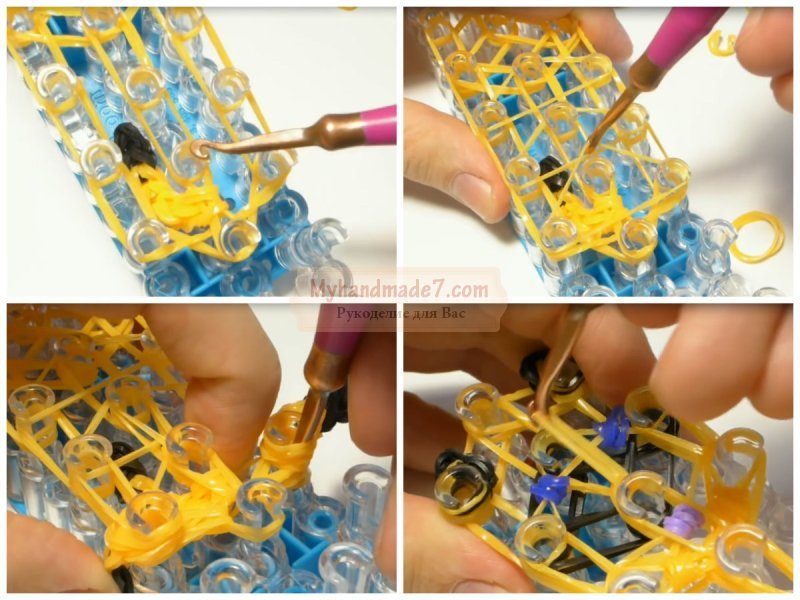
The next step is to create the details of the cat's face. The eyes and nose are made. It can be both dark-colored elastic bands twisted several times, and small beads. If you show on the example of rubber bands, then you should wind two rubber bands 4 times on the hook. Alternately, they are pulled together by one elastic band of the main color.

The eyes are stretched exactly in the middle of the black diamond, which formed the area around the eyes. One end of the loop goes to the left corner, the other to the right. The stretched elastic between the eyelets has formed a double line, its one edge is thrown onto the upper column, thereby the eyes will smoothly move to the upper cavities.


The nose is created by the same principle. Only now one elastic band is taken, wound on a hook in 4 turns and pulled over one elastic band of the main color. The nose is placed on the extreme columns exactly under the selected eye area.


To create the ears, a triangle of black rubber is formed on the free part of the machine. Vertically, from the corner of the triangle, one vertical loop is thrown onto two columns of the main shade of the cat. Then, from the corner columns, from left to right, it is thrown along an elastic band folded in half, from left down to the central column, from the central to the left.


One elastic band, wound 4 times, is thrown onto the lower column of the ear. Now all the details of the ear need to be woven together. Through it, two rubber bands are crocheted from the inside, stretched from the right pole and thrown back onto this pole. With rubber bands from the left column, the same is done.


