We do decoupage of flower pots with our own hands: a detailed master class with photos and video tutorials on working with different techniques. Decoupage of a flower pot "Hares in a birch forest" using craquelure
I'm just learning decoupage. So far, my work is the simplest, for beginners like me. Today I will show a clay pot decoupage master class.
At the hardware store, I bought an ordinary clay pot. These used to be called krinks and were used in the village for milk. Inside the jug was already glazed. And the outer side, as you can see, is ordinary, without a pattern. I really liked the Provence style. Therefore, I designed the jug in this style by buying napkins with lavender.
What will be required:
earthenware jug
Napkins for decoupage (one is enough)
acrylic paint
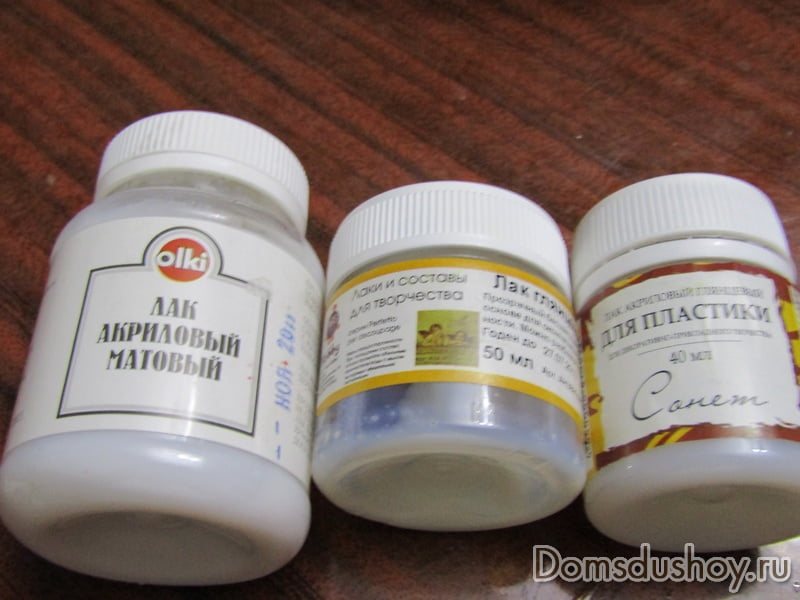
Acrylic lacquer
PVA glue (optional)
Sandpaper (fine-grained)
Brushes, sponge
Since my jug is already glazed inside, I did not prepare the inner surface additionally. I read that a jug that is without glaze, just burnt, needs to be poured with full-fat milk and kept for 20 to 30 minutes. Then carefully drain the milk so that it does not get on the outside.
I only washed off the barcode label in advance and went over the walls of the pot with a dry brush. This is for prevention, to remove dust. The pot was from the store and stood on the lowest shelf.
Bought this pot

I used water-based acrylic paint for the primer. The first two coats were done with white paint. The next two, I added quite a bit of blue color to the paint, which I bought at a hardware store. 

Dry each layer well. However, the paint dries very quickly. So in one evening I did all four layers and glued the napkins.
In order not to leave fingerprints, I first painted the jug itself, then, after drying, painted the bottom. The first two coats of primer were applied with a brush. The next two are foam sponge.
When the last layer of primer was completely dry, I glued the motifs. For decoupage, two, three-layer napkins are suitable. Before gluing the motifs, you need to separate the white layers of the napkin. Then tear out the motives with your hands or scissors. Line precision is not needed here. A thin layer of a napkin without a pattern will not be visible after gluing. So I just pulled out with my hands all the bunches of lavender that I wanted to glue.

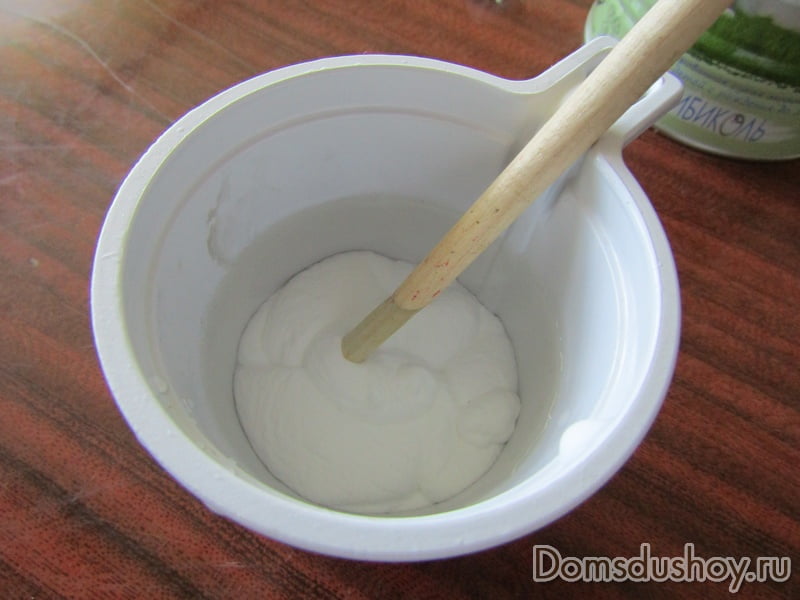
I glued motifs on PVA glue. Can also be applied to acrylic lacquer. Before gluing, grease the surface of the pot where the motifs will be glued with glue or varnish.
So that no wrinkles form during gluing, the motif must be moistened with water. It is recommended to lower the napkin directly into the water and then blot it with a towel or napkins. Perhaps the recognized craftswomen do this. I'm not succeeding so far. The napkin is falling apart. Therefore, I simply apply the motif to the surface and spray it with a spray bottle. Water quickly spreads over the entire surface of the napkin. The napkin stretches and I gently straighten it with my hands or a brush. I have a spray bottle that was left from under the hair care product. I washed it and now use it for my creations.
Then I iron the motif from above with a soft brush from the center to the edges, dipped in PVA glue. If wrinkles are still formed, they can then be cleaned with a knife.
After gluing, I left it to dry completely. 
When the motif dries, cover with one coat of colorless acrylic varnish. After the layer of varnish had dried, she examined the jug and, where wrinkles nevertheless formed, she cleaned it with scissors paper. Knife need to take the smallest, zero.
If there are flowers, then there must be grass. I painted the grass with a brush. Used a soft brush. I made a few more strokes all over the jug to give it a slightly aged look.

The photo doesn't show very well. I made strokes with a paint brush without applying any pressure to the brush. Her bristles are coarser and you can just make such careless strips.
Then I applied four more coats of acrylic varnish. The varnish was applied with a soft brush. Here's what happened  While artificial flowers are in the pot. But in such a jar you can put live ones.
I do all these things late in the evening and at night. Unfortunately, good photos are not always obtained. In the background are boxes made of newspaper tubes and painted with acrylic paint. I also have this hobby. True, the work has not been posted yet.
And more advice. When working with paint and glue, it is not always possible to work accurately. I cover the table with old bags or garbage bags. Then I just throw away the dirty ones and take new, clean ones for the next job.
Get the latest articles in your inbox
There are flower pots in almost every home, and very often the hostess would like them to serve not only as the place where her favorite plant grows, but also to see them as an unusual and harmonious part of the interior. But it is often very difficult to find suitable flower pots in the right range of shades, and even more difficult to choose a pot with a pattern that suits your interior. The author of this idea, we suggest that you familiarize yourself with a simple, but very beautiful and effective method of decorating flower pots - this is with the help of napkins. Napkins are now presented in a huge assortment and it will not be difficult to choose the right ones for your interior. Let's heed the advice of the author and give new life to an old flower pot that will perfectly fit into the interior and will delight your eyes every day.
For work you will need:
1. Old flower pot.
2. Sandpaper. The author uses K-120 size 20*20 cm.
3. PVA glue.
4. Napkins with a matching pattern.
5. Acrylic primer.
6. Acrylic paints.
7. Brushes for applying varnish and glue.
8. Scissors.
9. Foam rubber sponge.
10. Tray.
11. Dense file.
1 step.
To begin with, wash the pot well with a brush and detergent and dry it well. To speed up this procedure, you can use a hair dryer, as the author did, or you can simply leave the pot to air dry.
Then, using sandpaper, carefully sand the pot.
In the same way, we sand the plate that comes with the pot (tray for water accumulation). This procedure is very dusty, so the author advises to carry it out on the street or on the balcony. After this procedure, the surface of the pot and tray should be smooth, the old paint should not bulge anywhere or crumble.
Now you need to rinse the pot from dust and dry it well again.
2 step.
Then we take the acrylic primer and apply it with tangential movements, pressing a piece of foam sponge against the surface of the pot. The layer of soil should not be thick, otherwise, after drying, it may crack. Now let the soil dry very well.
Now you can apply the main background color. In this case, the author used three spoons of white paint and a few drops of yellow. You are guided by the color scheme that prevails in your interior and also consider the size of the decorated pot.
It is also necessary to remember that the background color is simply obliged to be in harmony with the napkin you have chosen.
Evenly apply the background color to the pot with a sponge.
If you have a small roller in your household, then the author strongly recommends applying paint with it. In this case, the paint layer is thin and applied evenly.
We apply the same paint on the pallet for the accumulation of water. Since the shape does not allow using a roller for high-quality paint application, we apply the paint with a sponge. In order not to get your hands dirty and paint over all hard-to-reach places with high quality, the author recommends using a clothespin as an applicator. Dry the painted blanks well.
If you have a small amount of paint left, collect it in a small jar.
Be sure to close the jar with a tight-fitting lid. Paint may still be needed, but it is very difficult to achieve exactly the same shade with a new mixing of paints.
3 step.
Let's get to work with napkins. To begin with, we will carefully consider the napkin and finally decide which of their elements you would like to see on the updated flower pot.
We cut out the fragments we like and separate the top layer from this piece, on which the drawing itself is directly applied.
Take a dense file and a tray, put the cut out piece of napkin with the colored side down and pour some water.
Very carefully with a brush we distribute water over a fragment of a napkin. In this way, you stretch the napkin fragment on the surface of the file and this will help you avoid creases and folds in the drawing when transferring it to the flower pot.
Then, very carefully, lift the file and gently drain the water from it, making sure that a fragment of the napkin remains on the surface of the file.
We transfer the picture from the file to the surface of the pot. To do this, we attach the file and a fragment of a napkin to the pot and carefully smooth it.
Carefully remove the file so that the motif cut out of the napkin remains on the surface of the pot. If necessary, use a brush or hold the motif with your fingers.
We fix the motif with PVA glue, apply glue with a soft brush on top of the motif. If wrinkles are formed, carefully smooth them with your fingers in the direction from the center to the edge of the pattern. Dry the workpiece well.
If the folds still turned out, carefully, without pressure, sand them with sandpaper.
If the borders of the napkin turned out to be very noticeable, take a sponge and the previously remaining background paint and paint over the resulting transition with light tangential movements.
4 step.
Then we mix paints for the border of the future product.
Sponge paint on the edges of the flower pot.
Paint the edges of the water collection tray with the same paint. Dry the blanks thoroughly.
5 step.
Now we will cover the pot with acrylic varnish in several layers. Be sure to thoroughly dry each applied layer of varnish. And do not forget: the amount of varnish affects the service life, the more layers, the more durable the product is in the end. The author in this case applied 10 layers of varnish.
And now a chic flower pot is ready, to which you gave a new bright and colorful life.
I’ll tell you one little secret: that evening when I was studying, I was so carried away by this business that I also wanted to urgently decorate something. The choice fell on
For work I used:
- an old table that is not a pity to drip with glue or paint
- flower pots, plastic and ceramic, new and empty, as well as already planted indoor flowers.
- three-layer napkins with a floral pattern
- PVA glue
- plastic cup for diluting glue
- scissors
- brush
- acrylic varnish (glossy)
- soft microfiber cloth (for timely removal of dirt)
So, I decided to start with a ceramic pot with a flower already planted in it. It is covered with green paint, monophonic.

I chose a napkin, which, in my opinion, could go well with him. I pulled out a fragment, not forgetting to first remove the two lower layers from the napkin.

I tried this piece of napkin on the pot.

It became clear that four such roses needed to be glued.

I diluted PVA glue one to one with water in a plastic glass. I let it sit for a few minutes for the glue to mix with the water.
And finally, I started gluing the napkin on the ceramic surface of the pot. Gently dipped the brush in PVA glue and glued the fragment to the pot in sequence.

I thought it would be very inconvenient to have a flower growing in a pot. But nothing, I did it. I slightly bent the pot and pasted four roses on all sides.

Here is the finished pot. A napkin lay well on it and wrinkles are almost invisible.

I put the ceramic pot to dry, took up the plastic one. It's new and white. I decided to stick the same roses as on the previous pot.

She did everything without haste, with pleasure. I also glued a few fragments on all sides of the pot.

At the bottom, I folded the edge and also glued it with glue.

Here it is and the second pot is ready, still with raw glue. Of course there are wrinkles. But it is important not to touch or peel off the soft and wet napkin layer during the drying of the pots. It's next to impossible to straighten it out.

The next one was also a plastic pot.

For him, I decided to use a dense napkin with a bright cage. By the way, for decoupage, choose dense and durable napkins. Soft ones are much more difficult to stick on because they quickly soak and tear even under a soft brush.

Here is the result of my labors.

And this is the next contender for the transformation.

I choose roses already familiar to you.

Ten minutes later and he's ready. The evening was a success!

My pots change very quickly. And, I think, for the better.

Then a few more pots were made. Agree, with this tablecloth in a small rose, the pots look quite bright.

That's so close. And don't berate yourself for the small wrinkles on the finished pots. Experienced craftsmen, for sure, also have them, only they do not like to admit it.

I think that after practicing on pots, it will be possible to decorate something else at home with the help of this technique (decoupage).

This photo is with those that I told you about at the beginning of the article.

You can take a closer look at the pots.

But that's not all. I thought that was not enough! The next morning I continued to decoupage pots. Now I took a brown plastic pot with a plant already planted in it.

Against a brown background, these roses look like a transfer picture. But also as an option.

This rosette will decorate the next pot. 
And here he is. It has a mandarin in it. It grew from a bone thrown into the ground. 
Then I decided to combine a checkered stripe from one napkin and a floral design from another. I had to prepare quite a few of these fragments for the design of the next pot.

It took me much more time to decoupage than all the previous ones. And all because it is quite voluminous and I had to stick small pieces of a napkin and at the same time try to choose the right pattern.

Here they are, my tangerine "trees" in updated pots.

I covered all the flower pots with acrylic varnish, but only when the PVA glue was already completely dry.
The decoupage technique has many advantages. Here are some of them:
- easy to select material for work
- a wide variety of materials and for every taste
- decoupage is fast
- objects after decoupage are completely transformed
- does not require special skills and experience

And my pots have changed beyond recognition and seem very elegant to me.

Such work does not tire, but quite the contrary, it gives rest to the head, and at the same time, as a result, it also turns out that the house becomes more comfortable.

Now each pot has acquired its own identity, instead of white, brown or gray.

If you have never done decoupage, give it a try. This is an exciting activity. After all, judge for yourself: as a result, you can get a completely exclusive thing, such as you came up with it. Now a lot of materials for decoupage are being sold and therefore there is a lot of opportunity to dream up and bring it to life. All good mood and inspiration!


2016, . All rights reserved.
Every hostess tries to do everything to make her house look beautiful and unique. Not the last place in creating comfort in a home is occupied by indoor plants. Ordinary plastic or clay flower pots often look dull and simple against the background of the entire interior. A good way out of this situation can be a regular large flower pot. This technique, translated from French, means “cut”, which explains its essence. The master selects paper motifs, cuts out the necessary elements and decorates the object with them.
In the photo below you can see how impressive flowerpots designed using this technique look.
Most often, paper napkins are used for decoration. But experienced craftswomen have already learned how to use fabric, foil, dry flowers and leaves, plant seeds for this technique. In the photo below you can see a pot made using eggshell decoupage technique.

Our step-by-step master class will help everyone to master this technique.
Do-it-yourself decoupage of a flower pot using napkins

We will need the following materials:
- flower pot;
- three-layer napkins;
- PVA glue;
- water-based acrylic paint in white or silver;
- brush;
- scissors;
- sponge;
- acrylic water-based varnish;
- multi-colored acrylic paints, rhinestones, beads for decoration.
Step by step instructions for beginners
1. Wipe the flower pot dry.
2. We cover the surface of the pot with acrylic paint with a sponge, as shown in this photo.

To achieve a more even tone, you can apply a double coat of paint.
3. Leave the pot to dry.
4. Cut out the elements you like from napkins and separate the color layer. It is he who will be needed to decorate the flower pot.
5. PVA glue is diluted with water in a ratio of 1:3. We apply the prepared fragment of the napkin to the surface of the pot in the place where you want to stick it. We dip the brush into the glue solution and apply glue on top of the paper element with movements from the middle to the edge. You can see it in the next photo.

Try to gently straighten any wrinkles that form. Make sure that there are no air bubbles between the wall of the pot and the napkin.
6. Leave the pot to dry.
7. After drying with acrylic paints, you can draw the contours of the picture, draw some elements (veins on the petals, stamens), glue rhinestones or beads for beauty.
8. We cover the decorated flower pot with two layers of acrylic varnish and leave it to dry completely. All work completed.
Step by step MK look at the video:
Clay pot job with a simple job description
Clay flower pots are easy to decoupage. The only thing to consider when decorating such pots is that the clay can absorb a small amount of liquid. This means that you may need a little more glue and, accordingly, time to dry the work.

This task according to the execution technology is fully consistent with the step-by-step instructions described above.
We are trying to work with the decoration of an ordinary plastic pot

Plastic pots can be decorated using the same technology as clay pots. But there is an even easier option - even without the use of glue. To do this, we apply the motif cut from the napkin to the surface of the pot and glue it with light movements of the brush, immediately dipped in acrylic varnish.

In the same way as in the first method, we smooth out wrinkles and irregularities. After drying, apply another layer of varnish.
See the detailed MK in the video tutorial.
A flower pot decorated using decoupage technique will never go unnoticed. We also recommend. They will take a worthy place in your home and will attract the attention of guests no worse than famous works of art, as well as decorate and refresh the overall interior of your home.
Video master classes for beginners
We have prepared for you a selection of interesting video tutorials and MK.
Provence style
Remember, we already studied with you? Here is another visual aid.
With aging effect
The effect of aging (otherwise called) in this short video.
Get better at decorating with us at our masterclass ).
Fans of home vegetation will understand me. So you want your favorite flower to have a decent "clothes". Sometimes it is very difficult to find pots that fit perfectly into the interior, and in which our home flower was comfortable and cozy. There is a way out - to create a pot that is perfect for your favorite plant and will become an integral decorating element of your home interior. - a technique that will help us with this.
To decorate a flower pot, we need:
- ceramic, clay or plastic pot
- napkin with your favorite pattern
- PVA glue
- acrylic paints - white, light green, green
We begin to decorate our pot.
1. We paint our pot with acrylic paint - completely outside and 3 cm from the edge from the inside.
In order for acrylic paint to take better and last longer, you need to properly rub our pot with sandpaper.

Master class decoupage pot
2. After it has completely dried, we glue the fragments of the picture torn from the napkin. To do this, use glue diluted with water in a ratio of 1: 2.
Glue very carefully, leveling all the folds of the napkin pattern from the center to the edges.

We decorate the pot
3. After complete drying of the place on the pot, where there is no napkin, you need to finish painting with light green and green paint in order to get a single solid drawing. When the paint is completely dry, it is necessary to varnish the flower pot.

decorate the pot
Our flower pot is ready!

DIY decoupage
Thanks to Lyudmila Bolotova for MK