Snowflake made from three snowflakes. How to make beautiful paper snowflakes with your own hands. Origami technique for creating volumetric snowflakes
Do you want to decorate your house with do-it-yourself voluminous paper snowflakes for the New Year? No problem! Our photo tutorials will help you make a beautiful holiday decoration step by step.
Now on sale you can find any decorations for the Christmas tree, bright balls, colorful garlands. However, if you make toys with your own hands, you can also get aesthetic pleasure from the process.
A simple option for making a volumetric snowflake
Although paper rips and wrinkles easily, it has many benefits. One of them is that it easily takes any shape. It is not for nothing that the Japanese believe that the whole world is hidden in the paper square. Psychologists advise doing paper crafts with children, as it has a beneficial effect on their nervous system.
To begin with, let's make the simplest, but such a wonderful volumetric snowflake. We will prepare the following materials: A4 paper, glue and scissors.
Do-it-yourself step-by-step making of a volumetric snowflake:

- Fold the sheet in half along its length and cut it off, then fold it diagonally and cut off the excess, resulting in 2 squares.

- Then we bend them 2 more times diagonally and cut out the rounded petals, on the side where the ordinary sheets are located.

- In each of them, we cut out two more rounded cuts, without bringing it to the end.

- We lay out the workpiece and bend the middle petals and glue to the middle, do this from 4 sides.

- We will perform the same actions with the second figure.
 Step-by-step photos of creating a snowflake
 - We glue the parts together, the reverse sides, and turn the lower one by 45 degrees, we get a lovely decoration.
 Photo: Beautiful New Year's paper snowflake
 Team snowflake for New Year 2019
New Year's volumetric paper snowflakes look gorgeous if they are made from several types of colored paper. You can use the shiny wrapper that tea is usually sold in.

Let's prepare the following materials:
- colored paper - 6 squares;
- scissors;
- stapler;
- Ruler and pencil;
- glue.
 The scheme for cutting a volumetric snowflake
 - Take the first square, draw a line connecting the two corners. Then on one side we will draw three triangles, at a distance of 1 cm from each other, without connecting the lines. You can see this more clearly on the diagram.

- Fold the square in half and make 3 cuts on each side, without completing them.
 Step by step photo
 - Expand the shape and first connect the corners of the smallest, inner square and glue them together.


- Turn the square over and fasten the ends of the next square. We repeat the whole process 2 more times. We got just one detail of the future snowflake.

- We repeat all actions from the remaining 5 squares.


- Then we fasten three parts together, and then from two large parts we compose one whole figure.
You can attach a string to a snowflake and hang it on a Christmas tree. If you attach voluminous snowflakes to the ceiling in an office, then at the slightest movement of air they will swirl, creating the feeling of a snowy waltz.
Snowflake in the form of a ball for the New Year 2019

The product looks very beautiful if it is made of wrapping paper on a paper basis, only you first need to glue it together. But for a start, it's better to practice on plain white paper; scissors and glue will still come in handy during the manufacturing process.
Let's consider the whole process step by step:
- We cut out 6 squares with a side of 9 cm from a sheet of A4 paper, the whole snowflake consists of six identical modules.

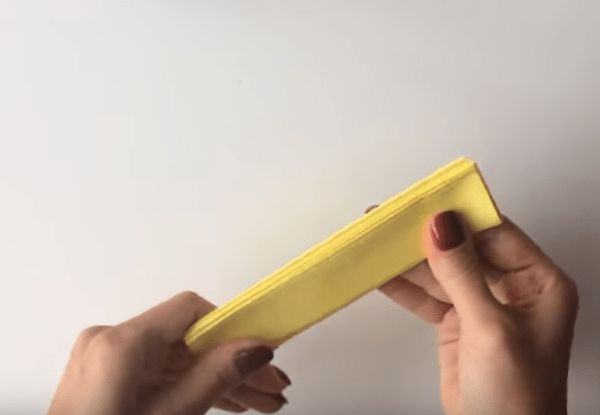
- We take one square and fold it in half, unfold it and make a fold narrower, on the other hand, if you take all 4 sides of the figure with your fingers, you get a folding bud.

- We bend each corner of the part by about 8 mm, make 4 notches on a square bent in half, up to the boundary line on one side, turn it over and do the same on the other.

- Expanding the part, we will see two triangles with cross-sections, we bend the extreme and third stripes in the opposite direction. If you fold it back into a triangle, then the two strips will protrude, we try to keep them parallel to each other.

- Now we bend the triangle at the very top to the outer side, and bend it in half, first in one direction, then in the other, holding the corner, put it back.


- We repeat the process from the other side.

- Expanding the figure, we see that there are two whole triangles left, carefully, stepping back 6 mm, we make an incision, not reaching the end of 1.5 cm on both sides.


- Then, starting from the center, we make cuts to two points, that is, a checkmark came out in the middle, we divide it in half. We repeat the same actions on the other side.

- It turned out to be a rather delicate detail.
- It is necessary to make 6 such parts, then glue them together.
The result is a gorgeous snowflake ball. It can be done in gold or silver. She can become the main decoration on the New Year tree.
Snowflake making video:
Snowflake-star

A beautiful volumetric paper snowflake for the New Year 2019 is made easy and simple! With your own hands, this product can be made together with children.
Necessary materials:
- colored paper - 4 sheets;
- glue;
- scissors.
Step-by-step manufacturing process:
- Take a sheet of A4 paper and cut it in half along the length, do everything the same way with the rest, we get 8 blanks.

- Take the first rectangle and fold it in half, then halve each half again. We unfold, 4 long rectangles came out, first we wrap the outermost ones in half, and in this form we bend the entire rectangle along its length. Let's repeat the whole process with the rest of the blanks.

- Take a ruler and a pencil and draw lines from the center of the narrower side to form a triangle, but not to the base. On the one hand, from the base there will be somewhere 4 cm, on the other - 7 cm and cut it out.

- We apply the resulting figure to the rest of the blanks and cut out the remaining 7 pieces.
- We unfold the figure and bend it along its length, coat the outermost strip with glue, bend and glue it. Let's repeat the process with the rest of the details.

- Then we glue all the details, putting them in a pile. Now we grease the last edge with glue, unfold the stack and glue it to the first.
The result is a beautiful and airy snowflake star.
Braided paper snowflakes
In Soviet times, children were happy to make snowflakes, glued flat ones to glass, and voluminous ones were hung from the ceiling. Then, for some reason, the fashion for this passed, and purchased products became more popular. How wonderful it is when the well-forgotten old comes back.
Let's make voluminous paper snowflakes with our own hands for the New Year 2019 to decorate your home with original toys.

Diagrams and description of the process:
- Take a piece of colored paper, for example, blue, A4 size, cut it into strips half a centimeter wide, along the long side. One craft requires 20 strips.
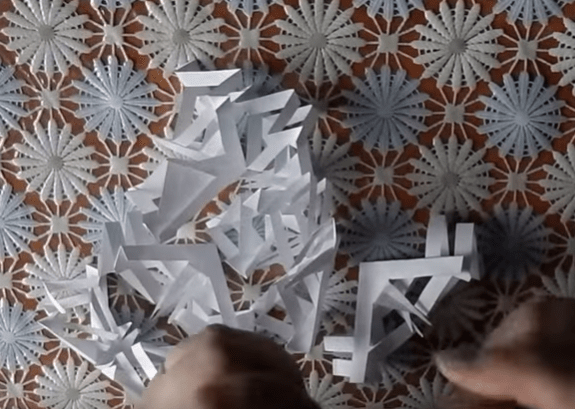
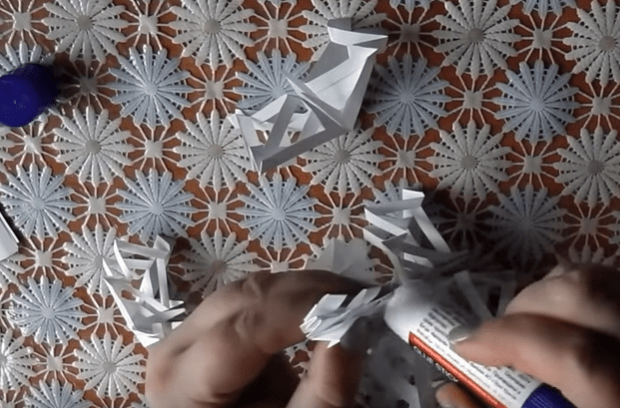
- We take 10 strips, divide them in half and weave a loose mesh. You should get a figure with a lattice in the center and free ends. Put some glue on the wire rack to fix it. Let's do the same with the rest of the stripes.
- Now let's put one shape straight, and the second on it, but with an offset of 45 degrees.
- Take the 2 extreme strips of the lower part, bring it up and fasten it with a stapler, above the upper part. Let's repeat this process with all the stripes. We turn the workpiece over and repeat all the steps. This must be done 4 times.


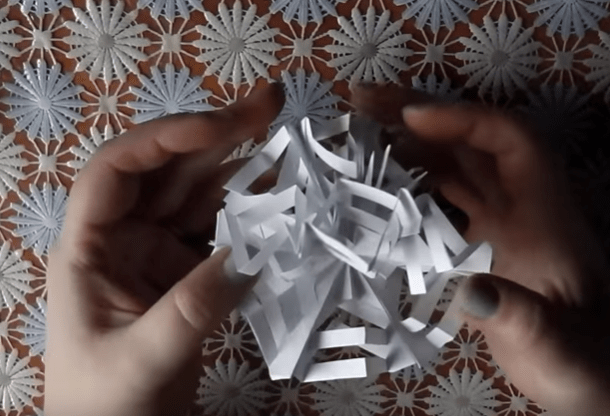
A beautiful volumetric snowflake comes out with a braided square on top.
Corrugated snowflake

Create one for New Year 2019 with your child. When a baby works with paper, he does the same actions with both hands, and this is very useful for the brain and fine motor skills. In addition, it forms diligence and perseverance in the baby. No complicated materials are needed; paper, scissors, glue and a stapler are enough.
And the diagrams will step by step facilitate the manufacturing process:
- Take a standard piece of paper and cut it in half lengthwise. One half is enough to create 1 snowflake. Fold the leaf like an accordion and place it in the middle.
- We will make cuts on the sides on both sides with scissors, their shape depends on the imagination, it can be openwork petals or geometric shapes.
- Then grease one side with glue and stick to the other. Expand the snowflake and glue the remaining sides.

 Scheme
 By making different cuts on the sides each time, you can make a whole set of unlikely snowflakes. The manufacturing process is very simple, but quite fun.
Fantasy snowflake for New Year 2019
Interestingly, many centuries ago, Japanese monks were fluent in the origami technique. When they needed to convey a secret message, they wrote it down on a piece of paper, and then folded it into some kind of figurine. So, to unfold it without tearing, only the one to whom the message was addressed was able to.

Let's make a voluminous snowflake out of paper, showing imagination, it depends on it how the future work will look.
Necessary materials:
- paper;
- scissors;
- paints and brush;
- pencil;
- large button;
- decorative cord;
- gypsy needle;
- sequins, sequins.
A step-by-step process for making a volumetric snowflake:
- Take a white sheet of paper and draw 8 petals on it, 6.5 cm wide and 11 cm high. We cut out and paint them with paints, in one or in different colors. Since this is a fantasy snowflake, you can make it from old newspapers or brown paper.

- Now, in the same manner, we will make 8 more petals, but only from a different color of paper, we will also need a circle that will serve as the base. You can make it from thick cardboard.

- We glue the denser petals, in wide parts, to the base of the circle. An eight-pointed, still flat snowflake should come out.

- Then we roll the thin paper petals into a small bag and glue them into the gaps between the cardboard petals, with the narrow part to the center.

- In the middle of the snowflake we sew a button on a decorative cord, leave long ends and tie it to a bow.
Decorate the snowflake with sequins and sparkles.
Airy paper snowflake
Interestingly, in the East, paper is endowed with a special meaning, it is believed that good paper can be made only from November to December. In addition, the Japanese characters for paper and deity, despite the fact that they are spelled differently, sound exactly the same.

Let's make a light and ethereal snowflake out of colored paper, prepare glue, scissors and a pencil for this. Incomprehensible moments can be seen in the photo. Let's consider the sequence of actions in more detail:
- Take a sheet of colored paper and fold it in half along the length, then make an accordion in width, 1 cm thick.

- To do this, fold the strip to one side, turn the sheet over, bend it to the other side, and so on until the end.
- Then we unfold and cut the sheet lengthwise.

- It turned out to be two accordions.


- We take the first one and, using a simple pencil, draw a pattern for the future snowflake, for example, thin leaves. We repeat the pattern on the second accordion.

- Cut out the drawn pattern with scissors.


- We lay out the halves and glue them together, first on one side, then on the other, as if looping it back.


- Expand and collect in the center.
You can glue the center or leave it that way, so the snowflake will be more airy. Lying on the table, it folds easily, and when you take it in your hands, it turns into a garland.
Transparent snowflake
Invite your child to make a simple volumetric snowflake for the New Year from paper with their own hands, for an exciting activity time will fly by.

Necessary materials:
- colored A4 paper;
- scissors;
- simple pencil;
- glue;
- bead.
Step-by-step manufacturing process:
- Take a sheet of paper and fold it so that we get a square, cut off the unnecessary with scissors. Fold it diagonally, a triangle emerges, which we fold in half 2 more times.

- At the end, where the ordinary leaves are located, draw a semi-oval with a simple pencil and cut it out, but not completely.

- Further, at a distance of 1 cm, we cut the same oval line and also do not finish it. And one more line of the same kind. Then, on the last line, cut out small triangles, so the snowflake will look more elegant.

- Then we make curly cuts on the side where the double leaves are located.

- Expanding the structure, you need to make another one of the same. Or you can immediately take 2 sheets of paper and perform all the actions in one go. However, you should be aware that the thickness of the paper will increase and it will be a little more difficult to cut. If the procedure is performed for the first time, then it is better not to experiment and perform it 2 times on one sheet.

- Take the middle petals, bend them to the center and glue them, you get a small flower in the middle. We repeat the procedure with the second part of the snowflake.


- Then we glue one part onto the second, with an offset of 45 degrees. Attach a bead to the center of the craft to match the paper.

Such snowflakes can be glued to the walls of the apartment using double-sided tape.
DIY volumetric snowflake from stripes
Working with paper is extremely calming, so if a person feels twitchy and annoyed, then it's time to start making jewelry for the New Year 2019. This helps to put your thoughts in order, focusing on the process of creating a home masterpiece. We need any paper, scissors, ruler and glue.
 Photo of beautiful snowflakes
 Step-by-step manufacturing process:
- Take paper and cut 25 strips 1 cm wide and A4 long. To make the snowflake more colorful, we will use several paper colors, for example, white, cyan and blue.
- First take 5 white stripes, put them together, measure 21 cm and cut off. Then we will make loops out of them, for this we glue the ends of each strip together.
- Now we take 10 blue stripes, also put them together, measure 17 cm and cut off. We take one white loop and on the sides of it we make blue loops on both sides, gluing them slightly at an angle. Therefore, for 5 white ones, we need 10 blue stripes.
- Take 10 blue rays, measure 14.5 cm, and cut off the excess. We take the part with blue and white loops and now we make blue loops on the sides, also slightly obliquely.
- Now we begin to connect, in order to do it correctly, you need to take a white sheet of paper and draw the lines of the correct five-pointed star on it. We take the first part, put it on the center line of the ray, grease the end with glue, apply the second one, aligning it with the second ray drawn on paper. We do the same with all the details. It will be impossible to independently maintain the correct inclination of all parts.

Glue shiny sequins to the center of the snowflake on both sides, the Christmas toy is ready.
Having decided to make voluminous paper snowflakes with your own hands for the New Year 2019, you can not only decorate your apartment, but also have a good time. And if you also call the children for help, you get a fun, family game that will cheer you up.
And perhaps the most popular of these is the paper snowflake.
There are many ways to make a paper snowflake, from very simple to very intricate and original.
In this article, you will learn how to make beautiful snowflakes, and how to create various Christmas crafts from these snowflakes.
But first, it's worth recalling how a simple beautiful snowflake is made, from which we will build on in the future.
Diagram of a beautiful snowflake made of paper
You are offered detailed instructions on how to create a standard snowflake.
If some steps are not clear to you, you can find video instructions below.
1. Prepare a sheet of A4 paper and cut a square out of it. To do this, bend a corner of the paper, pull it to the opposite edge, and fold it. Then we cut off the extra piece and get a square.
Here's how it's done:


2. The triangle that you have turned out needs to be bent in half and put with its top up.


3. Take the left edge of the triangle and pull it a little further than the middle.
Then overlap the right edge.
* You can start bending the right edge first and then the left edge.
* The main thing is that the edges do not protrude behind each other.


4. Turn the workpiece over and cut the lower part to the level of the strip that you get (see the picture).


5. It remains to draw the pattern you cut along the contour. Here are some examples:


Video instruction:
Another option:
Beautiful volumetric snowflake made of paper

You will need:
Paper (white or colored)
Ruler
Pencil
Scissors
1. Cut a square out of paper - bend a corner of the sheet, pull it to the opposite edge, bend and cut off the excess bottom. You will need two identical squares.

2. Bend the resulting triangle in half again.

3. Cut out the petals from the first and second blanks.


4. Open the workpiece.

5. Glue the middle petals to the middle.

6. Repeat the same with the second piece.

7. Glue the blanks together.

You can decorate a wall or windows with such snowflakes.
Cutting beautiful snowflakes from paper
Garland of snowflakes


Suspended structure made of snowflakes
You will need:
Knitting thread
Snowflakes (in this example, these are ready-made felt snowflakes, but you can make snowflakes with your own hands from paper or cut them out of felt using a printed and cut out template).
* Glue one end of the thread to the snowflake, and the other to the hoop. Repeat this step with other snowflakes, varying the length of the thread.


Here's another option:

Schemes of beautiful snowflakes from paper bags

Prepare several paper bags of the same size. 2 colors can be used for better effect.
You will also need a glue stick.
1. Spread glue on the bottom of the bag and glue another bag to it. Repeat the same for several packages.
2. Cut out the desired simple pattern at the top of the glued bags.
3. Unfold the bags and glue the first and last to create a snowflake.
Video instruction:
How to cut beautiful snowflakes like snowmen


How to make a beautiful snowflake out of unnecessary paper

You will need:
Scissors
Hole puncher
Some styrofoam or foam.
From the previous paragraphs, you already know how to cut snowflakes. Therefore, here we will go directly to the next stage.
1. First, make two snowflakes of the same size but different colors. In this example, the diameter of each snowflake is 7.5 cm.
* It is better to align one snowflake, and leave the other as it is.

2. Prepare some styrofoam or foam and cut out a small circle. In this example, its diameter is 10 mm. Use a stapler to make a hole inside the mug. You will have a small circle after using the stapler - save it.

3. Glue a circle of Styrofoam to the center of a flat snowflake, and a small remaining piece to the center of an unfinished snowflake.

4. Apply glue to the opposite side of the unsmoothed snowflake, and glue it to an even snowflake. Press a little on the snowflake so that it "falls" slightly into the foam ring.
* Make some of these snowflakes to decorate your house and tree.


Snowflake medallions are simple and beautiful

You will need:
White paper
Scissors
Stapler
Pencil.
1. Take a sheet of A4 paper and cut it in half lengthwise.

2. Begin folding each half of the paper into an accordion fold. You can fold it in half first, then in half again, and so on, to get an even accordion.

3. Secure the accordion in the middle with a stapler or thread.
4. Draw a simple pattern on the side of the accordion and cut along the contour (see image).

5. Unbend your blank and glue the ends to create a beautiful snowflake.

Here are some more pictures:


DIY beautiful snowflakes from old newspapers

You will need:
Scissors
Acrylic paint.
1. Unfold the newspaper and place it on a table or other work surface.
Hello, friends!

Beautiful craft "Snowflake-ballerina" with simple stencils for cutting
Have you ever met such a miracle of nature? Yes, you walk along the path in winter, and the snowflakes every now and then dance and dance like a waltz. So the masters came up with the idea of making and imitating something similar, but only from paper. The image of a girl who is dancing is taken as a basis. And any skirt you like can be worn on it.

Choose any beauty and cut it out of white cardboard or thick paper.


Use these blanks for the skirt. First, fold the sheet in the desired sequence:

Then choose any sample and carefully cut out the sketch. Dress up the ballerina, and then hang her on a ribbon or thread and on a herringbone, also hang on a chandelier or door.


On a note. A skirt, by the way, can also be made of fabric, for example, mesh or organza. It also looks very gentle and charming. Is not it?

Step-by-step master class on making accordion snowflakes from paper
I want to say right away that you can safely later include such a fluff in a New Year's garland. Or even just decorate a Christmas tree or window with such voluminous snowflakes. And most importantly, even a schoolchild or a younger child can handle such a product. No questions or difficulties should arise.
We need:
- office paper
- scissors
- decorative ribbon
Stages:
1. Fold a piece of paper into an accordion. By the way, you can use the advice and read above in this note on how to do this more accurately.

2. After the accordion is folded, fold it in half. Then draw these triangles. Take scissors and cut strictly along them.

3. Now unfold and you get a fan, but only it is very delicate.

4. Glue all the pieces with glue to make a circle.

5. And also glue a satin ribbon loop anywhere you like.

6. Wait until it is completely dry and then admire such a wonderful gift that you created in 5 minutes.

7. Here it is, a wonderful and sunny fluff made. Create at home with your children so that today there will be a festive atmosphere.

Snowflake Flashlight: step by step instructions
You think how this is possible. Yes, I was also surprised, and then I looked at these pictures and guessed. The point is that you will need, as in the previous description, to make a voluminous snowflake using the "accordion" technique, and this must be done in duplicate.

Guess what for? And in order to insert an LED between them, which will blink lights and emit light. Connect the snowflakes to each other and hang them on a string or thread.

Here is another reminder, you can familiarize yourself in more detail a little higher, if suddenly something is not clear to you here.

And here is such a charming result.


Master class of paper snowflake Hedgehog
We need:

Stages:
1. Print two such blanks on an A4 office sheet.


3. Now make a sun, cut to the center along the lines. Twist each ray. At the same time, start twisting, drip glue (or spread glue with a pencil) so that it fixes. Then twist, again a drop of glue.


5. Do the same with the other beams. The first sun is ready. You will need 8 such blanks.
Next, start assembling with a thread. Use a needle to pierce the first sample in the middle, and make a puncture from the front side (for four toys), then pierce the second product, and so on. Having reached the fifth, turn the product over with the seamy side and make a puncture there.


6. Since it is a very thin piece of paper, take a bead and put it on when all the blanks are on a thread. Start piercing the blanks again, but in the opposite order through all the layers. As you can see, it turns out a prickly hedgehog. Make a knot, put on another bead and cut the thread. Your souvenir toy is ready, straighten the ball.

Volumetric snowflakes for kindergarten children
There is also a craft option for very little ones. For example, it can be a work on a large sample. After all, the snowflakes are all different in shape and width. Let it be new masterpieces made by children’s hands.
To begin with, I want to show a work that is incredibly beautiful and at the same time original. Take a look.

In my collection, there are also other creations that we did last year with my son. Remember, this one))). And if you have forgotten, then you can easily enter. The craft was made using origami technique. It turned out wonderful and cool. Good luck!

So, let's go back and here's what you need to do with two types of office paper. Take blue and white for example for contrast. Of course, a child alone cannot cope, but if you organize an individual lesson, then everything will certainly work out.


The next option, which will also blow you on the spot, and even more so for preschoolers or elementary school students. Take cardboard for strength.
We need:
- glue titanium
- cardboard
- Scotch
- pencil
- decoration
- bottle caps
- Christmas tinsel
Stages:
1. Prepare for the kids these already cut out cardboard blanks in the form of paws (or you can call twigs) and circles.

2. You will also need to take two stars, you can use them store-type, or do it yourself.

3. Then take one circle and glue twigs to it in diameter, in this sequence.

4. Turn the workpiece over and glue the star onto the circle.

5. Then, to give the snowflake bulk, glue the two corks with Titanium.

6. Then tape the covers to the template using tape.

7. Do the same with the second circle. Glue the second snowflake to the lids as well. And to hide them, decorate the covers with tinsel.

An interesting snowflake in the form of a star in the origami technique: step-by-step work schemes
I think that all of you in childhood were fond of origami, I remember very much loved to fold bookmarks for books and create all kinds of people and animals. And of course, when the cold and frost came, I took up work and sat painstakingly folding a leaf to get a snowflake. I made a whole bunch of them, so that later I could decorate my bedroom with them. It turned out every time new compositions. In general, such work has always been a pleasure for me.
Here, quite recently, a child showed me one film, and he also wanted to create such a miracle in the form of an original and fabulous star. I did not think long and decided to also insert it and show you in this note.
And here are other options, also unusual, take note of. I would be very glad if these schematics are useful to you too.


Well, in conclusion, I want to show one more work in the modular origami technique. Gather everything together as a family.


Volumetric snowflakes to decorate and decorate the hall
Of course, when it comes to the moment when we need to decorate the premises for the holiday, we again think about how to do it. And here are some ideas that can come in handy in this matter. You just need to ... look at the materials yourself, and your desire to create.

See the whole process of work on these slides.


Well, now pay attention to this New Year's multi-colored beauty. Bravo to the master!
And a few more options to choose from, they are made of stripes.


Quilling snowflake making video tutorial for beginners
Now for one more creative work that you can easily do, turn on this video and watch. Happy viewing, friends! And most importantly, inspiration.
Ready-made schemes for printing openwork paper snowflakes
Now I give ready-made layouts, you just have to make a printout and create. Cut 3 identical snowflakes according to any pattern you like and sew them in the center with a thread.

So, choose the model you like. Just fold before cutting as follows.


Or you can not sew the blanks, but simply decorate with any cotton balls for bulk.


Christmas snowflake in the technique of facing
Another easy way to make fluff at home. Moreover, this model is good because preschoolers like it. Since this work is similar to applique work, take and glue the napkin leaves in an unpretentious arrangement and you will get a stunning result.
We need:
- cardboard
- napkins
- PVA glue
- wand
Stages:
1. For work you need a blank, but first you need to create it. Choose any layout and cut out the snowflake, and then attach it to the cardboard and outline the outline and cut it out. Or, already print the template on photo paper, which is shown in the figure on the right.


You can come up with your own image, for example, this one.

Now you need to cut a bunch of squares from a napkin. The size is 2.5 cm by 2.5 cm.

3. Then glue them to the workpiece using PVA glue, twisting around the sticks first and dipping them into glue.

4. Fill in this way the entire surface of the toy.

5. After drying, the twisted squares hold tightly.

6. This product will turn out, and it really came out great and snowy. As if they caught a real one from the street.

And we built such a beauty.

Snowflake flower from strips of paper
Quite an easy and not at all painstaking way of working, but the masterpiece turns out to be awesome too. For this creation, you will need strips of paper that will need to be twisted into pouches or cones.

And then glue them to the round base all the way around.

It is advisable to take different colors and sizes of the cones, as shown here. And decorate the middle with rhinestones or something shiny, such as tinsel or sequins.

It is already a matter of your imagination and ingenuity. In any case, such a souvenir looks smart and cool.

We need:

Each strip must be bent to make a petal, and then connect the 7 petals together. It turned out to be a twig. Make 8 such items.

Also create the middle from the newspaper, in the form of such a cylinder. Tie with string or secure with staples.

Then glue the prepared branches to the center.

How do you like this idea? I am very much, and you share your thoughts, express your opinion.

Now consider the following jobs.

Consider all the actions in these photo illustrations and repeat step by step. I hope that there will be no questions, but if there are, then ask.


You can take this fluff in the form of a flower, it is much simpler than the previous one and the technique is interesting. It turns out really a toy that resembles a flower.


I propose for the kids to make a funny and cheerful snowflake in the form of a smiley.
So, dare both adults and children. After all, the holidays are very soon, or maybe they have already arrived, and you still do not know how to make a snowflake? So, what are you waiting for, this post will help you with this. Add it to your bookmarks so that you can open and read it at the right time, and of course make wonderful winter masterpieces.
Good luck to everyone, great mood and, of course, a healthy, happy New Year! Bye, my good ones.
Good day to all!
The most wonderful holiday is approaching - New Year. Many are preparing for it for a month already. Would you say something a little early? However, it is never too early to buy jewelry, quite the opposite. Moreover, if you decide to make some jewelry with your own hands, for example. And what can be interesting to do. First of all, these are, of course, snowflakes. And what do we make them from? From paper.
In this article we will try to make paper snowflakes as well.
Making snowflakes out of paper is quite simple. You need the paper itself and scissors. We take paper, fold it several times to make a triangle. Like this:

Now all that remains is to cut out the patterns. Draw the desired pattern along the edges of the triangle and cut it out. After that, unfold the paper and get a beautiful patterned snowflake.

From what pattern you draw, this will be the snowflake. There is no limit to imagination here. You can cut, for example, the following snowflake:

Or this one:

In addition to ordinary snowflakes, you can make a volumetric one. Here, the manufacturing scheme is somewhat different.

If we make a snowflake from six rays, you will need six sheets of paper, if an eight-rayed one - eight, etc. On each sheet of paper we cut out a square measuring 10x10 cm or more. The larger the size of the sides of the square of the blank, the larger the snowflake itself will be. Now, at some distance from each other, draw parallel lines to make several squares inside a sheet of paper. Approximately as in the diagram.

The next step is to take scissors and make cuts along the drawn lines (in red). We do not cut it out, but just cut it so that these squares are fixed from two opposite corners.

Next, we take the central square (shown by the arrow in the figure) and fold its edges into a tube, towards the center. We glue the ends. Then we turn the sheet over and on the back side we do the same operation with another strip. Then we turn over and fold the tube again, and so as many times as you drew squares.

We do all the other blanks in the same way. After that, we fasten them to each other and, as a result, we get a snowflake.
Cut out snowflakes from paper according to templates that can be printed
You can cut snowflakes not only by folding paper. You can pick up special templates, print, and then cut your craft out of them.

Another fairly simple option.

And this snowflake pattern is a little more complicated.

If you bend a sheet of paper, but have no idea what drawing to draw to make a beautiful pattern, then here are some templates.

Or, for example, like this.

This pattern is a little tricky, but the result is a beautiful snowflake.


There are several templates at once, some of them are simple, some are somewhat more complicated. However, patience and perseverance will help create a masterpiece. And, of course, children, how to cut snowflakes without them.

And a few more templates

Also beautiful, even somewhat delicate patterns.

These are some great templates you can use.
Schemes for cutting beautiful snowflakes
In this section, you can see some patterns for making snowflakes, which can be used to cut beautiful crafts.
According to this scheme, you can cut out a snowflake, following the step by step drawings.

And here is another selection of patterns from several beautiful patterns.

Several different snowflakes can be cut using this pattern.

Another example of how to fold a piece of paper and cut out a snowflake.

This diagram shows how to cut out unwanted pieces of paper (shown in color) to create a beautiful pattern.

A variant of the snowflake pattern with hearts.

And on this diagram, look, quite interesting and original drawings.

And according to this scheme, we make a snowflake not only from a square sheet of paper, but also a round one.

Choose such wonderful schemes for manufacturing.
Simple snowflake patterns for beginners in origami technique
Origami is making paper crafts without cutting out. Snowflakes can also be made using this technique. Here are some diagrams.

This option uses scissors, but only to make cuts.

You can also make the following snowflake out of paper:

To do this, use the following scheme:

In this version, you make a snowflake from the prepared modules.

Then we collect the snowflake itself from them.

Try another pattern that can be used to fold a snowflake.

These were all snowflakes, shall we say, in 2-D format. But voluminous snowflakes are also popular.
Video on how to make volumetric paper snowflakes with your own hands (video)
Volumetric snowflakes look, of course, prettier and more original. And if they are also made in a large size, then they will look quite impressive.
And here you can watch the video, which clearly tells about the manufacture of such a snowflake.
We make snowflakes from paper strips with our own hands
Volumetric snowflakes can be made using colored strips of paper. For example, you can do something like this:

To do this, we take colored paper (you can choose any colors). Cut into strips 29 cm long and 0.5 cm wide. Cut about 20 strips.
Now we put strips in the form of a cross, 4-5 pieces, alternating colors. We put them intertwining with each other.

First, we glue the most extreme strips together (in the figure they are yellow), you should get something like an auto-tie on the map.


The remaining strips (white in the picture) are glued to the corners of the opposite yellow petals. As a result, we get a snowflake, as in the sample at the very beginning of the description.
An easy way to make 3D snowflakes step by step
Bulky, or 3-D, snowflakes look slightly better than simple ones. Let's try to make one.

Take a square sheet of paper and fold it several times until you get a triangle. There are six such triangles to be made. And they should all be the same. Now, on each triangle, draw parallel lines at a distance of about 1 cm. The number of such lines depends on the size of the triangle and there can be three or more of them. Now we cut along these strips from one edge to the other, but, of course, not until the very end.

We expand the triangle back into a square and fold its central part and glue it.

We turn the square over with the other side and similarly glue the next notched square.

Turn over and repeat. And so on until we glue all the cut strips. A similar procedure is carried out with all blanks. After that, we fasten together first three figures, then the other three.
As a result, we get such a snowflake.

or such.

Its size depends on the size of the paper. This craft requires a little more time and more painstaking work compared to simple snowflakes. But the result is worth it.
Quilling style snowflake master class for beginners (video)
Quilling is a paper craft technique that is cut into strips and rolled. After that, all these twisted blanks are connected and we get the conceived craft. For example, these are such wonderful snowflakes.

How to make snowflakes using the quilling technique, see this video
So, we looked at various ways to create New Year's snowflakes. Choose, craft and decorate your homes. Good luck!
On the eve of the New Year holidays, everyone wants the house to be unusually beautiful, cozy and fabulous. Therefore, it's time to think about what you can do to achieve the desired goal. A good option for decorating a room before the New Year's holidays will be decorating windows with unusual drawings, festive motives that will bring a pre-holiday mood and a New Year's fairy tale into the usual atmosphere of the room.
And you don't need to think that all home decorations can be purchased only in the store, while spending a fairly impressive amount of money. It would be much better, having united the whole family, to make a variety of decorations for the house and the Christmas tree on their own. For such an activity, a certain day can be allocated, for example, when it is planned to install a New Year's beauty of a spruce. And don't forget that - this is the most exciting thing to do!
The easiest thing to do with your own hands is to cut and attach snowflakes in different places. Everyone remembers how in childhood they carved them in the garden before the holidays. Today, having become parents, you can usefully and enjoyably spend time with your child, cutting beautiful snow-white snowflakes out of paper with your own hands. Kids are always happy to take part in such events.
Teaching a child to cut a snowflake himself is not at all difficult. To do this, you need to prepare the necessary tools and paper. As a basis, you can take napkins, colored paper, or just a white sheet from an album.
The thickness of the sheet does not really matter. But you need to know that the most delicate and airy snowflakes are obtained from thin sheets. And too thick paper will be difficult to cut.
You will also need a pencil and sharp scissors. After the pattern for the future snowflake has been selected, the paper is folded as shown in the photo. The more additions you make, the more interesting and delicate the snowflake will turn out.


The size of the future decoration depends on how large the leaf is initially selected. In this case, the choice is influenced only by the desire to have a large or small snowflake.

When the drawing is applied to the paper, we start cutting. This process requires special care and accuracy. In no case should you cut off the edges of the paper at the folds, as the snowflake may simply fall apart.

Children really love this process. After all, in the end, you will get beauty with your own hands, which is so pleasant to decorate a Christmas tree, windows or walls in a room.
It should be noted that a seemingly simple activity like cutting snowflakes from paper with your own hands is a great opportunity to develop a child's imagination, a sense of wonderful artistic taste.
It is possible and necessary to develop the abilities of your child at home, but a variety of circles in the garden, school will only help to raise the level and hone the child's talents.
In addition to simple cutting out of paper, a child can be interested in making volumetric models of snowflakes. Such jewelry is designed for older children and adults. But this did not make them less interesting or beautiful.

All the same openwork snowflakes made of paper are taken as a basis, the drawing is transferred, for example, to polystyrene or penoplex. With the help of a sharp knife, all the necessary elements are cut out, and as a result, unusually beautiful, voluminous snowflakes are obtained.

They can be left white, but if you connect the kids and paint them all together with bright colors, then such decor elements will simply amaze with their unusual design. And the time spent creating them will unite all family members. The result of your labors will be unique.

DIY volumetric paper snowflakes
In this master class, we will make such a heart with a snowflake. It can be used as a bag for a small gift or just as a DIY Christmas tree toy.

First you need to print this diagram.


We transfer the scheme to paper and cut it out.


The result is two identical blanks.


For fastening together, we make cuts - on the one side from the top to half of the snowflake, on the other - from the bottom to half of the snowflake.

We collect the ready-made volumetric snowflake, threading into each other.

We attach the handle.


Do-it-yourself volumetric paper snowflake is ready!

How to make a DIY 3-D snowflake
Modern technologies have also achieved such a seemingly simple occupation as creating a snowflake. As the name implies, 3-D snowflakes are a more complex, but very effective technique, thanks to which the made decor is distinguished by a special grace of lines and rather unusual shapes.
What do you need to make a 3D effect snowflake?
Prepare a square sheet of paper of the desired color, pencil and ruler, scissors or a sharp paper knife, glue. Making 3-D snowflakes is very painstaking and requires a lot of patience.
The first step is to draw a piece of paper into squares. We need 6 identical squares. Then such a scheme is applied. It can be printed.

Fold the square in half diagonally, transfer the diagram as shown in the figure. Fold in half again.

The next step is to cut parallel lines. The incisions must be made in such a way that they are directed towards each other, but do not converge to the end.


We connect and glue the corners of the first small square.


Then turn over and glue the corners of the next square.

And so on in order, until all the corners are glued together.

To make the snowflake three-dimensional, you need to very carefully glue the corners of all the squares. As a result, six snowflakes are obtained, which, gluing together, form a volumetric 3-D shape.

We connect the corners of all the blanks to each other.


In order for the figure to keep its shape and not fall apart, you need to additionally glue the sides of the snowflake.

That's it, our 3-D paper snowflake is ready!

Coming up with various patterns, painting a figure with paints and even decorating with beads, you can not only create a very beautiful New Year's decoration, but also help develop your child's imagination and sense of style.
Paper snowflakes - kirigami instruction
Snowflakes - Kirigami is a fairly simple way to quickly and effortlessly make many beautiful decorations. The highlight of this type of snowflake is the selection of paper. For snowflakes - kirigami you need bright colored paper.

It can be colored only on one side, but you can choose paper with saturated colors on both sides.
We take an A4 sheet and fold it as shown in the photo.

Cut out a square, fold it in half diagonally.

We add two more times.


Then we print and transfer such a scheme to the finished workpiece.


The next step is to cut out patterns on the workpiece with the help of nail scissors.


After carefully cutting out the snowflake, unfold it.


Fold the resulting corners, as in the photo.


The snowflake can be decorated with stases, beads, Christmas tree tinsel, and then it will become the central decoration of your New Year's home.
2 more options for do-it-yourself kirigami snowflakes:


A light, airy figure of a ballerina is very beautiful. If you combine together two types of a beautiful snowflake and a ballerina figurine, the effect can surpass all expectations.
It will take a lot of time to make this type of jewelry. But the work of cutting it out is quite simple, even a child can handle it. Not single figures look very impressive, but a whole garland of graceful ballerinas.
What needs to be prepared for work:
- dancing ballerina figure template;
- thin white paper for a ballerina's pack. Layered paper napkins work very well;
- thin cardboard white;
- scissors.

Select a ballerina figurine template. In the vastness of the Internet you can find a large number of options. It is enough just to copy the selected template into a text document, format and print. But it's much more interesting to draw a sketch yourself. Transfer the template to cardboard and cut it out.
It is very important that the cardboard is white on both sides, since the snowflake is voluminous and clearly visible from any side. The size of the figurine is selected at will. There are no restrictions on this issue.