How to make fluffy covered with your own hands. Plaid: Making from different materials in different ways, adults and children's. Plaid from the fleece, processed by oblique baker: master class
Products from yarn, made with their own hands, always look warm and comfortable, so I want to touch them! In this article we will tell you how to make a plaid from pumps - soft, fluffy and unusually beautiful.
Plaid for a newborn from Pomponov will be a wonderful gift from loving mom, grandmother or aunt. Hanging the baby in such a miracle blanket when discharge from the maternity hospital, you will make wonderful and tender photos of the memory of this unforgettable day, and in the future the plaid from the pump will warm the crumb during walks in the wheelchair or will make his sleep at home.

We offer you a master class on making a children's plaid from Pomponov: a photo for him was given to us a loving mother of kids-twins Tatyana Denisov. Those who wish to acquire such a cute package (for their children or as a gift) Tatyana invites to his group VKontakte.
Plaid from Pomponov do it yourself: master class with photos. Instructions for newbies
If you are interested in how to tie a plaid from pompons, we will fix you a little: these products do not knit and do not stitch, but we wipe on a special frame. "Knitting" of such a blanket is a long and time-consuming process, although it does not seem like this at first glance after the study of MK. Forest patience and preferably, because the result is worth it!
So, proceed directly to the master class.
Choose threads for plaid from pumps
To make a plaid for a child, choose the most soft and gentle yarn - the 100% acrylic is suitable for this purpose. In the absence of allergies, the semide and wool can also be used, but note that your threads are not prickly. In our case, the yarn is used from 100% acrylic "Vita Baby" (400 m / 100 g): 3 peach color and 5 white motors with colored streaks.
Why better use yarn two colors? This will significantly simplify the manufacture of your blanket: you do not have to consider the number of trimmed threads when forming pumps.

Eight Yarn Motes will be enough for the manufacture of the plaid with a size of 150x100 cm. If you plan to make a package for a newborn, the dimensions will be the other - 80x80 cm or 85x85 cm; The yarn consumption will respectively will be less than 5-6 sweating.
We prepare the frame for the manufacture of plaid from pomponov
This stage in the process of manufacturing the plaid is preparatory, and usually lies on the shoulders of the male half. You will need a wooden frame or a sheet of plywood, on the perimeter of which at an equal distance (usually 4 cm), you need to drive the carnations / screw the screws or screws. The size of your frame is the approximate size of the future blanket. However, it makes sense to make a frame for several centimes wider and longer, since the yarn, removed and no longer stretched, still give some "shrinkage".
For the plaid 150x100 cm and the standard pompon diameter, 4 cm will require 124 nails (as in the photo - 26 in width and 36 in height); With the size of the frame 80x80, see, it is obvious that 84 nails will be required, 21 for each side of the square.

"Knit" plaid from pomponov: weaving scheme
The next action in creating your blanket is winding the thread on the resulting frame. This is a monotonous, but not the most time consuming part of the process.
Secure reliably (tie a few nodules) on the corner nail thread and begin to wink it with "snake" on the frame: from top to bottom and back, moving from one side to another; Having reached the opposite side, transfer the thread on the adjacent carnation and continue the winding already in the horizontal direction.
Below is the 80x80 molecuction scheme. For plaid larger, the difference will be only in the amount of nails (26 and 36 pieces, respectively for width and length).

Each row - vertical and horizontal consists in a classic version of 50 threads; Thus, in places of their intersection, the number of threads doubles, thus, on the "crossroads" we obtain 50 * 2 \u003d 100 threads. In this case, carry out the winding like this: 20 rows of threads of the same color (40 threads in the intersection), 10 rows of the second (20 in the intersection) and then again 20 rows of the first color (40 in the intersection).
In our case, 80 threads turned out in crossings. At first, white yarn was wound - 30 rows in crossbar places:

then peach, 30 rows in the intersection, and again white with streaks, 20 rows in the intersection:

At the end of the winding, the thread firmly tie on the last carnation, as at the beginning of work.
Tearing the intersection of the threads
Now you have the most difficult and painstaking part of the job - to bandage all the intersections of the threads with strong reliable nodules so that the pumps do not dismiss. Be prepared for what you have to spend on dressing for several days. Wonderful if someone helps you in this matter!


Cut the thread - your plaid from pumps is ready!
The fastest and most pleasant stage of manufacture of the plaid is cutting threads, after which the long-awaited pumps are formed.
Remember, we wrapped the threads of the layers? This trick will help gently cut the threads without counting them. Leave the first layer of threads, it is about 1/3 wound yarn (we have 30 yarn threads with color splashes), and the rest gently cut in the middle between the intersections. Threads around the edges cut into the latter, so that the plaid is securely fixed until the end of the trimming. Looking your plaid when cutting threads will be approximately so.
A cozy soft plaid is always useful at home, and if you make this plaid with your own hands, then value will be even more. You can attract the whole family to the needlework, and then winter evenings will warm up under the warm blanket made by your own hands.
Bright plaid from fleece do it yourself
The soft plaid from the fleece without a single line and the loop will be even a child. Fleece can be called fashionable material recently. Durable, light, warm, easily erased. And this fabric is easy to handle and sewing. Fleece is ideal for creating a blanket. For this work, you do not need special skills in knitting and sewing.
The image is taken from the site: www. kollekcija.com.
- You need a clear number of fleece squares, it is best to make them size 20 by 20 cm, but the number of them depends on the overall size of the plaid, which in the end you want to get. All sides of the squares cut the noodles on the same number of segments. The length of each segment is about 4 cm, with an intermediate of 1 cm. You will succeed on each side of 10-12 segments.
- Now the billets are now sold out in the desired order on a flat surface, the floor is best. Thus, you can post any drawing: cells, strips, rectangles, triangles - all that your soul is pleased.
- Tie a so-called noodle noodle with each other. The stronger is the better that for centuries. Work is painstaking, monotonous and requires patience. Acquire someone to joint creativity, it will be much more fun, and the time will lose imperceptibly. At the end, you can decorate the plaid with bright appliqués.
Here already on the eyes, as in the past master class, you will not make the plaid turns out to be beautiful, neat and even, you need to adhere to certain standards. We approach work seriously, we will not bind the "noodles", but we will use the sewing machine, kapron threads, a special needle with a big ear and a fastened end. You will also need a black fleece - 315 cm and white - 135cm, pins, black and white yarn (better take cotton) and centimeter tape.


The image taken from the site: www.sdelai-sam.pp.ua
- To begin with, take a black fleece, cut a piece of material with a size of 92.5 to 115 cm for the rear of the plaid and 10 squares 25 by 25 cm, the same 10 - and from a white fleece.
- Then make 5 lanes of 4 squares, alternating black and white rectangles in a checker order. And so witch, leaving the allowances on the seams of 1.5 cm.
- Sunshive seams. And the strips fold so that it turns out a chessboard. Align the seams and make each strip from the fleece together.
- On the white squares, open the black shirts of the cross, retreating from the edge of 1.5 cm. And, on the contrary, on the black pieces of the material with white threads.
- Then fold the front part (this is what you have happened) and the rear part (large canvas of the black fleece) and, stupuming from the edge of 1.5 cm, take the edges. But leave on the one hand not flashing 20 cm to turn the plaid.
- It remains now to turn the plaid and swallow. The open slice is neatly sewnly sewn. For this, it will be useful to quarrel threads for quenching. Do it on the front side, laying the line of the seam in the seam.
- Such a plaid from the fleeing sales will not find exactly. White and black color can be replaced with any other, most importantly, so that they are combined.
Soft, fluffy, colored, bright plaid from pomponov perfectly suitable for your baby. You can not buy it in the store, but also to make such a plaid need a lot of time and strength to spend. So take patience.

- You will need a wooden frame with nails. You can make it any size, but more convenient to 80 cm 80 cm, nails are driven around the frame perimeter at a distance of 4 cm. Burst the yarn for knitting (at the same time the thicker of the yarn, the fluffy it is a product). It is best to take acrylic that is used for children's knitting. It is necessary approximately 800-900 g.
- Secure the thread on the extreme nail and start pulling it throughout the frame area along and across. It turns out 50 to 50 rows, and the first 25 on 25 is the basis. For her, white threads are suitable. And in the next rows that are tensioning again in the 25 ratio to 25, it is better to take multi-colored threads. They are then cut down, and the base is not.

- Touch the intersection tightly. It is necessary to cut in the middle between the intersections when we cut 4 sides from one intersection - get 1 POMPON. So continue until all threads turn into pumps. Be careful - ranks on rains remain from tight threads, you can even cut down.

Images taken from the site: www.lliveinternet.ru
Original, multicolored fluffy plaid will delight your child. It will be warm and cozy in it. You can also use this plaid and as a bedspread, such an unusual design will attract the attention of your guests.
Houses are full of old things: T-shirts, sweaters, dresses? You do not know where to do them, and throw out a sorry? Give them a second life! There is an idea - a warm new plaid from old clothes. Agree, it will be pleasant to hide the favorite things in the designer execution.


- First, find as many old sweaters as possible, better woolen. Probably, every hostess in the house will find things that have not yet been worn, but they look even quite decent, and, of course, suitable as a material for your future blanket.
- On average, you need about 10 sweaters, it is possible and more - it depends on the size of the blanket you want to do. You can not score the right amount of woolen things, ask friends, most likely they will be happy to get rid of old unnecessary clothing. Decide in advance with the color scheme.

- Now prepare the material, for this, dissolve the seams on old sweaters, expand the lightning and buttons. After you need to try things to ensure that woolen threads are strong and durable and caught up.

- To do this, post the sweaters, but preliminarily fold them into a bag for gentle wash or in a pillowcase, gain the drum with some more things and select a long mode with a spinning and switching of water with hot on the cold.

- Your plaid will consist of a plurality of squares, so make 1 template from the cardboard and then cut the parts on it. Then spread your billets on the floor, here the real designer work begins, show fantasy.


- We sew the parts on the typewriter using either a knitted line, or the widest stitch straight line. The allowance is about 1/4 inches. Sticking pieces among themselves, be careful, gently promote the fabric, if necessary, drag through the sewing machine.

- For lining, a wool fabric can also be used, but the fleece is also suitable, and flannel. Do not forget to round the edges of the front side and lining before the sewing. The finish is better to do manually using a closed screwdriver seam. Your creation is ready.


Images taken from the site: www.creative-handmade.org
Plaids and bedspreads are designed to give heat, create convenience while relaxing and make an interesting note in the design of the bedroom or living room. In this article you will learn how you can make a beautiful bedspread on the bed or sofa do it yourself. Such a thing will become a unique interior decoration and at the same time your funds will save. Moreover, the process of its creation itself will help you to distract from worries, relax and relax in your own way. How can you make beautiful blankets and covered with your own hands? Read further in our article with 33 photos of ready-made examples and step-by-step instructions!
How can you make a bedspread or plaid with your own hands: options
When you choose the way of making a blanket with your own hands, keep in mind that it should support the overall concept of interior design, combining with wallpaper, furniture style and color curtains. The most popular options for today make the bedspread on the bed or sofa include:
- Tie plaid with a hook or spoke;
- Sew from numerous patchworks (patchwork);
- Make a plaid from the pompons made by their own hands;
- Sew two-sided bedspreads from two types of fabric.
Let's alternately consider photos of interesting examples and step-by-step instructions for applying all the above methods.
Cozy knitted blankets and covered with their own hands
Very great and truly cozy in the interior looks like a knitted plaid. As a rule, he brings a hint of a rustic or bohemian style, although in a monophonic version and with a tight viscous may look quite modern. In the process of creating a knitted blanket, do not necessarily adhere to the same scheme. You can make your own adjustments, play with the color of the threads and incarnate the conceived in reality, without limiting yourself in anything. Several such ideas for creativity with knitting needles and crochet are presented to you in the following photos. Pay attention to how it is impressive and stylishly the plaid, made by a large mating hand.


 Also read:

 Plaids with a large viscous:

 An unusual floral plaid bound by crocheted:
  How can you decorate covered with tassels:
 Wink tone crochet:

A simple way to sew a patchwork patchwork
Tailoring of the patchwork bedspread is not complicated, albeit a rather long process. All the necessary materials for it can be found at hand: old pillowcases, curtains, clothes, etc.
How to sew covers from the patchwork with your own hands? Here is a step-by-step instruction:
- Decide with the dominant tinge of the fabric, and then pick up the colors that are well combined with it.
- Using a cardboard template, ruler and scissors, make the required number of square flap. Traditionally, their size is 15 * 15 cm. At the same time, about 1 cm on each side of the square will go on the seams.
- Alternating various patterns and colors of fabrics, suck all the patchworks among themselves. This will be the front side of the patchwork covered.
- Hot iron seal the inner free edges of the squares;
- You can use a sheet, a solid piece of fabric or also a patchwork as a backward side.

At its discretion, you can leave the seams outside and "rapidly" them, and also decorate the bedspread patchwork with an extra line as the next photo.


By the way, there is another interesting way to make a patchwork covered with their own hands - from crocheted hooks. Step-by-step instructions and examples of finished work below in the photo:


Instructions for creating a plaid from pomponov do it yourself
Funny and very soft plaid from pumps can also be made with your own hands using different methods:
- Decorate knitted bedspreads with pompons;

2. Tie pompon on a special base from threads, which can be done using a simple home frame;

3. Sew poars on a dense textile basis;

4. Tie a bulk viscous.

Below we offer you a few simple ways to make pompons with your own hands.
How to sew covers on the bed do it yourself - 5 photos
In winter, the extra bedtop will be very by the way. And heat will give, and the bedroom design will update. This season is fashionable to decorate a bed with a large cage, monophonic fabrics with a pile and New Year's motifs. We offer you a photo for inspiration and step-by-step instructions, how to sew a bilateral bed with your own hands.


Warm blankets and covered with their own hands - 33 ideas with photos Updated: December 24, 2016 by the author: Evgenia Yelkin
Seeing randomly on the Internet plaid's internet from Pomponikov, also caught fire, that such a miracle must be done. Immediately there was a lot of descriptions, detailed and not very, as well as pictures of finished products, for which the plan for further action was counted.
Well, now I want to tell and show what happened in the end in my photo master class for the manufacture of plaid from pomponov.
Immediately I want to say that the process of manufacturing such a blanket is rather time-consuming and not fast, despite at first glance - so be prepared to be patient and preferably. And also be prepared for what it may be and not to avoid small corns on delicate fingers)))
For the manufacture of plaid from pomponikov, the size of 80 * 80cm it took me:
The incomplete wooden frame with a size of 90 * 90cm, on the perimeter of which at a distance of about 4 cm it is necessary to drive away small carnations. I managed for each side of the frame for 22 nails.

And of course you will need yarn. In my case, on the above size, the 500m acrylic yarn (100g) and a pollube of thin acrylic threads in the color of the blanket (but you can also use the required amount of threads from the above machines)

And of course the manufacturing process itself:
Fix the thread on the extreme nail on either side of the row and begin the snake, moving from top to bottom and back to fix the thread, moving on one side of the frame to another. When you get to the end of a number of nails, we carefully throw the thread on the adjacent nail, and now the threads are not vertically, but horizontally. Thus, we wind the layer over the layer of all five sweats, connecting the ends of the motors into one thread (horizontal stands - the vertical layer and again horizontal - vertical). Fix the end of the thread, tugging it well on the nail.

This part of the process is satisfied with simple and time to do it a bit.
All the most difficult to come in front.
Immediately consider that you need to leave some amount of threads to the next stage of manufacture, or choose a suitable color in the color of a different motility. I took a small motility of the threads of the fond.

We proceed to the second stage of manufacturing plaid from pumps. To do this, cut the thread into pieces of 10-15 cm, and they bandage each intersection of the layers of threads on the frame. Since I had 22 nails in a row, it turned out 400 crosses of threads, each of which was necessary to tie a strong knot.
That's it precisely about this stage, I wrote above, as the most complex, because you really believe me, it's impossible to tie 400 strong knots for some night, while pretty well tired hands and fingers. So be prepared to stretch this pleasure for several evenings. I went to this week, despite the fact that knots knitted in the evenings during two or three hours.

Well, when all the nodules were tied out, the third stage remains, which will seem simple to you and quickly. All that will be required - it is to take scissors and methodically from one row to another to cut the threads between the nodules in the center, forming pumps. At the same time, there are not all threads, and 2/3 of their parts, since the pumps should be formed only with the front of the plaid, and the layer of threads forming the "carcass" remains with the invalid.

The extreme rows with nodes of the thread I left for the next, so that the rear of the plaid's pumps was well fixed on the frame. At the very end, cut the layers of thread around the perimeter between nails - the stress of the threads will be weakened - the pumps will acquire the form, will become closer to each other.

And now the plaid is ready! Fluffy soft pumps will delight not only you, but also your baby! And of course it is worth noting that the view of the plaid causes only admiration!

Video to help
Today completed its work.
Here in such a shelf, when I discharge our baby


For mating such a blanket, you need:
Yarn (I had 10 motels at 150m -100% acrylic, you can also take acrylic with wool - 2 white, 2 coral and 6 peachs. Later, I drew another white motion for dressing intersections)
The sheet of plywood, I have a thickness of 18mm, the size of 80 * 80cm (you can and more, only respectively the thread will leave more!)
80mm nails (shorter I do not advise because the threads will fly.
Help your spouse or other male individuals to drive nails into plywood leaf (maybe there are particularly gifted young ladies, which are forces and carpenter, alas, I don't care about that)
And your desire, patience and of course hardworking handles))
1. I had three shades yarn. 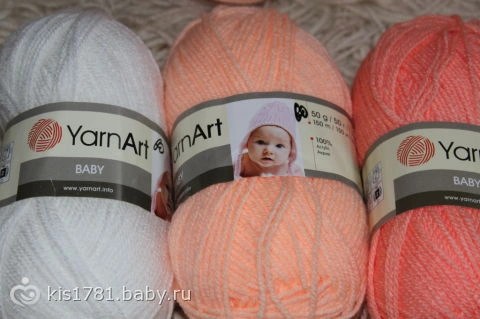
2. Here is a sheet of plywood, nails are already clogged. My distance between nails is 4cm, you can 5, then pumps will be slightly larger. And we begin to wind threads, first the ranks horizontally, then vertically, alternating. I advise you to start with white threads or any plaid contrasting.

3. Macro.  Winches 20 rows of white yarn, launched coral coral)
4. Conduct ... After two metals, we wind the main color is-persya (well, it is from me, and you can have a different shade of threads) 

 All yarn wound ...
5. We tie all the intersections (very hard, I tied up twice). In places of intersection, the thread is obtained 2 times more.
If you take the classic version of the knitting of this pad, everything should be wound up 50 rows of vetech and 50 horizontally,) of them 20 rows of the lowest contraceal shade) i.e. Accordingly, 100 threads are obtained at the intersection. I got more.
 6.
6. After all the intersections are tied, proceed to the formation of pumps. Simply reastrating the upper 30 threads (to white yarn) - I have not 30 and more it turned out, strictly in the middle between the intersections. Be careful, one incorrect movement and this is a cute product M.B. spoiled. Actually everything! If something does not understand something, I will tell you.
  Painted side
Additions to the post at the request of girls - how to shoot with nails plaid
Now go to the next stage of work. Sut our plaid with nails. We go around the entire perimeter of the frame and where the red line is marked with me in the photo, cut in half.

We completed most of the work, now we are waiting for cutting pumps. We take scissors, preferably not very sharp and not stupid))). Scissors are also fairly rubbed fingers, so make breaks when cutting. We cut from our nodes from four sides to 30 threads, not a touching foundation, otherwise nothing will work.
Now I explain why we took for the base of the threads of another color: to not count 30 threads every time, we simply see the color where the basis and do not touch it, cut only another color that we have wrapped after the foundation.
I also show in the photo, where exactly cut, the red line is the case of the cut. That is, we cut small sides of the fallen squares in the middle.

Thus, we cut our entire plaid and eventually it turns out such a wonderful fluffy plaid from pomponov with their own hands.

1.
2.
3.
4.
5.
6.
7.
8.
9.
10.
11.
12.
13.