How to make a toy from the fabric of the cat. Cat from fabric: patterns, master class. To do this will need
Almost all the breeds of smooth-haired cats frown in winter, especially if at home has been installed weak heating or not very heat for some other reason. In this case, the owners have to wear their pets.
Also, many people pick out the animal outfits just like that for beauty, and some even prepare costumes for exhibitions and real fashion shows, where cats dressed in chic outfits are the main models.

If you wear a pet in specialized salons, you can leave a lot of money. It is much more profitable to sew clothes for the cat with their own hands. This can be done relatively simply by using these recommendations.

Types of clothing for cats that can be sewn with your own hands
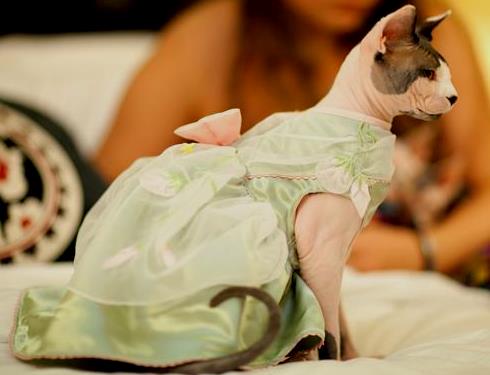
To start sewing clothes for cats, you do not need to draw a pattern every time, it is enough to do this once, and then as necessary to make the necessary adjustments. This pattern is suitable for sewing many types of clothing. With the help of it, you can make a comfortable T-shirt so that the Sphinx or the cat of another smooth-haired or bald breed has not overheated in the sun. For this purpose, knitted fabric will become the best choice of matter.

If you take more dense matter and make a slightly smaller cut for the neck, as well as openness for the paw, it will turn out the option of a warm sweater, jackets, fufi or ponfon for winter walks on the street or accommodation in weakly heated rooms.

When choosing elegant ornaments and an interesting color composition, you can create a dress or a suit in which the pet will not be ashamed to be shown at exhibitions.

Carnival costumes for cats look very cute:


During the creation of a sketch and patterns, it is extremely important to consider the location of the parts in such a way that the cat can breathe freely and move, without confusing in the abundance of jewelry. You should not sew some sharp or stitching ornaments, as well as those elements that the animal can contemplate and swallow.
Removing the necessary measure
The most important parameters for the pattern of a feline costume is the neck girth (measure 1), the length of the back of the animal from the neck to the tail (measure 2) and the size of its body in grip, which is measured in the region immediately behind the front paws (measure 3).

Additionally, depending on the purpose of clothing to create patterns, the following data may be required: Distance from the front to the rear paw; The volume of cat waist, under which it means girth of the body in the area of \u200b\u200bthe rear paws.
After receiving the required numbers, it will be possible to build a pattern. Later, the pattern made on the resulting scheme must necessarily apply to the pet and make the required adjustments, and the dimensions before it is removed with a slight margin so that you do not redo the work again.
Cat clothes pattern: Some simple ideas
- The simplest pattern for feline clothes - if you take a suitable squeeze, on which chalk mark the holes for the paw, and then carefully cut them with manicure scissors.

This will save time for drawing up the pattern and requires only the edges, sewing the necessary fasteners, decorations and any useful accessories, such as a loop for a leash.

- The second simple pattern of clothing for a cat on this photo:

To build such a pattern, you need to measure the circumference of the neck of the cat, the length of the back, the circle at the bottom and the distance between the legs. Be sure to provide allowances for the fastener and properly place the holes for the paw.

It sews clothes on such a pattern very easily - you just need to carve out the part with the cuttings on the seams, cut holes for the paw, sunmore or ends the edges of the part, sew any clasp.
- Go to a more complex pattern, to build which you need to spend a little more time than for the previous ones:

The pattern consists of two parts and is universal, on the basis of which you can build a variety of models, adding them with various parts: a hood, sleeves, pockets, make a clasp on the shoulder, on the sides, etc.

- To build a pattern of overalls for a cat, one measurement is needed - the length of the back (measure 2, i.e. the line AB in the diagram).

Now the resulting number should be divided by eight (8), the resulting measurement will be the side of the mesh square on which the pattern will be built. Then you need to draw the grid and move the circuit of the pattern by the cells.
Thus, you can make any patterns for the cat. The resulting pattern consists of 2 parts: a large part is the right and left side of the overalls, a smaller part is a wedge, which covers the chest and belly of the animal, it is sewn between the front legs (the narrow part is to the front.) When sewing overalls make fittings on the cat, During which the length and width of the product are configured. Upon bottom, the pantian needs to be provided in which the rubber band is inserted. The jumpsuit is better to sew from two layers - for the top to use a cloak fabric, which is practical in caring, it is better to take a flannel or soft fleece for lining. If desired, you can add a hooded product.

When building a pattern of clothing for a cat, some existing model is taken as the basis, with which the outlines of future parts are drawn. The sketch should be drawn on the checkered paper, where the size of one cell is equal to the tenth-row on the parameter of the feline back length. Taking into account this proportion, the remaining parts are drawn, and then the pattern is already created. At the same time, the scheme is necessarily adjusted for the existing measurements.
Paper sketches should be drawn in a natural value, so that the parts can be attached to the fabric and make the pattern. It is necessary to try out the outdated parts on the animal in order not to be calculated. For convenience, individual elements can be slightly stated with scotch, giving a template of the outline of future clothes.
Cutting fabric, fitting and tailoring
Before starting the cutting cloth, you need to wash and stroke the iron to make sure how it sits down. In this case, it must be taken into account when sewing and pick up a little more size than an animal.
The layout of the blanks is carried out on folded in half matter from large elements to less so that the direction of the equity thread becomes the parallel edge of the bend.
Then do the following:
- paper template Secure the pins to the fabric and carefully circle the drawing;
- next, cut all the necessary details, not forgetting about the allowances on the seams;
- get along with bright thread and put on the resulting clothes on the cat;
- if there are any problems, we need to make the markup needed to correct.
Well fitted clothing elements can be finally connected. First, close the upper, located on the back, and the bottom, passing through the stomach, half the costume. Seams on the sides and in the shoulder belt are flashing with a zigzag line flat stitches of the mustache. The width of the armor must be selected depending on the purpose of the object of the wardrobe, narrowing it with a winter version of the costume, and expanding for summer t-shirts.
Then you need to process the edges of the clothes. To do this, you can use a rubber band. It is attached from the front side by the same zigzag stitches, before that it is a little stretching, so that the braid is not going and did not compress the edges too much. It will not only prevent the plasticization of the edges, but will also be a good decoration for a feline costume.
The last stage is sewing the fasteners and accessories to decorate the costume. There are a large number of fasteners that can be chosen for a cat suits. There are several recommendations on this to this, but first of all it is necessary to take into account the breed of an animal.
Zipper is best suited to smooth-haired pets, otherwise wool will be stuck in the mechanism. Similarly, hair lingering on velcro. Universal fastening are buttons that can be placed either on the back, or under the pectoral animal.
After performing all these operations, you will make a luxury suit for a pet.

Let's summarize
So, on the basis of one pattern, you can make a large number of suits and significantly update the cat wardrobe. For those who can sew, it will not be a challenge and will not require serious financial costs. Especially since the sewing costumes for pet will become an excellent opportunity to embody their interesting ideas and turn into an excellent perennial passion.
Any thing made by your own hands is considered not only an exclusive, but also "alive" since the particle of the soul, heat, energy was stitched into each detail. Interesting toys Tilda cats, bunny, bearish, chickens will decorate any home, will serve as an excellent gift.
Creating a tilde will not take much time, but the result will be happy for a long time. In many magazines, on the Internet, there is a large selection of chipsets of cats in full size, with the help of it you can easily sew a toy.
Many needlewomen to create a hare toy use the pattern of the cat tildes in full size, adjust the ears - increase the desired size or take the finished pattern of the bunny.

The pattern is tightly pressed to the tissue, they will be reduced in chalk, with the deployment of the allowance. Flashing along the drawn line, places, on the pattern of the cat, marked with the dotted line are not strained, through them the parts are turned on the front side. The next stage - neatly stroke all the seams. All items are filled with filler, so that each element is soft, tightly stuffing should not be toy. Next to the manual, carefully stitched not focused places. All items are collected in one product.
Sometimes it is added to the main patterns of toys. Cat, hare and others add toys.
 It is not necessary to sew the outfits on the proposed schemes, you can come up with an original costume.


Tilda bunny with long legs: video MK
Before taking the pattern of the Tilda cat, cut the fabric and get to the sewing machine, it is worth familiar with the recommendations of people who have experience in tolding tailoring, maybe many advice will avoid problems when creating a toy, while others will be prompted to create, such as clothes for cats, interesting Registration.
All seams are performed only from the wrong side, otherwise the toy will look inactively.
It is necessary to leave points on all seams if the thing is sewn for the first time, it is recommended to leave from 0.5 cm, for more experienced - 0.3 cm. If the battery is large, at the end of the work excess tissue is cut, leaving 0.3 cm to the seam.
Of the variety of species and forms of Tilda, choose the one that more like it, they have almost the same complexity. Cat Pattern Tilde can be downloaded from the Internet, it opens the ability to adjust the size of the future toy. With the help of graphic editors, on the computer, you can increase, compress, stretch the pattern to the required dimensions.
Material for cats, their clothes before cutting erase, and stroke.
When sewing a cat, with your own hands on the places of details with a fold, in round places, you should make noise on the allowance, this makes it possible to eliminate the formation of folds and irregularities.
The finished part is turned out, a long item with a stupid rounded end (pencil, handle), if you take a pointed long object, you can break the fabric.
For filler choose one material for all parts, for these purposes it has been well proven - syntheps, syntputs, alpolarux, holofiber.
When making a face, black small beads are chosen for the eye, for nose and mouth - pick up dark threads for embroidery. In principle, the face can be drawn with a thin black marker or paint along the fabric.
Tilda cat: video master class
Two-wane cat Tilda
It is an excellent option for those who are afraid to start sewing. Cat pattern is simple, even a child will cope with it.

Details are all paired, except for the nose. Decrass, stitched, in all patterns in the style of Tilda, do not leave no stitching place for turning and filling.
To obtain a neat nose, on the edges, the detail is tightened by forming a "bag", fill in a package, tighten the threads, close the part. Send to the head. Unlike the standing cat Tilde, bileless should not, usually hang it on the hook or handle door.
Black thread sew the eyes of beads, embroider mustache. At the stage of the design of the face, it is necessary to show a fantasy - eyes, nose, mustache can do what it wanted, for every taste.


Catcher Angel (Tilda): Video MK
Tilda Tilda Pattern
A fairly simple product is well suited for beginner needlewomen. The pattern of the cat is customized under the desired dimensions of the future toy. Packed cut out of thick paper.

On the wrong side of the fabric tolerate the pattern, take into account the allowances on the seams, cut out. When sewing a cat starts with paired parts, stroken, filled with fillers, manually neatly sew the unlocked places. Collect a toy. You can add the Tilda of the cat in various objects, decorations made with your own hands.

Flis cat: step-by-step video MK
Master class on making Tilda Cats
Preparing toy looks very cute, pleasant to the touch, will serve as an excellent addition to the interior.
A small master class will help when creating crafts.
Tilda cat pattern consists of a small number of parts.

To sewing toys need: Main monophonic fabric, color cloth for clothing, lace, ribbons, black beads for eyes, black fishing line for mustache, dark threads, 4 buttons in the tone of the main material, filler.
Cut paper pattern from thick paper or cardboard. The pattern of kittens is transferred to the cloth, folded twice, fasten with needles and rub in chalk. Given the allowances on the seams, cut out. It is starting to work on the collection of toys from the head, it is stitched, leaving a non-stitching small hole for turning and filled with filler, after which the hole in the manual is sewn. The same operation is carried out with ears.

A distinctive feature of this Tilde cat doll toys is that all her paws move, like on hinges. It is achieved by such an effect so, with the help of buttons, the paws are sewn to the body to the body through it, and the paws are the upper or lower sews at the same time.

The tail is made similarly to other details, sew from behind to the body.

Eyes are drawn up by beads or simply draw, the nose is embroidered with threads, the cheeks are drawn by special paints along the fabric, the mustache - the fishing line, stretch through the muzzle, their length is limited only by fantasy.

The pattern of the dresses for a cat is done so - they measure the doll needed the length and width of the dress. On the paper on the received data draw a rectangle. At this stage, the upper part of the dress should be reduced - a trapezium is obtained. They translate the pattern to the colored tissue, cut out two parts and fold face to face, stitched with their own hands or on a typewriter, leaving the holes under the arms and head. For the tail they make a hole with scissors. Decorate the dress with lace, ribbons, bows. Tilda is ready.


Tilda Cat: Video Master Class
Textile Tilda Cat in Polka Dot: Video MK
Single scheme


8 221 478
Soft toys like representatives of all floors and ages. Adults are returned to carefree childhood, and the guys become best friends and companions in merry games.
Therefore, we have prepared a selection of simple lessons for you, of which you will learn how to sew a toy with your own hands. Homemade dogs, bunks and bears carry a powerful charge of love and positive energy. And this is a wonderful and bright element of the decor of the children's room and the win-win version of the gift.
Merry Misheut Soft Flis
Does your child love soft toys? Please will be pleased with a pretty bear, which will be his favorite friend and a partner in mischievous fun.
To work, you will need:
- soft fleece;
- pins;
- needle and threads;
- a piece of artificial leather for nose;
- 2 black beads for pupils;
- filler.

Take out of the fleece 2 billets for the Taurus, 4 for the paws. From white fleece Prepare mugs for eyes, from leatherette - nose.

Attach eyes to the body and fix them with pins. Singing manually or using a sewing machine.

Connect pairwise blanks for your feet. Purge them along the contour, leaving the bottom unimposed. Remove the obtained billets.

Align the details of the body with the front sides inward. At this stage, insert the Misheutkins of the paws between them. Lock the blank by pins.

Sustrate the toy by retreating from the edge by 0.5 cm. Leave the hole for turning down below. Remove the product on the front side.

Click the filler. Sweep the bottom of the bear with a secret seam.

It turns out a pretty little animal. It remains to turn it into the stated bear. Switch the mouth of the mouth with black thread.

You can proceed to the manufacture of large nose. Follow the edge of the edge of the neck "Forward Needle". Tighten the thread and bring the workpiece.

Success the nose to the muzzle. To the eyes of the trick beads-pupils.

Our Milestone Mishutka is ready. He will gladly settle in the children's room.

By the same principle, it is easy to sew him a whole company of funny friends: a mischievous kitten, an eared hare and a surprised peel. You will get a whole troupe of artists for a home doll theater.

We suggest you download the work patterns of funny toys right now, without postponing this thing in a long box.
Cat:


Bunny:


Pinsik:


Volumeting Hippo
Shelves in the nursery are already burying from soft toys? Are there any hippos among them? If not, you need to urgently correct the oversight. A cheerful and friendly Hippo very much wants to visit you. Thanks to the step-by-step lesson, the needlework can be made even a novice amateur Handmade.
To work, you will need:
- dense cotton fabric of two colors;
- filler;
- eyes or black beads;
- 3 Small buttons for nostrils and tail;
- a piece of ribbon.


Cut the resulting patterns and output the details of the future toy from the fabric. The material for the body is better to take a dense and elastic, so the toy will look more neat.
The abdomen and the back of the hippopotamus can be carved from one fabric or make them different colors. If you stopped on a monophonic version, spread a solid part. For this, two parts of the pattern are connecting in the muzzle area.

The first thing is to see the ears and foot, connecting the details of the face side inside. Succession of the circle-foot to the bottom of the paws.

Remove the blanks, climb the paws, leaving the free space for seamless.

If you have not taken a very dense fabric, in place of the eye on the reverse side, cover a piece of fliseline.

In the case of using two parts for the torso, scratch them on the muzzle.
Note the side parts to the body, starting to sew from the ear to the rear. Then again from the ear to the bottom of the muzzle. By the way, at this stage do not forget insert your ears and foot.

In the place of the inflection of the muzzle fabric you need to learn a little. It is better to fix it with a pin, and then flash.

As a result, it should be a billet with one unimpressed seam of rear (where the priest).

Purge on the typewriter or manually all the seams, besides the left opening at the bottom of the back. Remove the toy.

On the muzzle, make cuts on the place of the eyes and secure them. You can do beads or glue semobusins.

Fill the toy with sintecon.

Left earlier hole. Wear a loop from braid on the spot of the tail and a button on it.

Do not forget about nostril-buttons. As you can see, make this cutie quite simple.

An unusual handmade pet is ready to settle at your home. He will also become an excellent gift for loved ones. They will definitely appreciate your efforts and care.

Gray Bear in a vest
Want to make a soul gift for a child and not only? Sure a pretty bulk bear. This textile toy will definitely become a beloved - the children at the subconscious level feel the positive energy from things made with the love of her mother's hands.Thanks to our phased leadership for beginners, you can independently sew a cool bear.

To work, you will need:
- gray linen fabric;
- needle, pins and threads;
- filler;
- embroidery threads;
- eye beads;
- scissors;
- pattern.
Fold the cloth twice, lay out the details on it, placing the part with a fold to the collapse of the web. Circle them with a small or special marker. Do not forget about the allowance for the seams. Cut the blanks.

At the initial stage, take the body seams by folding the front side of the face inside. Leave an unimposed about 10 cm seam from the back toys and upper cuts.

On the side details of the head, sharpen the wrappers and start the seams in one direction. Smealance the details of the head, without forgetting to combine checkmarks.

Purge all the seams on the head, except the lower cuts. Remove the workpiece and recruit the filler, leaving a little space for further stitching with the torso. Sceress of pests-beads, out the bear with a spout and mouth. Insert your head in the torso through the head left on the back.

Manually enter your head to the body and only then turn it out. Vide a toy filler and suture on the back.

Fold the two parts of the ear front sides to each other and take them. In the middle of each ear, fold and notice the fold. Remove the obtained billets. Sing them to the head, having exposed the lower cuts inside the ear.

Fold the blanks for the paw pairly and sharpen them. Leave the top of the lapt. Also do not sew the bottom of the hind paws, there will be a foot.
Success soles to the hind legs. All blanks are removing and score. Now you can sew all the left places.

Sew all finished paws to the body. To do this, it is better to use thick threads and a long needle.

Handsome Mishutka is ready to conquer children's hearts. You can independently sew a stylish and beautiful outfit for him, at the same time choosing the floor of the pet.

If you use a plush for making toys, get a real plush bear. Such homemade favorite will delight not only for the baby. Any adult will be happy to the guest from his childhood.
Toy zoo do it yourself
Popular cattle and dogs offer to sew every second master class. And we found more interesting ideas for inspiration. Meet: spotted giraffe, cute floral hare with long ears and blue whale.
To work, you will need:
- any knitted or hb fabric with an interesting print;
- patterns;
- needle and threads;
- filler.
You can download all animal templates for free. If the image printout uses A4 format, the size of the finished toys will be such:
- giraffe - 29cm;
- chiten - 14 cm Length and height 9 cm;
- bunny - 15 cm without taking into account the ears.

The size of the legs of the giraffe can choose arbitrary. Cut out the details, give 0.5 cm per battery.
Our spots on your body, and those that come on both halves toys, cut in half and place symmetrically on both parts. When combining halves of the torso, common specks should be obtained.
Stop legs, twist them and score, leaving a little free space from above. Note the workpiece to the involving side of one of the halves of the body.
Note the rope tail and sew the body of the giraffe, folding the facelight to each other. Do not forget to leave a hole on the neck for turning.
Take the insane in the convex places of toys and remove the workpiece. Stuffing the toy, fill the neck as tight as possible, so that the giraffe proudly kept his head. Sewing left hole.
Lose eyes and nostrils toy. New homemade favorite is ready. Make it copyright: add decor elements, take a bow, use an unexpected combination of colors and textures. Any experiments are only welcome.
To start a career of the creator toys from the giraffe is scary? Need to make a bunny. It is easy to perform: complex techniques and work skills will not need.

Collect the details for the toy. Go on the abdominal decorative heart. Sust and remove the ears, entering them to one of the halves of the body.
Sustrate the workpiece, combining the details of the front parties. Leave the place below to turn out. Take the insane on the bulges of the toy. Remove the bunny and recruit the filler. Hold out eyes and mouth with a spout.
Optimal toy for newbie - pints. It is so simple and quickly that you can trust this occupation even to children.

Collect the items, align them with the front side and sew. Leave the place to turn the blank. Take the cloth in convex places and remove the workpiece. Vide a toy left. Hole squeeze, hang or draw eyes.
Such funny and cute little animals will decorate the children's room or spiritual presents of your loved ones.
Master classes with photos
We present you another number of ideas for incarnation. These crafts are so easy to repeat that they do not need an additional description. Watch on step-by-step photo instructions and act.Felt elephants will become an excellent Christmas decoration:
slices of elephant:

Lovers cat and cat will delight your half for Valentine's Day!
Scheme of cats:

And the baby terrier is, in general,. Prepare gifts in advance and love.
Coffee dachshakes:
Pins schemes:


Patterns Claws for download
Do not limit your fantasy flight. We picked up a variety of toys for you. Download them, print and create. A little effort and you personally create home the whole zoo.Pattern of the cat and kitty:

Funny cat:

Impressant cat:

Bunny Kostic Natalia:


Cats:

Schemes of cats:

Qubs:

Koto-puppy

Frog:

Angels:

Mishutka:

Olenok:

Lamb:

Giraffik:

Create toys of soft tissue is not just an entertaining hobby. During work, the charge of positive emotions and a lot of love is invested. Try to sew your baby of a cute kitten or a puzzled hippo. You will see - it is this toy that will become his beloved.


Create, experiment, get experience and new knowledge. Believe your loved ones not just gifts, give them your love invested in your work.
Toys made with your own hands can become an excellent gift and a child, and an adult. In addition, they will become an excellent interior decoration. Such cute things emit warmth and comfort, express the inside world of the author and fill the house with joyful emotions. It is not necessary that the toy is made of fur and looked like a lively - you can sew a cute kitten, or multicolored cats, which, besides, can be used as pillows. A textile cat with long hands and legs, the pattern of which is easy to find on the Internet and print and as if it wanted to hug you and give you your faithful cat heart. A felt toy from the eponymous cartoon - three cats - will delight adults and children.
In addition, the toy is quite easy to sew your own hands, if you find simple patterns. Consider how to sew a soft-toy-cat, which materials need for this, and what are the types of handmade toys.
Before you start, it is necessary to determine the type of toy, its shape, color, texture, level of complexity and the number of parts. They are also divided depending on the destination. A beginner, of course, is better to sew a simple toy, without unnecessary items, but the experienced master can choose something complicated and intricate.
By the way, there are already ready-made sewn toys, but white, they need to be painted and decorated.
And there are many other wonderful toys, for example, Valya, they are made from special unpaved wool, using a needle for a waxing. And they knit them most often do it in crochet. In general, now they are made from a wide variety of materials in various techniques.
You can choose the manufacturer's technique that will enjoy more and create a little animal, which will certainly bring only positive emotions.
Gallery: Soft toys do it yourself (25 photos)


Materials for creating soft toys
Of course, we need patterns and materials. They can be bought in specialized stores for needlework and creativity.
Where to take patterns
They can be found on the Internet, and there are also a lot of magazines and books on needlework, in which there is a huge number of patterns, sometimes even in full growth. You can also register on the forums or to enter into a group of social networks, where the needleworks are discussing sewing and share their patterns.
What materials are needed
Support materials such as:

Stitching toys
If the type of toys decided, and the materials are collected, you can start working.
This is a universal toy creating plan., it will help to sew not only the cat, but also other animals. Even newcomer will cope with it. She sews from one detail or from several.
- Prepare a cloth, divide it.
- Select Patterns, redraw them on paper, cut out. By the way, patterns can be taken on the Internet, and in books, magazines.
- Translate patterns on the cloth with chalk. Do not forget about the allowances on the seams 1-2 cm. Secure the part using the English pin.
- Cut all the details and sew them "Back Neck" or looped.
- If necessary, remove the job, and then type it, if necessary, sew the details together.
- Now it remains only to sew eyes, nose and add decorations that will give special charm and uniqueness. You can not embroider the cat muzzle, but draw it with special colors.
By the way, you can make a cat from the cat, for example, sewing a bow. And another cat or kitty can be adjusted: Sew pants, shirt or dress, and make shoes, such as shoes, shoes, boots. Of course, the image of the cat can complete the accessories: a handbag, a hat, an umbrella.
This is a common product creation algorithm.It can be changed a bit in accordance with personal preferences and amenities. You can come up with additional elements, for example, give a cat in a cat, make him a bowl, a house and so on.
Advantages of handmade toys
Why are the soft toys made by their own hands, so popular? Here is a list of their advantages:
 They can be used not only by destination - to play, but also for other purposes. It depends on the form, size and materials of work. For example, if the animal is large and mild, it can become a pillow. If it is completely tiny, and, for example, fetal, it can become a key chain or a volume magnet. And you can make tacks, the heating on the kettle, the rug or something else. In addition, any handmade manual is an excellent interior decoration and a gift for any holiday a child and an adult. By the way, work done by your own hands can perfectly complement the interior and give him beauty and originality. Especially this decor will be appropriate in the children's room.
"Cat" Themes, probably, one of the most beloved among the masters-needlewomen.
After all, more elegant and charismatic nature than the cat, it is difficult to find. That is why the past-striped often inspire their talented owners on needlework.
Today we will continue this glorious tradition and make a textile cat with your own hands. And not even one, but a whole company. It is only in the song it wakes up that the cat walks by itself. Our textile cats will appear before the public in a large and friendly company.
We present to your attention a charming kitty Kitty, which opens a feline master class. The kind, gentle, with a very soft character, the baby will be made of soft tissue - white fleece. And since she is also cheerful, we will try to make her movable legs with their own hands, so that Kitty can play with her friends.
And for this we need:
- paper pattern;
- fleece or velor white color for calf;
- loskutok fabric for dresses and, optional, for lining;
- pieces of pink and lilac felt for shoes;
- fragment of the stationery folder for inserts to legs and shoes;
- synthempuch as packing;
- black buttons or a piece of black felt (for eyes);
- yellow felt or self-sharpening mass for modeling (to make nose);
- wooden coil from threads;
- threads, needle;
- glue "moment-crystal", colorless varnish;
- decor elements: bows, flowers, ribbons or suspension;
- sewing machine.
Welcome to the master class!
To begin with, we lay out the details of the pattern on the white fabric and cut the parts of the Kitty Taurus, after which it cut out all the elements for the dress from the colored material. One of the details of the dress must be made with a fold so that the fastener gets from behind.

Continues the master class work on the tel. First, you need to sew the cuttings on fragments are ready and torso. Then stead the ears, turn and take the head. Next, you should sew a head, leaving the hole below for packing. In the same way, we decorate the handles, tail and taurus.
Tip! Sewing legs, you need to leave the hole for turning right above the heel. This will allow convenient and quickly insert the workpiece for the feet.
Complete the work of stitching the feet and all turn everything.
The cervical hinge make up the coil of the appropriate size. Before placing it, it is necessary to wrap a piece of white fabric.
Complete the stage with details. Before this, there are plastic blanks in the legs, slightly greased glue. After that, a secret seam need to sew holes on hand and legs.
Fashion and beauty


Now we make the face of Kitty. Successfully position "Features" will help the pattern. Glue ready (or made with your own plastic hands) nose and eyes cut from black felt. The eyes better flash on the contour of the seam across the edge and cover with varnish. Then black thread embroider the mustache and decorate the eyelet with a ready-made bow.
At the next stage, you need to connect your head with the torso, after which we attach hands and legs to the calf with the help of a rope hinge. And, of course, do not forget about the tail.
Next, the master class continues to work on shoes. To do this, you will need a pattern again. From the Firth you need to make the details of the shoes. Then take a fragment from the stationery folder and cut out the insoles for the shoes on the outlet, as well as two parts on the pattern of the foot.
Tip! These details must be cut into a circumference per millimeter less than the pattern.
Plastic insole must be attached to the sole and sew the top of the shoes and the soles with a marking seam. You should also place the top of the shoes and decorate the mysteries of the shoes with ribs from the tape.
We sew the dress, turn and be sure to give shape. After that, insert the belt belt and sew buttons for which there are air hinges.
Tip! To handle the edges of the dress, you can use the sewing technique "double dress", that is, to the main fabric as a combination partner to choose the material of the corresponding color. In addition, it is possible to process the edges of the dress with a dressing or simply to turn them.
The edges of the tapes can be in front of the neat bow and fasten with glue or threads. And here - the charming Kitty is ready to conquer the world with her beauty!
Cats-positives

She did it, as Milashka is molting with the laps, a team of merchant katsov, for which only one pattern will be required.
To sew your own positive trinity with your own hands, we will need:
- pattern (taking into account the allowances of 6-7 mm);
- 50 cm fleece (at the rate of 2 cats);
- 5 cm Satin tape;
- needle for fleece with a round tip;
- threads for sewing and embroidery, pins, scissors;
- stuffing;
- glue for fabric.


We begin the master class with the cutting: folding the fabric in half, cut out all the details, and also carry "face features" (you can make an "eye").
The stalk suture make up the muzzle, ears, navel and tail, and the nose is desirable to cut a contrasting color from the tissue or make it yourself from plastic and cover with varnish.
At the next stage, we turn, scroll and sew a toy manual seam, carefully hiding the tips of the threads inside.
On my paws you can make your fingers, tightening the threads with large loops through the paw. And our kotofechy are ready!

Cheerful kitokpaign

Dreamily admires kitty Kitty another textile handsome man. Wake-up with her hands from a bright red cloth, an elegant cat will not require great effort from the needlewomen.


To sew it, it will take a pattern, colorful fabric and packing, "puppet" eyes and nose from fleece, threads and a thin wire for mustaches, paws and a long tail.
And in order to sew these brother cats with their own hands, one pattern will be required for two and a minimum of time. Free evening in their company will turn into a master class on needlework.
