The most beautiful crafts for mom on her birthday. Ceramic dishes and products. Crafts from buttons, beads and beads as a gift
Perhaps, mother is the dearest and most beloved person in the world. You can tell her about your feelings not only with a purchased gift, but also with a handmade little thing. But how to make a craft for mom so that it turns out beautiful and inexpensive? After all, it often comes down to money. This is especially true for children who do not yet have their own income.
The article provides examples of what you can make yourself from what you can find at home. Surely you already have many materials, and you do not have to spend money on them. In any case, these crafts are inexpensive, even a child's pocket money is enough for them. If you try, then you will get quite a decent little thing.
Deciding what craft to do for mom
First of all, you need to decide on the idea of a gift. There is no need to rush and grab the first master class that comes across. Think about whether you have enough skills and time to make crafts. Last but not least are the materials. It's great if you already have them at home in stock, or at least there will be an opportunity to buy them.
If your mom loves flowers, then it would be quite logical to give her an original soft bouquet that will never wither. Don't know how to sew? Make a beautiful Sweet Tooth and give an organizer with sweets and other goodies. If your mother works in a hot office, she will surely appreciate the fan you gave her. Any present can be supplemented with warm words.
Postcard with hyacinths
Consider how to make paper crafts for mom. It's very simple and exciting. In addition, handmade postcards are read with more pleasure than purchased ones.
Choose a sheet of cardboard. It should be bright, and ideally double-sided. If one side is white, then paint it or paste in colored paper. Fold the cardboard in half, and iron the fold well. Glue a beautiful ribbon or lace around the perimeter. Lay out the flower arrangement in the center. Hyacinths look very festive. Making them is easy.
Cut colored paper into strips five to six centimeters wide. Take different colors: blue, red, orange, yellow. Cut the strips along, like a fringe, and curl the ends with scissors. Twist the stems from green paper. Now, starting from the top, wrap colored stripes around them. Assemble the composition and glue it on a postcard.
Now you know how to make crafts for mom that she will keep for a long time. Just do not forget to write in the card how much you love her and other kind words.
We sew soft tulips
For buds, take a beautiful fabric, it can even be polka dot or flower. For stems and leaves, a solid green material is better suited. You will also need a wire for stiffness, a synthetic winterizer (foam rubber or cotton wool), scissors, threads to match the fabric and a needle.

For convenience, first make patterns of the bud, leaf and stem. Transfer them to fabric and cut them out. Please note that one flower needs two parts. Make a stem. To do this, attach pieces of fabric to each other with the right side and sew. Now turn them out, insert the wire and fill with filler. Sew the bud and leaves in the same way. Only the wire is not needed here. Sew all the details together. Tie the bouquet with a ribbon, pack it in paper or put it in a basket.
This small master class will solve the question of how to make a birthday craft for mom, which will please the eye for a long time. If you don't know how to sew, make a vase with your own hands. Mom will probably be presented with fresh flowers, and such a gift will come in handy.
We make a vase with our own hands
As a basis, take a glass jar, a glass or a beautiful bottle with a wide neck. A good decoration option would be pasting with clippings from colored magazines or pieces of non-flowing fabric. Also prepare glue and decorations for decor (buttons, threads, rhinestones, etc.).
The surface of the vessel should ideally be degreased with alcohol or nail polish remover. Start pasting over with pieces from the top. Please note that paper can be overlapped, and fabric can be butt-to-butt. Fill in the entire surface. But a vase decorated in places will look good.

since morning?
Don't know how to make crafts for Mother's Day? Prepare her a delicious, healthy and unusual breakfast - an apple sandwich! This sweet gift can be called dietary, so feel free to cook it even for a woman on a diet.
You will need the actual apple itself (large), a knife, a small one (in the form of a heart, a flower, etc.) and dried fruits. Optionally, you can add peanut butter or fruit jam, grated chocolate, almonds.
Cut the apple into slices. Squeeze out the middle Slice of apple, grease with jam, sprinkle with dried fruits and other additives. Do this with all the pieces. Put another on one apple circle - the sandwich is ready! Serve the tray beautifully, put healthy sandwiches on it, put a glass of juice or tea and take it to your mother right in bed.

How to make crafts for mom-sweet tooth?
Sometimes a few sweets and tea bags can cheer up a woman. Especially if they are presented in a beautiful wrapper. Therefore, make a sweet organizer with your own hands. To do this, you will need tea bags, small chocolates, sweets, colored cardboard, paper, scissors, glue and beautiful ribbons.
Fold the cardboard in half. From colored paper, make envelopes for tea and sweets. Stick them inside the organizer. Sew or tie ribbons on the sides so that you can securely close the sweet postcard. Decorate the front and inside. When the glue dries, insert tea bags and chocolate into the pockets, tie the ribbons into a bow. Now you know how to make crafts for mom with your own hands and please her for any occasion. By the way, such an organizer can be sewn, then it will last much longer.

Fan made of plastic forks
Oddly enough, but from such an ordinary material you can make an elegant and sophisticated fan. It can be used for its intended purpose or hung on the wall as an interior detail. To make such a craft, prepare cardboard, disposable forks, glue, lace, satin ribbons and decorative elements (flowers, beads, rhinestones, etc.).
Cut out two half circles from cardboard. Glue the handles of the forks on one. Now cover with another semicircle. Pass the lace through the teeth and over the cardboard. Secure the ends with glue. It is better to place a three-dimensional decoration in the center of the semicircle: a large bow or flower. Further decoration of the fan is completely up to the imagination. By the way, forks can also be stuck on a paper plate or unnecessary computer disks. As a result, you will get a very beautiful and original gift, which is not a shame to give.

Before you make a craft for mom, think carefully about what she might like or need. This is the only way you can guarantee to please your loved one.
Helpful Hints
Mom gifts:
Grandma's gifts:
Gifts for sister:
Each of us loves to receive gifts, especially when it comes to a woman.
A handmade gift is much more expensive than usual.
Find out what gifts you can make to your beloved mother, grandmother or sister with your own hands.
Handmade gift for mom.
Beach bag.

You will need:
White nylon or cotton material
Acrylic paint of any color
Potato

1. Prepare a fabric measuring 45 x 104 cm and fold it in half.

2. Take one potato and cut it into two halves. After that, cut a triangle on one of the halves (see picture).

3. Dip the potato in the prepared paint (you can pour the paint in a saucer and dip the potato into it).

4. Start applying triangles from the bottom of the fabric. You can apply as many layers of triangles as you wish.

5. Leave the paint to dry.

6. Sew the edges of the bag with a thread, and fold the upper part inside the bag by about 5 cm.
7. For handles, you can use both plain fabric and inexpensive cut leather straps. Just stitch them to the bag as shown in the picture.

* When the bag is full, the leather handles straighten out.
What a gift you can make with your own hands.
Sweet heart.

This gift for mom is perfect for any occasion. It is worth noting right away that painstaking work lies ahead, but the result is worth it. In addition, the work itself is within the power of almost any child.
You will need:
Thick cardboard
Red or pink paper (it is better if the paper is double-sided)
Candy (preferably round or oval) with tails on both sides.
toothpicks
Compasses (ruler with circles of different diameters)
PVA glue
Scissors
Scotch tape (preferably transparent)
1. Prepare white cardboard and cut a heart out of it.
2. On the back of the sheet, draw the lines as in the picture.
* You can choose any size. In this example, the width is 8 cm, and the height where both halves meet is 7 cm.


3. In the middle of the heart, draw a circle (in this example, its diameter is 5 cm). Next, start retreating from the center of the circle by about 1 cm and draw an arc - you should get something similar to an oval. (The broken line represents the original circle.)
4. Cut out a heart and a circle from cardboard.
5. Now you need to start making the details of the pattern - they are made using the quilling technique. To learn more about how to work in this simple technique, read the articles:
6. For patterns, you will need paper strips 0.5 cm or 1 cm wide. Twist the strip on a toothpick and release it a little so that it unwinds. You should get what is shown in the picture.

* To fix the spiral, use PVA glue.
* All coils should be approximately the same size.
7. From several spirals, make various shapes. You can make, for example, the shape of a "drop", "eye", "petal" and others. Here are some examples:

* The number of elements depends on the size of the heart. For this example, it took to make 6 "spirals", 3 "eyes" and 28 "drops".
8. Lay out all the elements on the heart to find the best arrangement. When you have done everything, start lubricating each element from below with PVA glue and attach it to the heart.


9. The last no less important element remains - candy. In this example, this is Raffaello. Cut short strips of transparent tape and stick them to the candy tails on one side and to the cardboard on the other.
How to make a gift for mom with your own hands.
Box with a bright surprise.

Such a bright box with a surprise can be presented to your mother, girlfriend and / or sister, and the occasion can be any: March 8 or birthday.

The box itself looks beautiful, like a gift box, but the most interesting thing is inside. When you open the box, bright butterflies fly out of it.

You will need:
colored paper
Scissors
Ruler
Pencil
Details for gift decoration
1. Prepare cardboard and cut out 2 squares from it - one with a side of 19 cm, the second - 8.2 cm. These squares will play the role of a box and a lid.

2. From each edge of the square you need to retreat 7.4 cm, and then draw parallel lines.

3. Preparing the base of the box - you need to cut out a piece that resembles a cross.

4. Fold the cut out piece to make the base of the box.


5. We make the lid of the box. To do this, step back from the edge by 2 cm - the side of the lid. Next, cut and glue the lid (see picture).
You should end up like this:

6. You can start decorating the box inside and out. Everything is limited by your imagination. It is worth noting that the bottom of the box does not need to be touched.
7. Now you need to prepare a surprise - for this you need to take transparent strips on which butterflies will "flutter". Such strips can be made from a plastic bottle. Each strip is 1.9 cm long and 0.5 cm wide.

8. In colored paper, you need to make several cuts. Next, this paper must be glued to thick cardboard. Insert transparent strips into the cuts and fasten them on the other side.

9. Prepare butterflies and glue them to transparent strips.
10. This whole structure must be glued to the bottom of the box from the inside.

DIY gift ideas for mom.
"Cake" for kitchen utensils.

You will need:
Thick cardboard
Kitchen towels and other accessories
Ribbon, letters and other decorations
Hot glue gun or superglue
pins
1. For the stand, you can use thick cardboard from any box.
2. To make cylinders, you can use, for example, a cereal box - straighten it and cut 2 strips out of it: in this example, the first strip is 40 cm long and 10 cm wide, and the second strip is 33 cm long and 15 cm wide.

3. Roll both strips into tubes and glue them to the stand using a hot glue gun or instant glue.

* Each strip should be approximately in the middle.
4. We cover the cardboard product. Prepare and fold small kitchen towels (2 pieces) and wrap them around the craft. Use pins to secure the towel to the inside of the craft.

5. The third towel is simply tucked into a long cylinder and adjusted to make it look nice.

6. It's time to decorate. Add wooden spoons, spatulas and/or other kitchen items. You can also add ribbon and glitter letters.


DIY gift for grandma's birthday.
Recipe book with original cover.

You will need:
Folder (where all recipes will be added)
Cloth (to wrap the cover) - about 2 times the area of the book
Silk embroidery thread

1. Let's start, perhaps, with the most interesting thing - straightening the spoon. Wrap the spoon in an old towel and use a hammer to straighten it out. It shouldn't take long.


2. Cut out a rectangle from the fabric that you will use to wrap the folder. On all sides, the fabric should be approximately 2.5 cm larger than the folder.

3. Mark the corners of the folder with a marker pen to help center your design and create a zigzag stitch.

4. You need to decide what kind of design you want and transfer the pattern to the material using a marker. This is easy to do if you draw a pattern on paper (write the desired words) and attach the sheet to the window, and attach the fabric on top.


5. Place the fabric on the hoop and outline the letters with a decorative stitch. Here are some images to help you with this:


In this example, yellow thread was used first, and red was used around the edges, which plays the role of a shadow.

6. For a zigzag pattern, you can use a sewing machine. Using the marks made with a marker on the back of the fabric (where the folder folds), draw lines from top to bottom. Repeat the same on the reverse side.

Start scribbling the pattern along the drawn lines. In this example, 3 colors were used. After that, erase the marking.

7. Sew a straightened spoon (wide part up). You can use superglue to secure the spoon in place.

8. Lay the folder on the fabric - try to make sure that the folder is in the middle of the fabric. Make sure that the spine of the folder matches the pattern you sewed.
9. Bend the bottom of the fabric to the spine and attach it with glue. Do the same with the top.

10. For the corners, you need to cut the fabric into a V shape. Now you can fold the left and right sides of the fabric and glue them to the folder. Glue each corner separately.


11. Cut a rectangle out of thick cardboard that will cover the inside of the folder. The rectangle should be slightly smaller than the walls. Also, it should not go beyond the spine of the folder, otherwise it will not close normally.

Using a ready-made rectangle made of thick cardboard, cut out the second one and glue it to the other inner wall.
12. If desired, you can wrap each cut out rectangle with a cloth and then glue it to the folder.


13. It remains only to add pages with recipes.

Handmade gift for grandma.
Flower pots from old floppy disks.

You will need:
floppy disks
Super glue and hot glue from a hot glue gun
Plants (or soil + seeds + yogurt cups)
Scissors

1. For one pot, prepare 5 floppy disks.

2. Apply glue to the edges of each floppy and carefully glue all 5 floppy disks together. On the bottom floppy, you need to apply glue to all edges.

3. Prepare the plants. If the pots are a little larger, you can cut them with scissors and then insert them into new floppy pots.

* If you want to plant a separate flower, you can pour the earth into a yogurt cup and then put it in a pot.
* You can use floppy disk stickers to write the name of the plant on them.


How to make a gift to your grandmother with your own hands
Woven rug.

You will need:
Thick canvas, for the base of the rug (in this example, the rug has dimensions of 61x76cm)
Many multi-colored scraps of fabric for weaving a rug
black threads
Scissors
Glue for fabric (for example, BF-6)
adhesive tape
Protective and water-repellent coating spray (Polycrylic Aerosol was used in this example) - Shoe spray can be used as an alternative.

1. Decide in advance on the size of the rug. Then cut out the base.
2. Cut the prepared fabrics into strips (you can tear them with your hands).
* It is worth noting that the length of each woven braid of fabric extends approximately 10 cm beyond the length of the base.

3. Start weaving braids from fabrics. You will need a lot of time, so you can relax and, for example, turn on a movie.
4. Secure the ends with duct tape.
5. Your braids are ready and it's time to glue them onto the base. Don't feel sorry for the glue.
6. Using black thread and a needle, sew the pigtails around the edge - each needs to be captured with stitches.
7. Peel off the adhesive tape and trim the fringe on each side.
8. It remains to impregnate the mat with a water-repellent spray so that it lasts longer. It is best to spray outdoors.

What gift to give grandma
Bouquet of artificial flowers.

You will need:
Simple pencils with an eraser
Thick colored paper (preferably bright colors)
Scissors
Hole puncher
Floristic foam (you can use regular)
Super glue
Pot (preferably aluminum, but also made of thick plastic)
1. Get your pot ready and cut the foam to the size you want to fit into the pot.
2. Use superglue to stick the styrofoam to the bottom of the pot.
3. Prepare a thick colored cardboard and cut flowers out of it.
4. Using a hole punch, make a hole in the center of each flower so that the eraser at the end of the pencil can crawl through it. Try not to make the hole too big.

* Instead of a hole punch, you can use a clerical knife, or in extreme cases, ordinary scissors.
5. Insert each pencil into the flower.
Vinyl notebook cover.

You will need:
Plate
adhesive tape
Thread and needle
glue gun
Scissors
Oven
You can prepare a notebook in advance or make it yourself.
If you chose the second option, then you will need plain paper, which must be cut into several small sheets and sewn with threads.

1. Take the plate and draw on it the fold lines and where you will cut off the extra parts.
2. Place the plate on a baking sheet and briefly place in the oven.
3. After the oven, the plate will become soft, and it can be cut along pre-drawn lines.
* If the plate becomes hard, place it back in the oven. Also, when you cut off all the extra parts, place the plate in the oven to straighten it later by pressing on it with your hands.
4. Add glue to the spine of the notebook and stick it to a wide adhesive tape.
5. Attach the vinyl parts of the cover to the left and right of the adhesive tape.
6. Cut off the excess parts of the tape, leave about 1 cm at the top and bottom. Bend these extra centimeters towards the notebook.

* If desired, you can make a hole in the vinyl with a hole punch and thread the ribbon.
DIY gift (video)
Cool gifts for your sister with your own hands.
Multi-colored pearl bracelets.

You will need:
simple bangles
Any garlands of beads (ordinary beads with pebbles or small balls are enough)
Super glue
Threads (one or more colors)

1. Glue the beads to the bracelet. It is advisable to apply a little glue under each bead.
2. Wrap string around each pearl. You can wrap three times, it all depends on how thick you want to make the bracelet.
3. After you have wrapped the bracelet, make a knot and secure the thread with glue.

A do-it-yourself gift for mom is able to make each of us, there are more options and ideas around than you can imagine - it is important just to find an idea, and all members of a large friendly family will help to bring it to life.
From your mother, everything good and tender has been invested in you, from your mother - the warmth of your hands and an indifferent heart.
Agree, who knows your mother better than you - you have lived with her all your life, you can’t imagine how you can live without her at all, not call up at least once a day and not say warm words to her. So I want to find such a gift set for her birthday, not just the best, but unique, inimitable.
![]()
- If it is possible to make a gift to mom with your own hands, then this will be regarded as a desire to express love.
- Purchased gifts are good, but they are not personal, they are bought only if you need to donate household appliances, jewelry, branded cosmetics. But even such gifts, after all, you can just pack exclusive boxes made by your own hands to your mother.
- Why not assemble a box from lace boards cut with a jigsaw, put in expensive jewelry or beautiful souvenir soap - raspberries, strawberries, apples and lemons.
Imagine how mom opens the package and examines its contents - a beautiful gift, a wonderful aroma, a great mood.
- Sometimes the giver experiences much more satisfaction than the donee, the desire to give seems to speak for itself, remember the wonderful animated film under Winnie the Pooh, how the Owl defined the concept of giving - to give away free of charge, without demanding anything in return.
- This is how we give love, just please or make small souvenirs - a tiny gift for the day for a mother's heart is more important than a very expensive TV or a super-new refrigerator brought once.
- Yes, they are also needed, but a small craft made for mom with her own hands is more important, she will not hide in the closet, but will be placed so that she can be seen more often, rejoice.
- Let gifts for mom be indifferent, so we don’t just make gifts, but we continue to realize what our mothers tried to invest in us - love, mutual understanding, tenderness. Therefore, make your present, already anticipating how your mother will accept it. And how to make a gift to mom with your own hands - your loving heart will tell you.
What gift can be given if there are no special talents and you do not know how to sew or knit?

- You can buy an ordinary puzzle - the largest picture consists of 32,000 pieces! It will take you at least a month to assemble it, you will have to hide the finished parts of the picture so that mom does not guess in advance that you are preparing the best gift in the world for her! A large picture will be placed in a neat frame and then hung in the living room - to the delight of my mother.

Whatever the craft, it will please mommy much more than just a box of perfume bought as a present or another box of chocolates.
Possible gifts
Do I need to buy things as a gift? It is better to let such purchases become ordinary for you, and make a gift for your mother yourself.

Do you remember what your mother enjoyed the most? Your first drawing, a ridiculous, clumsy plasticine vase in which you placed the first spring flowers, and from which water always flowed.
Whatever the gift with your own hands, it always caused a smile, certainly made your mother happy and filled your little baby heart with pride - I did it!
Let your gift be original. Let it be a little strange - so we remembered the first plasticine vases, but now you are older.
- You can give mom glasses of chocolate for an evening feast. Making them is as easy as half-forgotten vases - melt the chocolate, pour it into wide glasses, cool. And before serving, pour egg liqueur into each glass of chocolate - delicious, beautiful, good!
- You can make - a basket of paper or branches, fill it with souvenir soap.
- If you are well versed in electronics and are ready to do something very necessary for your home - an excellent alarm or heating control system.
- Love to draw - draw a picture or a portrait.
- You can assemble an original collage from completely different parts.
You will create a gift for the whole family - let the children work with you. A gift from grandchildren is another step, valued even higher.
It is easy to do everything that comes from a sincere heart, you can make a gift from everyone - sit with your brothers and sisters (if you have them) and put each piece of yourself into the product. Twigs, cones, dried inflorescences and even small pebbles collected in the summer are so easy to use. DIY gift ideas for mom are all around you:
- Original high-tech painting;
- Tapestry;
- Photo frames;
- Caskets.


You can make them quickly, it will take only a couple of days to work: preparing parts, assembling, drying. And the result is an incredibly beautiful original gift for mom. The most important thing in such a gift is your desire to please your mother. After all, you can give mom the simplest gift - give a certain amount of money, let her buy herself what she needs, but happiness is not in money, but only in sincere love.
Discuss together - what to give mom, distribute responsibilities, think about what can and will look better in the living room - a picture, a tapestry or a collage of drawings and photographs. Sometimes the decision comes spontaneously, and ingenious masterpieces are born.
- The pattern on the wallpaper can become a stencil for embroidery on kitchen curtains or on a paper towel holder;
- Several gilded cones and dry twigs of grass - the basis for the picture;
- A small piece of glass will turn into a luxurious stained glass window;
- Homemade jewelry box;
- You can weave a basket - a necessary and beautiful thing for mom. You can watch the tutorial in the video below;
- Collage of family photos;
- Embroidery - it can be done on mom's clothes, pillows, towels or any other home textiles.
- Knitting. If you have such abilities, then it will not be difficult to come up with a gift.
Buy several ready-made needlework kits, in addition to mosaics and puzzles - let each member of the friendly family make their own birthday craft. Collected together, these gifts will be a wonderful proof of family unity, love and trust.
keepsakes
A separate category of gifts - just a keepsake. They are stored in special boxes, rarely pulled out into the "light of God", they are special. As if not much work has been invested in these products, they are inexpensive, but with what love mom will get a box with these cute reminders of your love and sort through funny trinkets.

Of course, all the gifts listed earlier can also be attributed to this category. But with these presents, mom will not be separated so accurately:
- Give your mother a hand-embroidered handkerchief. She will definitely not part with him;
- You can insert your small joint photo into your mom's wallet;
- Below you can watch instructional videos on how to make a decoration for mom. Not just a children's trinket, but a talisman that reminds you of you - a bracelet or pendant around your neck, for example;
- Knit a warm homemade sweater for mom, every winter it will remind mom of you;
- Another option is a t-shirt with a picture of your family or some cool slogans, but don't overdo it! The gift should be associated with you. Of course, most likely, mom will not wear such a gift on the street, such a T-shirt is designed for home decor.
Such gifts still keep the warmth of your hands, they not only remind your mother that her child exists somewhere far away from her, but also that he is the best, because you can do it yourself only by sincerely loving a person.
Therefore, products, no matter how complex they are, are unusually beautiful and original. Take the time to create gifts for mothers, and try to bring them at least flowers more often.
On the eve of their mother's birthday, the children think about the question of what to give her. I want the gift to surprise my mother and remain in her memory for many years. Of course, you can ask your mother for money or break a piggy bank and buy some souvenir in the store. But why? After all, the best and most valuable gift is the one that is made with your own hands. In this article, we will tell you how to make a simple but original gift for your beloved mom from improvised materials.
Any congratulation begins with flowers, so we suggest making a beautiful craft for mom.
orange joy

The following materials are required for work:
- threads;
- thermal gun;
- felt paper;
- needle;
- scissors.
Execution scheme:
Step 1. Cut out strips of orange felt 5 cm wide and 10 cm long.
Step 2. Cut out two leaves from green felt paper.
Step 3. Fold up the rectangular ribbon and stitch the edges. Do the same with all blanks.
Step 4. Cut out a circle from red felt and sew along the edge.
Step 5 Using a heat gun, connect all the workpieces together.
Step 6. Glue a button in the middle of the flower.
Work is done.
Consider do-it-yourself paper crafts for mom for a birthday. A fabulous flower will be a good gift for the closest person.

In creating a holiday card, knowledge of the quilling technique will be required. Therefore, prepare special paper and glue for work.

Step 1. Roll quilling paper onto a toothpick, unfold it and form the desired pattern.

Step 2. Arrange the composition on paper. The postcard is ready.
Do-it-yourself crafts for mom's birthday can be done using different techniques - for example, origami. Try to fold the original boat.

For its implementation, the following materials are needed:
- sisal rope;
- double-sided colored paper;
- scissors.
Execution scheme.
Step 1. Make a paper boat, following the instructions shown in the video.
Step 2. Decorate the figure. Make holes with a hole punch and thread the sisal rope. Tie a keychain-heart or flower made of colored paper to one end of the rope.
A gift for mom can be made from plasticine. This is such a beautiful composition you can give your mom.

Prepare for work:
- modeling board and plasticine;
- a glass;
- stacks;
- handle.

Step 1. Sculpt all the blanks and stick plasticine around the glass and handle.

Step 2. Combine all the blanks into a single composition.
Step 3. Make a decoration for a vase.
A flower with a vase is ready.
We offer you to look at the ideas of crafts for mom.


Bouquet in an eggshell
You can create an amazing composition even from eggshells. Therefore, before you throw it away, think well, maybe it will come in handy for you.

To make such a composition, prepare the following materials:
- fresh or artificial flowers;
- eggshell;
- skewers;
- gouache;
- filler;
- glue.

So let's get started.
Step 1. Make a hole in the egg and blow out the contents. Rinse the workpiece and dry the shell.
Step 2. If you decide to use artificial flowers, then making them is easy. Cut out a flower from fabric and glue it on a skewer. Create a bouquet in this way and stick it into the shell, after putting the filler there.
The composition is ready.
For everyone, mom is the most beloved and dear person. I want to please her not only on holidays, but every day. Thanks to such simple crafts, you can give your mom gifts every day. She will be immensely happy because she gave birth and raised a creative child.
See what other crafts you can do for mom on her birthday, the video will help you decide on the right option.
Plastic bottles to the rescue
An older child can try making a pretty butterfly out of a plastic bottle. In fact, crafts from a plastic container are a flight of fancy. But today we will talk about the butterfly. 
For its manufacture you will need the following materials:
- light plastic bottle;
- permanent marker;
- glue;
- scissors;
- nail polish;
- acrylic paints and paints on glass;
- beads;
- wire;
- butterfly stencil.
Step 1: Cut off part of the bottle.
Step 2. Attach the stencil and trace with a marker.
Step 3. Cut out the workpiece along the contour.
Step 4 Bend the wings so that the outline is on top.
Step 5. Decorate with butterflies with paints or varnish at your discretion.
Step 6. Glue the beads all over the body.
Step 7. Make antennae from the wire and glue the butterfly in the middle.
Craft for mom is ready.
We offer a number of gift ideas (video).
In articles for Mother's Day, we have repeatedly said that this holiday is very symbolic, and it is not the functionality and high cost of the gift that is important, but its sincerity and sincerity. This is exactly what handmade gifts are. We tried to pick up ideas that will be adequately accepted from both an adult and a child. The main secret is stylish and simple.

Idea 1: make colored hyacinths
A gift for mom on Mother's Day made of paper is the most versatile and budget option. Flowers are especially graceful of this material. Take a look at the photo below: paper hyacinths look flawless.

- a set of colored paper (use a variety of tones, the paper must be double-sided);
- scissors;
- good glue;
- You may also need a simple pencil and ruler.


Idea 2: soft tulips
Such a gift to mom on Mother's Day will definitely not be left without compliments. If you have at least minimal sewing skills, then you can easily bring the idea to life. Soft tulips, unlike paper ones, are durable and fit perfectly into the interior. Look how beautiful it turns out.


- a few shreds of bright fabric from which the buds will be sewn. It is desirable that the fabric be of different shades, which are harmoniously combined with each other. Feel free to use patterns on the fabric: for example, polka dots or stripes.
- a piece of green fabric for leaves and stems of future tulips;
- soft filler (for example, cotton wool or foam rubber);
- stiffening wire.
Let's get started:
First you need to cut out the pattern and transfer it to paper from the computer screen. Then we bend a piece of fabric for the bud in half and circle the pattern with a pencil. Next, the part must be swept away (so the fabric will not disperse). We do the same with the stem and leaves of the future tulip. When all the details are cut out, carefully sew them on a typewriter. Be sure to leave some space for turning. We fill our buds with soft cotton wool, synthetic winterizer or foam rubber, sew and attach to the stem (this can be done using a hidden seam). That's just how a gift is made to mom on Mother's Day with your own hands. This flower will never wither!


Idea 3: stone cactus
If you are looking for a gift that will surprise, then this idea is what you need. The craft looks original, but it is extremely simple to do. If there are children in the house, then be sure to connect them to the process.
You will need:
- a small flower pot (it is advisable to use ceramic pots, you can use old ones, so the craft will look more natural); some sand;
- pieces of 5-6 flat stones of different sizes and shapes;
- acrylic paint set.


Idea 4: a heart of flowers
A very tender gift that symbolizes your love. It is not difficult to make it: the whole process will take you no more than forty minutes.
You will need:
- many small roses;
- one heart made of cardboard (blank);
- stapler;
- a rope on which the heart will be hung.


First, on a sheet of thick cardboard, you need to draw a heart of the size you need. Then we hang the future flower heart on a rope. Carefully cut off the flower buds from the stems (or it is better to use twigs at all), and fix them on a cardboard blank with a stapler. A beautiful craft for Mother's Day with your own hands is ready!

Idea 5: spring birds
These birds look incredibly cute, but they are made simply. However, almost every craft made of felt delights the one to whom it is intended. So let's get started.
You will need:
- a few pieces of multi-colored felt;
- threads;
- soft filler;
- glue;
- scissors;
- ribbons;
- beads.


Let's get started:
On the landscape sheet, you need to draw the wings and body of the future bird. Cut out blanks. Then the felt must be folded in half, and the bird's body blank should be attached. Cut along the contour. We do the same with the wings, only we use felt of a different color. Cut out a small beak. Now the body of the bird needs to be swept away and filled with soft fillers. Wings are sewn on the sides, a beak is sewn on. Don't forget to add eye beads. The bird can be attached to wooden sticks or hung on satin ribbons, and a small heart or flower can be inserted into the beak.

We offer you to get acquainted with several photo instructions and options for what else you can do on Mother's Day with your own hands.
Idea 6: rainbow beads

Idea 7: paper hearts


Idea 8: bright panels with photos of children

Idea 9: a bouquet of chocolates

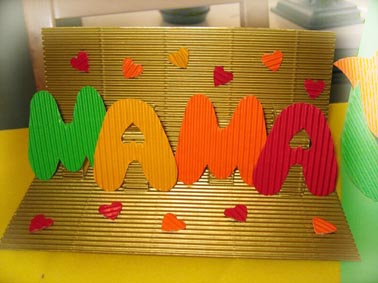
Idea 10: three-dimensional letters from flowers

Idea 11: Treasure Collection

If you are looking for a place to celebrate Mother's Day, then welcome to our catalog: you will find hundreds of the best places in Ukraine with detailed descriptions, photos and guest reviews.
You may also be interested in:
Photo: at the request of Yandex and Google