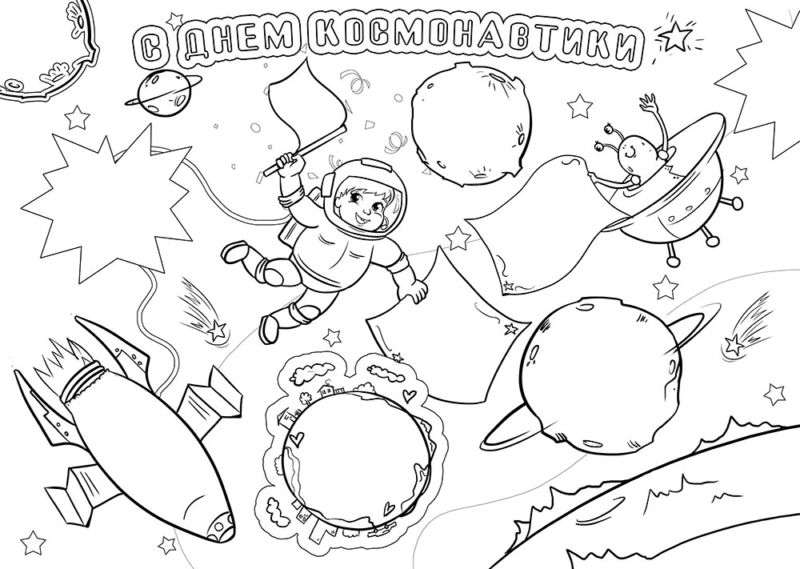
Ideas of crafts on the topic "Cosmos. Drinking space - Actual thematic toys, ideas and stylish decorations on cosmic subjects (100 photos)
Hello dear subscribers and blogs blog!
I imagine completely forgot that in April there is another world holiday, which is always celebrated on the same day on April 12 - this is the day of cosmonautics. How about this can be forgotten (((.
I decided to correct right now and present to your attention a collection of original and unique crafts that you can perform at home with your children and bring to the contest or exhibition. Ideas will be different from easy-to-challenging, so that you can choose. After all, someone has children already adults and go to school, and someone else is still at all kids - in the kindergarten.
I think that here everything is clear, the most important symbol of this holiday will be a rocket, because it was on it that was the first in the world to emissions into space Yuri Gagarin, if you did not forget.
Yes, by the way, do not forget that there is ahead of Easter, and I have already given any kind of remember? Well, do not forget that in May. Wow, cool, right a whole petition.
Perhaps, perhaps from the most common and you already guessed the popular option, it is a rocket. It can be done independently from what you always have at hand.
To do this, you can first take a dressing roller, if you do not have it, you can twist the cardboard and glue the sleeve.

Stages of work will be such as not difficult, but on the contrary, on these pictures you can easily create this unique thing.
So that the rocket fell not falling, it is necessary to make a support, that is, a stand and consolidate it on it.


You can create a huge charm. Exactly in the flight children will go))).

Well, or many such.

From ordinary plastic bottles here, what happened.


Here's another charm, the child did himself, pasted with newspapers.

You can also build a flying plate.


What will you do to it? Choose from what I found on the Internet on the Internet, or write at the bottom under the article, from which you can still create.
From the CD discs, as well as can be decorated with beads and rhinestones, cinema wire.

The legs can be made of rustic chopsticks or skeins, and glue beads.

Ha, hands from the filth are made.

Healthy models, directly to the exhibition can be sent.


Plastic cups also went here, it turned out a cabin.

Space base has been released from plasticine and matches.

Cool it looks, the main thing is that you can perform quickly and easily, while not spending a lot of finance and investments.

And if you are tired of all primitive, then you will detect anything creative and your own.

But this is not all, you can make any planet of the solar system, as you have such an idea, see how such a papier-mache.


Or perhaps all the planets are depiction using the dough for modeling or take ordinary color plasticine. Twist in flagella, and then, like straw and in the ball.


Marsian lacks them. Wow, what wanders came out from the authors, take a look. And the material is an ordinary egg from Kinder Surprise, or rather her box.

What a pitfall, and the legs are made of wire and plugs from bottles.

Ideas of cosmic crafts in kindergarten
It came to the next stage, I will show you what can be performed with your favorite kids. Put them in a circle and start with them to perform the following actions, you will need paper, or rather square sheets.

The result will be like that you will definitely have to do, but for children for sure.

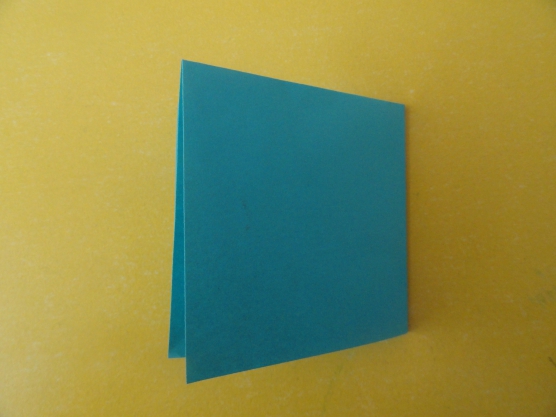
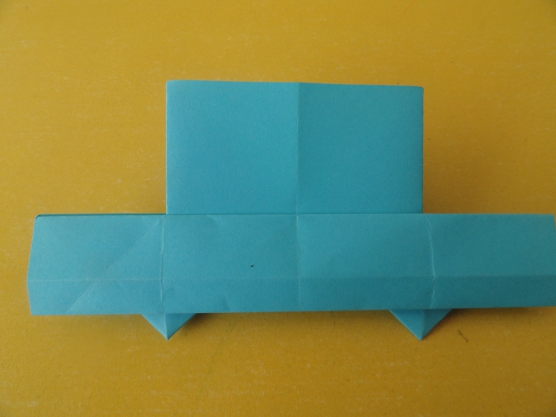
After all, Origami like everyone. What could be easier? So, fold the square sheet in half along.

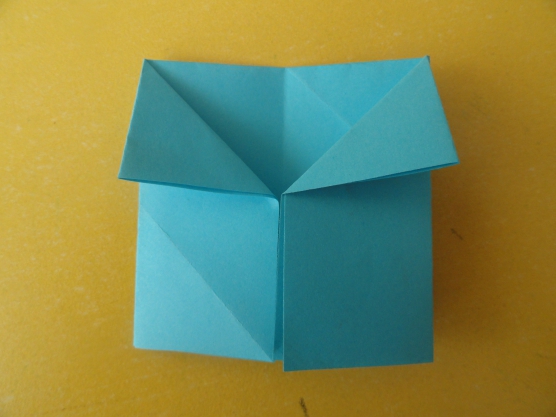
To this fold line again begin to make bends on both sides.


Now beaten like the way it is shown.

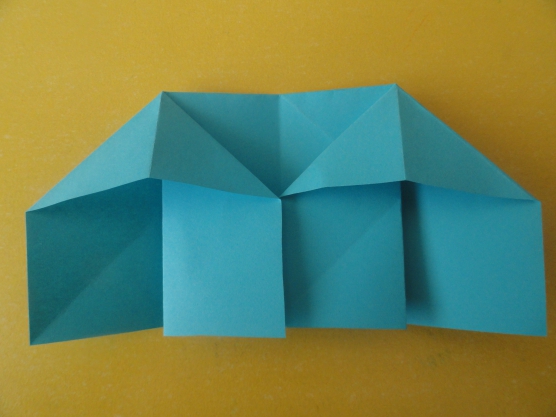
The next step is to trim everything too much.
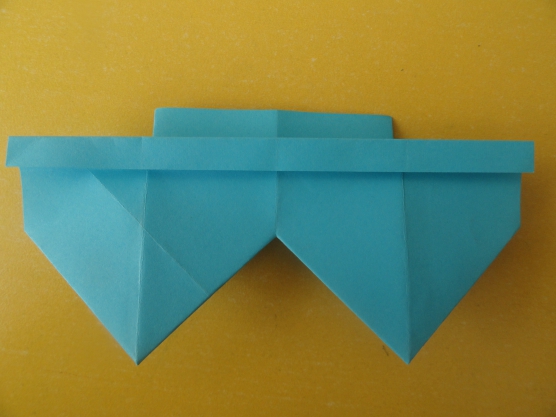
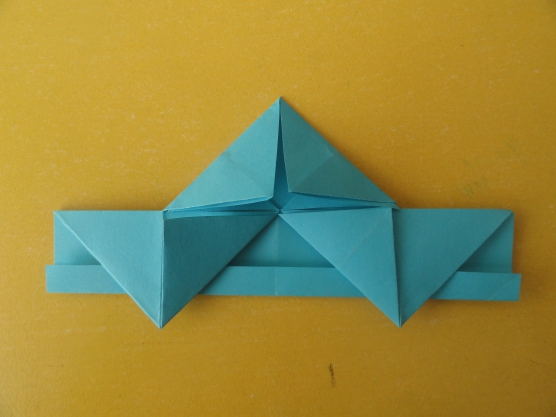
Start bending like an envelope.

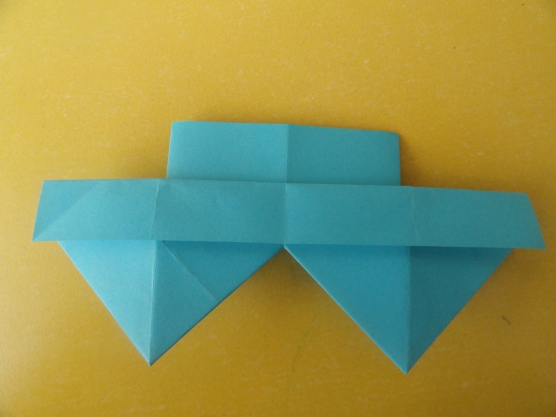
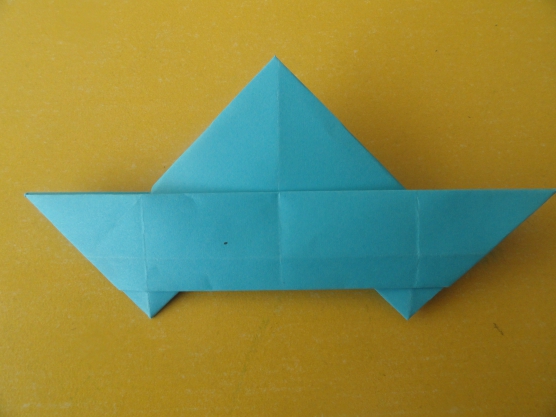
Then subsequently two triangular parts will be seen. Follow the further instructions.

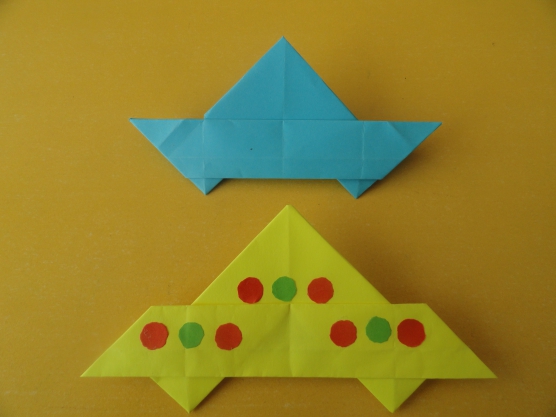
Also, do not forget about the fact that you can use plasticine here, roll out small balls out of it and cut out.

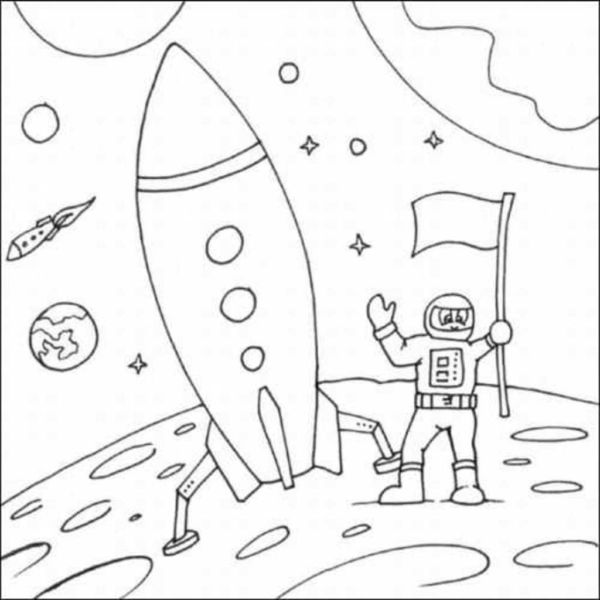
Draw or print an astronaut and rocket for example.

And start writing a picture. It develops not only perfection, but also attentiveness.

It is possible to roll greamp. Or still pumpkin seeds to paint and stick here, but it is already under the control of adults and at home with their parents.

Or completely large lumps in the form of planets of the entire solar system. The foam rubber was used here.

This is such a simple model and a flying object scheme. You can use it further by appointment, for example for applications, etc.

See how great it can look at the usual sheet of paper.

These are the types of transport with the stars.

Also from colored paper you can make an unusual craft for skyscraper.

You can add to this version of people to add, inhabitants.

Or your child to make a pilot, he will be accurately delighted. Here again, children's palms have adapted.

Or a teamwork of a group or class with children's photo of the children.

You can also take a ready-made pattern and cut, and reoxoile will issue these parts on the A4 sheet.

It all depends on you and your imagination.

Why not, all make such a distribution material.

Also, a super idea was to create an astronaut from Kinder Surprise.

Video news, you will help you, if you want, something new to make something with your wards.
The most simple work on space from paper and cardboard
Do not forget that you can take any coloring and paint it with markers or watercolor paints, gouache.


Perhaps such samples, someone will be useful for their work.


Or use colored paper and cardboard.

Work I found masters in the country.

Here, even Gagarin depicted.

Here is a sketch you can print and cut, after gluing.

Do not forget to sign the product. It may be a beagase.

Beautiful crafts about space to school
You will probably laugh, but I decided to find something unusual this time, and I found. Of course, you can take as a basis any idea and something to it from yourself. Or do the humanoid of foil and napkins).
The master class will be from Konstantin Cobzik.


You can make an earth satellite. In order to create it, I suggest you to see this video.
Well, or then lay out a whole composition of the cast material. For example, take the box and paint it into the appropriate background.

Get stars from self-adhesive paper.


This will be an outer object. All other parts attach to it from plasticine.

Come up with something else, such as a plane.

Position at your discretion.

You can do this picture, without your favorite heroes, the cartoon can not do here. A product is made of dough for modeling.

You can also use corrugated cardboard and tin cans.

That is what base turned out.

Or such men, as if robots that live on the moon, Lunatic).

Here is such an idea from round pasta.

Choose, here again plasticine.

The whole picture of it is flattered.

It looks bright and stylish, your peers will accurately appreciate.
Do not forget that you can also use the sun too much, because it is also a planet.

There are many options in general, so choose and create!
Cool work from the country of masters
Here I suggest you see pictures taken from this site, maybe it will open you on a new thought.
I first came across the work performed in the style of modular origami. How do you?

Fast flight, Uuu!

From the cereal, too, won, that they launched the children, take a look.

Someone even managed to associate such a product.

Perform quilling in the technique.

Here are some more adorable ideas.


Space plate and aliens from the cast material and assembly foam
Here everything goes everything, what you have at hand. Let's think together together what you can create space masterpieces. That's right, from anything. Take a look, from an ordinary shampoo, or rather packing a bottle made a racing.

And on the side of the aliens, whose aliens. In the course and plates went paper, it is possible to take plastic.

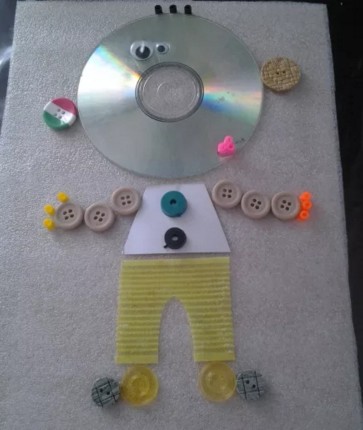
These are such cradle. Straight some alien station turned out, here as you can see and disks and even pasta instead of hands, and the hair made of straw are made.

Here are also the ideas of the bottles and even the bow adapted.


Wow, from egg shell.

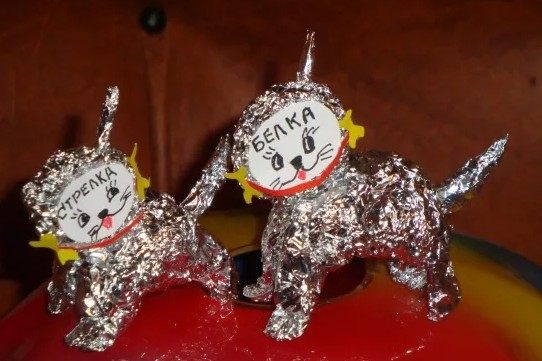
It also looks originally work from foil, squirrel and arrow, ha))).
Or, see the composition of the box and the bump instead of the device started.

This, I also liked me, made of fabric and buttons.
And I saw such oats, a super option.

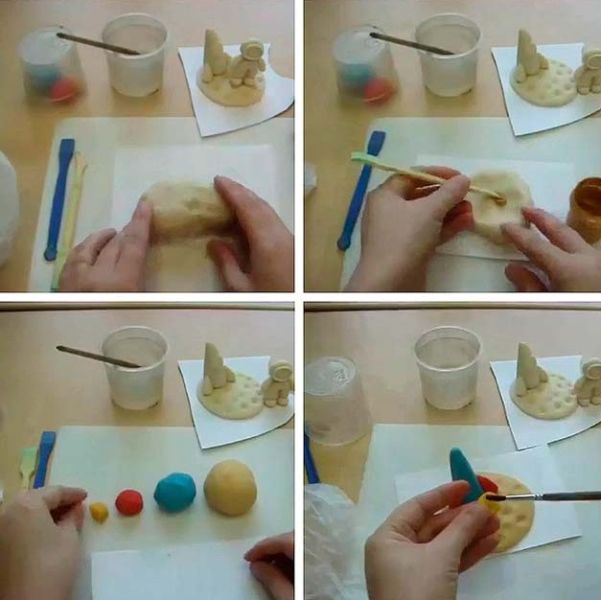
Have you ever tried to make products from a salt dough?

If not, then it is just this moment, see this video from the Yutuba channel and you also have such a charm.
You can certainly use more fabric, such as felt.

Cool crafts look awesomely attractive.


But the masterpiece from the mounting foam, it looks cool, a cosmonaut made of salted dough.

From the test at all, it is fashionable to create a bunch of crafts.
Souvenir right to order came out.

Just like paper, reminds the tunnel.

Baby Cards on Space
First of all, I want to immediately offer to make a postcard, so it is not easy, and the bulk. You need to choose the plot if you like this, like on this sample, then write to send you it. So, you print it and then paint with pencils or markers.


But so that it looks civilantly, you need to make a cover, fold it in half, and then draw to it.

Perhaps you will have this soul.

Either use the trace method, it is also ideal for this purpose.

Cosmos For many centuries, it excites human consciousness, manits its greatness and mysteriousness. Children admire the expanses and beauty of the uncharted, so they often want to recreate the outer space in the crafts and drawings. To do this, we have prepared several master classes on crafts on the topic of space, which will definitely like your breath.
Materials for products
To begin with, you will get acquainted with what you can make a "cosmic" craft.
- Plasticine;
- Polymer clay;
- Discs;
- Salty dough;
- Paper cardboard;
- Plastic bottle;
- Boxes;
- The cloth.

These are not all items that can be used to make a craft. Appearance, colors and list of materials are unlimited, as well as human fantasy.

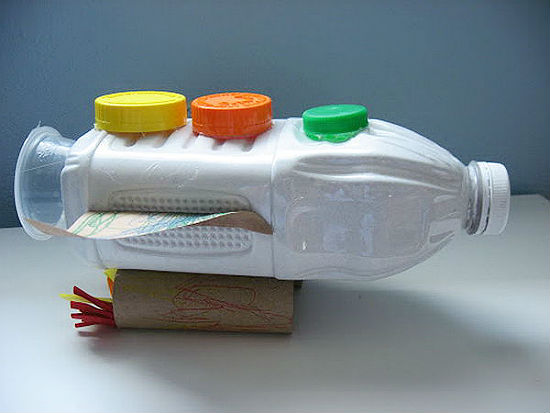
Plastic bottle rocket
A realistic space rocket can be created from ordinary plastic bottles from under milk and other beverages. To do this, prepare:
- plastic bottles;
- pump for balls;
- scotch;
- acrylic or gouache;
- cardboard;
- water.

We will proceed to create an interesting space craft:
- Cull the cone from the cardboard, which will serve as the tip of the rocket. Cut out several spacewashes of space technology. Take the resulting items to the bottle.
- Decorate the rocket with gouache or acrylic paints. Draw the external coating of the ship, the window, in the window you can draw astronauts.
- Insert a pump with a pump in a plug. If the hole does not coincide with the size of the needle, pour water before launching the rocket. Use the pump. Now your rocket can take off. Enjoy spectacle with your child!


Flying plate of disposable plates
In order to create a flying plate, prepare several disposable plates of different depths. We give advice to create this light craft:
- Turn the plate to the bottom upwards, and take another plastic plate from above another depth; You can close the plate of the foil, so it will look even more unusual;
- Paint sacks of silver paint. From above, you can draw various additional elements, such as stars, windows and aliens that live in a plate. From buttons and rhises, you can make lights that are located around the perimeter of the plate.
- If you wish, you can make a hole at the bottom of the deep plate (it will be the top of the transport for aliens), through which to push the thread. Next, tie a plate to the chandelier.


Planets from plasticine
In order to create the planets of the solar system from plasticine with their own hands, use the following instructions for creating crafts on the subject of space.

We give a detailed algorithm for creating planets:
- Connect yellow, white and orange in one large plasticine bowl. The ball should be monochrome and do not contain foreign residences.
- Stick the sun to the center of the dark blue sheet. You can pre-draw small stars and overflow on the sheet.
- Mix gray, brown and white colors in one small ball. With the help of a match or toothpicks, apply holes on the ball, they will serve as crater. A small ball will be a Mercury, which is the smallest planet in the solar system.
- Make Venus from brown, black and gray. One must be more Mercury in 2-3 times. Wire draw the texture of the planet.
- Make our planet from green, blue and white.
- Make Mars out of orange, red and black colors.
- Jupiter must be made from beige, brown and orange. The planet is large enough, so do not spare the material.
- Take a beautiful Saturn. Do not forget to make the famous planet ring.
- From blue and blue, make uranium, which also has a ring.
- From the blue plasticine, roll the ball, which will be neptune.
- White and gray roll in a small ball, symbolizing Pluto.


Having finished creating a planet, attach the planet to orbit in the correct order. In order to familiarize yourself with the right order of planets and original ideas for the background of the crafts, we recommend reading the photo of Cosmos crafts on the Internet

Simple space crafts for children from tin cans
From ordinary tin cans, which will probably be found in every home, you can make interesting space inhabitants. Turn on the fantasy to complete and do not be afraid to experiment with the appearance of your alien.

To begin with, prepare a tin jar. Clean it from the label.

You can leave the original silver coating of the banks, however, if you wish, you can paint the jar of acrylic paint, gouache or paint from the canister.


Draw a mouth, eyes and ears on the jar. Make a hole on the sides of tin cans in which you can insert straws or folded pieces of foil, so that they formed the handles.

The first alien head can be covered with a metal washcloth, and to place bright straws from above. The resulting result will accurately charge you and your child.

Instead of painted parts, you can use bolts of different sizes as an eye.

Conclusion
There are a great many options for creating cosmic crafts that differ from each other material, color and style. Do not be afraid to experiment with these parameters, and in this case you will have to create an original model of space objects.

Photo crafts Space


In many ways, thanks to the recent Rocket Falcon Heavy, interest in space discoveries and technologies increased by both adults and among children. The latter are already beginning to dream of becoming if not an astronaut, then a certain developer of the newest aircraft. Well, the approaching day of cosmonautics gives a reason to try your hand so far in the very simple: making crafts on the subject of space with your own hands.
Rocket do it yourself
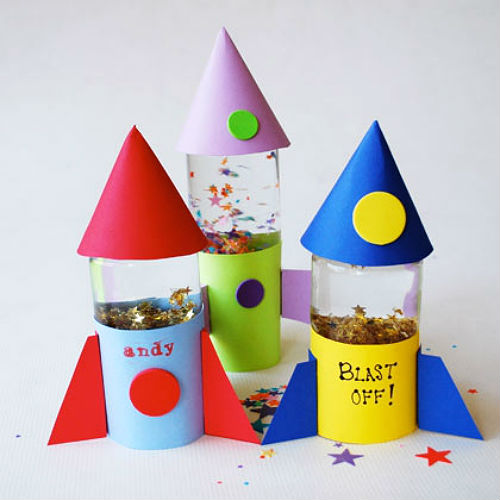
No wonder that the rocket is the most popular handicraft from the space series.
The easiest way to make this aircraft from a plastic bottle. To do this, you will need:
- plastic bottle;
- primer (as it can use PVA glue);
- acrylic paints;
- colored paper;
- foil;
- cardboard.
Stop the bottle, let dry. Cover with acrylic paint layer, let dry and cover another layer. Attach cardboard wings. Decorate the rocket carved from paper or foil stars.


You can simplify the task, avoiding staining, and simply leave the bottle with paper or foil.


Here is such an impressive rocket can be done using tin bottles from under Coca or other drinks:

It is also easier to use as the base for a rocket cardboard tube from under paper towels or toilet paper. It is enough to attach to it made from the cardboard wings and a cone-nose, decorate with colored paper or decorate with markers.


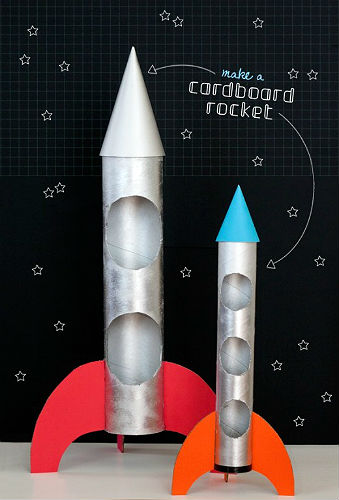


To create an imitation of a flying rocket, you can take care of the "fire" from the engines.


A cosmonaut's hero can fly in the rocket - it's enough to put an astronaut's figure or gluing the photo of the child himself. See how fun looks from the window!


And make a real missile that will definitely fly, you can watch this video and making everything according to the instructions in it - of course, only with the help of the supervision of parents!
UFO do it yourself
Another popular handicraft on the theme of space is a flying saucer with aliens inside.
Make it easier simple, using plastic or paper disposable plates. A transparent plastic cup can be used as a cabin. For a special effect, an alien creature is well put in the cabin) made with your own hands or a normal toy). UFOs can be frowning and decorate with bright rhinestones and waters.


To the plate you can attach the legs from under the sticks from ice cream.
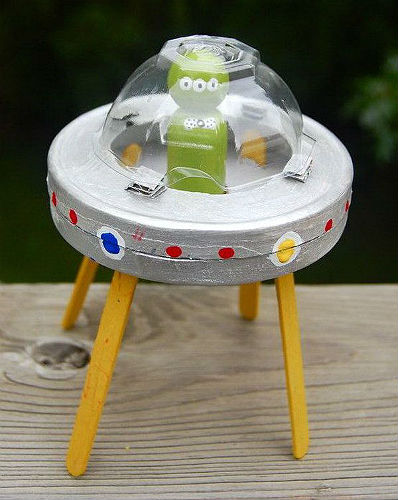
UFOs can even be saved from wool if you own the skills of this needlework:

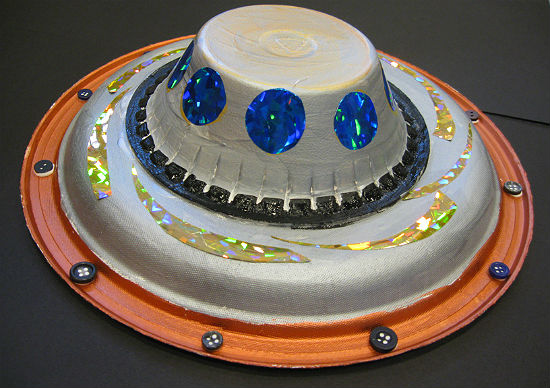
For the manufacture of flying plates, unnecessary CDs and boxes from the Kinder Eggs will rise.

Maks of the Universe
All sorts of mockups of the universe or solar system, made of plasticine, papier-mache, tennis balls, felt, look great.

Often they are performed in the form of a mobile, which can be fixed under the ceiling, creating an illusion of objects moving in space.

Crafts on the topic of cosmos from origami
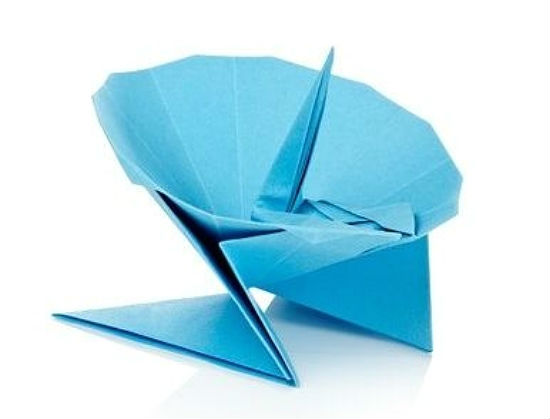
To create an original starrel, a flying plate, a rocket or fighter from "Star Wars", just just one sheet of paper. This can be done with the help of Origami art.


Watch the video, how to make a fighter in Origami technique:
But the master class on the manufacture of a starship:
And finally, the video, thanks to which you learn to make ordinary Origami rockets:
Separately, it is worth noting the volume (modular) origami, which allows you to create true artworks from individual paper modules:

And what craft did you do? Share with us in the comments!
Before the day of cosmonautics in preschool and school institutions, various exhibitions of crafts are organized. Today, the space rocket, UFOs or solar systems is easy to do even from girlfriend. We are interested in leisure with your children and turn disposable dishes, cardboard boxes or rolls from toilet paper in creative crafts on the topic "Cosmos". You can make many unique products yourself.
Flying plate of paper dishes
Interest in UFO has arisen quite a long time, so any child with interest reaches the manufacture of a flying plate, which he often saw in films and cartoons. It is easiest to do such a craft from plastic or paper different sizes.

The UFO will look original, made of two plates, one of which performs the feature of the cabin to control. In order to glue them, you need to make cutters on a small plate at the bottom of the bottom, and then bend in a circle and glue to a large plate. If you work with paper materials, then make it easy with the help of a regular PVA, plastic is better glued with hot glue. Do not forget to color your craft with acrylic paints and re-establish, placing ordinary buttons along the contour.

The flying plate of and halves the big egg from the Kinder surprise will look original. It is possible to use even a part of the plastic egg, it will be much more convenient to glue than the greater half. Do not forget to discones your craft.

Space station do it yourself
From rolls from toilet paper and towels, you can either ship, but a whole space station. To do this, you will need plastic bottles, bilateral scotch, aerosol paint, plastic plates or sudripes, acrylic paints. First, think over the design and dimensions of the future station. After that, prepare all the necessary materials and tools. Parts can be glued together with a tape or hot glue. Make a bottle of 1.5 or 2 liters. A beautiful stand is obtained from disposable plates or trudes, which will need to turn over and install each other.

Secure one long roller from towels and 6 small at the bottom. Small details from old toys can be useful in the manufacture of spacecraft with their own hands. After you collect completely crawl, you can start staining. First, use the aerosol paint, and then acrylic apply the pattern or some drawing. Such a workout will definitely defeat space work.
If your handicraft consists of a small amount of small elements, then instead of paint, you can use the usual foil, which is completely covered.
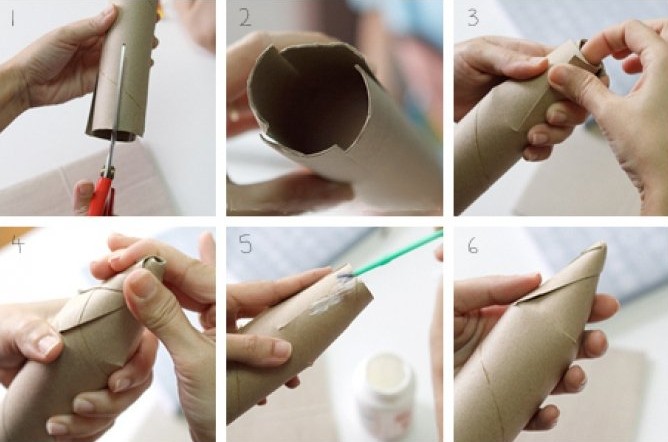
Master class: how to make a rocket
From an ordinary cardboard roll, which most often enters the garbage after use, it is easy to make a real space rocket. To do this, take a roller and a piece of corrugated cardboard. After that, make 4 cuts on a roll at a depth of up to 5 cm and twist them so that it turns out the cone. It will be the upper part of the rocket. Glue it tightly PVA.


Rocket from cardboard boxes for children

Space robots from girlfriend
If your child is delighted with robots, not necessarily buy a finished toy in the store. Try to make a handsome robot with your own hands. For this you do not need any specific knowledge and skills. You can use conventional cardboard boxes of different sizes and rollers from toilet paper. Metal effect feeding with foil.
The "Rocket" handicraft will be the perfect gift for such a holiday as the Day of Defender of the Fatherland, or on April 12. Photo of various rocket crafts can be viewed on the Internet. Acquaintance with several variants of this type of craft will allow you to enable fantasy and create a real masterpiece.
Paper rocket
In case you do not know, from which you can make a rocket, it is recommended to draw your attention to paper. The composition of paper is characterized by making it even children aged five years. The presented product can act as a gift to relatives.

Try to make a missile with children, developing an eye, visual memory, and in general approaching the babies.

The process of creating a paper missile, includes the following manipulations:
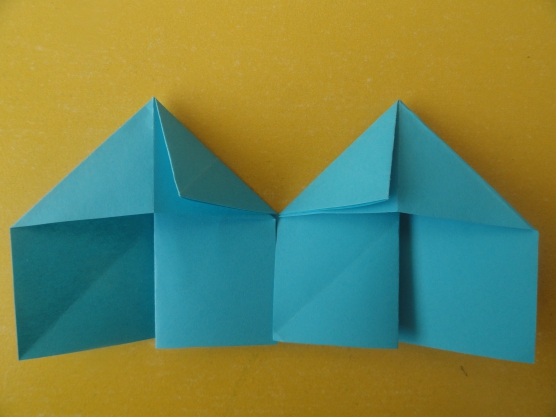
First of all, you must neatly fold the paper sheet, having received a rectangle. One half of the rectangle is folded so as to get a cylinder.


Do not forget that the edges will need to be neatly trimmed in a circle, this is done in order to ultimately the design is more stable.

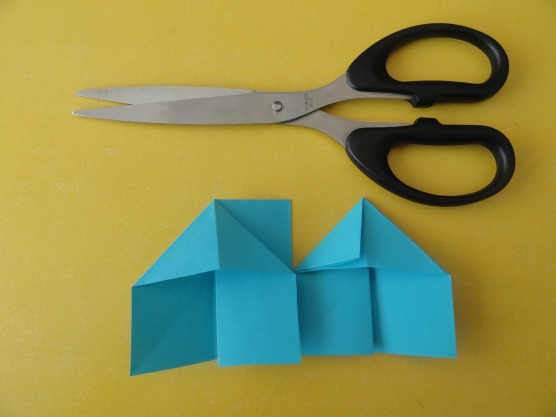
Taking three squares and using scissors it is necessary to make the porthole. If children create the crawl, then you need to remind them that you need to carefully use cutting devices.

All that remains is to glue the resulting porthole to the existing cylinder. Next you need to go to the rocket assembly. When the nasal part is fixed, you can go to the decoration of the "tail" of the product.

Such a simple master class on the manufacture of a rocket will allow you to personally make sure that there is nothing complicated in creating such a composition.

It leads to the fact that if desired and proper approach, you can always create a spacecraft with your own hands, and your children will be happy to help you.

Rocket in Origami technique - beautiful and original
Such a composition really looks unusually, wanting to create it, you need to make a minimum effort, spending some time, not forgetting to turn on the fantasy, showing my exquisite taste. We make a missile with your own hands step by step, so as not to miss any detail.

Such a composition can be a great solution for such a holiday as Cosmonautics Day, for example, to perform it is quite possible in the technique of modular origami. Older children will be able to independently implement the idea.


Creating crafts is carried out by this plan:
At the very beginning, you will need to prepare paper squares, each of their parties should be ten centimeters. The square is so that the result is the result of two rectangles and four squares.

It is important here to note that four angles need to gently bent to the center, after which the figure turns over, the corners are bended strictly to the middle. As a result of such elementary manipulations, you can create a "star in a square".

Next, you need to insert already created modules in each other, carefully glued them. At that moment, when you are glued down by the lower row, you can take another three rows from above, connecting the case as a whole. Do not forget that any manipulations need to be taken carefully, only then will achieve the result of the same composition.

But it is impossible to submit a missile without a nose, respectively, proceed to its creation, there is nothing complicated here. All that will be needed to be done is to roll a paper cone, it's easy and easy.

If necessary, or if desired, you can always make legs and legs that are glued to the base of the module. Handling such simple manipulations, you can enjoy the fact that in the end you will have an original rocket.

Now you are familiar with the instruction of how you can make a rocket with your own hands, and personally were able to make sure that there was nothing complicated here. Therefore, helping your children, together it will be to create a real masterpiece that can be given to relatives, friends.

Plasticine rocket
You can always make a spacecraft from plasticine. It should be noted that this option is famous for developing a small toddler motorcy, this occupation is useful, both for attention and amplification, which will necessarily take into account. But in general, such an occupation will definitely be able to attract children to creative activities.

Kids independently need to choose that shelter from plasticine, which will like most, riding it on the gloss and creating a small oval. Next, the oval is transformed into a long sausage, it is required to be divided into 4 parts, as it will be legs. To create the door, the oval rolls, attached to the bottom of the "self-made".

What do you need to know?
The manufacture of a rocket from the primary materials is an interesting and useful occupation that children love. The main task of the parents is to provide them with it, giving this opportunity, so it is necessary to treat this issue comprehensively and responsibly.

Photo craft rocket


