The master class will show how to make their own hands - a headdress for the Snow Maiden - the crown. Master class will show how to make her own hands - a headdress for the Snow Maiden - Crown Crown for Snow Maiden Beaded With Your Hands
Russian women who had a form of crest. There was a name from the Old Slavonic word "Cocosh", which is translated as a rooster or chicken. Konoshnik comb can be different: in the form of a rounded shield, crescent, high pointed, wide cylindrical, low with cap, in the shape of a crown.
Now this kind of headdress is often used girls and small girls who wear national costumes for holidays, for folk dance, at the Matinists in kindergarten and school. This is a very beautiful product that traditionally on New Year's holiday puts on Snow Maiden, granddaughter of Santa Claus. For a holiday, a child can make Kokoshnik on the pattern in a natural value for the role of snowflakes, a snowy queen or snow maiden.
Necessary materials
To sew the Kokoshnik you need to have a dense cardboard for the ridge itself, the material for it is punctured, for example, a pass or atlas. He must be bright and brilliant, so that the Snow Maiden sparkle in the light of the lights. Some craftswomen are used when sewing a wire frame, so that Kokoshnik does not fall on the pattern in a natural size, and kept his shape. If the headdress is not too high, it will only be enough cardboard design.
It is also necessary to take care of the decoration of Kokoshnik. He is always beautifully decorated with beads, embroidery, sewn edges, pebbles. Now in the stores of sewing accessories, you can choose a huge number of modern materials so that the cososhnik's sewn in full size was the most beautiful and elegant.

After the headdress is ready, it needs to be consolidated on the child's head. To do this, prepare either a wide gum, or tapes under the main color of the Kokoshnik or a fabulous character dresses. For the pattern you will need to draw a template on the Watman sheet. It will take a circular, a simple pencil, a gum, panting.
Drawing pattern
Kokoshnik on a natural amount to draw after the choice of the silhouette of the ridge is made and measurements are made. To make the pattern to be smooth and symmetrical, it is better to fold the paper in half and make the template of one half of the head. The article presents averaged pattern size. After the pattern is drawn, you need to draw decorative elements with a simple pencil and approximately consider their placement on the ridge. Further tolerate on the carved on a dense cardboard. Then cut out with scissors.
Crown Snow Maiden
The pattern of the kokoshnik for the Snow Maiden in a natural value is drawn in the form of a crown. This is a special form of a comb with beautiful carved symmetric elements. Here you will need a circulation, or you will need to completely redraw the pattern given in the article. When working on decoration, the tops of the crown are decorated with the same elements.

The symmetry and other parts of the ridge are observed. You can decompose the pattern on the table and try on all the elements, beautifully placing them over the entire surface. Then the pattern is transferred over the cut pattern to a dense cardboard, and each element is carefully cut.
Cardboard blank
In order for the ridge of the Russian Kokoshnik to a natural amount by the pattern, he kept on the head, it is necessary to cut the hoop support for it. It can be placed both in front of the ridge and on the back side. To draw support, it is necessary to measure the distance from one ear to another along the forehead line. According to these standards, crescents are drawn on cardboard. From the inner semicircular line, you need to retreat down two centimeters and draw a semicircular line parallel to it. This is a strip and will be a hoop support.

You can simply sew a cardboard with dense cotton threads, and can be made from the wire frame, as in the photo above. Then the pattern of the Russian cososhnik on a natural amount of paper will be well keeping the shape, and the Snow Maiden will be able to move freely and dance, without fear that the Kokoshnik comb is deformed.
Different forms of Kokoshnikov
The article showed the patterns of the Kokoshnik for the girl in a natural value, namely the ridge. Also readers understood how to draw hoop support. But there are still other types of cososhnikov, for whom it is enough to carve out long ends and sew satin ribbons to them, with the help of which the tide will hold onto the head of the child. You can also accurately measure the circle of the head and sew a wide gum, then the kokoshnik will wear quickly and simply.

There are still preferences on the head of the ridge. Do it with the help of a cap, which is sewn around the ridge circumference, and the back is tightened with a rubber band. You can still submit support in the form of a handkerchief, preferably from organza or monophonic fine tissue. It also sews from the inside on the circumference of the Kokoshnik and is tied at the back of the hair on the knot.
Sewing Kokoshnik
When the pattern of the kokoshnik in full size according to the diagram is made of cardboard, it is glued to matter from two sides. Support or cap is made, ribbons or gum sew. Make fitting on the child's head. Kokoshnik should not be cramped and uncomfortable. After all, the holiday lasts for a long time, and the child should feel comfortable throughout the action. The back side remains primarily, and the facial part of the product is decorated.

Decorating Kokoshnik
As can be seen in the photo, the frontal side of the head is often closed in the cooserbanks using a bead mesh. It can be separately buying in the store, and if you wish to rinse on a fishing line from the beads of different sizes and color. It is advisable to acquire oval and elongated elements to make the decoration more flat. Also decorated and side jokes from below. They sew long identical pendants from threads with shiny beads or balls. You can use plastic segments of the Christmas tree garlands of silver or blue colors. On the Kokoshnik, it is necessary to draw first a simple pencil pattern on which it will be subsequently applied to drawing by pebbles, rhinestones or semi-sinsinks. Can be edges to sew edge.
Corona decoration
In the manufacture of kokoshnik on the pattern for cutting and sewing in the form of the crown, it is necessary to design the same all the elements of the tops. Only the central part may differ. Also, the band around the forehead should be distinguished separately, if it is on the frontal part of the head, in front of the ridge.
- In order to tightly glue the fabric to the cardboard, the transparent glue "Crystal" is used. From him there are no stains on the fabric, and it is very strong. Dries fast enough.
- You can decorate the cososhnik using the applique. To do this, you need to make items on the adhesive fliesline for sealing. Artificial material is taken, it is usually atlas or a crea-satin. Cut the elements by the inland apparatus. The edges are riddled, and the fabric does not roll.
- For the Kokoshnik, individual elements are glued with an iron and adhesive tape.
- Web and rhinestones are glued with an adhesive gun. Beautifully looks golden braid of different shapes. At the edges of the Kokoshnik, glued with coins with coins (with round identical elements), and the frontal semicircle is placed with tapes with tassels. They hang on the forehead, and then it will not be necessary to make a grid of beads.
- On the back side instead of tapes that need to be tied, you can sew a wide gum on which a large satin bow is attached under the color of the Kokosnik with hanging long ends, cropped at an angle.
The article presents the patterns of different cososhnikov in full swing, described in detail the types of different cososhnikov, both semicircular and in the shape of the crown. The methods and secrets of the original jewelry of Kokoshnik are shown. It is described than it is better to decorate and what glue is desirable to use. We hope that by reading the recommendations and tips, a novice master will be able to easily make such a beautiful headdress as in the photos above. Good job!
Santa Claus comes to us with his granddaughter - Snow Maiden. If they are not even in the house, they enter, then they will certainly appear on the TV screens. And then someone in the family either from acquaintances will decide to dress up on the carnival in the Snow Maiden costume. He is many of the most beautiful sexes in the shower. After all, the girl or even the mature lady, putting the costume of Snow Maiden, like the queen - so he is elegant and luxurious. And indeed, a well-made outfit is capable of making his mistress delightly charming, just charming.
Options for outfits for grandmother Santa Claus
There are several varieties of snow maiden robes. These are options:
- snow Maiden suit from a long fur coat "in the floor" with a cap and fur torn;
- short sexy fur coat with a cap or kokoshnik with a fur finish;
- long to the floor dress with lace inserts, transparent sleeves and kokoshnik.

Features of the masquerade apparel Snow Maiden
The main elements in this outfit are sparkles, rhinestones, fur, lace. Often in the Snow Maiden suit include:
- high collars decorated with beads, beads, pearls, rhinestones and lace;
- pelinka with fur spoon;
- mittens with embroidery and fur;
- couplings;
- transparent raincoats or long capes (for dresses).
Pelleryka for outfacing
By the way, the ability to sew this thing will be useful not only for the manufacture of a New Year's costume of Snow Maiden. Great looks winter and demi-season coat with pelerin. Yes, and some stamps of dresses suggest this item as made separately and sewn into the outfit.
There are several options for sewing pellery. It can be done:
- circular "sun", with a cut in front and a neck;
- "Half-gravel", from a circle with a cut segment;
- with oblique shoulder seams;
- fully repeating shoulders shape with lowered hands.
Pellery made from various materials. Used for sewing lace, transparent materials, knitted knitwear, fur, basic fabric outfit. Making the Snow Maiden suit for the girl, it is best to take advantage of the pattern of peler with oblique shoulder seams. It is recommended to sew it from the fur coat fabric and disappear with the fur.
Patterina pattern
If you wish, you can make a simple luxurious Snow Maiden costume with your own hands. The photo shows how great the little girl looks like in this elegant outfit. Probably, Pelterina is played a huge role in the robe - a retro accessory who came to us from the past.

Make a pattern with beveled shoulder seams just just, if you carefully consider the drawing. You need to make two patterns: for the transfer and back.
The rear half is cut down, folding the cloth twice and putting the pattern by the vertical side to the spin of the material. Before consisting of two parts. It is a little wider than the back, as it gives a few centimeters to design a clasp or a bending. It should also be remembered that before always a bit wider than the rear of the robe.
Tailoring Mittens for Snow Maiden
Everyone remembers that, although in the festive room warmly, in Winter Street. And granddaughter's grandmother Santa Claus arrived to us from the North city. Therefore, the New Year's costume of Snow Maiden is unthinkable without such an attribute like mittens.
Make a pattern for mittens is easy. You just need to attach a palm with folded fingers to paper and circling it along the contour. When you, it should be remembered about the seams and that the palm worked out without the volume of hands. Therefore, you need to do about two centimeters of the allowance over the entire contour.
Cut four details. Two details are linked, and a couple - inside out. Move gloves, folding the facial sides inside. Then the blanks are turned and twisted with fur.

Making a hat for Snow Maiden and Santa Claus
Headdres of both characters are identical. The basis of the caps are performed from four "iron" - so the tailors jicely magnify the type of this pattern. And she really resembles the sole tool for ironing.
Marko "Iron" is prepared according to the drawing, where the bottom base of the part is equal to the fourth part of the scalp. The height of the shape is equal to half the size of the head, shot between the middle of the ears through the top.
In addition to the base of the cap, it is necessary to prepare a lapse - a strip for a rolling of arbitrary width and length equal to the scalp. It is possible to remove the volume of the head of the head, measuring the girth of the head through the middle of the ears centimeter.
Wide sleeves in Snow Maiden
Aimension, some ephemery attach to this character flying flowing fabrics and lush clothes of robes. For example, the Snow Maiden costume, the photo of which is presented here, has luxurious wide sleeves with a wavy edge, decorated with fur. This creates a fabulous effect - as if a huge fishing bird flew to a holiday from a fairy tale of childhood.

Such sleeves are not so difficult. It is enough to take molding of the usual sleeve and the seam line to dilute to the side as much as the width of the fabric allows. The edge line can also be carved. Only the bending of an uneven sleeve will now be fulfilled more difficult than this is done with the usual crown. It will be necessary to use either tread, or oblique beyk.
The fur coat is fitted, "in the floor"
This is the most common costume of Snow Maiden. The photo shows how elegant this character looks like in the dress, emphasizing the charm of the female figure.
Seying such a fur coat is usually from satin fabric. Lining silk. The color of matter is best to choose either white or blue. Although other shades of blue are quite appropriate here.

Snow Maiden costume pattern is built on the principle of a fitted long dress-dressing dress. You can also take advantage of the clothes from the wardrobe, which has long been lying back unclaimed. You will need to remove the details template. Most often, the tremors simply break the old outfit on the seams, smooth out the parts of the iron - and the finished patterns for the dress.
Short fur coat, direct silhouette (cutting)
You can make the costume of Snow Maiden for the girl, without breaking the old dresses. In order to cut a short straw, you should build a simple pattern. This option is suitable for those who need to make the Snow Maiden costume with their own hands in an extremely short time.
Of course, novice craftsmen are better to try to draw the patterns on paper, then hide a thing from old sheets, which are decided to put on a rag, to fit and try on - check the correctness of the pattern. But the experimental tailor can be chopped immediately on the fabric.
Draws out with dry soap or chalk rectangle. Its length should be equal to the twin-length of the product, since the shoulder seams will not arrange. Line of transverse pattern pattern will perform their role.

The width of the rectangle should be equal to the width of the fur coat. The front will need to be cut along in half just to the center point (where diagonals are intersect). The neck is immediately drawn up. In front, it is deeper than behind.
The sleeves also have a form of rectangles. Founding tissue passes along.
Short fur coat, direct silhouette (tailoring)
It is recommended to first be cut out the main rectangle to the main rectangle, but not mediated sleeves. The billet will resemble a cross or helicopter (without a tail). After that, you can stack the side seams of the coat together with the seams in the sleeves. The finish is performed either a fur or a white flowable cloth. Sometimes they are also made from the atlas. You can use pumps, tinsel, large butt cloth covered buttons, a cut or a wide belt.
Cooker "Sun-Clash" with round coquette
Quite quickly you can sew such a costume of Snow Maiden with your own hands. The photo shows how much it can turn out to be elegant, elegant and even luxurious.

For the coquetka, turn the circle with a radius, equal chest height. Front coil has a cut. In the center it needs to make a throat of arbitrary size.
The lower part lies also in the form of a circle. Its radius is equal to the length of the product less the radius of the coquette. In the middle of the patterns there are a concentric circle, the circumference of which is equal to the girth of the body in the place where the coquette is connected to the bottom of the dress. You can calculate the radius of the inner circle according to the formula: half the length of body girth, divided by 3.14.
The coquette is coated with fur, embroider. The skirt (the lower part) is sewn from below to the coquette so that the upper part goes the flask.
It looks very beautiful, not even hem, and figure. Fluffy pumps made to the bottom, fluffy pompons made of fur, look just great.
The sleeves of this outfit can be any style, at the request of the wizard.
Kokoshnik for Snow Maiden
You can replace the cap with a beautiful kokoshnik. It is manufactured by a variety of materials. The simplest is made of cardboard and decorate with glitter, tinsel, cotton, foil figures, beads.

You can make the Kokoshnik Frame from the wire, stretch on it white or blue lace and sow silver threads, beads, tinsel. It is appropriate here will be a chipboard, chiffon or other transparent fabric.
Snow Maiden costume is one of the most sought-after outfits on the New Year holiday. Many girls dream of trying the image of grandmother of Santa Claus. The radio attribute of such an outfit is a beautiful kokoshnik. Make it with your own hands is not as difficult as it may seem, at first glance.
What will need for Kokoshnik 
Kokoshnik can be made in various ways. Therefore, the list of essential materials is varied. In most cases, the following materials and tools will be required:
- Paper and cardboard. As a paper to create a layout, a common newspaper is useful. The cardboard is selected depending on the type of jewelry, which will decor the product;
- Blue fabric cut. A guipure with New Year's patterns is well suited;
- Hoop. You can use the usual wide hoop from plastics;
- Pencil, eraser and scissors;
- Metal strips or wire of different lengths. It can be given the necessary form, in addition, it keeps the form well;
- Satin ribbons of various widths;
- Glue or adhesive gun (PVA, moment and others);
- Decorative elements (rhinestones, beads, sequins, beads, etc.;
- Candle or lighter;
- Porolon.
Important!Cardboard must be prepared in advance and stripped, because Some types of cardboard are stored in a rolled form. We must give him time to fly away under the action of cargo.
General recommendations for the manufacture of Kokosnik Snow Maiden 
To begin with, it is necessary to decide on the shape, size and structural features of the future product. To do this, see the outfit of Snow Maiden in specialized literature or on thematic sites. Kokoshnik may have the shape of a classic dome, flower and snowflake edges. Ultimately, much determined by the author's fantasy and his personal preferences. Even with the presence of a finished pattern, Kokoshnik will still have to be customized in size on his head or the child's head so that he perfectly sat down and kept well on the hoop. Therefore, the most important point is the process of making patterns and fitting the prepared billet.
Attention!Carefully think over the size of the future Kokoshnik, because First of all, it should be comfortable, easy and not to create discomfort during the event.
How to make kokoshnik Snow Maiden with hoop 
When all the necessary materials are prepared, you can proceed to the manufacture of the outfit. Consider the phased process of manufacturing one of the popular types of Kokoshnik with the hoop:
- First you need to simulate the form of the future product. So that it was symmetrical paper should be folded in half and draw the contour of the kokoshnik. You can make several options and choose the most suitable;
- The resulting workpiece must be deployed and applied to it. It should be noted by the dotted line of the contour of the rim;
- Cut the head for the head and customize it for the required parameters by fitting. It should be cut a little more, because The product in this case will join the hoop. You can also measure the workpiece on the already dressed hoop;
- The strip where the rim will be attached to equal segments of 2 cm long;
- The resulting pattern should be translated into a dense cardboard of white;
- Cardboard can be wrapped with an elegant blue cloth or paint paint;
- When the cloth is saved, you need to cut two parts in the form of a template. One of the elements should be more than 1 cm. After sizing, the fabric should dry carefully. Passing also glue from the back. In the future, decorative decoration disguises him;
- Preparing the hoop. To do this, wind by a narrow ribbon and lubricate glue places;
- Flexing the left teeth on the Kokoshnik, glit it from the inside of the hoop;
- The headdress is ready and you can proceed to decorating it.
Reference!Instead of hoop, you can use a strip of foam rubber. It is glued with the front and back of the product. In this way, the kokoshnik will be securely fixed and not cause unpleasant and painful sensations. They should be nice to decorate.
Create various options for Kokosnik Snow Maiden with their own hands 
There are other ways to manufacture Kokosnik. Consider the features of the manufacture of kokoshnik with artificial oblique. We also need white colors, rubber band and overhead. To sew a product, perform step-by-step instructions:
- After making the main part, it is necessary to proceed to the manufacture of a hat on the forehead. It is necessary to measure the distance from the base of the product to the middle of the forehead, as well as the length of the rim;
- You should consider the outlet so that the item is better sat on the forehead;
- The outer part of the product is decorated in various ways;
- The resulting item is connected to the kokoshnik and the hoop;
- Next, you should prepare a braid. It is better to sew it on a cut exactly the same as the headdress of the material and fasten the rear of the product;
- I cut the back of the craft. To do this, cut off seized, measuring the distance between the ears and from the beginning of the Kokosnik and to the shoulders;
- The edge of the posterior cap fell and insert a gum into it for the convenience of dressing and better fit the product on the head;
- Next, the rear item attach to Kokoshnik;
- You should make blanks for bows. To do this, cut a rectangle in size of about 60x40 cm. And the strip is 60x10 cm., Flexing to the edges. From these parts make a bow. It is possible to make any other convenient way;
- The bow attach to the founding of the braid;
- Headdress is ready. It remains to decorate it, if possible, hiding the seams from the connection of the details.
You can also make a headdress without hoo. To do this, it is necessary to prepare a beautiful tape in the width of two or more centimeters. The wider there will be a tape, the better. It is sewn to the kokoshnik and tie on the back of the head. This method is a universal and product suitable for any head. Also additionally Kokoshnik can be attached to the head of the invisible.
How to decorate Kokosnik Snow Maiden 
In the matter of decoration, the arterians may have complete freedom. Different decorative elements are suitable. Many of them can be taken from old or unnecessary things and jewelry. Most often in the museum collections there are kokoshniki, richly decorated with a pearl mesh. The threads of pearls are descended on the cheeks of the Snow Beauty. This pattern can be repeated independently, dissolving the usual with white pebbles. Consider one of the simple ways to decorate the billet of the Kokosnik cloth. Perform the following actions:
- Cardboard blank can be wrapped with a piece of fire. To do this, cut off the cososhnik from paper or thin plastic. Next, turn it off with a cloth;
- We start sewing on the typewriter. The first line is done without affecting the workpiece. The second line is paved along the external contour, shifting the workpiece to the first line;
- Next, cut the resulting item along the edge, leaving the allowance of 1 cm. On each side of the contour;
- To the resulting part it is necessary to apply patterns. If transparent plastic was used, you can first draw patterns on a paper blank. Then put it under the plastic and simply circling the patterns with gold glue on the finished markup. If the fatina is covered with a sheet of paper, the patterns can be applied by stern or arbitrarily;
- Next, add additional decorations.
Reference!Kokoshnik must be beautifully decorated with both external and inner side.
For the upper edge of the crafts effectively looked to it sew thread from beads. Beads, beads and fiberglass it is better to sew, and not to use glue. Upon bottoms can be glued with a compact with a special thermopystole. Fastening places of parts are decorated with tinsel white or other elements. You can make spectacular petals using Kanzashi technique. This will require the following actions:
- For their manufacture, you need to take two white ribbons and silver color. From a silver material, we cut the squares with a side of 2.5 cm., And from white with a side of 5 cm;
- Every square bended first diagonally, and then in half and once again in half;
- Hold the resulting element with forceps, we cut a couple of millimeters from the tip and poured it to a complete gluing with a candle or lighter;
- The lower part of the petal is also cutting off and migrating, thereby protecting the fabric from a possible decline in the future;
- Thus, they come with all carved quadraticles. In the future, silver petals are glued inside white;
- You can leave separate white petals and glue beads to them;
- Next, begin to decorate the intake of the Kokosnik elements. In the central part, you can place a large flower, and two small sides. The composition can be invent independently;
- In the middle of the resulting flower, it is better to place large visible beads.
Important!Petals in Kanzashi technique is better to place on the product in a checker order. In this way, it turns out a peculiar effect of the immersion of each next row between the petals of the previous one.
For decoration, foil is suitable, pieces of brocade and other spectacular fabrics, christmas rain and other decor elements. You can use lace stripes. Of course, snowflakes, cut from fabric or paper, will look impressive. You can buy ready-made snowflakes in the store, as well as draw them acrylic paints. Often a beautiful addition to Kokoshnik's grandmother's granddaughter of Santa Claus is a lightweight cobweb or silk ribbons.
Make an exclusive kokoznnik for the Snow Maiden with your own hands. Do not forget about the standards of manufacturing this head, so that it is as close as possible to models from fabulous illustrations and movies. Observing uncomplicated recommendations, it can be made with his own hands in one evening.
Each nationality has its own national costumes, in detail of which can immediately determine the ethnic personality of a person. The headband for the heads with feathers will issue an Indian, the Sombrero - Mexican or Spaniard, a wreath with numerous bright - Ukrainian fashionista of the past centuries, and the Koksoshnik decorated with beads - the Great Russian Beauty.
A few words about the headdress
Our article we will talk about how to make the Kokoshnik Snow Maiden themselves for the New Year's carnival. But first, let's say a few words about the very subject of female national costume. The word "Kokoshnik" will hear now rarely. He was successfully replaced by a more familiar - "Crown". Although not quite accurately, but quite correctly reflects the essence of the subject. Kokoshnik Snow Maiden really looks like a crown having a kind of crescent or a large fuel, less often the shield wrapped around the head. The name is associated, according to linguists, with the ancient Russian word "Kokosh". So they spoke our ancestors on the quorted Curia, who were sitting chickens. Consequently, Kokoshnik Snow Maiden - decoration of an adult girl who is time to marry.
UBOR form

Elegant, rich "crowns" had to pay attention to guys on potential brides. Fan was mounted or a comb on a hat, worn directly on his head. She could be deep, close the forehead, ears and headings - depending on how it was taken in one area or another to turn and put braid girls: wrapping them around the head, let go down their shoulders or wrap over the ears. So the Kokoshnik Snow Maiden can also be so that it is convenient to wear and wear it during the carnival.
As for the decor, then you are provided with complete freedom of action. For the decoration of Ura, beads are suitable for pearls, because their openwork messenger is most often visible on museum exhibits. And pearl threads, descending on cheeks, rhinestones, pieces of brocade, foil, Christmas rain (everything that flickers, glitters, glitters) be sure to suit you. And even flowers from lace. Kokoshnik Snow Maiden often complement the easy-to-patch, which also corresponds to the ancient Russian traditions in the wearing of this head. Or silk ribbons, with which it is fixed on the head.
Necessary materials
In antiquity for the manufacture of Uraz, the masters used special metal ribbons, dense paper and cloth, cardboard, other materials. It is necessary and to you. Instead of metal strips, it will be suitable when you plan how to make a kokoshnik for the Snow Maiden, select a few pieces of wire of different lengths. Why exactly aluminum? This wire and strong enough to keep the shape, and flexible (it can be extended by the most intricate way). In addition, you will not interfere with pieces of foam rubber, universal glue, threads, ordinary and wrapping paper, scissors, simple pencil, eraser.
Kokoshnik for the girl: initial blanks

How to make Kokoshnik for the Snow Maiden, considering that wearing it will be a girl with age from 5 to 10-11 years old? In this case, the headdress is performed easily and simply, and what else needs a newcomer in the design area? Already stinging your hand, the next year make a more complex Kokoshnik for Snow Maiden.
Master class Let's start with the choice of a style. From ordinary cardboard, you can corrugated, cut the shield crown in the form of a crescent of medium height. If your daughter likes the pointed Kokoshnik, give the billet dome-shaped form. Make a semicircle cutout for the head of the corresponding sizes. To make the decoration did not give on the skin and did not deliver inconvenience, and also well kept, with the front and back sides of the cososhnik on this cut, make the strips of foam rubber. It is possible to disguise them either by a Christmas rain or packaging paper or other fittings.
Kokoshnik for the girl: final stage

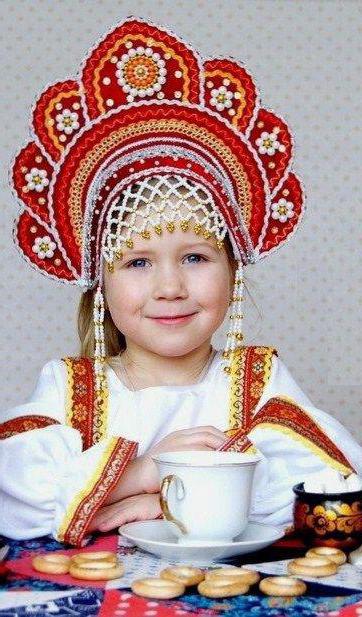
Here you have the foundation for the Kokoshnik for Snow Maiden. Master class for beginners continues. Your task is to decorate the headdress, making the most elegant. Cover it with light blue or white silk. Our small snowflakes purchased in the store or for a beads, small pearl beads or transparent glasswood. Alternatively, lace stripes are suitable. Photos of which you see above, includes a headdress of this type. It looks beautiful, right? And the last stage: Sew 2 blue or white ribbons, tie a bow under the hair. Start now the daughter and hurry to the carnival!
Details outfit

What elements are the costume of Snow Maiden? Photos of reproductions from folk fairy tales and New Year cards presented in the article will help you remember the details of the grandmother's grandmother's grandmother. Wears a snowy girl straight long dress or fabric color - all shades of blue, white, can be tenderly turquoise. The dress is broken down to be fur. From above, a brocade or fur coat to the middle of the hips, in the tone of the dress. Embroider or mitps. And boots. For a girl, of course, you will fit the dress to the knees, bright co-rates or tights. Mandatory clothes need to squeeze sparkles. On the head instead of Kokoshnika put on a crown cap.
Kokoshnik on the rim

Very convenient and simply make the Kokosnik Snow Maiden (the photo is attached) for a carnival costume, taking as the basis of the usual one should be wide enough, not to move from the head. Suitable plastic or steel. Make a fan-shaped basis from aluminum wire. She may be like a fellow snowflakes. Secure the workpiece on the rim. Thin foam or foam cloth connect with a frame using stationery closets or a sever threads of large stitches. Cover the cloth with glitter: silk, brocade, atlas, organza (what is available). Even a white or blue satin is suitable, because the costume of Snow Maiden with Kokoshnik will require additional jewelry. And to the crown on the rim, it is more expensive to mount a pearl mesh and beads.
Decor options

How else is the kokoshnik? Buy more different size of white beads similar to pearls. Measuring the length of the forehead and leaving 5-7 centimeters in the reserve, prepare 5 segments of a durable thread and take beads on them, fixing the ends. One section, leaving skipping to Kokoshnik. The second thread bus is already attached to the first, labeling in a checker order. The third to the second, etc. You should get a mesh that resembles a pattern of fish with scales. She places on the forehead of the Snow Maiden. Approximately at the level of the temples to Kokoshnik, attach another rows of beads - they should go down along the face and can reach the line and even before the neck. True, this option of UBOR is more suitable for a teenage girl. If the outfit you cook for a little girl, do this: to refuse the beads, the lower base of the cososhnik will flush the bright blue ribbon. And make a few pieces from it, for example, 6, 10-15 minutes long. From pieces of light fur or threads make small pomponic balls. Sew them to one of the edges of the sliced \u200b\u200bribbons. And the second edges are combined with Kokoshnik where, for more adult Snow Maiden, it was supposed to secure low beads. Original, stylish, comfortable and charming - that's what you can say about your vacation!
So it came to the children's New Year's matinee. Princesses, snowflakes, Christmas trees, Malvina, and of course, Snow Maiden twist in the merry dance. Someone buys costumes, takes place or familiar, and someone with love himself makes a suit for his native tea. Yes, yes, I am talking about you, dear needleworks, who did not bypass my master class. Today I suggest making my own hands the crown for the Snow Maiden in the form of Kokoshnik. Not every Snow Maiden suit can boast a beautiful headdress, but it is in him that the Snow Maiden appears in Russian fairy tales. In order not to retreat from traditions, I also decided to make an elegant kokoshnik for his Snow Maiden instead of a cap. To create a New Year's head, we will need:
- cardboard and newspaper,
- scissors,
- pVA glue, "Moment Crystal",
- thermopystole
- rim
- white Foamiran,
- guipure,
- beads on the thread
- fringe,
- tinsel,
- satin ribbons (white 5cm wide, silver - 2.5 cm),
- beads, rhinestones, cabochons for decoration,
- candle or lighter.
We start working with the simulation of the shape of the Kokoshnik. To do this, fold the newspaper in half and draw the contour of the head. I chose a traditional shape with five petals. Inside cut a hole for the head and customize it under the desired size, trying on the model. Keep in mind that Kokoshnik will be attached to the rim, so make an inner cut a little more head. Or try immediately on the rim. Pattern of the future Kokoshnik is ready. We translate the contour to the white cardboard, leaving the stock of 1 cm for mounting on the rim. Left for future fastening stock cut into teeth. We take a white guipure and glue it to the cardboard of PVA glue. First, from the outside, flexing a part of the guipure backwards, then from the inside. Now the basis for creativity is ready. Such Kokosnik will easily glue beads, petals, rhinestones. So that the top edge of the Kokosnik is aesthetically looked, sewing a thread from Bus. I suggest it to sew, because there is little hope for glue, it can bring in the most inopportune moment. Under the bottom of the cososhnik, glue the fringe using the thermal system. Now you can put our Kokoshnik based on the base. We take a strip of white phoamyran about 1.5 cm wide and wind the rim, places fasten with hot glue. So our bezel will be soft enough for the head, and the cososhnik to it will well stick. We turn off the teeth of the Kokoshnik alternately on itself and from ourselves and glue the cososhnik on the rim. In order not to be seen the place of fastening, decorate their tinsel white color. Kokoshnik Snow Maiden should look elegant. We decorate it with petals in Kanzashi technique. Satin ribbons look beautifully in New Year's costumes, their glitter gives a festive. For the manufacture of petals, we need to cut the satin ribbon into squares: white with a side 5cm and silver with a side of 2.5 cm. Blue ribbon in the course of work I decided not to take. First, bend the square diagonally. Then the resulting triangle bend in half. And once again bend in half. Cut a little tip and puzzled it above the candle, pressing with tweezers or fingers. The tip should be tightly glued. The lower part of the petal is also cut off at an angle of 30to and ponday. All sections of the satin ribbon when working should be squeezed so that the product does not bloom and looks aesthetic. Petal ready. Thus, act with all the squares. With the help of "Moment Crystal" glue, we glue silver petals inside white. And the remaining white glit silver beads. We start to decorate the kokoznnik petals. I placed in the center of a large mixture, two small sides. That's what happened. Petals Try to glue in a chess order to make every next row as if drowned between the petals of the previous row. Final touch - decorate the middle of the beads and cabochon. We got such a wonderful Kokoshnik. By the same principle you can make Kokoshnik Sudarushki. Success in creative work!