Crochet circular rug scheme. We decorate the house with handmade products: crochet patterns for knitting carpets from cord. Video: We knit together an oval rug from a cord "Openwork"
Soft rug for home
There is a difference between home and home. It happens that stylish furniture, modern appliances are bought, but the feeling of Home, just like that, with a capital letter, does not. A special atmosphere, a cozy and warm aura, help to create cute little things. Hand-made crafts have a special charm. For example, rugs: shops are full of all kinds of rugs.
But it is much cheaper and more interesting to make an attribute of home warmth and comfort with your own hands. Creative craftswomen have invented many ways to make these functional pieces, from classic crochet to experimenting with old clothes. We offer some interesting lessons on how to knit a rug with your own hands.
Almost every girl, thanks to detailed lessons from experienced needlewomen, can learn to knit carpets with her own hands. Science is not difficult at all, but it requires perseverance and patience. A crocheted rug or woven from old T-shirts will become a "highlight" of the home interior. You can knit a product from any yarn, knitted ribbons, many even use a strong clothesline. There are several ways to make rugs, the most popular technique is crocheting. We offer interesting master classes for beginner craftswomen.
 You can knit such a rug yourself
 Simple round doormat
A beautiful one-piece product can be welcomed on the doorstep, in the bathroom, living room or children's room. To make it easier for a beginner to cope with the work, you need a little basic knowledge, crochet skills and the ability to create the simplest elements.
 Baby rug in the shape of a bear
 Let's get started:
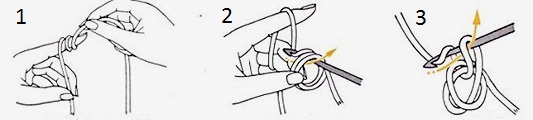
- We collect three air loops, of which we form a central base ring. The yarn is chosen according to the following principle: the thinner the thread, the more air loops will be required for the warp. We close the ring, which will be the middle, with a connecting loop.
- Moving on to the second row, we will knit two columns in the loops. If we knit single crochet stitches, the structure of the product will turn out to be more rigid and dense, with a crochet - looser, but knit in this way much faster. The choice of technique remains with the craftswoman, it depends on how she sees the future product.
- In the third row, it is necessary to knit two columns in the first three loops, then one in the next loop. A similar algorithm continues to the end of the series.
- In the fourth row, using a similar technique, we knit two columns in the first two loops, then one, and so on. Thus, we can achieve a perfectly round, uniformly expanding shape.
- When the knitting process is completed, we fix the working thread, and then iron it with an iron from the wrong side. This will prevent the rug from puckering.
Round rugs for home


In the simplest technique, a product is knitted not only round, but also oval, square or any other shape. To make the rug look more elegant, you can decorate the edge with thread pom-poms or fringe.
We knit a round rug
Star rug
Curly rugs bring coziness into the interior, want it more aesthetically pleasing, emphasize the refined and refined taste of the hostess - the keeper of the hearth. To create curly knitted rugs with your own hands for crocheting the floor, you need yarn and a hook.
 Star-shaped floor mat
 Many people use several shades of yarn at the same time, so the product will have a bright and original look.
We knit a rug crochet in the form of a five-pointed star:
- We will start work from the center of the circle. A chain is recruited, consisting of five air loops, which closes in a ring. Then we move on to knitting each individual row.
- We knit the first one according to this pattern: three air loops, then two double crochets over the first loop, then two air loops, three double crochets, we finish with two air loops. In a similar way, we knit five times and we get a pentagon as a result.
- The second row is knitted according to the algorithm: we collect three air loops, two double crochets over the first loop, then two air loops, three double crochets, we complete the row with one air loop. Using a simple technique, the product “grows” in breadth, acquiring the shape of a regular pentagon.
- The rest of the elements are tied round in a standard pattern until we get the product of the size we need. We tie each tip of the star at the end separately.
Such an unusual rug can be knitted into a nursery, living room or bedroom, or you can fantasize by making in this technique not only a rug, but also an elegant bedspread and a decorative pillow.
How to crochet a rug
Creative ways to make rugs
For everyone who does not know the art of crocheting, there is good news: you can make an unusual rug from knitwear, rags or threads on a sirloin net. Old knitwear, unnecessary scraps of fabric, fleecy yarn can become the material for manufacturing. We offer several lessons on making wicker rugs.
 Crochet knitted rug
 Pigtail rug
A dense rug with an unusual texture will decorate any of the rooms in the country house or in a city apartment. If you make a substrate for it from a water-repellent material, you can safely lay it in the bathroom, bathhouse or shower. Take knitwear in two different colors, scissors, a sewing machine, and safety pins.
 Pigtailed rug
 Work algorithm:
- The first step is to make knitted yarn. The material for knitted yarn can be not only old T-shirts, but also sheets or just fabric cuts. To do this, simply cut into ribbons and pull them out a little in length so that the flap twists into a tube.
- We will weave many braids from stripes of different colors. Using various color combinations, you can achieve any effect, create an unusual pattern. The braids should be the same length.
- For the base, we take a dense fabric, fold it in half, sew on the side and turn it inside out. Lay out the braids one by one on top and sew each one with a zigzag seam. We try not to stretch the braids, otherwise the rug may eventually deform.
- We fix the edges of the work with straight lines, cut off the excess. The result is a simple and original rug with a cheerful pattern.
Having played with the color, texture of the fabric, the types of weaving of braids and the thickness of the yarn, you can create practical and original attributes of home comfort with your own hands from the simplest materials.
Wicker rug
To weave a beautiful path for the corridor, you need to make a wooden frame, and stuff carnations on the sides. For work, you only need yarn, preferably from jersey. The brighter the shades, the more fun and cheerful the rug will be.
 Old rug
 The operating instructions are as follows:
- Pull it onto the frame along the strip of material. It is better to use yarn of a neutral shade, this will be the base.
- We begin to weave working threads across the main threads. The principle of weaving is simple - first we stretch the thread on top of the base, and then under it, and so on until the end of the row.
- At the end of the row, we stretch the thread under the base, turn it and move in the opposite order.
Variety of floor mats


As you can see, weaving is the simplest. In the process of work, we shift the finished rows upwards so that the weaving turns out to be denser. If the working thread has run out or you need to add a new color, just tie one end to the other, and hide the knots from the seamy side. We remove the finished product from the frame, smooth it and determine its place in the interior. Thus, you can knit a long track for the corridor, simply stitching together the same elements. In a similar way, you can make a carpet product from strong yarn or clothesline.
There are many techniques for creating carpets at home. These are intricate crochet laces, the simplest patchwork technique, and original Japanese knitting. Choose yours and create, decorating your home and your daily life with original, warm and stylish hand-made crafts.
Recently, it has become fashionable to make decor with your own hands. Such works are always exclusive, fit perfectly into the interior, and also create a cozy atmosphere. Crocheting floor rugs is not only a pleasant experience, but also creating chic products for your home. These rugs are very beautiful and easy to make. They can be made not from yarn, but from scraps of fabric, rope, or even ordinary bags.
Simple crochet rugs for beginner needlewomen
Girls who are just learning to knit can already create their first masterpiece. To do this, you need to prepare a thick yarn, for example, wool blend, acrylic or cotton, and a hook with the corresponding number.
A rectangular floor product can be knitted using the following pattern:
1st row. We make double crochet on a chain. They should be the same length as the rug. Next, the product must be turned over to the wrong side.
2nd row. We carry out single crochet stitches under the front wall of the loop. Turn the canvas over again.
The 3rd row should be knitted under both walls of the loop with and without a crochet.
The 4th row is performed in the same way as the 2nd.
The 5th row is knitted with double crochets under the back wall of the loop.
Further, the pattern is repeated from the 2nd to the 5th row.
A round floor mat can be crocheted using the following pattern. Knitting consists of columns under the back wall of the loop.
Openwork rug (55 cm): video master class
Round rugs from fabric crocheted or "grandmother's rug"
To create this product, we need old knitwear or linen items. The color scheme can be very diverse. For example, different tones of the same color, or several bright colors. Before starting work, we need to make yarn. To do this, we cut things into strips approximately 3 cm wide. The strips need to be sewn together or tied together, and then rolled into a ball. The hook must be taken twice as thick as the thread itself. The scheme of this rug is suitable for both experienced needlewomen and beginners.
First you need to dial 3 air loops and connect them in a circle. Then knit 6 single crochet into these loops. After that, the circle must be divided into 6 parts and in each row add 6 single crochets. The result will be the 1st row - 6 columns, the 2nd row - 12 columns, the 3rd row - 24 columns, etc. To make the rug embossed, the posts need to be knitted through the back of the loop. Below is a diagram of the embossed knitting method.
The finished mat can be laid on the floor.
Openwork oval rug: video master class
Crochet a Japanese Style Round Floor Rug for Beginners
This type of rug is distinguished by its ease of implementation and excellent results. The yarn should be taken not very thick and crocheted # 6-8. It is better to choose a brighter color scheme. First you need to knit the round part of the product. To do this, we collect a chain of 6 air loops, and then we close it in a ring.
Then we knit 7 columns with 2 yarns, each of which starts with 3 air loops for lifting. The 2nd row should consist of 5 unfinished columns with two crochets knitted together, between which you need to make 3 air loops. The number of air loops can be adjusted according to the thickness of the thread. In the 3rd and 4th rows, we knit 2 columns of four unfinished columns with two crochets, knitted together under the air loops of the previous row. 5th row - a chain of air loops, which must be attached to the previous row with a half-column.
Next, we need to tie rings of arbitrary size. We collect air loops in a chain and close the ring with a half-column. The diameter of the ring is equal to the length of the chain. Then we tie the ring with a double crochet. The first ring is ready. We immediately begin to knit the second. To do this, we need to dial a chain of air loops, thread it into the first ring and only then connect the first and last loops with a half-column. Below are the diagrams where this is clearly shown. The next ring will be threaded into the second circle, etc. The last ring should be connected with the penultimate and with the first. Rings can be sewn to the circle or attached while knitting.
Ring connection diagram
Children's rug from squares: video master class
Crochet rug from plastic bags
This unusual use of simple bags was a real discovery for housewives. Cloths from bags are usually placed on the floor of the bathroom, kitchen or toilet, because they are moisture resistant. If water gets in, just shake it off and dry the product. It is very easy to knit such a rug and it will not be a problem even for beginners. So, you need to take about 4 dozen garbage bags and cut them into strips about 3 cm wide. The strips must be sewn together or glued together with a warm iron, ironing through the fabric. Roll the finished thread into a ball. Knitting must be crocheted # 4.
We collect 12 air loops and 3 air lifting loops. From the 4th loop from the edge of the chain, tie 5 double crochets. Then from each air loop, knit 1 double crochet 10 times. Turn the product and tie the other side in the same way, thereby forming an oval. The row should be closed with a connecting post. The second and subsequent rows must be knitted according to the pattern. The result is an oval canvas. Its central part will be straight, and the edges will expand and round off, because they made increases in semicircles.
Asterisk: video master class
Beginner sirloin floor mat

Over time, each of us accumulates a large number of knitted items that no one has worn for a long time. Do not rush to throw them away, if you show a little imagination, you can make wonderful and functional rugs that will decorate the interior of your apartment or house. Crocheting rugs from knitted rags is available even to beginner knitters, since the knitting patterns for these products are quite simple to perform.
Tools and materials Time: 1-2 days Difficulty: 3/10
- yarn from old knitwear;
- a hook corresponding to the thickness of the thread (usually number 12-15);
- scissors;
- threads with a needle or a sewing machine for joining strips into a single whole.
Crocheting rugs from knitted rags is available even to beginner knitters, since the knitting patterns for these products are quite simple to perform.
Step-by-step description with a diagram:
Step 1. Making knitted yarn
In order to make yarn from old things, you will need scissors and, in fact, the things themselves. T-shirts, knitted shorts, children's sets and the like are perfect as materials.
We start making yarn by cutting the old thing into strips about 2 cm wide. This must be done on a flat and hard surface, for example on a table. First, carefully cut off the bottom of the T-shirt.


Then we cut the strips. During the cutting process, do not cut each strip slightly, stopping about 3 cm to the opposite side edge of the product. When all the strips are cut, we separate them from each other along the undercut seam so that the seams are located diagonally.


Having separated all the strips, you need to sew them into one knitted thread.
The yarn from old things is ready, now you can start knitting the rug.
Step 2. Choosing the shape and determining the size of the product
The choice of shape and determination of the size is an important preparatory moment when knitting a rug. In this master class, you will learn how to knit a round and oval rug from knitted yarn.
Step 3. Knitting a rug of a certain shape
Round rug
We start knitting with arugumi loop.

After that, the arugumi loop is carefully tightened.

The first row of our rug is ready.
2 row. We knit 24 double crochets, two loops in one loop of the previous row.

3 row. We increase the number of loops to 36. To do this, we knit 2 double crochets in every second loop of the previous row.

Let's make the 4th row slightly openwork. To do this, we will knit according to the following pattern: 1 double crochet, 2 air loops, skipping one loop of the previous row, 1 double crochet. Thus, each double crochet must be knitted through the loop of the previous row.

5 row. We knit with double crochets.

Important! In order for the product to expand evenly, you need to knit 2 double crochets in every fourth loop of the previous row.
The 6th row can be done in a different color. The knitting pattern remains the same starting from row 2.


After the rug of the size you need is knitted, we complete the knitting according to the following pattern: one air lifting loop, 6 double crochets in the third loop of the previous row, half a column in the sixth loop of the previous row. Next is the repetition of the pattern to the end of the row.

This is how the finished knitted product looks like:

Oval-shaped rug

We start knitting with a chain set of air loops.
The length of the chain is calculated as follows: desired length minus width. For example, if you want to knit a 100 × 40 rug, then your chain will be 60 cm long (100 - 40 = 60). Then we knit according to the scheme:

You can complete knitting in the same way as in the previous master class.
Now you know how you can use old things rationally, extend their service life and give originality to your interior, making your home even more comfortable and colorful.
Good day! And again about the rugs.
Crocheting a rug for beginner needlewomen can also be done according to patterns from Japanese craftswomen, who are distinguished by their special beauty and at the same time are very simple to perform.
How to crochet a square rug
Square rugs can also be knitted according to the principle of rectangular in reverse rows. But square rugs, connected from the center in a circle, look more interesting. They can be done  single crochet under the front wall of the loop or double crochet - whichever you prefer.
To get a square in each row, you need to make increments in four corners as follows: two columns, two air loops, two columns.
In each next row in the corners, the hook should be inserted under the air loops.
In the same way, you can knit a pentagon and a hexagon: divide the loops into the desired equal number and knit, making additions in the corners.
Octagonal crochet rug
I suggest, for example, the scheme of an octagonal rug .


Crocheting a rug for beginners is not difficult at all, isn't it?
The interior of some home rooms will seem unfinished without at least a small rug on the floor, which will emphasize the comfort. Moreover, such an element of decor is appropriate in absolutely any room in your home.
If you are ready to spend time usefully - learn how to make spectacular and stylish rugs yourself.
It doesn't take much time to create a small carpet, and given that even without much experience you will be able to do something interesting, such creativity will clearly be worth the hours spent.
We suggest that you familiarize yourself with several of the simplest methods that involve weaving and knitting a rug on a net of threads with your own hands.
Rug on a grid, photo
Idea 1: patchwork rug
If your room lacks colors - why not make do-it-yourself rugs on a net from pieces of fabric? You can use different materials to make the rugs bright, soft and pleasant to the touch. Most often, for such purposes, the remains of unnecessary T-shirts are used, since the knitwear perfectly stretches and ties around the base mesh.
In addition to the material that will form the design, it is important to think in advance what kind of mesh will serve as the base of the carpet.
In fact, absolutely any mesh with holes of a suitable size will do, but we advise you to make a rug with your own hands on a construction mesh, as it is particularly strong and durable.
 Construction mesh for the manufacture of rugs
 Advice: in specialized stores you can find ready-made carpet netting.
To make a rug based on a construction mesh, you need a fabric, the base itself, as well as scissors (for cutting out patches) and a crochet hook (useful during the weaving process).
Let's start designing the construction mesh for the rug:
- in the process of weaving the rug, the mesh may fray. Therefore, it will be more correct to initially process its edges: close them with tape, crochet or hem to the inside;
- cut the prepared fabric into long shreds with parameters of one and a half centimeters. You can take larger shreds: then you get an even softer rug. Using a crochet hook, pass the shreds through the holes in the mesh. Alternatively, perform this procedure manually. In this case, each piece must be tied into a knot.

That's all it takes to create a mesh and shreds rug. Nothing complicated: a little patience and perseverance - and a comfortable carpet will be ready!
You can choose any patterns of the rug on the mesh with your own hands - and, operating in different shades, perform a certain pattern or pattern on the surface.
If you have scraps lying around, or you just decided to use unnecessary tissue to the advantage, you can choose another similar technique. All that is needed is to sew the shreds to the mesh, burlap or other dense material.
 Rug on a mesh of fabric scraps
 Idea 2: crocheting from yarn
More experienced craftswomen will be able to crochet a rug on a net from threads. First, decide on a knitting pattern: it can be floral images, plots with animals, landscapes, abstraction, geometric ornaments and much more.
Now get ready for work: you will need a square mesh or carpet canvas, bright yarn and a hook with a foot (in a pinch, ordinary).

Advice: when choosing threads, pay attention to their properties. For example, synthetics, which are more resistant to constant moisture, are better suited for the bathroom interior. And for the bedroom, natural woolen or cotton threads are suitable.
To keep a do-it-yourself rug made of yarn on a mesh maintain its shape, use a dense and rigid base. If you want to soften it, you can use a silicone base.
As for the hook, it should be large enough so that you can easily handle the knitting process on a base with large holes for the threads.

Pay attention to the following features of crocheting a rug on a mesh:

One example of such a knitting pattern is in the photo below:


Using this method, you can get a lot of interesting carpet products for the home. To make your rug neat, prepare the threads in advance. They must be the same size.
Advice: the easiest way is to adjust the parameters of the strand to each other by winding the roll on a cardboard with a width of up to eight centimeters. After removing the yarn, you will need to cut the threads at the top and bottom side in the same way as for creating pom poms.
After choosing an ornament, it is important to correctly calculate the dimensions of the canvas or mesh. Considering that part of the material chosen for the base can go to the fold, calculate the length and width of the carpet: the number of holes should correspond to the number of cells in the selected patterns.
When the composition on the rug is completely ready, we advise you to add finishing touches - and slightly adjust the height of the threads. To do this, use a special device or level the height of the carpet with scissors.
note that with a decrease in the height of the pile, the clarity of the pattern will increase.

Idea 3: rug with pom poms
An original pattern for a rug on a mesh can be done using pompons. Such a product will definitely surprise your loved ones, since carpets with pom-poms are not only very soft, but also interesting in appearance: you can give them an unusual shape or make them look like some kind of animal.
Start off by cutting out the desired mesh shape, as well as creating the pom-poms themselves. Pompons are made according to different schemes: without a base, as well as with a base, as in the photo example.

Next, you need to sew all the pom-poms to the mesh in a predetermined order. In this case, it is important to maintain the same distance between the individual elements: it should be minimal so that the mesh does not show through the threads.

If you do this work carefully, you will get a cute rug that will keep you warm in the cold. It is advisable to close the bottom of such a product with a purl fabric with a dense texture. Then it will last you longer.
Idea 4: volumetric mats on a fillet net
One of the most common techniques is crocheting rugs on a sirloin net. It is completely uncomplicated and allows you to implement many bright ideas. You can also use ready-made patterns of rugs on a sirloin mesh and even make your product voluminous (this effect is achieved by correctly placing the "second row" of yarn posts).
Such carpets can be made plain and colored, made of different types of yarn. As a rule, sirloin mesh is used to create rectangular rugs, as this is the least complicated way of needlework.
If you decide to implement the patterns of rugs from threads on a net, then first you will have to prepare the net itself, which is easy to knit by hand. Knit the base by alternating stitches and stitches. Only after completing the mesh proceed directly to the ornament. For example, you can create a geometric pattern like the one in the photo.
 Sirloin mat
 To make the carpet not too thin, knit rows of double crochets, connecting to the base using a single method.
The nature of the drawing is not important: here you can show your imagination. And the next pattern of such knitting can help you in your work.
 The scheme of knitting rugs crochet on a sirloin mesh
 How to make a knitted carpet mesh
It remains to figure out how to make a net for weaving rugs. We will describe the process of its creation using the example of detailed knitting of a net for a rug made of pompons: to implement other ideas described above, you can use similar techniques.First, make a set of four stitches connected by a stitch. Knit the net in a circle: each point is a new row of the product:
- knit single crochet stitches eight times from the center of the chain;
- complete two single crochets through each of the loops in the first row;
- knit one column on the first loop without a crochet, two on the second, then alternate their number;
- knit one column at a time, similar to the previous paragraph, already on two loops - and repeat the procedure again, increasing the gap in each next row by three, four, five columns and more.
After creating nineteen rows, you will get a round mesh for knitting rugs with diameters of 32 centimeters. Now do one more round element in the same way.
After it is ready, start securing the pom-poms by threading the threads through the holes that remained after they were tied. Tie the pom-poms in tight knots from the inside out. Cut off the strands that are sticking out and sew a second knitted base to the bottom of the rug so that it lies flat on the floor surface.
See schemes for rugs on a grid, photos with examples of homemade carpets for home interiors - and implement your ideas to make your houses and apartments even more positive and brighter!
Video
A simpler version of a rubber mesh rug for those who collect the remains of colored yarn in the hope that they will be useful for some purpose. It's time to put them to good use! In this case, practically nothing will have to be knitted, and the hook is only needed to draw the threads and fasten them to the mesh base.
Watch a video from MK on making such a simple fluffy rug from the rest of the thread with your own hands: