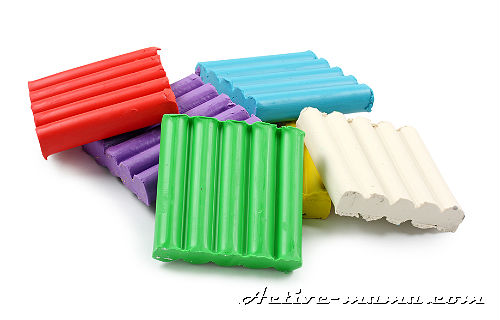
A model of modeling from plasticine. What interesting figures can be molded from plasticine
Plasticine horse
A wide variety of gifts and toys can be made from plasticine. In kindergarten, special attention is paid to modeling, as it develops fine motor skills, perseverance, patience and imagination. Plasticine crafts have a positive effect on abstract thinking, logic, and even the speech of young children. You can try to teach a child to sculpt at home, because he can do this from 1.5 years old.
DIY plasticine crafts
Today there are many special books for plasticine applications, as well as special tools for sculpting. It is necessary to prepare a workplace for the child so as not to stain everything around in the plasticine. To start classes, you will need a table, a plank, and a plasticine knife.

First, have the child knead a piece of plasticine in his hand. After that, entrust him to cover a picture or an ordinary glass jar with plasticine. Once your little one gets used to working with this plastic material, you can try making simple crafts, such as a snake or caterpillar. They are made from strips or plasticine balls.


It is easy to make small details with it. You can try making combined crafts, for example, or with chestnuts and plasticine.

Dinosaur made of cones and plasticine

Caterpillar made of chestnuts and plasticine
We sculpt from plasticine. Step by step diagrams

The funky cow is perfect for farm-themed craft ideas.


Very often, parents are wary of such creative material as plasticine. And all because it can stick to the floor and furniture, leave greasy traces, or the young sculptor just manages to swallow it.
At first, adults explain their negative attitude towards plastic material by the young age of their children and their gastronomic interest in everything around them, and even more color and soft, and then refer to other interests, claiming that such fun is for kids. If you agree with this opinion, then you yourself have become a victim of the older generation and you were not taught to love plasticine. Allow yourself to escape from the routine of everyday affairs for a few minutes and learn the magic and magic of plasticine sculpting with your own child.
Plasticine sculpting for children: a rainbow of positive
Believe me, you can give a little man a whole kaleidoscope of positive emotions that cannot be replaced by an applique or pencils. Unfortunately, moms and dads forget that the joys of creativity and the safety of the baby depend on their ability to teach, explain, and interest.
Plasticine is a truly unique material. Remember how the little one wants to knead and smear something, and food comes to the rescue. Your prohibitions and indignations about this are absolutely understandable. Try offering him plasticine. Of course, after having a conversation with him and feeding him tightly. There will be no limit to delight.

Plasticine develops perseverance. Follow the hands of the clock as the young sculptor creates with soft colored blocks. The active work of the joints and muscles of the hands increases blood circulation, replacing professional massage and stimulating development. Brain activity is activated, coordination and speech develops. Imagination and fantasy are connected, there is a form perception, attention to detail and, most importantly, independence.
 Photo: depositphotos.com
 Choosing the right plasticine for children's crafts
Modern manufacturers offer a huge assortment of plasticine from the usual hard blocks to small balls in the adhesive mass. It is impossible to answer unequivocally which material to choose. It all depends on the age of the creator and the purpose of the purchase.
Good plasticine for modeling with children is characterized by elasticity and pliability. He easily rolls with his hands and on any surface. The plasticine product should not fall apart into its component parts. The material should not crumble even after hardening and quickly restore its original properties. When exposed to heat, the mass melts, leaving greasy stains that can be easily washed off with soap and water. The composition of ordinary plasticine includes clay powder, dye and substances that prevent the mass from drying out (fat, wax, ceresin, etc.)

Pay attention to the manufacturer, domestic kits for creativity are much cheaper than imported counterparts that do not differ in characteristics. However, imported plasticine has richer and more varied shades, sometimes pleasant aromas.
Plasticine should not contain synthetic and harmful additives, crumble, dry out and leave hard-to-wash stains on your hands.

The properties of the material and the age of the child play an important role. So, the kid does not need sculptural or solidifying plasticine, he will not cope with it, but he will appreciate the bright, odorless material that does not stick to the floor and hands.
For drawing with plasticine, you should give preference to softer samples. The solidifying and sculptural material is suitable for older children, will allow not only to show imagination and skill, but also to preserve their creation. The luminescent, shiny and color-changing material will surely conquer any sculptor and propel him to new achievements.
Plasticine for the little ones
Already at a year and a half, the baby can be offered a magic substance called plasticine (before that, it is better to use it for modeling with a child). But the main thing is to teach him from the very beginning to work with him in a certain place, at the table. Mom doesn't want to collect crushed pieces all over the house.
Start with color. Which one he likes best. Let it crumple, roll it out. Sausages, balls, cakes can later turn into a caterpillar, snail, pyramid, well, fungus. A pair of eyes and a smile will turn an ordinary plasticine ball into a character from a fairyland. Several such heroes - and you can teach the baby to properly build a dialogue and answer the questions posed. Kids love to leave prints on plasticine with their fingers or some figures, caps, spoon, pencil.

So, we sculpt from plasticine with young children. Roll up a plump sausage and decorate it with seeds or rice and the funny hedgehog is already ready to work, collecting colorful mushrooms. Revive a dry branch by sculpting leaves and flowers for it.
Study geometry using plasticine figures, explain their properties to the kid. For example, a ball can roll, but a cube has edges, so it is stable, the cone has a spiky nose and a circle at the base - it looks like a Christmas tree. When the child is familiar with the figures, periodically ask him to show the cube or ball. The most important thing is a competent approach, and you will form a stable platform for starting in the difficult world of geometry. Sculpt animals from plasticine and tell the baby that a bird has a beak, legs and feathers, and a tiger has a mouth, paws and claws.

Separately, it is worth talking about ball plasticine. This is a unique developmental material. In addition to its plastic properties, it is pleasant to the touch, small balls allow the child to feel the shape, it is lightweight and does not stick to the hands at all. The hardening material will allow you to keep the baby's first crafts as a keepsake. An adult can make a frame of some kind of sculpture out of foil or paper, and the kid will stick it with plasticine. Work on small details together.
Children at this age absorb information like sponges, and if at first glance it seems to you that the child is not interested in this and does not remember anything, you are mistaken. He leaves everything he heard somewhere in the subconscious and, if necessary, will definitely apply, even after a long time.

It will be difficult, but when sculpting from plasticine with children, try to observe one most important rule - give the young sculptor complete freedom. Don't rush to fix unsightly sculptures. Praise the creator, inspire, and subtly prompt.
We sculpt from plasticine with children of preschool and primary school age
The most talented imaginers and plasticine masters reveal themselves at the age of 3 to 7 years. It was at this time that the crumbs have the richest imagination, which is not yet limited by the framework of school and adult life. They quickly turn all their impressions into plasticine sculptures. While an adult ponders what can be made of plasticine, looking at the palette of plasticine blocks, the young sculptor creates with lightning speed what an adult could hardly imagine. And here the main thing is to get the sculptor to talk. Let him talk about what he made. This will help teach your child to express thoughts correctly, increase vocabulary and allow you to feel your genuine interest in his work.

Plasticine sculpting ideas for kids
So, we sculpt from plasticine with preschool children. Try to dazzle the characters of his favorite cartoon by placing an image in front of you and notice how the child begins to notice little things that he would not have paid attention to before.
Absolutely everyone, both girls and boys, is in awe of the castles. Buy a curing clay, a larger solid tablet and build together a palace with all your entourage, outbuildings, weapons, animals, a prince and a princess.

Of course, modeling clay is a little more expensive than usual, and a large-scale project may not be cheap, but the game is worth the capital spent. Do not buy a large batch of plasticine at once, just a couple of sets per month is enough. The main thing is to set the child up for attention to detail. Do not build walls of "pancakes", stack them brick by brick, mold people in proportion, paying attention to the features of the body structure of representatives of different sexes, dress them in exquisite clothes. By the way, they can be sewn from fabric, this will inspire the prospector even more. After the completion of construction, do not lose interest in the craft: shoot a short film, at least on your phone. This can be thought of as a job for a currently fashionable portfolio for school or kindergarten.
 Do-it-yourself plasticine circus. Photo: depositphotos.com
Freezing plasticine will be appreciated by older children. They will not be able to resist the opportunity to make key chains, jewelry, pencil holders and other little things.

Drawing with plasticine
Who said that you can only sculpt from plasticine? It is an excellent paint substitute. Pictures from it are obtained as if they were alive, and the process of creation gives young artists a lot of pleasure.

Plasticine does not flow like watercolor, does not leave uneven strokes like pencils, crayons and felt-tip pens, and you need to draw with your finger, feeling the picture. Draw an image on a piece of cardboard and fill it with plasticine, teach the artist to mix several shades, for example, grass combines several shades of green, yellow, orange, brown. In this regard, plasticine is a very grateful material, it seems to feel the desire of the artist and mixes perfectly.
 Photo: depositphotos.com
 In addition, in a plasticine painting, the image is transmitted not only through color, but also through form. Convexities, depressions, stripes drawn with special tools seem to breathe life into the picture.

A slightly different drawing with plasticine on glass, here you need to pay special attention to the effect of a mirror. That is, what is in the foreground is fashioned first, and so on layer by layer. It remains only to add a velvet colored background - and the masterpiece will not be inferior in presentability to an oil painting.
 Photo: depositphotos.com
 How and where to store children's plasticine crafts?
The property of plasticine to melt makes it unreliable for long-term storage. For organizing an exhibition, the coolest place, which does not get direct sunlight, or glass, which protects the work from dust, is best suited.
 Photo: depositphotos.com
 Whether it's paintings or just crafts, to give them temporary durability, you can cover the work with varnish, but only intended for ceramics, which can be bought in specialized stores. Clay film will replace glass for decorating plasticine paintings.
 Photo: depositphotos.com
 Demonstration stands are often set up in schools and kindergartens. The plot works look brighter and more colorful, if the children are not yet independent enough to play the plasticine action, then the adults will have to make a background and arrange the works of young masters on it, like characters. By the way, the background may not necessarily be made of plasticine, it can be drawn or made from improvised and natural materials.
 Photo: depositphotos.com
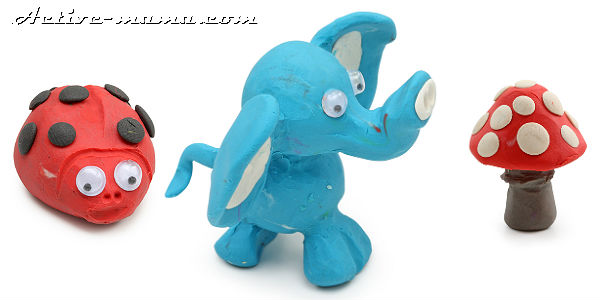
I really want to ask adults once again not to impoverish the fabulous world of childhood and to give the child a box of plasticine, because, unlike other toys, it does not get bored, it is different every day, one block can be transformed more than a dozen times. And ask mothers to save the brightest children's plasticine crafts. There will not be many of them and a cardboard box located under the bed is enough. After a short time, you and your adult son or daughter will look into this magical chest and remember funny or sad moments. The child will definitely appreciate the mother's attention. Create and have fun with plasticine sculpting with children.
 Photo: depositphotos.com
 The material was prepared by Olga Churkina with her daughter Varya specially for the site
Children's creativity is an extraordinary and magical process. The child dives into creativity with his head, he is absorbed in the process, forgets everything in the world - both about cartoons, and about sweets, and even about his beloved hamster!
Have you noticed with what zeal the kid is enthusiastically driving a brush on paper or trying to roll a ball of plasticine with tiny fingers? Hush, do not frighten off, at this moment a miracle happens - your child is doing! The kid is experimenting, creating his first masterpiece, and with it his personality, develops!
Children's creativity has no boundaries - it is not only paints and an album, there are leaves, and pebbles, and colored paper with plasticine. Do you think this can all be combined? Easily! Plasticine sculpting for children is a whole world full of variety and experiments! Many different options for crafts can be created using, in addition to plasticine, natural materials, beads for decoration, cardboard for the base.
You can talk for a long time, but let's try it better!
Children from an early age need to instill a love of creativity, because this develops fantasy, imagination, and also positively affects the development of fine motor skills of hands, perseverance, and intelligence.

Modeling is an extremely interesting activity for children. In the process of creating crafts from plasticine, the child embodies his fantasies, creates new forms and images. A natural question arises about at what age to start introducing the baby to modeling? Of course, a lot depends on the child, but often the first acquaintance occurs starting from a year or two. You can try earlier, but, most likely, the bright cubes will cause only gastronomic interest in the crumbs - he just wants to taste them, which absolutely cannot be done. This must be explained to the baby in the first place.
Modeling for children 2 years old should be for informational purposes and last from 5 to 10 minutes. Do not force the child to sculpt, otherwise there can be no question of any creative process. If the kid does not have a positive attitude towards modeling, then offer him this lesson later.
Where to begin?
Perhaps with color. Do not offer the entire palette for selection, because the colors are very bright and there are so many of them that the baby will simply be confused. Start with the basic tones: red, blue, yellow, white and black. Let your "creator" make the choice for himself.

The decision was made and a bright block flaunts in tiny handles. Choose your color and, together with your baby, continue your acquaintance with a new activity. To begin with, let the child just hold the plasticine in the pens, find out what it feels like, remember it.
Then, step by step, you need to teach the simplest actions with material that is new for the baby:
- Use your thumb and forefinger to pinch off small pieces from a whole bar.
- Roll up balls or sausages from the torn pieces. Let the baby try to make small balls or sausages with two fingers, and for larger figures, you need to use both handles, rolling plasticine between the palms.
- Flatten these same balls by pressing on them with your finger, turning them into cakes.
When the baby has mastered the basic actions, you can start sculpting the simplest figures, for example, an apple. It is important that the baby pinches each piece of plasticine himself and tries to roll them into balls.

- To begin with, choose the "apple" color: red, yellow, pink and roll the bun. Next, flatten slightly and make a depression with your finger. Ready? “Forgot the leaf,” the kid will correct you. Flatten the green sausage and stick it into the groove - a wonderful apple came out! Be sure to praise your child for their efforts.
- Here is another version of a simple craft - a caterpillar. The kid already knows how to roll the balls well, we choose several colors, and let's go. The kid will be pleased if mom rolls a few balls. We connect all the resulting figures (if they do not stick well together, you can fasten it with a match or a toothpick). We will also shape the face with a toothpick. The result is a very bright and positive caterpillar.
The balls have learned to roll excellently, you need to fix the "sausage". Let's try to "cook" a treat for the doll - a donut.
- First, we roll out a thin sausage, and then we connect its ends.
- An excellent pyramid will come out of several bagels, only you need to sculpt one plump sausage (the base of the pyramid), fix it on a piece of cardboard and put on it several multi-colored bagels of different sizes. As you can see, the kid is in the process!
Improving skills
The kid is developing, his skills are improving, so he will soon get bored of rolling balls and sausages.
For more productive and entertaining activities, you need to stock up on a tool:
- tablet;
- stacks of various shapes;
- knife;
- rolling pin;
- molds.
With the help of such simple tools, sculpting can be turned into an interesting game, for example, cooking or a restaurant.

- Help the child use a rolling pin to roll out a layer of plasticine, and then he will do a great job on his own.
- Then we squeeze out various figures with molds, just let the baby try to take the figure out of the mold himself, every time it will come out better.
- Then we fantasize - we bake cookies, pizza, invite dolls to dinner and treat them to “homemade cakes”!
The continuation of this exciting game will be the acquisition of the skill to cut plasticine. Give the child a plastic knife and ask him to cut the sausage, by the way, offer to count how many pieces came out.
This is how, from day to day, modeling from plasticine for children of 4-5 years old becomes a meaningful creative process. The child fantasizes, creates something new. Children love to create different animals (domestic, wild, fabulous) and favorite toys (toy cars, tumblers, bears) from plasticine.
The execution patterns usually differ and depend on the abilities of the toddler. You can make this or that craft from simple components, or you can complicate it with additional elements.

Step by step diagrams
Let's try to mold step by step the favorite toy of most boys - a toy car. Prepare:
- plasticine (body of any color, wheels - black, glass - light);
- knife;
- stacks for realism;
- round molds for making wheels.
- For a small rectangular block of plasticine, you need to smooth out the corners and make two holes on opposite sides: the hood in front, and the trunk in the back.
- In places where the wheels are planned to make rounded grooves with a knife.
- Roll out black plasticine and squeeze out the wheels with molds. Stick them to the body.
- Light (white or blue) plasticine must also be rolled out, and then cut out four rectangles (future windows).
- With a toothpick (stack) and with the help of additional parts, we give the machine a realistic look: mirrors, headlights, wipers.
- The machine is ready!

What else can we come up with? Children's imagination is endless, and soon your kid will be happy to throw up more and more new ideas!
Now let's dive into the Mesozoic era and come up with a new dinosaur.
- We use the same tool, choose a color. Will the dinosaur be naturally green or fabulously purple - let the little author decide.
- After choosing the reptile suit, you need to roll four balls, from which we will mold parts of the body: the body, tail, head and mouth.
- We give the body an almond shape, the head is round. We fasten together with a toothpick and smooth the edges.
- In the same way, we attach the tail, smooth it with the body and stretch it, giving it an elongated shape.
- Next, we attach the fourth ball - the mouth, it should be smaller than the head.
- The silhouette of the dinosaur is ready.
- For stability, we stick in two toothpicks - the hind legs.
- Next, you should disguise the toothpicks, for this we sculpt realistic legs, similar to frogs, but more massive.
- From plasticine of the same color as the paws, we make triangular spikes, fasten them along the back and tail.
- Flatten the yellow (or any contrasting) small ball and cover the abdomen of the reptile.
- We make the front paws by analogy with the hind ones, that is, from toothpicks and plasticine, but much less.
Now you need to shape the mouth.
- Using a knife, cut a small ball across, which we attached to the head at the very beginning.
- We cover the inner part of the cut with red plasticine, and sculpt the teeth along the contour with white.
- We make a stack of nostrils.
- The eyes remained. We will sculpt them from small balls.
- At the end, we decorate the dinosaur with a toothpick or a stack: we draw scales, various folds of the skin, in general, we make it "real".

There is no limit to perfection
Modeling from plasticine for children 5-6 years old, that is, in senior preschool age, has become an independent creative process. Guys with minimal or no adult help create rather laborious figures and whole compositions, following step-by-step instructions or coming up with their own.
Do not limit the time for classes, give the child the opportunity to create for his own pleasure as much as he wants.
Another unusual idea will help the kid to diversify the sculpting process - to make a picture from plasticine. After all, your baby already knows how to make more complex crafts with a huge number of small details, using various techniques, combining colors and materials.

The creation of paintings using plasticine is called plasticine painting.
Plasticine is the modeling of a picture with plasticine on a hard surface: paper, cardboard or glass.
Any illustration or fantasy of a child can draw his own image as a plot for creating an applique.
Applications begin with simple ideas, for example, a lilac branch. You will need different colors of cardboard and plasticine.
- First, you need to draw a contour of a lilac branch on cardboard with a simple pencil.
- We roll as many small balls as possible from purple and lilac plasticine flowers.
- Fill the contours of the twigs with balls, lightly pressing the stack on their centers.
- The final stage is the formation of leaves.
- You can decorate the background with paints and varnish.
In the same way, you can play with the variety of plots, developing not only fine motor skills, but also the child's speech. During the creation of a picture, a child can come up with a whole plot and translate it into applications. An excellent option would be a theme of the seasons, for example, "Autumn" or "Winter" - just a flight of imagination and no schemes.
Conclusion
Encourage any creative manifestations of your child, because the imagination of kids has no boundaries and it is not known what masterpiece our kids will present to us tomorrow.
Regular handicrafts develop perseverance in children, fine motor skills, imaginative thinking and even speech! This especially applies to modeling from plasticine. Since it is he who allows you to create three-dimensional elements, it can be easily combined with other materials, pleasant to the touch. Also, plasticine is actively used in children's puppet shows, as it allows you to change the appearance of the fairy tale characters literally on the go!
What crafts can you make from plasticine with your own hands?
Many young children, working with plasticine, love to give it to their parents and observe with interest, who are they blind to him? And the parents have already forgotten how to sculpt correctly and what rules should be followed. Therefore, the topic "what can be done from plasticine" is very relevant at all times.
In children's stores, not only plasticine is sold, but also a special modeling dough created for babies (from 1 year old). Such a dough is softer than ordinary plasticine, very pleasant to the touch and does not stick to your hands at all. However, it should be noted that this material is not suitable for complex paintings or compositions.
Plasticine animals
These are the most beloved figures, they are molded very simply and quickly. Most often, children sculpt from plasticine: a squirrel, a frog, a snake (especially a spectacled cobra), rams, hares, a giraffe, a caterpillar, spiders, horses, an octopus, a turtle, a crocodile and a shark. The color and shape of the animals can vary, depending on the age of the child and his preferences.
 Funny animals, it's easy to blind them. Cute penguin family
  Sculpt a horse
  Plasticine pig
  And one more cute plasticine penguin
 We make animals from a container from a kinder egg and plasticine
Plasticine flowers
Plasticine can be used to create charming decorations and whole compositions. The complexity of the colors increases with the age of the child. For example, kids will be able to make a chamomile and a tulip, while schoolchildren will be able to make roses, pansies and other complex crafts.
 Beautiful flowers, a reason to blind a gift to mom or grandmother
 Plasticine flowers by the hands of a child - master class
Toys
Children are especially happy when they make their own toys. DIY plasticine crafts for games are conventionally divided into three groups:
- universal - animals and fairy-tale heroes;
- for girls - dolls, baby dolls, mermaids;
- for boys - they prefer various vehicles, dinosaurs and transformers.
 Through play, children learn the big world

Master class: the famous Flash from plasticine
Vegetables and fruits
These are fairly simple crafts that even novice "masters" can easily master. Usually these are apples, watermelons, grapes, strawberries, raspberries. Other foods are also often sculpted, such as cakes, rolls, and candy.
 Delicious delicious treats for kids!
 Workshop on modeling vegetables from plasticine
Heroes of fairy tales and cartoons
A child's heart has always been partial to fairy tales and cartoons, so children like to sculpt their favorite characters. They create not only toys, but also figurines, wall decorations, chips for board games, "actors" for the puppet theater.
Most often found: fixies, smeshariki, Masha and the bear, Cheburashka, teenage mutant ninja turtles, heroes of the Minecraft game and many others.
 Heroes of everyone's favorite fairy tales


Learning to sculpt the Snake Gorynych from plasticine
Children's plasticine crafts - ideas and step-by-step master classes
Some crafts, seemingly simple from the outside, are very difficult to do without a detailed description. Next, we will look at detailed instructions for sculpting various crafts, with a photo and a list of necessary materials.
Plasticine chicken for toddlers 2-3 years old
Simple crafts that do not require special skills and a lot of time are suitable for kids. A striking example was the plasticine chicken. The little one will definitely need the help of parents so that the handicraft with his own hands comes out without obvious flaws and pleases the child.

For work you need:
- plasticine 3 colors;
- cardboard for the platform of the composition,
- beads for eyes;
- stack for plasticine.
How to make a chicken step by step:

Aquarium fish for children 3-4 years old
Many kids simply adore the beautiful, bright fish that live in the aquarium. Using plasticine, you can create not only the fish themselves, but also the whole composition, using blue cardboard for modeling water, green paper for algae. For additional decoration, you can use shells, beautiful sea pebbles and other natural materials.

You will need:
- plasticine;
- modeling board;
- decor accessories (sequins, beads, shells).
The scheme of the step-by-step creation of a fish:

Tiger cub from plasticine mass for children 5-6 years old
For preschool children, we offer a master class "How to make a cute tiger out of plasticine." This is a fairly simple craft for a child of this age.

To create a tiger you will need:
- plasticine 3 colors (orange, white, black);
- stationery knife;
- beads or sequins for the eyes.
Step-by-step creation of a tiger:

Plasticine baby elephant for children 6-7 years old
For children 6-7 years old, the Elephant calf craft is suitable in terms of complexity. And using decorative elements, the child will be able to give the animal realism and originality. For example, you can turn an ordinary elephant into a fighting one. Just add armor and riders with bows and spears to him. Or you can add a special booth on his back and get an excursion elephant carrying tourists. The creative process of sculpting and modernizing the craft will captivate your child and help to usefully spend time.

To create crafts you need:
- plasticine;
- stacks for work;
- a pair of decorative eyes (beads, rhinestones);
- PVA glue.
Step-by-step creation of an elephant:

Plasticine space for curious students in grades 1-4
The theme of the unknown space is interesting for children of all ages. The starry sky, flying ships, aliens, planets of the solar system ... And crafts on this topic reflect the vision of the little master's world and his idea of the immense universe.

To create crafts you will need:
- plasticine mass;
- stacks;
- cardboard (base for crafts);
- additional elements (matches, toothpicks, tubes, etc.).
How to make space crafts with a flying saucer and planets step by step:
 Master class on creating planets from plasticine
  Master class on sculpting alien ships
 Do not refuse children if they ask you to play together. Find at least 15 minutes of free time - and you won't regret it! It's so exciting and interesting to create your own world from plasticine!
Imagine, sculpt figures, paintings, or even shoot your own cartoons with plasticine characters. Give the joy of creativity to yourself and your children!
Creative modeling exercises are useful for the child, they develop fine motor skills, thinking, imagination and speech. What you can mold from plasticine at home with children of different ages, how to do it in an interesting and correct way, read the article.
Preparation for modeling from plasticine
Working with your child in a good mood is an important rule for a successful result. Modeling lessons should not be a burden. If the craft is not finished yet, but the child is tired, it is better to postpone everything until next time.
For sculpting, you will need the following materials:
- multi-colored plasticine;
- plastic board;
- a set of plastic tools;
- boxes for storing finished products;
- wet wipes for hands.
Which is the best plasticine to choose depends on the age of the child. For modeling with very young children, it is better to use salted dough.
For preschoolers, Luch plasticine, a classic of 18 colors, is suitable. It is a little hard, but when it gets warm in your hands, it is good to sculpt from it. Products do not creep, retain their shape for a long time.
Interesting ideas for classes with a child 1-3 years old
You can start modeling with a child of one year. Plasticine dough, soft in structure and convenient for children's fingers, is sold in the store, but you can make it yourself. When working with paper, ordinary soft plasticine is used, since it adheres better to the surface of the sheet, in contrast to the dough.

You can start getting to know the plasticine dough with prints. They take objects of different shapes (keys, emblems, badges, etc.), and press them into the surface of the plasticine cake. When an item is removed, an interesting imprint is left. Special sets with molds for modeling are sold in stores.
Techniques for working with plasticine:
- prints;
- kneading;
- pressure;
- indentation;
- pinching off;
- smearing on the sheet;
- sticking in sticks;
- rolling lumps;
- flattening;
- rolling sausages.
Every trick with a baby needs to be played up. For example, having rolled out a plasticine sausage, cut it into pieces and mold pies for dolls. Invite toys to visit for a puppet birthday, drink tea with pies.
What can be molded from plasticine with children 3-7 years old
For children of younger preschool age, wax plasticine "Gamma" is convenient in sculpting. If the child sculpts for the first time, he is introduced to the material so that he masters the basic techniques of working with such material.

Children of three years old learn to sculpt plasticine figures of various shapes:
- Column or cylinder. To make it, a piece of plasticine is rolled out in the form of a sausage between the palms.
- A ring. To make a ring, the column is folded into a ring.
- Ball. To make a ball, roll a piece of plasticine between the palms in a circular motion.
- Disk. Pressing the ball against the table, give it the shape of a disk.
The initial stage of mastering modeling takes several months.
After that, you can do various simple plasticine crafts with children:
- fungus;
- airplane;
- Tumbler doll;
- hare;
- pyramid.
We offer a step-by-step description of sculpting a funny multi-colored caterpillar:
- For work, you need plasticine of eight different colors, two pieces of white and black.
- Roll 9 multi-colored balls of the same diameter, the size of a cherry. Two of them will be the same color.
- A mouth is made on a pink ball using a stack. Two eyes are attached - cakes of white plasticine with black dots in the middle.
- At the top of the head, two antennae rolled into a spiral are made of black plasticine.
- The balls are fastened together in a row, it turns out a multi-colored caterpillar with a smiling pink head.
- A small plasticine cone of any color is attached to the tail, corresponding in size to the base balls.
- Bend the caterpillar as if it were crawling.
More complex crafts for children 8-10 years old
With children of primary school age, they make beautiful flowers, animals, cartoon characters from plasticine.

Stages of making a plasticine rose:
- For work, you need red and green plasticine.
- 8 balls are rolled from red. Six of them are about 2 cm in diameter and two - 1 cm in diameter. These will be rose petals.
- Flat discs are made from the balls, kneading them with your fingers.
- Collect the flower. Small petals are placed in the center of the bud, large at the edges.
- A long sausage-stalk and two balls-leaves are rolled from green plasticine.
- The leaves are given an oblong shape, veins and cloves are applied in a stack along the edge.
- The rose is laid on a cardboard sheet, the stem and leaves are attached to the flower.
Almost like a living plasticine turtle turns out.
Stages of its manufacture:
- To work you need brown, yellow and green plasticine. For the eyes, two small pieces of white and black.
- A cylinder is rolled from green plasticine. Divide it into 3 identical parts.
- A short "snake" with a large head is molded from one part. This will be the turtle's head and its tail, which protrudes from under the shell.
- Eyes from two white plasticine discs with black dots in the middle stick to the "uzha". Make a smiling mouth with a stack.
- The other two pieces of the green cylinder are rolled into two long sausages with a diameter of about 0.5 cm and a length of 8 cm. These are the legs of a turtle.
- Long cylinders are fastened crosswise, and a snake is placed in the middle.
- A yellow plasticine cake is attached from below - this is the lower part of the shell.
- The paws are slightly bent down so that the turtle does not lie down, but stands.
- A ball is rolled from brown plasticine, an oval hemisphere is made, and placed on top of the turtle in the form of a shell.
- A pattern is drawn in a stack on the shell (a pentagon with rays extending downward), 3 claws are made on each paw.
Cartoon characters often become the child's favorite toys.
We sculpt the Hedgehog from Smeshariki from plasticine:
- To work you need pink and purple plasticine, small pieces of white, black and red.
- A ball is rolled out of pink plasticine. Make two indentations on it with a round stick for the eyes.
- 2 white discs are placed in the depressions - the big eyes of the hedgehog.
- A thin thread is made of purple plasticine - a border around the eyes.
- Pupils - small peas of black plasticine - are placed in the center of the white discs.
- A small ball is rolled out of pink plasticine, fixed under the eyes, in the place where the nose will be. Stick, level, make an elongated muzzle.
- A mouth is cut out on the face with a stack, a thin strip of red is inserted into it.
- A small purple ball is attached to the nose.
- Hedgehog needles are made in the form of triangular pyramids. To do this, roll up 12 balls of purple plasticine, make triangular pyramids out of them with your fingers.
- The needles are attached to the back of the hedgehog, which is located almost immediately behind its large eyes. In the first row - 3 needles of the pyramid, in the second - 4, then again 3 and 2.
- A sausage is rolled from pink plasticine, divided into 4 identical parts - these will be the paws of a hedgehog.
- Make 4 cylinders with rounded edges. The paws are fastened, and slightly bent so that the hedgehog can be put on the ass.
- Small rounded ears are made of pink plasticine above the eyes.
- Notches are applied in a stack, drawing folds in the ears and toes.
Drawing with plasticine using template pictures
For this unusual drawing, wax plasticine from the Luch company or any other soft plasticine is suitable.

You will also need:
- plastic knife (stack) to make small parts;
- plain or coated cardboard;
- oilcloth or plastic board under a sheet of cardboard so as not to smear the table;
- a glass of water to moisten your hands;
- hand wipes.
Before starting work, the desired drawing is applied to the cardboard with a simple pencil.
Pieces of plasticine are torn off, small balls are rolled between the fingers, and applied to paper, gently smearing the desired color within the outline of the drawing. It is convenient to distribute plasticine on paper with the middle or forefinger of the right hand.
With the help of a stack, the plasticine is aligned on the surface of the sheet where a large layer is obtained. With the same tool, everything unnecessary is removed from the sheet, different colors are mixed, and strokes are applied to the drawing. In the hands of a skilled craftsman, the picture is bright, voluminous and expressive.
Rules for storing plasticine crafts

To store plasticine crafts, they take a hotel shelf in a sideboard or bookcase. To prevent dust from sticking, beautiful toys are varnished.
It is better not to cover the figures intended for play. It is convenient to store them in transparent plastic containers with a lid.
Plasticine melts from heating, so the crafts should be kept away from radiators and direct sunlight. They can also be stored in cookie cartons.
If a child is modeling every day, and soon there will be nowhere to put his products, it is better to take a photo with memorable signatures. Of the plasticine toys, only the most beautiful or made for some occasion are left.
Related Videos