DIY Christmas decorations from light bulbs. Christmas toys made of light bulbs: a storehouse of ideas for New Year's decor. Option nine: ready-made stickers and napkins
Today, such a trend in needlework as the manufacture of products from waste material is very popular. Craftsmen have learned to use everything: plastic bottles, packages from semi-finished products, egg containers and even old burned-out light bulbs. It is about the latter that will be discussed in our article. For the attention of readers, here is information on how to make toys from Photos of similar products can also be seen in this article. Such crafts can serve as souvenirs or If you have bulbs unsuitable for their intended use in your house, we invite you to our master classes on "turning" them into interesting products. If you plan to involve children in the process of making toys from light bulbs with your own hands, then follow the safety rules, since a fragile glass object, adhesive materials and scissors are used in the work. So what can you make from an old light bulb?
Christmas decorations using decoupage technique. Preparatory stage
Products made by this method look very beautiful and original. It is napkins for decoupage that will help us decorate Christmas tree toys from light bulbs. Performing such a craft is not at all difficult. The main thing is to prepare the necessary materials in advance. What do we need for work? We study the list:
- bulb;
- thin satin ribbon - 30 cm;
- acrylic white paint;
- scissors;
- PVA glue;
- lighter;
- napkin for decoupage;
- brush;
- spray acrylic varnish;
- glitters with glitters;
- corrugated paper;
- water;
- a bowl.
from light bulbs with your own hands? We study the instructions

Cut the satin ribbon in half. Tie one part of it around the base. Tie the second piece with the ends to the first. You will get a loop above the light bulb. Next, paint the glass surface with white acrylic paint and leave to dry. Cut out the fragments from the napkin that you want to use in decorating the product. Cut them to fit the light bulb. In a bowl, dilute the glue with water. Place a napkin on a dry glass surface and apply the solution to it with a brush. Follow this procedure from the center to the sides, expelling air and excess liquid from under the paper. Smooth creases with gentle strokes. After sticking all the fragments of the napkin, leave the product to dry for several hours. Then, with the help of colored glitters, select the contours of the drawings, add some elements if desired. After this material also dries, sprinkle the craft with varnish. It remains to arrange the base. To do this, cut out a strip of corrugated paper, the width and length of which is slightly larger than the upper metal part of the light bulb. Wrap this blank around the base and tie it with tape. The decoration, made using decoupage technique, is ready to go to the festive Christmas tree.
Making a souvenir pendant with flowers. What is needed for this?
New Year's toys from light bulbs, a photo of this, look very original and interesting. In this article we will tell you how you can use your "golden" pens to perform them in a variety of techniques. The next master class introduces us to floristry. Following the instructions, you will make a pendant decorated with plants. Let's get down to preparation. For work you will need the following materials:

Suspension manufacturing stage
In order to make such toy souvenirs from light bulbs with your own hands, you will have to work hard. The work is not hard, but jewelry. The first thing to do is remove the base. The glass may break during this procedure, so we recommend that you wear gloves. Using a knife, carefully pry out the metal part from below around the entire circumference of the light bulb and remove it. Next, insert the knitting needle into the deepest cavity and push it down. When all the interior filling of the lighting fixture has failed, shake it out. Now fill the glass pear with flowers. Do this very carefully so that the petals do not fall off. Use a knitting needle to position the plant in the desired angle inside the light bulb. Lubricate the base with glue and attach it to its place. Tie a piece of string or cord to it in the form of a loop. Paint over this part of the product with spray. When the pendant is dry, arrange it. The souvenir is ready.
Toys - "faces"

The shape resembles a head wearing a hat. At least, many craftsmen saw just such a similarity and rushed to adopt it in the manufacture of crafts. They have learned to "turn" a glass light fixture into cute faces. You can see an example of such a product in the photo. How to make a toy from a light bulb? Prepare acrylic or gouache paints of different colors, brushes, water, sewing supplies and material for making a headdress (fabric, ribbon).
Draw a sketch of the face on the light bulb with a pencil. Then use paints to decorate the picture. If you work with gouache, then dilute it with a few drops. This will give the product a shine, and the paint itself will not be "picked up" in the future. Form a loop of tape on the metal part of the product. Next, complete the headdress. To do this, cut out a rectangular piece from the fabric, the width of which corresponds to the circumference of the upper part of the light bulb. Sew a hat out of it and put it on the base. You can decorate a small accessory with a pompom, bow or bead.
And another version of the toy
Even a child will agree that the shape of the light bulb resembles a penguin figurine. So why don't we turn this glass object into a fun hero? For work, you will need the same materials as in the previous section of the article.

How is a penguin toy made from a light bulb? There are no secrets here. Follow the same instructions as described above. Only in this version of the craft, the glass surface is not only the head, but the whole figure of the hero. Draw the penguin's face immediately under the plinth, and the wings and tummy just below. The headwear can be sewn or knitted. That's all.
In this article, we presented you three ways to make toys from old light bulbs. We hope that now this thing, which has become unusable, will not go straight to the trash, but will turn into a bright, beautiful product.
New Year is just around the corner, it's time to think about decorating the interior and a forest beauty - a Christmas tree. The best jewelry is one made with your own hands. In addition, there are a lot of variations on this theme. Wondering what to take for the update? Why not make Christmas tree decorations from light bulbs? Funny? Why not? Now we will dispel all your doubts. 
Benefits of a lamp masterpiece
 There are a lot of advantages of toys made from waste material:

Necessary materials
 Making Christmas tree toys from light bulbs is not at all difficult. And almost any materials from home will be used. You may need:
- Actually, the bulbs themselves are used up.
- Glue ("super", PVA, from a heat gun).
- Pliers, awl, drill, protective gloves if you will be removing the lamp base and insides.
- Any scraps of fabric, lace, ribbons, braid.
- Acrylic paints of different colors.
- Scotch tape, scissors, pencil for marking and drawing.
- Threads, yarns.
- Various decor. They can be sequins, buttons, sequins, beads, rhinestones, beads and other small things.
- Perseverance and fantasy.
Christmas toys from light bulbs: master class
There are a lot of options for creating masterpieces. Let's consider some of the most interesting ones.
A scattering of gloss
 Perhaps this is the easiest and fastest way to change a light bulb and Christmas tree decoration:

Work quickly so the glue doesn't dry out. You can cover part of the light bulb with glue, sprinkle it with sparkles, and then tackle another area.
By the way, if you connect several of these toys together, you get a beautiful garland for decorating a Christmas tree or room.
Snowball
Remember this funny souvenir: a sphere with a winter landscape filled with snowflakes: turned it over several times, and shiny snowflakes swirled in the ball. Very nice. And you can easily make such a Christmas tree toy from a light bulb yourself (a detailed photo is presented).
The filament must be removed from the bulb before starting work. The photo below clearly shows how to do this simple manipulation. 

Decoupage
 This option for decorating light bulbs is no different from decoupage, say, a bottle or a casket.
For the convenience of operation, the light bulb must be held by the base or installed on a lid of a suitable size (as an option, some kind of stand).
Decorating process:

That's it, your masterpiece is ready.
Openwork magic
 From a skein of beautiful yarn or thread, you can create an elegant "dress" for a light bulb. This version of a Christmas tree toy from a light bulb with your own hands is distinguished by creativity and originality - you will have an exclusive Christmas tree toy.
  They use both plain and multi-colored threads, or you can weave beads or beads.
Fashionable design
 Now let's look at how to make a Christmas tree toy from a light bulb using sewing. Can't you? Not a problem - you need a minimum of knowledge (you know how to hold a needle - great). Additionally, you will need fabric for making hats, hair yarn and plasticine for carrots.
The fabric can be taken in any color, preferably bright and multi-colored. If you know how to handle polymer clay, you can replace plasticine with it.
So let's get started:

The result is impressive - such a snowman is not inferior even to a factory glass toy.
Additional variations
 We will mention a few more options for creating Christmas tree decorations from light bulbs with our own hands (the photo shows the simplicity of these methods):

As you can see, making Christmas tree toys from light bulbs is not only very simple, but also interesting and exciting. This is a great option for interior decor or a Christmas tree. It can also be a great gift option. 
Give your light bulbs a new, beautiful life!
Workshop on making toys from a light bulb - video
Do not throw away burnt out light bulbs! Today we will learn how to turn them with our own hands into very cute Christmas tree decorations. Snowmen, Santa Clauses, shiny lanterns and much more - we have collected for you the best ideas for inspiration and useful master classes. With a little effort, you will have a great set of unique toys that will make your Christmas tree even more beautiful!
All materials for work are very simple. The process itself is not difficult either: play Christmas songs and get down to business, recharged with New Year's mood!
Option one: shiny lanterns
The finished toys will sparkle and shine. Choose any colors, mix them, combine with each other.
What do we need?
- light bulbs (preferably small)
- PVA glue
- dry glitter
How to do it?
- The light bulb must be coated with glue with a brush. If you have dry dyes of the color of the selected glitters, you can mix them with glue: if the gaps are tolerated, the flaws will not be visible.
- Then just sprinkle them with sparkles. We hold by the base, pour with a spoon.
- It remains only to make a rope.

These homemade Christmas toys can replace any set!
Option two: gold and silver bulbs
Such Christmas tree decorations look very expensive and always turn out to be especially beautiful.
What do we need?
- large sequins
- PVA glue
- spray paint or acrylic paints in gold and silver
- standard size bulbs
How to do it?
- Pour glue into a bowl and pour glitter into it. Dip a light bulb in a bowl and scroll it from all sides.
- We take another light bulb, hold it by the base and carefully cover it with paint on all sides. Don't forget to wear gloves!

Ready! The lights of the garland are very nicely reflected in these Christmas tree decorations.
Option three: light bulbs in "sugar" sprinkle
I just want to eat these New Year's toys! They are very similar to sweet lollipops.
What do we need?
- small bulbs
- acrylic paints
- artificial snow (ready-made or homemade)
How to do it?
- Cover the light bulb with acrylic paints and let it dry.
- Then we repeat the procedure to make the color saturated.
- Cover our craft with artificial snow on top. Ready!

It is better to take small bulbs - it is easy to glue a golden thread to them, for which you can hang a toy.
By the way, if you make artificial snow with your own hands (you will find a corresponding master class), cover the spruce branches with it too - so your tree will turn out to be snow-covered and "candied".
Option four: sequined Christmas toys
This method is suitable for those who love hard work.
What do we need?
- small bulbs
- bag of sequins
- additional decorations in the form of flowers or stars
- PVA glue
- tweezers
How to do it?
- The bulbs can be pre-painted. Gently pick up each sequin with tweezers and dip it in the glue, and then "seat" them on the light bulb, one by one next to each other.
- Wrap the top of the craft with cotton wool.

Option five: shiny decor and satin ribbons
You will end up with very neat Christmas toys made of light bulbs that will look beautiful both in a set and separately.
What do we need?
- bulbs of different sizes
- acrylic paints
- PVA glue
- sequins, mirror pieces, stars and other decor
- thin satin ribbons
How to do it?
Life hack: If you don't have acrylic paints, but only gouache, watercolor or other paints, mix them with glue and cover the light bulbs with the mixture with a brush. This paint will fit tightly.
- We paint the bulbs with acrylic.
- Next, use tweezers and super glue to lay out the decorative elements.
- Wrap the base with ribbons.

Option six: Christmas tree decorations with stones
We will not paint the light bulb, but we will make the decor - it will still be beautiful. This option is suitable for those who do not have paints at home.
What do we need?
- bulb
- large rhinestones
- Super glue
How to do it?
Please note that the glue in this case must be transparent.
The stones can be glued with tweezers or directly by hand. If you wish, you can lay out a fancy pattern.

In this case, the main thing is not to overdo it with the decor, so that the Christmas tree toy turns out to be beautiful, but not tasteless.
Option seven: snowmen in hats
You will end up with a very cute Christmas tree toy that is hard to miss.
What do we need?
- a small piece of cloth milking the cap
- white acrylic paint
- plasticine
- marker
How to do it?
- We paint the light bulb white.
- We roll up the fabric with a cone and glue it to the base.
- We draw eyes and a smile for our snowman with a marker, mark the place for the "carrot"
- If there is a ready-made "nose" made of plastic, we glue it on superglue, if not, we sculpt a "carrot" from plasticine.
- If you want to make a girl snowman, add yarn pigtails.

Try to craft different New Year characters in the same way. In fact, it is not difficult.
Option eight: Christmas toy made of fabric
The light bulb can turn into a ball! You just need to decorate it correctly.
What do we need?
- a piece of beautiful elegant fabric
- bulb
- satin ribbon, lace lace
- small decorative elements: leaves, spruce twigs, etc.
How to do it?
- We wrap the light bulb with a cloth, and from above we intercept it with a tape (in the place where the base begins).
- It is better to fix the structure with glue.
- It remains to add decorative elements!

Choose fabrics in red, green, white, gold and silver colors. Velvet, felt, or densely printed fabric look best.
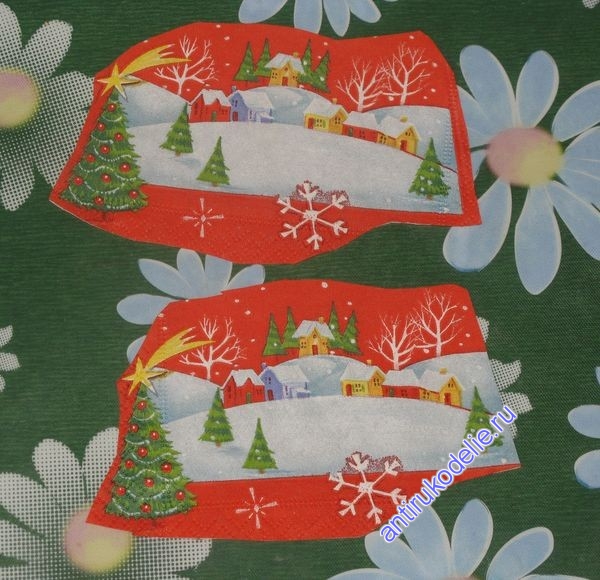
Option nine: ready-made stickers and napkins
If you've ever decorated Easter eggs with ready-made stickers, you already know what this is about.
What do we need?
- bulb
- ready-made stickers or napkins
- acrylic paints
How to do it?
- First you need to paint the light bulb in one or more colors.
- If you have ready-made Christmas stickers, just decorate them beautifully on the glass surface.
- If you have New Year's napkins, try decoupage a light bulb.

In this way, toys can be made even with very complex patterns.
Option ten: toys with a beautiful pattern
If you can draw or are ready to work with stencils, this idea will definitely suit your taste.
What do we need?
- bulbs of different sizes
- acrylic paints
- thin tassels
- pieces of fabric for decor
How to do it?
- Color the light bulb in one tone. Let this layer dry well and apply a second one.
- Then arm yourself with a thin brush and paint on the surface. It is better to "rehearse" the image on paper in advance, and then copy it. If you can't draw, use a stencil and tracing paper. Draw on the image with a simple pencil, and then color it.
- Instead of thin brushes and acrylic paints, you can use nail polish (try glitter options - they are often used for nail art, which means that they have a thin brush) or special markers.

Do not forget to put a hat on the New Year's character, glue him a scarf and other related accessories. By the way, such a toy light bulb will be a great holiday gift!
Choose any of the ten suggested options. Don't be afraid to experiment! If you are working on decor with children, do it on the table. If the light bulb suddenly slips out of your hands and breaks, the debris will not fly to the floor.

Enjoy the process, get inspired and feel like an artist!
Views: 8,090
In anticipation of the New Year's holidays, it is worth doing needlework. This will help to cheer you up and give you the opportunity to decorate your home. Someone makes Christmas wreaths, someone cuts snowflakes, sews or knits a symbol of the coming year. We propose to make a Christmas tree toy with our own hands. Since we are accustomed to the fact that such products are made of glass, we will not deviate from the rules. Let's take a burned-out incandescent lamp as a basis. For its intended purpose, we have already used it, now it's time to give it a second - a new and no less interesting, but more durable life.
To create a Christmas tree toy from a light bulb, you will need: a light bulb, two 15 cm pieces of red satin thin ribbon, scissors, a lighter, white acrylic paint, PVA glue, napkins with a suitable "winter" pattern, a brush, water, acrylic varnish in spray, acrylic paints , a set of multicolored glitters with sequins and a piece of red corrugated paper.

It is not difficult to make a Christmas tree toy from a light bulb, but the process will stretch in time, since it will be necessary to wait for the paint and glue to dry.
So let's get started, let's take a light bulb. We will tie the base with one end of the red ribbon.

We skip the second tip under the resulting girth, which will not work very tight, since there is a thread on the base. You can help with a knife.

Now we tie a tight knot so that the tip holds. Our product can be hung by a strap.

It's good if you have a matte incandescent bulb. But most often we use transparent ones, so we will have to paint the glass with white acrylic paint in one layer. You can add 50% PVA glue to it to keep it better.

We cover the entire surface of the lamp and hang to dry. Depending on the thickness of the layer, it may take from half an hour to several hours. We are waiting for the paint to dry well. At this time, we will deal with the future pattern of the toy. We take a napkin. Cut out fragments from it, trying on to a light bulb. It should be covered in a circle with a pattern. We needed two identical fragments.
Carefully cut off the evenly cut edge, leaving it uneven so that the joints of the drawings are not visible on the toy. Separate the two white napkin layers.

The paint on the light bulb is dry.

We make a solution for decoupage - we dilute the PVA glue with water in half. We apply the fragment to the glass, marking the place of its future location.

Using a brush dipped in decoupage solution, glue the fragment to the light bulb. We coat gently, quickly, from the center of the picture to the edges. Remember that a soggy napkin is highly stretched and deformed. Slowly correct the folds, if they are obtained during gluing.

We join the drawings of both fragments, glue all the planned elements and let the glue dry.

We take acrylic paints and glitters. We select a suitable red color in tone and paint over the surface of the light bulb over the fragment of the napkin, continuing the drawing.

We do the same with the blue area at the bottom of the pattern. We do not leave white spaces on the toy. It should be covered with either a piece of napkin or acrylic colored paint.

Now let the paint dry. This can also take several hours. We will only decorate a completely dry surface! Let's take a set of glitters and start doing some magic. We apply silver glitter to the snow-covered roofs of houses.

With blue glitter we outline the snowdrifts located in the background.

In red we go over the red background.

In blue we paint on the outlines of snowdrifts, in which there are houses, trees and Christmas trees.

We add volume to the green trees, highlighting the tiers on their surface.

When you are completely satisfied with the decoration, leave the toy to dry. The glitter gel will evaporate and the glitter will remain on the surface of the toy. The light bulb can now be varnished. We took an acrylic varnish in a spray that is suitable for all surfaces and dries quickly. We leave the room on the staircase, balcony or street and spray varnish on the toy from a distance of 30 cm, turning it so that the coating comes out evenly. We hang the product, spread a newspaper under it, and let it dry. After that, you can decorate the toy. We need a second piece of tape and corrugated paper that is twice the width and height of the light bulb. The edges of the tape should be cut evenly with scissors and set on fire with a lighter so that they do not bloom.

Fold the paper three times in length.

We take PVA glue and coat the lamp base with it around the circumference. Gently apply the paper, collecting folds from it. We expect it to be enough for the entire surface of the base. We fix the corrugated paper with a satin ribbon tied to a bow approximately in the place where it was smeared with glue.

Let the decoration stick. Our Christmas light bulb toy is ready!

Serebryakova Anna specially for the magazine Women's News
Christmas tree toy made of a light bulb is a wonderful homemade Christmas decoration. Such original toys can decorate your home, create a special festive atmosphere. Where do we usually put burnt out light bulbs? The answer here is unambiguous: of course, we throw them away, as a rule, over a year in the trash can there are more than a dozen possible bases for beautiful Christmas tree decorations. We offer several options on how to give them a second life.
If you haven't saved the old light bulbs, and you can't wait to try to bring our design ideas to life, then be sure to buy in the store, its cost is low. To understand how to make a toy for a Christmas tree from a light bulb, you will need one incandescent lamp (by the way, on the market they can be chosen in different sizes, which makes it possible to make many different, interesting toys). If you have a lot of other materials at hand, then they will be useful for New Year's crafts, and you can find ideas.
Christmas tree toy made of a light bulb
You can make sure that toys on the tree from a light bulb photo looks very original, and materials for its creation, and, moreover, special skills or abilities, you need very little. In addition to our glass base, we also need acrylic art primer, white acrylic paint, napkins with a festive New Year's pattern, gold acrylic paint, contour glitter, satin ribbon, PVA glue, autolacquer.
As you may have guessed, we will carry out this craft using the decoupage technique, we have already used it more than once to decorate various objects, which then become a real decoration for your interior. And if you do everything they will tell you about the intricacies of decoupage technique.
The glass base must first be coated with primer, for this you can use a regular brush or do it with a sponge.
When the primer layer has dried, it is necessary to paint it with white acrylic paint, for this it is better to use a sponge. To speed up the drying process, you can use a hairdryer, but if you are not in a hurry, then just leave it neatly upright on a stand so that it dries evenly.

At this time, get busy preparing napkin motifs. Those girls who have been doing decoupage for a long time know where you can find many different napkins with beautiful, festive ornaments. Of course, you can also come across a pack of beautifully patterned napkins in the supermarket, which you will also need to set the table. There is a large assortment of napkins that are sold by the piece in the All for Needlework stores, so first of all, go there to understand how it will look Christmas tree toy from a light bulb, ideas will surely come to your mind when you see a bright Christmas drawing.
From the napkin, you need to pull out (carefully, but so that there are beautiful torn edges) the motifs you like. Then separate the outermost layer (third). With the help of PVA and a brush, the motifs must be glued to the base.

Now we need some gold paint to paint over the entire background. Next, we will use a glitter outline. With glitter, you can draw snowflakes or check marks.
After two hours, all the elements will dry, which means that you can proceed to the final stage: the toy must be covered with a transparent auto-varnish.
We will use a satin ribbon to create a loop, it must be carefully glued, and you can hang the toy on the tree.

Christmas tree toy from a light bulb: ideas
If you have artistic skills, then you can decorate a lot of light bulbs, create original Christmas tree decorations. It is enough to paint the base with paints to your taste, and then varnish it. You can, using this base, make a snowman that will take place under the tree or in the center of the festive table. But for him it is also necessary to make a stand, for this you can use plaster or plastic: press the lamp into the raw gypsum cake, then remove it, and leave the stand to dry.
The glass must be thoroughly washed and degreased (for example, with alcohol), then sprayed with white paint. Glue the lamp to the stand with glue. Leave it to dry for a while. Using a putty, stick the twigs on the sides.

Next, you need to apply a narrow band of putty to the base, it must be rough. Make a carrot from orange plastic, glue it (this will be a nose). Paint the millet grains with a red marker and glue them as buttons.
The base must be painted with black paint, a pompom with a fur outline should be made on it. Draw the mouth and eyes with a black marker at the end. And you can decorate the snowman with a woolen scarf.
With paints and a glitter contour, you can paint a light bulb with interesting, bright motives: stripes, zigzags, circles. It's very simple, you don't need any special drawing skills, so invite your children to engage in such creativity.

You will get very beautiful Christmas tree toy from a light bulb, photo master classes will tell you about each step of its implementation. For decoration, you can use various materials, for example, a very meticulous work can be done if you decorate the glass base with beads, forming a New Year's pattern, you can use multi-colored sequins and other materials. And there is also a simple and original way - to wrap the base with threads, they can be taken in one color or several. Here are some great tips you can find on our website.