From the tree to the Day of Cosmonautics. How to make space ships do it yourself
Before the day of cosmonautics in preschool and school institutions, various exhibitions of crafts are organized. Today, the space rocket, UFOs or solar systems is easy to do even from girlfriend. We are interested in leisure with your children and turn disposable dishes, cardboard boxes or rolls from toilet paper in creative crafts on the topic "Cosmos". You can make many unique products yourself.
Flying plate of paper dishes
Interest in UFO has arisen quite a long time, so any child with interest reaches the manufacture of a flying plate, which he often saw in films and cartoons. It is easiest to do such a craft from plastic or paper different sizes.

The UFO will look original, made of two plates, one of which performs the feature of the cabin to control. In order to glue them, you need to make cutters on a small plate at the bottom of the bottom, and then bend in a circle and glue to a large plate. If you work with paper materials, then make it easy with the help of a regular PVA, plastic is better glued with hot glue. Do not forget to color your craft with acrylic paints and re-establish, placing ordinary buttons along the contour.

The flying plate of and halves the big egg from the Kinder surprise will look original. It is possible to use even a part of the plastic egg, it will be much more convenient to glue than the greater half. Do not forget to discones your craft.

Space station do it yourself
From rolls from toilet paper and towels, you can either ship, but a whole space station. To do this, you will need plastic bottles, bilateral scotch, aerosol paint, plastic plates or sudripes, acrylic paints. First, think over the design and dimensions of the future station. After that, prepare all the necessary materials and tools. Parts can be glued together with a tape or hot glue. Make a bottle of 1.5 or 2 liters. A beautiful stand is obtained from disposable plates or trudes, which will need to turn over and install each other.

Secure one long roller from towels and 6 small at the bottom. Small details from old toys can be useful in the manufacture of spacecraft with your own hands. After you collect completely crawl, you can start staining. First, use the aerosol paint, and then acrylic apply the pattern or some drawing. Such a workout will definitely defeat space work.
If your handicraft consists of a small amount of small elements, then instead of paint, you can use the usual foil, which is completely covered.
Master class: how to make a rocket
From an ordinary cardboard roll, which most often enters the garbage after use, it is easy to make a real space rocket. To do this, take a roller and a piece of corrugated cardboard. After that, make 4 cuts on a roll at a depth of up to 5 cm and twist them so that it turns out the cone. It will be the upper part of the rocket. Glue it tightly PVA.


Rocket from cardboard boxes for children

Space robots from girlfriend
If your child is delighted with robots, not necessarily buy a finished toy in the store. Try to make a handsome robot with your own hands. For this you do not need any specific knowledge and skills. You can use conventional cardboard boxes of different sizes and rollers from toilet paper. Metal effect feeding with foil.
Crafts for Cosmonautics can not necessarily do from "space" materials. Everything can be found in the house: old boxes, ribbons, plasticine, desire.
Cardboard, pencil, plasticine.
In order, all the planets
Write any of us:
Once - Mercury,
Two - Venus,
Three - Earth,
Four - Mars,
Five - Jupiter,
Six - Saturn,
Seven - uranium
Behind him - Neptune
Plasticine colors were mixed for each planet:
Mercury - Yellow and Black
Venus - Yellow and White
Earth - White, Blue and Green
Mars - Red and Black
Jupiter - Red, Yellow and White
Saturn - Red, Yellow and White
Uranium - White and Blue
Neptune - White and Blue
Signatures are made with an adult. Because The garden organized a circle of English for preschoolers, the names of the planets are duplicated in English.
IN Madou Children's Garden number 9. Ischima of the Tyumen region Children under the leadership of the teacher of the Igishov Natalya Arnoldna created a mini-copy of cosmic airfields.

So they saw the Baikonur kids of the senior group, Elena Nikolayevna, Elena Nikolayevna, Dolko Marina.

These are crafts for the day of cosmonautics made guys from MBDOU "Kindergarten" Smile "," Winter, Irkutsk region.Educator - Polyakova Tatiana Georgievna.
Application "Cosmos".

Application "Mysterious Cosmos".

Applique from plasticine "Amazing Cosmos".

Figure with wax pencils.

Fear aliens.

Aliens "Three-Cluster".

Alien Pucheglase and Rogatik.


This work was performed by Andreykin Rostislav under the leadership of the Udomovina teacher Natalia Yuryevna, MBDOU DSCV No. 2 "Kalinka", KhMAO-Ugra, Nizhnevartovsk.

Children from the group "Gobelki" MKDOU № 159, KirovMade a collective handicraft, under the leadership of teachers: Maltsev Irina Nikolaevna and Novocremascot Ekaterina Mikhailovna.


Craks to the Day of Cosmonautics make not only children, but also teachers. Such a drawing performed Dmitrieva Yana Mikhailovna, teacher, kindergarten № 102, Taganrog.

Guys out Madou "CRR - kindergarten number 10" Sunny "" Under the leadership of Aitkulova Rashida Safitdinovna and Cauchelian Gusel Rinatna made a whole space station.


The article presents the photo of the crafts sent to the contest "Let's go."
Note: Demonstration material at low prices in a specialized store "Kindergarten" - Detsad-shop.ru.
A selection of didactic and visual aids for the Day of Cosmonautics in kindergarten. It is useful to teacher DOW! Excellent quality and inexpensive prices. Specialized store for kindergartens.


The collective work of the coloring "Rocket" was performed by the children of the senior group №11 "Polyanka" MDOU kindergarten of the overall view number 62 "Scarlet flower" Kotlas Arkhangelsk region. Educator Petrushina Alexander Anatolyevna
Material for work: Coloring "Rocket" on 18 sheets, watercolor colored pencils, wax crayons, glue.

Crafts for the Day of Cosmonautics "Rocket" performed Sharin Timofey Senior Panel №11 "Polyanka" MDOU Kindergarten of the Outressive Type No. 62 "Scarlet Flower" Kotlas Arkhangelsk region. The crawl was prepared with dad. The cracker can be used to decorate the "Cosmos" layout and, as material for strengthening exercises for the development of exhalation force. Petrushin's teacher Alexander Anatolyevna.

Collective work of children of the preparatory group of the Mikhailovsky kindergarten 2. Educator Berezhnyak Irina Nikolaevna with children Lyakh Taya, Rajachakov Valeria, Chepurnov Artem, Rakhmetov Aslan, Poltava Augustus. The work is called "waiting for us quick rockets ..."

Participant - Sasha Bulat.
Age - 5 years.
Title of work: "We live dream about space!"


Collective work of group number 1. 3 years. Protvino Moscow region MBDOU "Kindergarten 4" Fairy Tale ". Pedagogue: Varvaritsa Julia Alekseevna.

Stepanov Ilya 6 years


Bonov seed 6 years

Vlasova Valery 6 years

Janus Timofey 6 years

Zhukova Karina 5 years

Sailors Savely 6 years

Petrova Alena 6 years

Gulin Danya 5 years

"On the rocket in space" Kozhevnikov Seraphim, 5 years. MBDOU "Kindergarten № 2" city Okhansk, Perm region. Educator Kalinina Nadezhda Vladimirovna.

Korotko Karina Evgenievna, 7 years old. MBDOU D / s №36 S.Myagutovo Municipal District Duvan district of the Republic of Bashkortostan. Layout "Planet Solar System". Leader: Ihmukhametova Liana Ildusovna, Educator MBDOU D / C №36 S.Myagutovo Municipal District Duvan district of the Republic of Bashkortostan
Works of children of kindergarten number 36. Officers: Borisova-Pugacheva O.V, Semenova S.S.

Dmitrieva Elizabeth - 6.5 years

Charkov Sophia- 6 years

Ivanova Sofia- 7 years

Velieva Albina- 6.5 years

Gorodetskaya Daria- 6.5 years

Tiganova Anastasia - 6.5 years

All salute!
How are you, dear readers and guests of my blog? Have time to relax from? I think this is not even something else to make something like it with kids. And now one holiday is still ahead - the day of cosmonautics. And he falls on April 12th. On the day, when our Soviet cosmonaut Yuri Gagarin flew to space for the first time.
This is usually the boys theme - space. They really love to invent flying vehicles, sacks and rockets. But some girls also do not lag behind. Still would! It is very exciting, and from the cast yes natural material you can make such work that they will win on any contest.
Let's see a selection of interesting ideas. Most likely, they will push you on interesting thoughts and with bulk their masterpieces. After all, the fantasy is here where to get roaring. You can include planets, satellites, flying devices, UFOs, rockets and more.
I note that the ideas of the science also from the Internet, from its publicly available sources. Basically, these are cool and original creations for the guys of kindergartens and elementary school. Plus I can recommend excellent options for paper airplanes in the note https://mognotak.ru/kak-sdelat-samoletik-iz-bumag.html
Well, we went! How was once aptly said Yuri Gagarin).
Interesting ideas on the subject of cosmos do it yourself
To begin with, consider what you can make it easier for this topic. For kids, a shame will be done (not without the help of parents), here is such a layout of colored paper. It has all the planets of our solar system. At the same time, of course, we learn the kids names of the planets.
Applique Solar System

You can make such appliques from small plasticine balls. Only such compositions first draw and even paint with flowers. And then you can already roll small balls and just join.
After all, the truth is possible and to provide for the competition?
Squirrel in Rocket

We scratch astronauts and a lounge from salt dough. Simple. With this material it is pleasant to work for several reasons:
- it quickly solidifies and can even be placed in the oven;
- it is easily painted with different colors acrylic colors or gouache;
- environmentally friendly, it can even swallow))).
Russian cosmonauts and luno

Simple paper rockets will be able to make kids 4-5 years old. It turns out a simple type of origami. And you can glue them on a dark blue background that will personify the outer space.
Rockets in the Universe

From toys, jars, tubes and plasticine, they make such funny aliens.
Merry aliens

Another option to the contest in the technique of modular origami.
We include fantasy and use everything: foam foam foam, twigs of trees, foil, wire. Even the sleeves will come in handy.
Gagarin in flight

Plasticine composition with Saturn, asterisks, rocket and our green planet.
Milky Way

And a little humor)
Cat in a hat from planets of our solar system

I hope you have already chosen yourself more or less something that they can make it easier.
Simple crafts for kids in kindergarten for the day of cosmonautics
I suggest with the kids to make a rocket from the bush (you can even toilet) and colored paper. It turns out such a long and stable thing, which can be put on a blue background and next to the alarm of the astronaut.

Add foil and you will have a more realistic spacecraft.

Let's lay down a strip of paper. Make it just according to the scheme below.

And here is the prepared option. Collect it at your discretion.

Or fold from thick paper an unidentified flying machine. Such things can be done somewhat and impose again on the blue sky.

Here to see what colorful and at the same time the original UFOs are obtained from us.

Let me go to the move your beloved baby toy - plasticine. It is malleable, soft and well glued to almost any surface.
This appliqués can be done with it in disposable plates.
Plates - Overdown Space

Oh, and we drank! Lepim a cute aliens. It will just look good next to a paper flying saucer.
Funny aliens

Do not want to fold paper? So let's blind her too, because there is a lot of plasticine!
When working with the plasticine, the first thing you need to explain to the kids, that this intolerable material and you do not need to take it in your mouth.
Slaughter and Flying Plasticine Flying Plate

Space idea of \u200b\u200bpaper and cardboard on April 12
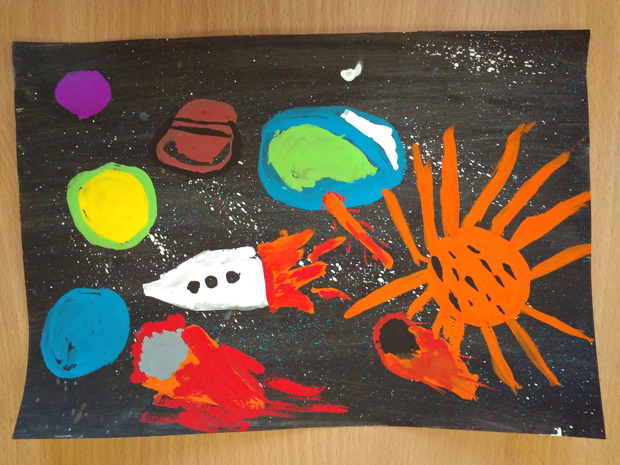
Of these components, like paper and cardboard, the easiest way to do works in kindergarten and school. Because they are always in any house. As well as scissors and glue. If all this is available, then I propose to build such a composition of a flying spacecraft, the sun and Saturn on a black background.

It requires:
- Cardboard with a black background somewhere 30 * 25 cm;
- Toilet paper sleeve;
- Colored paper;
- Gold and silver foil;
- Semolina;
- Scissors;
- PVA glue;
- Pencil.
Production:
1. The sleeve is cut in half. From one end we cut the edge to get a rocket nose.
2. From the blue paper, cut out three blue cones, which in the middle bend. These will be our rocket engines. They are glued to the uncircumcised (rear) part of the bush.

3. Printed the missile on a black background.
4. Cut two petals of red and golden paper. It will be a fire that takes out the back of the ship.
5. Printe the flame and carved window.

6. On Golden Foil, we draw the sun, and on a silver - Saturn with a ring. Cut and glue both figures on a black cardboard.
7. We apply glue on the background and on top of sprinkling semolina. This is our Milky Way. Beautiful handicraft ready!

Did you like the collage? If you have children's schoolchildren, you can make a flying glowing object below.
Video about how to make a flying plastic bottle plate
How to do it - see a small video. I am sure that the children will like the process itself, and then the enthusiasight will play UFO. After all, this is not just a handicraft, but with light special effects!
How to make crafts from disks on a space subject?
CD discs are already throwing out on the trash, and in vain. After all, this cast material is very good for souvenirs for the Day of Cosmonautics. Its brilliant and round flat surface is very suitable for the production of unidentified flying objects.
Here is a masterpiece of second-graders. It applied a disc to a flying plate with a very cute aliens.

And this is the alien itself with the springs and foil antennas.

Interplanetary taxis from the guys from the preparatory group in kindergarten.

Milestone saucer from rhinestones and fluffy antennas.

ABOUT! And then a whole group of funny humanoids with its own transport.)

And one more idea how to apply CDs.
Step-by-step 3D greeting card in the form of a rocket
If you never created bulk cards, then here you have a phased way. Again, everything is simple as twice two. And templates can be requested at the end of my note.

We need:
- Paper sheet pure A4;
- Pencil simple;
- Scissors;
- Colored paper;
- Glue;
- Paints gouache.
Production:
1. Sheet A4 bend in half. On the bend draw a half rocket.

2. Part of the rocket in the photo is labeled dotted. This means that we will not cut here. And all straight lines cut out with scissors.

3. We try to do everything as careful as possible.

4. Soak our starrel in the inner side. It will bend inside, and the entire greeting card is outside.

5. Draw parts of the ship: nozzles, porthole, nose and flame bottom.

6. Color the background in the black color of the gouache. And the rocket itself with suitable colors.
Here you can run the face of the astronaut in the window of the porthole.
7. Draw beautiful flame languages.

8. From colored paper, cut out different planets. They are glued throughout the background. You can also make stars from foil.

Voila! Our cool bulk card is ready. We give it to the appointment.
Mastery Original Work at the School Competition
Let's be inspired by the ideas of kids who won in contests on crafts on the subject of space. They all tried, working out every detail in their masterpieces.
In the works used any infringement materials. This is a twine, foam balls as planets, glass pebbles, felt and a lot more.
International Station

Composition from the planet Earth, rockets and two cosmonauts in open space.
Russian cosmonauts

Solar system with satellite and planets.

And then there is a magnificent layout of plastic bottles.

Use felt for volumetric appliqué.

Intergalactic travelers.

Beautiful applique from napkin balls.
To do it, you need to roll many, many balls of colored paper napkins. But work, as can be seen, is worth it!

The squirrel and the arrow from the salt dough are masting your legs).

A droplet of imagination on the topic of galaxies, starsoles and UFOs - and is ready for a wonderful job for the competition!
Pictures and templates on the subject of space
As a background and pictures, we suggest using cute templates and drawings. They will perfectly fit when creating cards or crafts on the theme of cosmonautics.


On this notch, I will say goodbye to you. I wish you success in creativity and pleasant moments spent with the guys!
I prepared for you several master classes for the manufacture of self-smoking for the Day of Cosmonautics. Let's find out how easy it is to make a rocket from cardboard and plastic bottles and from which technicians will get a flying saucer.
How to make a cardboard missile
I suggest you feel like young gagarin and make a rocket . In the space on it you will not fly away, but no one forbids;)
Interesting! By the way, the Vostok Spaceship, which Iri Gagarin made flight, today, no one would have released into space! And all because the technique was badly tested. After the start of the rocket, the ship Gagarin was 40 km higher than expected. And if the braking installation did not work, the "East" would go down to Earth for 10 days longer - there would be no food, no oxygen as a cosmonaut. What is the most interesting, Gagarin himself did not know about it.
The rocket from the cardboard roller is simple in the manufacture of an expectant day. Here is a detailed master class that will help you.
On one side of the cardboard roll, do small cuts, twisted strips and spool them together.

From cardboard Make a stand for rocket and engines.

Last barcode - coloring rocket.

"Go!" - Yuri Gagarin would say.
Interesting! As a person who first flew into space, Gagarin was struck by the incredible beauty of the limitless space that opened in front of him, and described it like this: "Here I saw the horizon ... Stars, the sky is black, completely black sky color ... Very beautiful horizon, It can be seen straight circle of the Earth, there is such a gentle-gentle blue color around the horizon near the surface of the earth. Then gradually darkens, the purple shade goes into black. "
What incredible beauty opened Gagarina from the porthole! And if you had the opportunity to fly into space, what do you think, what would you see there? Or in your imagination everything is the same as Gagarin writes? ;)
It is also interesting to make this rocket for fun. From large cardboard boxes, make the basis for this "house" and decorate it with various colored cuts.

You can not be made not just a rocket, but a whole space station from various subwoofers - plastic bottles, plates of various sizes, cardboard cylinders. All items need to be glued down as prompts you fantasy, and paint with a canister in silver color.

How to make a flying plate
Interesting and simple handicraft - flying saucer. It does not require many materials for its manufacture. At the heart of such an aircraft - plastic or paper disposable plates of different sizes and depths (then you can experiment with the form). Skill them as in the figure. The finished product can be wrapped with foil or paint in silver color.

The device is almost ready, but there is another important point - signal lights. In order for the plate to be noticeable, you need to stick bright details on it: it can be buttons or parts of the designer and the like.
And here is a more complex version of Cosmonautics Day. For its manufacture, you will need:
- 2 plastic plates;
- little plastic salad bowl;
- 3 disposable wine glasses;
- adhesive thermal power.
Skill plates with each other.

On top of the boile salad bowl.

The upper part of the glasses you need to cut a little bit and glued on the other side of the glued plates.


The basis of the aircraft is ready! It remains only to decorate it with various details - those that will be at hand.


Even so flying plate looks interesting and unusual, but if it is also painted in silver color, it will really become similar to the alien device.
Babies represent space as an endless mysterious world, which is inhabited by unusual creatures, endowed with supernormalities. Do not relieve the baby in the opposite, it is better to use these fantasies for the development of figurative thinking. Crafts can be made by a group or separate baby.
Invite your child to make a craft from materials that will always be at home, and you will have funny cosmic crafts. In this article, several master classes will be presented to your attention, where you will learn to make crafts on the subject of space.
Picture from croup "Cosmos"
Crafts (in kindergarten) may look different. For example, a wonderful material for creativity will be a cereal.
Source materials:
- gouache paints;
- cereals: rice, beans, buckwheat, peas;
- multicolored plasticine;
- cardboard, foil;
- glue, brush, scissors;
- saucer;
- transparent varnish (can be stained with nail).
So, how is it done in kindergarten from cereals? We look below:
- In advance, in order to dry, score cereals into different colors: rice - in yellow color, buckwheat - in blue, peas and beans - in different colors. To do this, we need to breed the gouache paints of various colors with water and apply to the cereals. Dry.
- On the cardboard sheet, applied the contours of any space objects (rocket, moon, planets, stars). Then it is necessary to place plasticine well and cut out the image of the moon and rocket.
- Decreased beans and pea pressed into plasticine as close as possible so that the plasticine is not visible in the intervals.
- Foil cale the porthole rocket, and also arrange a picture frame.
- Carefully apply glue on the contour of the stars, sprinkle with yellow rice cereals. When the glue will dry up, shake up too much.
- Unmounted gaps are thickly lubricated with glue and pour blue with a blue cereal. Dock over. Repeat so many times so that, as a result, all empties are filled.
- Rush lacquet part of paintings details.
Craftmap "Cosmos" from fresh dough
Crafts for the Day of Cosmonautics in kindergarten from this raw material is made easy. We will only have to be patient and some materials:
- food colorings;
- fresh dough;
- wire;
- sticks, beads, buttons, balls, eyes for toys;
- stack;
- cardboard rolls (from under foil, food film, parchment paper);
- cocktail straws.

Crafts for the Day of Cosmonautics in kindergarten is made easy:
- You must first prepare a colorful dough. To do this, we knew into pieces of dough different food dyes.
- Next, you should enable the child to choose the items and the characters whom he wants to cut out. For example, a funny aliens with several eyes.
- You can offer to make the planet Earth. To do this, we need to stock sufficient number of blue and green dough.
- Very interesting idea - to blind figures of the planets of the solar system. Attach the resulting planets and the sun on threads. Sun in the middle, planets around, it turns out a beautiful suspension "Solar System".
- Another suspension type: Cut with a shape for stars cookie, decorate beads, balls, sequins and hang on a string.
- This fantasy flight will be the manufacture of space base. To do this in the pallet, place the sand. Make rockets, cosmic ships from cardboard rolls. Arrange them on the pallet.
Crafts for Cosmonautics in kindergarten ready! You can safely participate in the exhibition.
Souvenir "Rocket"
Materials and tools required for work:
- little plastic bottle;
- paints;
- brushes, scissors;
- corrugated colored paper, cardboard, aluminum foil;
- big beads;
- glue, tape.

Rocket manufacturing steps:
- A plastic bottle cut a dyshko. Slightly above Esured Bottle Housing Cut the porthole.
- From a piece of non-hard cardboard, roll the cone, fix it with a stapler or glue, to align the edge scissors and glue the cone from top of the bottle.
- From dense cardboard, cut two circles. One circle is cut into four parts (these are rocket stabilizers). Another circle should be left for the porthole.
- Of the soft cardboard, form two small cylinders are a rocket nozzle.
- The body is painted with orange, stabilizers - blue, nozzles - black. The ring from cardboard for the porthole is wrapped in foil.
- Wrap the foil tip rocket, glue the items into place. Decorate with beads and pieces of foil.
- From yellow, orange and red paper (corrugated), cut a lot of thin stripes and attach inside the nozzles - it will be similar to the exhaust fire.
Plasticine Panel "Mysterious Cosmos": Materials
Crafts for Cosmonautics in a kindergarten made of natural material is simply made, and above we have considered options using cereals. For the plasticine composition will need to be purchased:
- multicolored plasticine for children's creativity;
- dense cardboard of black, blue or purple color;
- plasticine board;
- stack.

Technique performing crafts
Make panel is easy, it is worth only to show fantasy.
- One of the details of the panel, the sun, be shed from plasticine yellow, orange, red. A piece of plasticine needs to roll into the ball, stick to the sheet of cardboard, which serves as the basis of the panel, and crush into the layer. Another piece of plasticine stretch with a thin wand such a length to completely wrap the sun. Fasten around the sun and rub on a finger cardboard. That's ready.
- The moon is painted from pieces of plasticine brown, white and yellow colors. For this, plasticine of different colors is slightly mixed, forming a marble pattern. You can depict both a month and a full moon, giving a piece of the corresponding shape and attaching it to the base in a flattened form.
- It is very easy to make stars: for this you need to roll small plasticine balls and, attaching them to the base, to put out from the center to the periphery.
- The planets of the solar system are shaking the same way as the full moon, only for each planet you need to pick up your blend of colors (for the Earth - blue, green, white, mars - red, brown, etc.). For Saturn, you need to make a belt depicting rings.
- The next part of the panel - rocket - consists of plasticine rectangle. It is necessary to attach a triangle over it, kneading a piece of orange-red plasticine, which depicts fire from the rocket. At the end you need to decorate the rocket with details on your own taste. Exchange to the Day of Cosmonautics in kindergarten is ready!
After these master classes, you can spend very interesting and educational classes with children with the manufacture of crafts with your own hands and stories about space.