Nail tips at home. Video tutorials for beginners - training. Step-by-step description of the process
Look at your nails. Sometimes you want them to be long and beautiful. But it takes so much work and time to grow them. And if one accidentally breaks, then all the work turned out to be useless and you have to start all over again, never reaching the desired length. Indeed, on long nails you can create extraordinary design masterpieces. However, growing nails now has a very good alternative that many women have been using for a long time. It is, you guessed it,. And now we will consider such an important material with which it is easy to lengthen your nails, like tips.
What are nail tips and a brief history of their appearance?
Tips (translated from English. Tip - tip) are plastic tips that imitate a natural nail. They serve to create nails of a certain length. But you can think of a lot of applications for them. You can practice making different drawings first on the tips. You can even create your own collection of drawings that will always be at hand. And if you are professionally engaged in manicure, then they can serve as a kind of advertising.
A bit of history. Nail tips were first made from various materials, until in 1970 they tried to make it from plastic, which made a splash in the nail industry. However, while there were problems that they were done by hand, there was only one size and the tips were thick and stiff. The problem was solved in 1974, when they began to be produced in large quantities, using a special execution technology. However, they were quite expensive (about 40 thousand dollars), and their service life was about 7 months. Tips are made from ABS plastic (acrylonitrile butadiene styrene). The variety of shapes and thickness of tips has also changed, and, accordingly, their quality. And now we can choose tips individually for our nails.
 The structure of tips. Tips have a specific structure. First of all, all tips are divided into two halves: this is the contact zone, which has a smaller length (3-6 mm) and thickness, and. The first is designed to fit the nail, and the second forms the length of the tip of the nail. Separates these parts stop line... The contact zone can have an ending of various shapes: round, V-shaped, serrated, etc. It depends on the size of the natural nail, the speed of cutting, as well as convenient and high-quality gluing. The shape of the free edge can be made by yourself or left. They are square, sharp, tapered, etc. Many options are provided to choose from tips colors... There are white, transparent, colored and pre-designed tips. Here the choice depends on what you want to do with them. Tips also differ in their curvature, because everyone has a different shape of the nail.
1. Among the variety of tips, choose the ones that follow the shape of your nail. Then they will sit well enough on the nail and will not allow it to deform under the tips. If you can't find the right size, then take the tips a little larger than the nail plate and then use it to fit it under your nail.
2. Pay attention to the elasticity of the tips. They should bend gently, but not break. You can try bending the tips so that the fold goes from one side to the other. If the white strip does not appear, then the tips are of sufficient quality. Softness is required so that they can be easier to cut.
3. To give the tips the desired length, you can file them, but cut them off much faster. However, you cannot use simple ones for this, otherwise the tips will crack or you simply will not get what you want. There are special tools for this - type cutters... With the help of them, you can get any shape of tips from oval to square.
5. Nail tips are sold in sets and are divided into 10 sizes for each nail. Most manufacturers number them: 10 is the largest, and 1 is correspondingly the smallest. It is best to remove these numbers before using the tips to make the surface even. This can be done with a file, acetone, or a correcting pencil.
The main thing when choosing tips is that they should be:
- quite thin and similar to natural nails
- bend well and be elastic
- not sharp, which means safe
- comfortable for nails, no nicks or scratches.
How to apply tips?
 And now we will consider the most important question, how to nevertheless attach the tips to the nail so that they hold securely enough and for a long time. We have already said about the choice of tips. After you have selected the size tips, they are ready to use.
1. First you need to process natural nails (file, remove cuticles and) and remove shine and moisture from them. When placing the tip on your nail, make sure that it covers less than half of the natural nail.
Build-up on tips is gaining popularity among girls today. This is a very convenient way to make your nails beautiful and neat for a long time. In addition, tools and materials for such a build-up are easy to find in a store, and each girl can learn how to perform the procedure on her own.
What is tip extension?
Nail extension is a type of manicure using special plastic plates that imitate real nails. The material is usually selected individually, because the master must take into account the structural features of your hands.
Tips grown nails can look very natural if you perform a manicure with high quality
A big plus of the tips is that they exactly repeat the shape of the girl's natural nails. Of course, if you are going to buy materials yourself, then you should consult with a manicurist or a seller. Note that the artificial plates sit well on the nail and are perfectly fixed with a special glue.
It is interesting that tips can be either transparent or with a ready-made design. The second option is suitable for busy girls, since the procedure in this case will take very little time.
Necessary tools and materials for nail extension on tips
In order to successfully carry out the procedure of gel nail extension on tips at home, you need the following materials and tools:
If the build-up is acrylic, then instead of the gel, you must use:
- acrylic powder;
- monomer (liquid).
The nuances of preparing for the procedure
Stages of gel extension on tips

Wash your hands thoroughly before the procedure.

Before extending nails, it is imperative to push back and trim the cuticle.

Glue on tips should be applied only in the place of its adhesion to the nail.

You should apply tips to the nail very carefully so that bubbles do not form.

You can cut the plate at the first stage of the procedure as described above, but it is more convenient to do this when the tips are already on the nail

After building, you need to process the nails with a file to bring them to perfect condition.

At the end of the procedure, it is necessary to take care of the skin of the hands: rub oil into the cuticle and use a moisturizer
Video: performing gel nail extension on tips at home
Making acrylic extensions on tips
Acrylic is the first material used for nail extension. This method was invented by a dentist in the second half of the twentieth century. Acrylic is very popular today as it does not require a UV lamp to be used. It should be noted that the material, unlike the gel, is a strong allergen and has the following contraindications:
- diabetes;
- fungal diseases;
- herpes;
- individual intolerance.
The first 6 points of acrylic build-up completely coincide with the gel. Then it is necessary to complete several more steps so that the procedure can be considered complete.
Stages of performing acrylic extension on tips

When you apply acrylic to your nail, you need to quickly distribute the material over the surface
Video: performing acrylic extensions on tips
Photo gallery: design ideas for nail extensions on tips
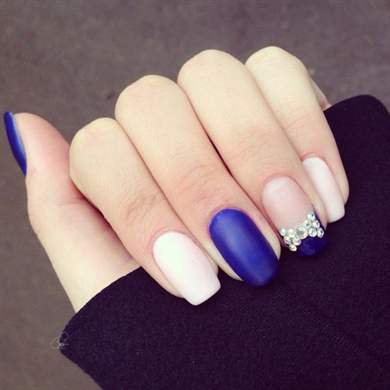
For building "Flowers in the middle" it is better to use ready-made tips with a pattern, since it is rather difficult to repeat such a design on your own. Classical French extension is easy to do on your own, without using tips with a ready-made pattern
Wedding extensions with rhinestones are ideal for the corresponding event
Extension of nails on tips is a rather simple procedure, if you carefully study all the nuances. But it must be remembered that such a manicure will take you a lot of time and effort. However, the result will please for a very long time. Therefore, if you have long dreamed of long and well-groomed nails, then be sure to try building on tips yourself.
Unfortunately, nature has not endowed all women with strong and durable nails. This issue is easily solved, one has only to visit a beauty salon and use the nail extension service. This process can be done with your own hands. We will consider two types of gel build-up: on tips and forms. And also briefly talk about the types of French-style extensions with visual photos. And, if you have no desire to visit salons, then our article will tell you about gel nail extension step by step.
What to choose: forms or tips?
Extension of nails can be carried out using forms or tips. When there is a nail base on the finger, it is necessary to use nail tips. In order not to be mistaken in the right choice, you need to take into account the width of the nail surface, what kind of bend you want to get at the end of the work, and do not forget about the height of the nail hole. When we talk about using forms for building gel, we mean recreating from scratch the lengths, shapes that you or your client prefer, not forgetting to take into account the structure of the nails and the size of the fingertips. When the type of work has been chosen that suits your client, you need to know that there are five types of nail structure:
- slightly convex;
- snub;
- flat;
- cat's marigold;
- wavy.
The most common are feline marigold and snub-nosed nail growth.
"Cat's marigold"
Extension of a cat's marigold must be carried out not on tips, since with the growth of the nail, its free edge will bend down. This will create a space between the tips and your nail, hence dust and water can enter. In this case, you need to use a nail extension form.

"Snub-nosed" nails
If you work with snub-nosed nails and decide to build on forms, do not be surprised that in the future the nails will lose their correct structure. And in this case, it is better to use tips.
The final result of gel build-up also depends on the type chosen, one of which is used most often - this is a three-phase gel build-up:
- Base gel
- Construction gel
- Finishing - coating with gel polish

Extension of nails at home
To make your work at home smooth and complete, you need to stock up on these tools, they can be purchased at ruNail:
- ultraviolet lamp;
- antiseptic;
- modeling agent - adhesive;
- the foundation;
- degreasing agent - dehydrator;
- tips;
- forms;
- sculptor;
- clinser;
- flat brush;
- file 220/280 grit;
- file 240 grit;
- finishing gel;
- glue for tips;
- lint-free napkins;
- orange sticks;
- dust brush
- cuticle oil.

Step-by-step instructions for beginners
Gel nail extension on tips:
- Prepare the nail surface with an orange stick: peel off the cuticle, create the desired shape for the free edge, and polish the nail area with a 220/280 grit rectangular file, it prepares the nails for polishing, smooths and removes scratches.
- Apply a degreasing agent
- Apply a thin layer of nail tip glue to the free edge of the nail and the contact point of the tips. It is necessary to attach the tips to the nail at an angle of 45 degrees, and lower it so that the line of the tips of the tips and the edge of the nail are aligned.
- Further, without detaching, gently lower the tips on the nail and spread the glue in the same amount over the entire area with smearing movements.
- Again we put the tips at an angle of 45 degrees, bring them to the line of the foot and after the heard crackling, gently lower the tips onto the nail. It must be held for about 10 seconds.
- We shape the tips at the request of the client, taking into account the structure of the nail.
- We get rid of dust particles and degrease.
- We cover with a modeling agent on the area of \u200b\u200bthe nail.
- With a slightly damp brush, apply the base gel along the entire length of the future nail and place your finger under the lamp for 1 minute.
- Using a flat brush, apply the sculptor, taking into account the structure of the nail. We leave it under the lamp for three minutes.
- Using a lint-free napkin, remove the sticky layer with a clinser.
- Using a buff, we palette the area of \u200b\u200bthe nail.
- Degrease and cover with a finishing gel. Again we put our fingers under the lamp for three minutes.


Below we offer you video tutorials on building:
How to build up nails with gel on forms
- We treat our hands with an antiseptic.
- We clean the surface of the nail with a 220 grit file.
- We cover with a degreaser.
- Next, cover with a base and place your hands under the lamp for two minutes.
- We clean up the top layer.
- We fix the form.
- Using a brush, apply the gel, while turning your finger downward with your fingernail, so that the gel is evenly distributed.
- Again we put our hands under the lamp for three minutes.
- Cover with gel again and form an “S” curve.
- After the lamp, we clean the sticky layer.
- Getting rid of the form.
- We level the surface with a buff.
- Brush off the dust and cover with a finishing gel.
- Again we put our hands in the lamp to dry for two minutes. Degrease the surface of the nails and cover the cuticles with oil.
Below we propose to consider step-by-step build-up in photos and videos:


Ageless jacket
Under each type of jacket, you can see the finished work in pictures, as well as a video on design.
Tips extension is a salon procedure that will allow you to get a gorgeous long manicure. Having learned about all the features, advantages and disadvantages of this procedure, you can decide if this type of nail extension is right for you.
If you have very short nails and want to get a manicure today, then nail extension with tips is your option. This procedure will allow you to get a magnificent long and durable manicure in a couple of hours.
Features of nail extension on tips
As a rule, today different modeling materials are used for nail extension: acrylic or gel. These are plastic compounds that, after hardening, become very durable and very much resemble natural manicure. But to lay out these modeling masses, you need some kind of foundation. Salon masters of nail design use tips and forms for these purposes. Forms are special foil-coated paper templates. And tips are artificial nails made of flexible polymer material.
Nail extension on tips can be used for any shape of the nail plate, since tips of any shape and color can be found on sale. That is why in the salon you can always choose tips to the shape and size of your nail plates, which guarantees a natural look of manicure.
Tips are glued to their own nail plates using special glue and additionally strengthened with gel or acrylic. At the same time, do not confuse tips and false nails, because tips, unlike them, do not cover the entire surface of your nail, but only half of it. Tips grown nails can be of medium length. This ensures sufficient strength and durability of the manicure. If you increase the length, there is a great risk of nail breakage and peeling.

Today, liquid nail tips are very popular. This is the same part only more flexible and soft due to the gel pumped into the polymer form.
Who is the tip extension suitable for?
The procedure for building up with acrylic or gel can be done on tips in such cases:
- If your nails are very short, or rather, there is no overgrown tip of sufficient length to fit the shape, then the extension will be performed on tips.
- If you have a habit of biting your nails, then most likely their length and condition is such that you can only perform nail extension.
- With a very short nail bed, the situation will be corrected by building up on tips.
Contraindications for building on tips are the same as for building on other technologies:
- It is better not to do the procedure if your nail plates are damaged or there are cracks on them.
- Extended nails should not be done for pregnant and lactating mothers.
- It is better to refuse building up before menstruation and in the first days of the menstrual cycle.
- If you drink antibiotics or hormones, it is better to postpone the build-up procedure until you stop taking medication.

Advantages and disadvantages of building on tips
Extension of nails with gel or acrylic on tips has a number of advantages:
- This technique allows everyone to acquire nails, and even those who naturally have weak exfoliating nails.
- A manicure is performed faster than other types of extensions.
- The spectacular appearance of the manicure and great design possibilities are another plus.
- Affordable price for nail extension using tips is another advantage of this procedure.
The disadvantages of this building technology include the following:
- The appearance of nails extended with tips is not very natural, since it is clear from the shape of the nail that tips were used.
- The durability and strength of such a manicure is lower than when using the extension on the forms.
- Prices for nail extension with gel on tips are not as low as we would like.
Extension of nails with gel and acrylic on tips: technique of execution
The procedure is usually performed in a salon. To do this, the master will need the following devices and materials:
- a set of nail files;
- scissors;
- tweezers;
- glue for tips;
- tips of different sizes and shapes;
- degreaser for nails;
- primer;
- gel or acrylic;
- ultraviolet lamp when using gel;
- brush for applying modeling mass.

The price for nail extension on tips in different salons may differ, but the sequence of the procedure is the same. It takes place in several stages:
- The preparatory stage includes the treatment of the hands of the master and the client with an antiseptic. Then the cuticle is processed in any suitable way. After that, the nail plates are degreased, polished and primed.
- The main stage. Tips of the required size and shape are selected. They are glued to the nail plates with a special glue. Then the master prepares an acrylic mass or takes a ready-made gel. Please note that the price for nail extension with gel for tips is higher than for using acrylic.
- After that, the modeling composition is applied in layers to the nail and tips. If gel is used, then each layer must be dried under an ultraviolet lamp. The acrylic mass hardens by itself. To lay out the modeling mass, the master uses a special brush. At the same time, acrylic dries so quickly that the work must be carried out accurately and quickly, so it is better to entrust such a procedure to the master in the salon.
- After this comes the final stage. With the help of nail files, the master corrects the shape of the nail plates. If acrylic build-up was performed, then additionally polishing of the nail is done to give it shine. In the case of a gel modeling mass, sanding is not required, since such a manicure already has a glossy shine, which remains for the entire period of its wear.
- When the nails are formed, the master performs their design, that is, a decorative manicure is done.
In the network of salons "Manicure" you can order nail tips. The price for this procedure in our establishment will pleasantly surprise and delight you. To sign up for an extension to the master and clarify the cost of this procedure, you need to contact us at one of the phones indicated on the website.
Extension of nails today remains the only way to acquire a gorgeous manicure with the desired length of nails in a short period of time. The high-tech scheme involves the use of special plates - tips made of plastic material. The template is placed on the free edge of the natural nail and modeled using gel, resin or acrylic.
Manicurists use tips only from well-known manufacturers. This is due to the care for clients, the preservation of the healthy structure of their nails and the duration of wearing the extended plates.
Plastic templates are available in various shapes and sizes, which allows you to choose the material for any nail plate. Colors and shades will create a natural effect.
A nail tip manicure is suitable for the following cases:
- with very short natural nails;
- if you have a bad habit of biting your nails;
- - with very small sizes of the nail bed.
The procedure for building up with various technologies should be abandoned in the following cases:
- damage and cracking of nails;
- during pregnancy and lactation;
- during antibiotic treatment or when using hormones.
You also need to postpone a visit to the salon before the menstrual cycle or in its early days.

Features of the method
 Tips augmentation is a common procedure. The free tips of a natural nail are lengthened using a plastic template, which is then given the chosen shape and color. The material is selected taking into account the individual anatomical shapes of the fingers and the nail rim. The plastic blank consists of two parts:
- a refined contact area that is glued to the natural nail;
- compacted free edge.
The two surfaces are fixed with gel or acrylic.
Artificial plates are available in transparent, colored or with ready-made art painting, which significantly reduces the time to complete a manicure. Colored plates fixed on natural nails are enough to cover with a top coat.
How is the build-up
The building process itself is not particularly difficult, but it still requires certain skills and knowledge for high-quality performance. Therefore, when choosing a master, you need to pay attention to work experience and the availability of a client base.
Materials and tools required for the procedure:
- tips, matched to size;
- fixing agent (acrylic, gel);
- (ultraviolet);
- antiseptic liquid;
- a means for removing the sticky layer;
- topcoat;
- a flat-shaped brush for applying the material;
- orange stick;
- a set of files for shaping and grinding;
- primer;
- polishing pillow (buff);
- tweezers;
- glue for blanks.

Step-by-step description of the process
The extension procedure should be carried out with knowledge of the anatomical features of natural nails for the correct removal of the free edge and preparation for the procedure. You should know that this method can only be used on healthy plates. Before visiting a master, you should not use various hand creams. This can affect the clamping quality of the workpiece.
You also need to decide in advance on the shape of the manicure.
To do this, independently or with the participation of a master, one of the options is selected from the manual:
- clear square;
- soft square;
- almond-shaped;
- oval;
- stiletto, etc.
 Any manicure begins with preparing the plate for processing. Build-up is no exception. The duration of the use of artificial marigolds depends on the quality of the preparatory process.
- The first thing to start with is carefully, having previously treated your hands with a disinfectant. You should try to avoid getting microtraumas. If, nevertheless, the soft tissue has been damaged, it is worth postponing the procedure for several days until healing.
- Remove natural shine from nails with a file or sanding. Movements should be directed in one direction. Remove dust from the surface with a special brush.
- Saw off the nails under the tips hole.
- Treat platinum with a degreasing agent. Try not to touch the treated surfaces with other objects before continuing the procedure.
- Apply a primer to dry nail plates.
- With a stacker or a nail file, treat the contact area of \u200b\u200bthe tips with the nail for a tight fit. The width of the workpieces must correspond to the parameters of natural plates.
- Apply a drop of special glue to the tips from the inside and press it against the nail for 10 seconds. Pressing on the edge of the workpiece is carried out using two saws.
- Trim the artificial nail to the desired length.
- With the use of nail files, give the plate the intended shape.
- Clean the joint with a file. Treat the surface with a buff. At the end of sanding, remove dust with a brush.
- Apply primer.
- Apply a modeling agent (gel) to the surface. Turn the hand over to evenly distribute the liquid along the nail plane.
- Dry under the lamp.
- Apply a second coat of modeling agent and dry again.
- Remove the sticky layer from a dry surface with a special product and a cotton pad.
- Smooth the surface with a file with a polishing effect.
- Clean the surface from nail dust with a brush.
- Topcoat application.
Comparison with other extension methods
In addition to building on tips, methods of increasing the nail plates on the forms are used. Disposable paper substrates or reusable metal blanks are attached with adhesive or a special clamp. Unlike nail tips, mold extensions cannot be applied to short nails. You need at least a small free edge to attach the fake blank. After removal, paper blanks are thrown away, and metal blanks can be reused after disinfection.
When choosing a method, it is necessary to rely, first of all, on the shape of natural nail plates:
- for plates bent down, the method on forms is suitable, since the growing end will not be very noticeable;
- tips are suitable for those who are bitten;
- both methods are suitable flat;
- it is preferable to use tips with a springboard, on forms it is possible to build up in the case of applying the correction of gaps with acrylic or gel.

A professional master will be able to make extensions in various ways on almost any form of nails. But you need to be fair to state the fact that there are a small number of real masters of manicure. Therefore, it is better not to go by contradiction when choosing a method.
Whichever extension technology is chosen, one should remember that an air cushion does not appear between two surfaces. This will lead not only to rapid peeling, but also to possible infection of the natural plate.
Benefits:
- an increase in the nail plates in a short time;
- the material used does not cause allergic reactions;
- affordable way in relation to costs;
- technology on tips is performed much faster than other methods;
- does not have a destructive effect on the nail structure;
- the possibility of gluing the plates on the naturally exfoliating and weakened marigolds.
disadvantages:
- difficult to disguise as natural nails;
- gel build-up is more expensive than other methods;
- the durability and strength is inferior to the build-up on the forms.

Care
Artificial plates are not exempt from daily care. For long-term wear, you will need not only high-quality build-up, but also careful care. Although there are no special difficulties in this matter.
- Rub special nourishing oil into the cuticle area every day.
- Periodically apply a colorless coating to the plates to give a fresh manicure.
- Timely carry out the correction procedure (once every 3 weeks).
- Contact the specialist immediately when peeling off or tearing off the plastic blank.
- Do not allow air or moisture to enter under the plate, this will lead to infection.
- Remove only according to the instructions by gentle action on the nails.
- For gel and acrylic coatings, use acetone-free nail polish remover.
- When correcting, do not use scissors and nippers, processing only with nail files is allowed.
- Do not use baths, replace them with softening oils.
- Do not cover the plates with a thick layer of varnish.
- Avoid a sharp change in temperature, this can lead to breakage of the marigolds (for example, after a bath, dive into a cool pool).

The extended manicure is very easy to use, does not require much attention and maintenance. However, it is worth remembering that between treatments it takes time to restore the nail structure. If it is not damaged, it weakens anyway. And frequent chemical treatments literally deplete the shell layer. It is easier to prevent any problem than to waste time and money on treatment.