Gorgeous gnome costume. Do-it-yourself gnome costume options. How does a gnome dress?
This year, in the son's group, all the boys at the New Year's party will be gnomes. After elementary calculations, it turned out that buying a fabric would be cheaper than spending money on a ready-made kit. (For comparison, the finished suit costs 600 rubles, the materials cost me 300 rubles.) And now the dust has been wiped off the typewriter, the tailor's chalk and scissors are in place - I get to work.
I’ll make a reservation right away: I’m a lazy person (I found something to surprise, right?). So. I know that there are special formulas for building patterns. But I forgot all of them and don't want to remember them. To sew a carnival costume, in my opinion, the depth of the darts on the pants is not important, is it? We're not going to prom.
Therefore, we take suitable clothes for patterns - I have shorts and a son's T-shirt. And let's get to work.
Panties
For panties, fold our shorts in half and apply them to the paper. Stretching the elastic band on the belt, we circle the shorts along the contour. Decide on the length of the pants. Mine is just below the knee.
We process the sections left open along the edge, laying an ordinary line close to the edge.
We fold the ribbons in half and iron. We put the lower sections of the panties into them, slightly picking up. We lay a line along the entire length of the tape. We tie bows on each leg.
We process the cut of the panties on the belt, turning the allowance to the wrong side. We do not close the line to the end, leaving a hole for the elastic band. We insert an elastic band - panties are ready.
Cap
We measure the circumference of the child's head. From the red satin we cut out two isosceles triangles, the bases of which are equal to half the girth of the head, and the height can be any (I have 50 cm). Don't forget allowances!
We cut out a rectangle from white fur, one side of which is equal to the girth of the child’s head, and the second is about 15 cm. We also cut out a small circle with a diameter of 15 cm from the fur.
We grind the side seams of the cap.
We fold the fur rectangle in half lengthwise, face outward, and grind it with the lower cut of the cap.
On the edge of the fur circle, we manually lay a basting line.
Put a little padding polyester in the middle of the circle and tighten the thread.
Sew the pompom by hand to the end of the cap.
Vest
We fold the T-shirt in half and circle the resulting sleeveless part on paper. This is the back of the future vest.
We deepen the neck, add the width by a centimeter from the middle - this is a shelf.
From green fleece we cut out two parts of the shelves and one part of the back with a fold.
Stitch shoulder and side seams. We process the armholes of the sleeves, the edges of the shelves and the bottom of the vest.
The neckline is trimmed with a strip of white fur.
Sew on hooks and loops (or, like me, we make thread stitches instead of loops).
For the belt, we cut out a rectangle from dense fabric. One of its sides is equal to the circumference of the child's waist 10 cm, and the width is twice the width of the buckle.
Fold the strip in half lengthwise, right side up, iron and stitch along the edge. At the end, stepping back a couple of centimeters from the edge, we make a slot for the buckle tongue, thread the tongue, bend the rest of the fabric to the wrong side and stitch it.
On the other edge of the belt we make holes and strengthen them with eyelets.
Sew the belt in the middle of the back.
Slippers
We trace the foot of the child on paper. We lengthen the sock, sharpening it. We cut out two details of the foot, side details and top details from the fabric.
Complete information on the topic "how to make a gnome's beard with your own hands for a boy" - all the most relevant and useful on this issue.
A do-it-yourself gnome costume for a child is a guarantee of your child's comfort at a New Year's party in a kindergarten or on a Christmas tree at school. Not one suit rented or bought in a store will bring so much joy and delight to a child than the one that his mother made for him. A cheerful New Year's gnome costume with a homemade cap will be remembered by the child for a long time, and will help in this photo, which you are probably planning to take.
How to make a New Year's gnome costume for a child with your own hands
Watch the master class, which will tell you in detail and step by step how to make a gnome costume at home.
In this costume, the most important thing is a beautiful beard and the presence of some accessories. Let's start with making a beard.
How to make a gnome beard with your own hands
To make a gnome beard we need:
We fold the threads as shown in the photo.
Just sew the threads to the collar or bib.
Step by step we make the beard more and more magnificent. Sew on a rubber band.
This is what a beard for a gnome will turn out to be. We used brown threads, but you can experiment and make a different color beard.
You can also see how to make a Santa Claus beard using a different technique and make it for your gnome.
Making a gnome costume
To make a gnome costume you will need:
- shorts;
- turtleneck;
- vest;
- tie;
- a cone hat (you can use a regular hat and insert a folded A4 cardboard sheet into it).
- stomach (the stomach can be made from a simple fabric by folding it four times);
- belt;
- to complete the image of the gnome, you can put striped leggings on the child.
How to make a beard for a gnome: a simple master class with photo and video material
Birthday or New Year, carnival, a morning party in kindergarten or a holiday at school - how many reasons to think about a fancy dress for your child. There are, of course, a lot of options. If you have chosen a gnome costume, then most likely you will be wondering: how to make a beard for a gnome? After all, it is she who completes the image and turns the little man into a real gnome, and it can be quite difficult to buy it, and even expensive. At the same time, you need to make this part of the costume comfortable so that the child likes to wear it during the event.
We will present for you several options for making a beard with your own hands from various materials.
Crochet beard
This method is easy to perform and does not require large expenditures. If you have any leftovers of white yarn at home, then you can do without any cash investments. A gnome's beard is usually white, but it doesn't have to be. For example, characters of, say, Irish origin - Leprechauns - have a red beard.
You will need
So, in order to crochet a beard, you will need:
- Leftover yarn in desired color
- Elastic band (about 25 cm)
- Small piece of soft fabric for lining
How to do
Dial 40 air loops. On the chain, knit one row without a crochet and turn the work. Next, knit the front and back rows.
In each front row, knit with elongated loops, and in each wrong side - with connecting posts, hooking on only one half-loop of the columns of the previous row (purl rows are needed to return to the beginning of the front row).
How to knit elongated loops:
Take the knitting in your right hand, and pull the thread with the finger of your left hand.
After that, shift the knitting to your left hand and make sure that the thread lies on the index finger of your left hand. The hook must be inserted into the loop that lies to the left of the extended loop. Then insert the hook under the thread on the index finger and knit a single crochet. Release your thumb.
To fix the elongated loops, knit the next row with single crochets.
Another way, simpler, requires a regular school ruler:
When 2 or 3 rows are knitted with elongated loops, start in each row not to knit 3-4 loops so that the beard begins to take on a rounded shape.
Now it remains to sew rubber bands to the edges, and on the wrong side of the beard - a fabric lining so as not to rub the chin.
By the way, such a knitting pattern for elongated loops is suitable for creating a wig for other costumes, for example, a clown.
fur beard
Making a fur beard is very easy.
To make this you will need:
- beard pattern
- Lace
- Piece of fabric for the inside of the beard
- Piece of faux fur
- Needle and thread
How to do
Print or draw a beard pattern on a piece of paper:
Cut out the lining and fur from this pattern.
Place two pieces of beard-shaped fabric one on top of the other and sew together.
Now it remains only to sew a lace or rubber band.
The beard for the gnome is ready. Its color, of course, you choose yourself.
thread beard
Another interesting and easy way to create a beard for a gnome costume is to make it from ordinary knitting threads.
You will need
- Yarn for knitting
- Needle and thread
- Scissors
- Collar, fabric or even a baby bib - something that resembles the shape of a beard
How to do
Sew them now to the fabric or collar.
The second, easier way is to take an elastic band, cut the threads into strips of the same length and tie them to a cord or elastic band.
paper beard
The method of making a beard out of paper is suitable if you do not have time at all.
Fold vertically in half a plain sheet of A4 white paper and cut out according to a template that you can either copy or print:
Non-standard options
If the costume is required by an adult who, in addition, has his own thick beard, you can create a romantic image of a cute gnome and please the others with such an interesting solution: a beard with flowers. Get small fake plants and just stick them in your beard. You can also buy or borrow small children's crab hair clips in the shape of daisies and roses from your daughter and attach them.
The same can be done with glitter. At the New Year's corporate party, you will be the most glamorous gnome. In this case, even a cap is optional: your image will be irresistible.
Related videos
We also invite you to watch a short video selection in which you can pick up other interesting ideas for creating a beard with your own hands.
Do-it-yourself gnome pattern from fabric
New Year's parties in kindergarten are usually held in the form of a carnival, that is, children put on any costumes of fairy-tale characters. Parents are faced with the difficult task of choosing an original costume for their child, so that it does not happen that several more people will come in the same costumes. Only an independent solution of the problem will help. The costume needs to be made at home. But what if the parents do not have such professional skills. The answer is simple. You need to try to sew a gnome costume according to a pattern. All elements of the outfit are quite easy to make. The article provides a detailed description of the tailoring of such carnival outfits for boys.
The easiest option
If a mother has never sewed, but wants to make an original costume for her baby inexpensively, then this is not a problem. You can always pick up a gnome's clothes: dark trousers or shorts, a plaid shirt or T-shirt of any color, put on a belt and sew a cap. In order for it to turn out beautiful and bright, you will need to buy one sheet of felt in a sewing supplies store. The choice of color is up to you. Gnome hats can be of different colors.
Having measured the circumference of the head, transfer the dimensions to a sheet of paper and add 1 cm to the seam. You can divide the head circumference in half and sew a cap from two pieces of felt. We take any height of the triangle for the gnome pattern, as desired. Felt is a soft material that is easy to cut and sew. The cut edge can not be processed in any way, the threads will not crumble along the edge. If you put a cap on your child for the New Year's holiday, then you can sheathe the bottom edge with fur, cotton wool or silver rain. It is also permissible to sew a pompom or cotton ball on the sharp edge of the cap.
Gnome beard
A mandatory element of any gnome pattern is a beard. It can be made from cotton wool on an elastic band, woven from threads of white yarn, or sewn according to the pattern in the photo from the same felt.
To properly cut such a beard, you need to make the necessary measurements. Take a soft meter and measure the distance from the beginning of one ear through the chin to the beginning of the second ear. You can reduce 1 cm on each side so that the product does not cover your ears. Before stitching, you can always attach the cut to the child’s head, measure it and make it comfortable for him. It is permissible to make a beard in one layer, or you can make a two-layer one. A simple elastic band is sewn along the edges.
thread beard
You can make a beard of white thick yarn for a gnome costume sewn according to a pattern with your own hands. The thread must be strong so that the product does not break at the most crucial moment. Also, the thread should not prick so that the child does not feel uncomfortable at the holiday. This beard is easy to make. You can place the “hairs” on a string or rubber band.
The threads are cut to the same length so that when folded in half, it matches the length of the character's future beard. Then, a thread of yarn bent in half is threaded through a loop in the middle onto a rope, tightening it tightly so that the knots do not untie during the holiday. The beard is made of any size, depending on where it will be. If it is tied around the neck, then it can be made long and lush. If it will be mounted on the head of a child, then it should correspond to the size of the face or be from ear to ear.
Fabric suit
You can make such a simple gnome costume according to a pattern yourself. To sew such a vest, you need to measure the distance from shoulder to shoulder. The fabric on the wrong side is folded in half and a simple rectangle is marked with chalk. The length of the vest is taken at will. From above, the center of the rectangle is outlined and a neck is drawn with chalk on the eye, which is then cut out with scissors. It remains to sew the sides to the level of the middle of the body. The vest is worn over the head. You can simply tie it with a belt, or you can make an application on the fabric, as in the photo below.
It is best to sew such a costume from felt. The material does not crumble, so it will not be necessary to sheathe the edges.
paper cap
This version of the New Year's cap is easy to make on a sheet of drawing paper according to the pattern. The gnome will turn out beautiful too. The edges can be glued or stapled. If the cardboard is thick, then you can even sew the edges. The lower part of the cap will look great with glued cotton wool. You can paste over the entire product with cloth or make an application, for example, gold stars.
To complement the suit, you can wear a vest and dark trousers with a belt. And on your feet put on gnome slippers with twisted socks. Consider how you can do this according to the pattern for the gnome.
magic slippers
Before you start drawing the pattern, you need to circle the child's foot in a circle on cardboard. You can use the insole from the baby's shoes, if it is dense and not deformed. Draw a foot on paper. Before make pointed. The sides can be made whole by folding the material in half. The fold line runs through the heel.
All details of the slipper are sewn along the upper side with a decorative seam over the edge. You can take floss threads to match the material or, conversely, a contrasting color. It is desirable to sew a felt insole to the foot from the inside so that the child does not feel cold in the legs. There is one more option. Sew slippers a little larger and put them on top of your feet, shod in Czech shoes. When the foot and the side of the slippers are sewn, you need to sew on the top, the sharp edge of which looks towards the toe of the slippers.
DIY gnome costume: patterns
If mom knows how to sew well, then you can sew a gnome costume on your own using this pattern. Such an outfit consists of several elements: shorts or pants, a vest, a cap and mittens on the hands.
After cutting the gnome pattern with your own hands, you need to decompose the pants into separate parts, then manually with a thread and a needle, all the parts are swept away and attached to the sewing machine. After the overcasting thread is removed, you need to carefully process the edges of the seams. From the bottom of each leg, two centimeters of matter are left for a hem for an elastic band. After sewing the legs together, the material for sewing in the elastic is also left on top. When everything is done, insert an elastic band with a pin.
After sewing together the two parts of the front and back, the vest is decorated with a strip of fur along the edges. You can also decorate the cap. Mittens are sewn at will. Do not forget that the New Year's party lasts a long time, and the children always dance a round dance, during which they hold each other's hands. Think in advance whether it will be convenient for your child to bathe in mittens for the whole holiday or not.
Outfit for baby
It is easy to make a gnome costume according to a pattern for a boy. You can wear such a simple outfit for a holiday and a baby up to 1-1.5 years old. Not a single detail of the costume should prevent the child from moving, pressing or rubbing. Therefore, the fabric used is soft and natural. The beard is sewn like a bib. You can use it as a template for sewing a beard for a pattern of a New Year's gnome. The contours are drawn at will, you can take a drawing such as in this photo.
A belt with a large badge is sewn from soft felt, having previously measured the circumference of the baby's waist. On the legs are soft booties.
Many people do not want to bother with tailoring holiday dresses and rent costumes in the atelier or, in general, on the Internet. Often such costumes are not processed properly. There were cases when a child after such an outfit fell ill with pediculosis. It is best to spend a couple of evenings and sew your own, new and original costume, especially since, according to the patterns in the article, it is not difficult to do this at all, the main thing is to want to. Try it and you will understand how simple it is, and in terms of cash costs it will cost five times cheaper. But you will know for sure that the costume is clean and the child will not get sick after the holiday, and will be the most beautiful. Then the costume can be worn again or given to relatives for the next holiday.
How to make a beard for a gnome with your own hands?
I made a beard for Santa Claus from felting wool (sold in needlework stores). I rolled pieces of wool to each other, so that it seemed that they were separate strands. I think you can just sew on to some kind of base. Fastening to the head on a linen elastic band. You can also offer to sew a beard from fleece-type fabric, from cotton wool or simply cut it out of paper, knit it from yarn.
And you can also sew from artificial wool. Make a pattern out of paper and cut out a beard from artificial wool according to the pattern. Sew elastic bands or ropes to the temples, and the beard for the gnome is ready.
A beard for a gnome can be made from foam or from cotton wool planted on cardboard with glue. It can be from some kind of white fur or fabric. I think that if a gnome, anyway, the beard should be white or yellowish.
How to sew a gnome costume with your own hands
Children love to dress up as different characters from movies and cartoons. One such character is the gnome. But what if you buy ready suit problematic? In this case, you can sew a gnome costume with your own hands! For sewing any costume they can be used as a sample, so as not to waste extra time on measurements.DIY gnome costume
For boys, the gnome suit is more suitable, however, with the proper approach on girls, he too looks good.The complete suit consists of the following main parts:
- shirt or jacket / T-shirt;
- vest;
- panties or shorts with golfs / skirt with tights;
- shoes;
- cap;
- belt and other accessories - optional.
Surely in the wardrobe there are already everyday things for the child . For sewing any costume they can be used as a sample, so as not to waste extra time on measurements. The pattern of the gnome will be very useful if there are things that are both a pity to throw away and wearing them are irrelevant.
Gallery: do-it-yourself gnome costume (25 photos)
How to sew a shirt and vest
Any shirt from the existing ones is taken as a basis and applied to the fabric. Next, you need to lightly circle with chalk, while adding 5-7 cm, except for the bottom (it should be lengthened by 14-15 cm). To put a thing on a child without effort and hassle, the neck must be large. In the same way jacket is made.It is better to use the largest and brightest buttons. A pattern for a girl is made according to the same principle. But you can use any bright T-shirt for these purposes, as well "fantastic" will add accessories.
Sewing a vest is not as easy as it might seem at first glance. If you make the size too big, then the vest will hang down or fall off. However, such a miss is easily compensated by bandages and laces. The pattern is done as for a shirt, but the fabric should be denser. Details are sewn together from the inside. On the overlock, cut edges are processed and stitched, pre-tucking in 1-2 layers.
Gnome Pants
For boys, two options are more suitable: one pants or shorts with knee-highs. The second option is preferable, because it will look more spectacular. It is also necessary to attach to the fabric, circle, add about 5 cm, cut out 2 such details, sew and insert an elastic band.Girls are better do not use a skirt with colored tights or stockings. The option of using shorts with a skirt is also suitable.
Dwarven shoes
Shoes for a gnome costume are made from special thick fabric. Felt is suitable for her role. When choosing a theme, by and large, it doesn’t matter what color the base of the shoe will be, whether it’s a New Year’s slipper or a regular one. In both cases, red bells are added so that the shoes look as good on New Year's Eve as on another holiday.
Here are two main options with a photo and a pattern pattern:
Making a cap
The headdress of a gnome is made very easily: first, the head is measured with a thread, folded in half and applied to the fabric. Next, you need to add a few centimeters to turned out the base of the cap. Then two such triangles are cut out, sewn together and the cap is equipped with an elastic band. The bell at the tip of the cap can be made red so that it also suits the New Year holidays.Gnome Accessories
Various decorations will give an unusual and fabulous look to the child. These include:
- beard
- belt;
- handbag on the belt or on the shoulder;
- bandages, flowers, ribbons and more.
Creating a costume is a creative business, so do not be afraid experiment and invent something of your own.
A beard can be made from thick white threads and equip it with a rubber band. The beard is also useful for the New Year's costume of Santa Claus. A small handbag is often present in the wardrobe of girls. It can be decorated with magical attributes, decorated with dragonflies, butterflies or flowers. The handbag will become more magical if you put homemade potion jars or gems in it. Girls can use bracelets on their hands and bows.
The belt can be made in several versions, differing in the type of fastening: buttoned, simply tied, etc. There are other uses for the belt - tie a child with it in the form of the letter “x”, having previously equipped the belt pockets for small items.
Dwarf toy made of felt
For the atmosphere of the party, you can make a toy in the form of a small gnome and put it in a prominent place. For its manufacture, two main materials are needed - paper and felt, the rest can be used from improvised means.
First you need to make a paper cone, which will form the basis of the toy. Then sheathe it, this will be the main costume. The top will become a cap, so you can sew another small cone on it with or without protrusions around the edges. Then we make a beard, face, patterns as desired.
We sew handles separately. The hand is sewn from 2 parts in the form of an oval. After that, you can proceed to elements such as buttons on the suit, eyes, nose, etc. For this, you can use the buttons themselves, beads, or any suitable materials.
When creating shoes, it should be remembered that excessive freedom of the legs will only interfere with the child's walking. This applies, first of all, to those shoes with a long nose. Caps and some gnome attributes do not have to be made of fabric. As a material, plastic, paper or cardboard and so on are more practical. They are suitable for making small items.
With proper skill, you can make your own unique 2 in 1 costume, where by turning the clothes inside out, the child will get a different color of the thing. Other accessories can also be replaced with a different color - bells, headbands, etc. This approach will allow the costume to be used in summer and winter holidays. When choosing a fabric color, you can especially do not bother if the choice is small. After all, gnomes are fabulous creatures, which means that they can dress as they want.
The gnome costume can be used several times, while spending a little time and saving money. You can wear a costume for the New Year, birthday and other fun holidays. With due imagination, the costume can also be sewn for adults in order to diversify family life. In this case, an additional Snow White costume will come in handy.
Attention, only TODAY!
Any event in a kindergarten or school is accompanied by a costumed concert of children for their parents. The job of creating the image falls on the shoulders of the parents. Do not worry, in fact, all the costumes can be made by yourself with your own hands.
Today's master class is dedicated to the story of how to sew a gnome costume for a boy with your own hands.
Do-it-yourself gnome costume for a boy: blouse or vest
In order to look like a gnome, you need to be dressed like a gnome. The main attributes when creating a do-it-yourself gnome costume for a boy are: a cap, a jacket or vest, pants or shorts and shoes. You can also complement the image with leggings if you wear shorts, a beard and a wide belt on a jacket.
Decide on the color scheme of the entire costume. If the jacket matches the color of the pants, then the cap must be of a different color, and if the jacket does not match the color of the pants, then the cap must be combined with the pants. It's nice to look not only at the costume, but also to note the taste preferences of the one who chose and completed the fabrics of the entire image as a whole.
Gnome's blouse is usually wraparound and always with buttons and a large belt
In order to sew a jacket, you will need a fabric of one or two colors, a thread, a centimeter tape, large buttons.
Stage 1
Take measurements for the child and transfer them to the fabric according to these patterns.

If it’s difficult for you, and you are confused with measurements, then you can make it easier: put the fabric on the table from which you will sew a blouse and attach to it any purchased jacket of your child, which is just the right size for him. Circle the outline from it, and the patterns are ready.
You can mentally divide the jacket into sleeves, front and back parts of the body. Do not forget that with this method, for each part you need to cut out a fabric already folded in half, or, if the parts are from one layer of fabric, in its mirror image.
Stage 2
If you want to see on the child not a sweater, but a vest, then do not sew on the sleeves. The scheme for the body remains the same. Details are sewn together from the inside. Cut edges are processed on an overlock, then tucked in one or two layers and stitched.
Stage 3
For decoration, you can sew a visor on the shoulder of a vest of a different color. To do this, take the desired fabric, cut out a rectangle measuring 10 × 15 cm from it and fold it in half. Sew it to the inside of the fabric with the cut edge so that the folded edge remains hanging over the child's shoulder. Hide all the edges in the seam, so that the cuts would not be visible.
Stage 4
Sew on large buttons on the chest. Tie a belt around your stomach.
Do-it-yourself gnome costume for a boy: shorts or pants
Now sew pants or shorts. If you want to sew shorts, then the suit can be supplemented with striped golfs - leggings.
Stage 1
Measure your child's waistband and leg height from hip to bottom and crotch to bottom. Divide the circumference of the belt in half, as the fabric will be cut and sewn folded.
Stage 2
Fold the fabric in four layers and transfer the dimensions to the drawing. Make a pattern according to this pattern.

The diagram shows that the pattern is applied to the fabric, folded in 4 layers. Next, you will get two parts. Sew them together along the side top seams. Next, twist the product so that the seams pass in the middle, and the two parts lie on the sides folded in half.
Stage 3
Sew long sections in pieces folded in half between each other. This will be the seam between the legs.
Stage 4
Turn and sew the remaining seams at the waist and legs. You can sew or insert an elastic band into the tucked fabric, which will hold the pants on the belt and tighten at the ankle. If the trouser leg is much wider than the leg, then the elastic band, pulling off the lower part, will emphasize the splendor of the suit.
If you decide to sew shorts, then they are made in the same way, only shorter in leg length.
Do-it-yourself gnome costume for a boy: cap

This cap is very easy to make. You will need only two parts: a cone with a rounded bottom and a rectangle. The width of the rectangle is 20-22 cm, the length is equal to the length of the girth of the head.
Stage 1
Measure the circumference of your head with a measuring tape. Transfer the resulting dimensions to the fabric. The length or height of the cap is up to you. If you make it very long, then the tip can be tied into a knot, as shown in the picture.
Stage 2
Cut and sew the resulting parts together. The crown for the cap can be of different shapes and colors. The contrast crown looks beautiful and emphasizes the headdress.
One of the decoration options can be cloves made on it. In this case, sew it from one even edge, and turn the other inside out.

It can also be made two-layer, which will give it additional rigidity.
Do-it-yourself gnome costume for a boy: shoes
Shoes are also an important attribute in a suit. The gnome will turn out not at all fabulous or not full-fledged without beautiful shoes with curved noses and bells at the end. You can make them in several ways according to the pattern.
For boots, you will need colored felt or thick fabric and a thick, strong thread. You can use several colors of fabric and make the sole of one color and the edges of another. You can also make shoes one color inside and another outside. When you put them on your feet and turn the edges inside out, it will look interesting.
Option 1

For this type of boots, you will need to make the following pattern and cut out the details.

Stage 1
Be sure to measure the length of the child's foot and the height of the instep from heel to ankle and transfer the measurements to the fabric. This is important, because if the baby is not comfortable in these shoes, then he will not feel the joy of the holiday.
Stage 2
Draw on the fabric pattern according to the pattern shown above. Cut and sew the resulting parts together. Part A in the picture is the upper part of the boot, and part C is the bottom part or sole.
If you want, you can stitch the details with a sewing machine, or you can sew them with your hands. As a rule, the work is done manually with a buttonhole, because it does not require much time and effort.

The buttonhole stitch looks like this and is sewn by hand using a regular needle and thread. They process the cut edges of fabric or paper.
Stage 3
Decorate the shoes with bells or bumbons that are sewn onto the sharp ends of the noses. You can also sew a satin ribbon bow onto the tongue of the boot.
Option 2

This image shows the pattern and the final result. You can, as with the first option, use several colors and types of fabrics.
Stage 1
Measure your child's foot size and leg height.
Stage 2
Draw the details on the fabric according to measurements and cut out. Sew them together by hand or with a sewing machine. Decorate with bombons, bells and bows as desired.
The need for a child to participate in a New Year's party, dressed in a carnival costume, sets the task for parents to choose the right image. One of the most popular is the gnome costume. It is known to us from many fairy tales, in each of which these creatures had their own characteristics.
What should a gnome's outfit consist of
Parents with extensive experience in sewing can independently make each element of such a costume. But what about those whose skills in this area are limited or when there is not enough free time? How to make a gnome costume and not spend a lot of time and effort on it?
As a basis for the top of the outfit, you can use a one-color shirt. At the same time, its bright shade is important. For the bottom fit almost any existing pants. In this case, creating the basis of the image will not require labor.
The most important elements of the gnome's attire are additional items: a vest, a belt with a massive buckle, a stick with a knot and a cap with a characteristic bend.
In some cases, they use mittens, false nose and makeup, as well as cardboard buckles on shoes.

How to sew a vest?
This part of the suit should be different in color from the shirt. Unlike the latter, the vest can be sewn from fabric of different shades, for example, checkered.
To make this item you will need:
the cloth ;
sewing machine;
threads to match the fabric;
paper;
marker.
The first step is to make patterns. They can be made by tracing any son's T-shirt on paper. It must be remembered that the vest is more open in front and should be shorter than the shirt. Therefore, you need to make appropriate adjustments to the drawing. With them, the fabric is cut off.
With the help of a machine, it is necessary to carefully sew the parts of the vest, as well as make neat inversions of the fabric along its edges. After that, the vest will be ready.

Cap tailoring
The cap should also be bright. Its color match to the shirt will be ideal. When making a headdress, it is important that its lower part fits the size of the boy's head. Therefore, you need to measure this parameter with a centimeter.
The pattern should be made on the basis of the drawing, the lower part of which is 2-3 cm larger than the above value. This stock is taken for the future seam. The upper part of the drawing represents a single vertex, to which there are two lines converging from the base.
With the help of a machine, a neat seam is made, after which it remains only to bend the cap, stuffing its top with cotton or padding polyester.

Creating other elements
The gnome's belt is made using a fabric belt and a fake large buckle glued to it, which can be cut out of cardboard. The same elements can decorate shoes.
An important part of the attire is a stick with a knot. It is made in an elementary way: with the help of a short wooden handle. The knot itself should be stuffed with light soft material.
If the pants to be used are short, it is advisable to wear striped socks.
The independent creation of a gnome carnival costume is not an impossible task. With the proper degree of perseverance, the result can greatly please the boy and the whole family.
Julia Weber
We sew a gnome costume for a boy with our own hands

Children's New Year's parties are not complete without costumes of fairy-tale characters. Not everyone can afford to buy a suit. Moreover, the child is growing rapidly and this is likely to be an outfit for only one time.
If you have a sewing machine and at least some basic sewing skills, you can sew a New Year's costume with your own hands. It is not even necessary to buy new fabric and other finishing materials for this. We offer the idea of \u200b\u200bsuits for a gnome for a boy from what may be gathering dust in cupboards idle. They are not sewn according to all the rules of "cutting and sewing", so this is by no means a training material, but only an example of how every inexperienced seamstress can make a costume for her child for the New Year.
The first version of a gnome costume for a boy
Sweater
To make a pattern, you can take the child's thing as a basis. For example, a turtleneck. We add a few centimeters on the sides, depending on how wide we want to make the jacket. Set aside the desired length. We make a round neckline. Not very deep, but enough for a head to crawl through. We draw armholes as in the photo.

It also shows the pattern of the collar and parts that are sewn to the armholes.
Sew shoulder and side seams. Here, for stitched details to the armholes, faux fur was used on the front side and knitwear on the wrong side. We fold the fur and knitwear face to face and sew along one long and two sides. We turn it right side out and stitch along the edge, laying the part with the jersey up, watching the pile of the fur and straightening it if necessary. We sweep the finished parts with armholes and sew. The edges of the strip should match at the side seam.


The collar also consists of fur on the front and jersey on the wrong side. We sew the details, leaving the side unstitched, with which the collar will be sewn to the neck. We turn it right side out, stitch along the edge, laying the part with the fur down. We sew a collar. We cut out a strip from the same knitwear and make it a border around the bottom.

Since knitwear is used to finish the bottom edge, it can be cut in a straight line. If you take a non-stretch fabric, you will need to cut already on the bias.
We make black fur pompoms: two for the jacket and one for the cap. To do this, we draw circles. It is convenient to use a jar of cream or a small glass, and circle with a sharpened bar of soap. Cut circles with a sharp blade.

Pinch off equal pieces of cotton wool. They should not be too large, but such that the pompom is softly stuffed and the cotton wool allows you to sew the edges without strong tension. With small stitches, we manually pass along the edge of the circle, insert cotton wool and tighten the thread. Make a few more stitches to secure the edges together. We leave needles and threads on pompoms.


We sew them to the jacket. It is better to do this together with small buttons on the wrong side. And it looks neater, and the fabric will not break through.


Instead of fur pompoms, you can sew on large wooden buttons. And replace the fur on the collar and armholes with wool or felt, and at the end of the cap make a brush from the same material cut into thin strips.
Trousers
Using any pants of the child, we make such a pattern.

Cut out 2 pieces, put them together with the right sides inward. Sew the middle seams and then the step seam. We cut out a strip for the belt from knitwear (here black velvet-stretch). Its length should be less than the circumference of the top of the trousers. We will insert an elastic band, therefore, having measured its width, we multiply the resulting number by 2 and add 2 cm to the seam - we get the width of the strip. We sew the edges of this part together, fold it in half along the length and attach it to the top of the pants with its slight tension, laying a line 1 cm from the edge. Leave an open gap. We insert the elastic, sew its ends together, hide it inside and stitch the seam to the end. The elastic inside should fit evenly, so it is important to correctly calculate the width of the strip. As a result, wide trousers gently gather at the waist. We also make cuffs from below, but we cut the rectangles wider and do not insert an elastic band.

Cap
We measure the girth of the head and determine the length of the cap.
Here the circumference is 50 cm and the length of the cap is 45 cm.

Fold the fabric in half right side inward. We set aside the length of the cap along the fold, put marks (in the photo "a" and "b"). From point "a" we draw a perpendicular line about 3 cm long (point "c" in the photo). From point “b” we draw a perpendicular line and set aside half the circumference of the head, plus 2 cm for a loose fit, plus 1 cm for a seam allowance, plus 3 cm. From point “c” we draw a line equal to the length of the cap (point “d”) . We connect the point "b" with the point "g" with a smooth arcuate line. Cut out. It is better to immediately check on the child’s head whether the part is too wide or narrow. If everything is correct, put it on the fabric with the right sides together, circle and cut it out. Blue jersey is used for the inside of the cap. It is softer, thinner and more pleasant.
The gnome's cap will hold its shape slightly. To do this, we use just such a cotton wool "zig-zag". It is unwound from the roll with a thin strip, which is very convenient.


We lay out the strips of cotton wool slightly overlaid. We put the outer part of the cap and tack. Sew close to the edge around the perimeter. We cut off the cotton at the edges.


We apply the inner part face up to the side with cotton wool, sweep it. We sew close to the edge along the entire perimeter and immediately begin to sew in straight lines (perpendicular to the bottom of the cap) at an equal distance from each other. We do not interrupt the line: we finish it to the edge, turn it, sew the required distance along the side and again a straight line down and so on. You need to stitch on the front part. The fabric will sag a little, it's okay, you just need to make sure that it is even.


Fold the cap right side inward and sew the side seam and top 0.5 mm from the edge. We twist, straighten the tip. Take a pom-pom and sew it to the top so that it holds tight.

From knitwear, cut a strip 3 cm longer than the circumference of the bottom of the cap. We measure the width of the elastic band, multiply by two and add 2 cm per seam - this is the width of the strip.

Sew together the edges of this facing from the inside. Fold in half and attach to the cap, laying the strip on the front side. When sewing, you need to stretch the cap a little, because the strip is longer. Due to this, the cap will fit the head, holding tightly on it, and on the forehead - freely, without pressing the ears.

The figure shows the simplest version.

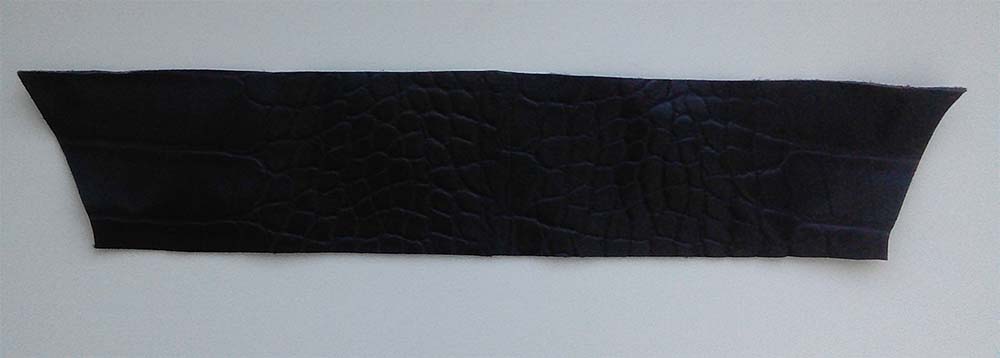
We cut out one detail from the wool (we determine the length by the girth of the abdomen, adding a few centimeters to the free end), make a hole according to the mark, insert the buckle tongue, wrap the end on the wrong side and fasten it. We sew the edges of the loop, turn it inside out and put it on the strap. The end can be made straight. And it is better to take a plastic buckle, as it is lighter and the strap will not sag.
shoes
For them, the pattern is like this.

- foot width
- foot length
- the circumference of the foot at the highest point, divided by 2
- ankle circumference divided by 2
The girth of the foot is measured as follows: put the foot on the floor and measure with a measuring tape (an arc along the leg) from the floor from one side to the floor from the other.
We add a few centimeters to the measurements obtained, because the gnome's shoes are voluminous. The tongue, the nose of the shoe and the tip of the sole are modeled arbitrarily. For the base of the sole, you can put it on a sheet of a child’s shoes and circle it. Here a mistake was made and the width of the tongue was not taken into account. Therefore, the shoes turned out to be huge.
When constructing the side part, divide the width of the tongue by 2 and subtract the result from lines 3 and 4.
I used artificial leather as the material, and a yoga mat for the seal. You can take wool or felt. And to give volume - cotton wool. Or do without padding at all.


We cut out the details. If the material allows, we make the sidewalls one-piece, if not, the upper part is cut out separately.
Sew the sides together. For strengthening, non-woven fabric is used here (not ironing), and the edges are ground in a zigzag.


In the same way, we sew the halves of the lapels, if the parts are not one-piece.
We sew the upper parts to the main ones.

We impose the second parts of the top, sew and process with a zigzag on the sides and top sides.


Then the face can be stitched again with a thread of a contrasting color.

We put the assembled front part on the fabric (here velvet-stretch), draw around the contour, excluding the top.

We make an allowance as in the photo. These need 2 parts.

Sew on the lining as shown in the photo.

The sealing material was glued with Moment Crystal transparent glue. It must be applied to the entire surface in a very thin layer. First on one side and attach to the imitation leather part, then on the other side, apply the velvet part. Press, for example, a stack of books. However, this step can be skipped. Moreover, then in some places the skin leaves, so this method is not very good. And the glue can even come through the fabric and get a hard spot.


For a bow we sew a strip.

For the sole and tongues, we also cut out paired parts and assemble everything together.

In the middle of the main part we sew a strip for a bow.

We sew the sole with the main part manually with an overcast seam. We start with the spout, stepping back a little from the edge. We finish the seam also a little before reaching the end.


We sew the tongue. We mark the middle point on it, combine it with the nose and start sewing.


Stretching the strip for the bow a little, mark the line where to sew. We remove from the shoe and sew along the mark.


We form a bow, determined by the length of its tips.

We scribble.


Now you need to sew together the middle - seam to seam.


The bow turned out to be too big and falling.
Tip: Use a measuring tape to determine the exact length of the strip to be sewn. Tie it on the shoe with a bow and see how many centimeters it took.


Let's make it like this: fold the parts as in the photo and sew together.


Of course, with a bow it turned out too tricky. You can do it easier. For example, make it separately by sewing a rectangle, lightly stuffing it with cotton and gathering it in the middle. Then sew to the shoe. If you use felt or wool for a shoe, then you can pull it up along your leg with an elastic band, and a wide ribbon is quite suitable for a bow or a buckle instead.
We tightly pull the bow in the middle with a piece of elastic, sew its ends together.


Sew the bow to the top of the tongue, stepping back a little from the edge.


We make 2 pompoms and sew one on each spout so that they firmly "sit" in place.


These are the shoes of the gnome.


And a general look.

The second version of the gnome costume for the boy
Since the costumes are for brothers, it was decided that they would not differ much. The main fabric is the same (this is, by the way, an old curtain). Only a different color is used for decoration. And other shoes.
Blouse
We take something as a basis. Here is a jumpsuit, and since it is tight-fitting and already small, we add quite a lot (a fold on top of the fabric). We sew on the sides.

Cut out a strip from the jersey around the circumference of the jacket, sew the ends and iron the edges to the middle.

We fasten to the edge of the jacket, then we sew close to the edge. It is important here that the seam runs smoothly from the face and inside out and does not go beyond the edge. You can put a decorative stitch on top.


The neck can be made deep enough for the head to fit freely. Otherwise, you need to make a fastener. To do this, on the back part (or front) in the middle we make a perpendicular cut.

The facing would be more accurate here, but if there is not enough fabric, we will also process the neckline with a knitwear strip. We adjust it from the inside to the end of the cut.


Sew the edges and finish the line.


Now we make a buttonhole. We fold the thread in several layers, thread it into the needle, tie a knot, pierce the turning on the corner from the inside, bringing it out.

We crochet a chain of air loops of the desired length.


Now we insert the needle inside. We make a couple of stitches near the base of the loop, fasten and cut the thread. We turn the edging, we outline, we sew.


It also features decorative stitching.
Iron, pressing the rounding on the cut below. Sew on a button. The clasp is in the form of a drop.


We cut out 2 parts from the same knitwear (their length is calculated according to the circumference of the place on the sleeve where we will sew) for the drawstring on the sleeves. We iron the edges to the middle.

We tuck the ends and it is more convenient to sew them by hand.

For a tie, we take a thin ribbon, cut off the desired length and string a bead on one end, securing it with a knot from below.

Sew on the drawstring, stepping back from the edge of the sleeve. We put on a ribbon. We string the second bead. We tie a bow.


Panties
Cut out along the bottom of the child's overalls. We add as much as necessary.


We sew the middle (back and front) seams, then the step.

We iron out the edges.


Since the pants are wide, and they need to be planted on the stomach, we make a fold or tucks on the sides. You can make them with an elastic band. But then, when cutting, do not forget to add to the collar.


A fairly wide strip of knitwear is used here, which is shorter in length. There was no rubber band on the inside. The strip is cut out so long that it fits snugly around the stomach, but does not press.

We hem the edges of the trousers. Sew on a drawstring at some distance from the bottom and insert a ribbon with beads at the ends. We tie bows.

Vest
We cut like this.


All parts are sewn with a seam overlay, so we make allowances of 0.5 cm, and on the sides and shoulders - 1 cm. There is no need to make allowances along the armhole, neck, bottom and opposite edges of the front. But if you sew from wool or felt. Bulk material will need to be processed.
It is convenient to mark the seam line and apply the part along it. We sew on the front side.


First we collect the back and front, then we sew along the sides and shoulders.


You can beautifully stitch with a contrasting thread, for example, in the color of the main fabric of the suit.

We outline the places for the buttons.

We fold the thread in several layers, thread it into the needle, fold it in half, tie a knot. We pierce the fabric, hide the knot with a few stitches.

Crochet a chain of air loops.

Gently sheathe the base of the loop, hide the thread, cut it off.

We tighten the buttons in knitwear. Cut out circles larger than the buttons. If the fabric is thin, you can make a double layer so that the button itself does not shine through.

We put the button on the wrong side of the circle, pull it together and randomly sew the ends. To conveniently pull the circle, sheathe it around the perimeter. We do not cut threads with a needle.

Sew on one button.

Then the second, closing the base of the loop.


We cut out 2 strips for the belt and a loop along the width of the buckle. We determine the length by the girth of the abdomen, adding the desired length of the free edge.

Lay the strips together face to face. In the middle at the end, we mark a place for the tongue, stepping back from the edge. We lay lines above and below this gap.

We thread the strip into the buckle, insert the tongue into the hole, fold the parts of the belt and, without turning the edges, sew along the perimeter. We sew the ends of the loops, turn it right side out and put it on the strap. We mark the place for the holes.

We cut out small holes (it is convenient to do this with a ripper) and sheathe them manually along the edge.


Cap
We cut out and lay with cotton wool.


The same fabric is used for the inside.
Sew and turn right side out.


We cut 2 strips along the width of the cap. Wool is used here, as for the vest.

Fold together face to face and sew along one edge. We cut the allowance at the ends.

We iron the seam. We put the resulting unfolded part on the knitwear. Cut out the inside of the jersey as in the photo.

Sew the ends of the knitted part and the remaining ends of the front part. We collect together. We put the knitted strip face up, on its edge we put a strip of wool face up. We sew close to the edge.

This is what the back looks like.

Now we turn out. On the woolen part we have a knitted one. So we put it under the foot of the sewing machine. We evenly tuck the edge of the knitwear along the edge of the wool and lay a line. We make sure that the knitwear under the foot does not move forward much.


We collect a strip with a cap. We impose it on the edge of the cap with the woolen part outward with a sufficient allowance. We fix at 4 points at an equal distance. We stitch around the perimeter.


Slippers
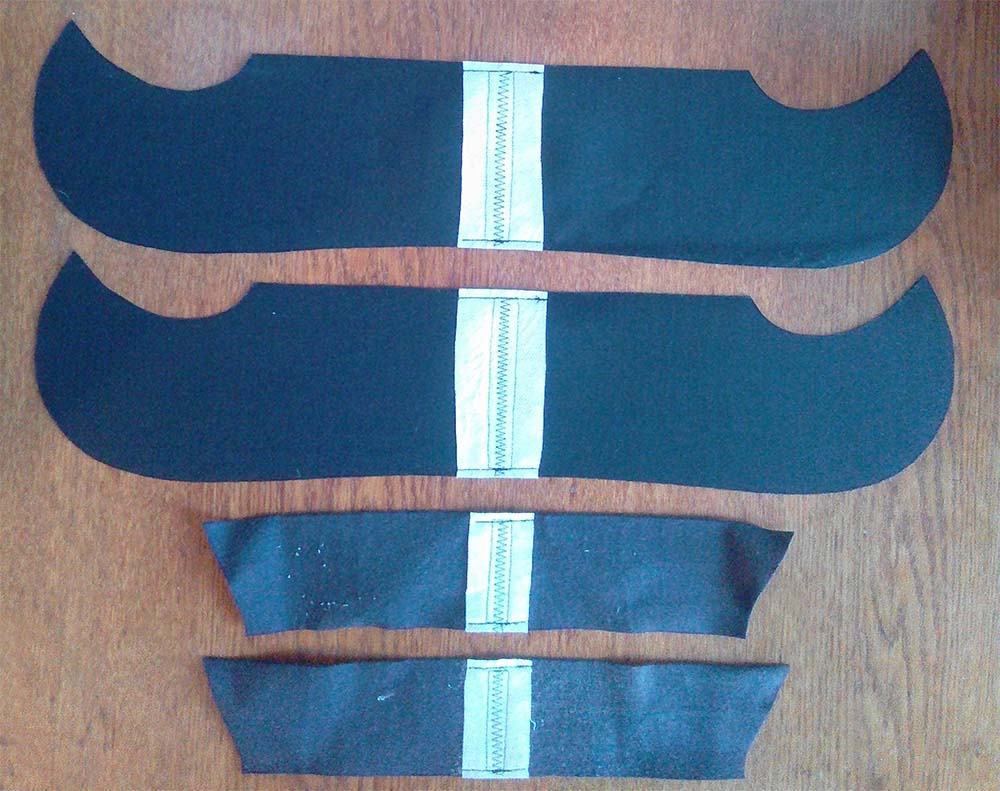
We make a pattern.

It is better to check the result on paper: sew a slipper out of it and, if necessary, correct mismatches in the length of the sidewalls with the sole.

We cut out the details. Here the shoes themselves are completely made of wool, and a synthetic winterizer is used for laying.


We collect such "sandwiches" and stitch them close to the edge. Smooth out the edges if necessary.


We grind together the sides of the shoes edge to edge.


Hand-sew the top with an overlock seam.

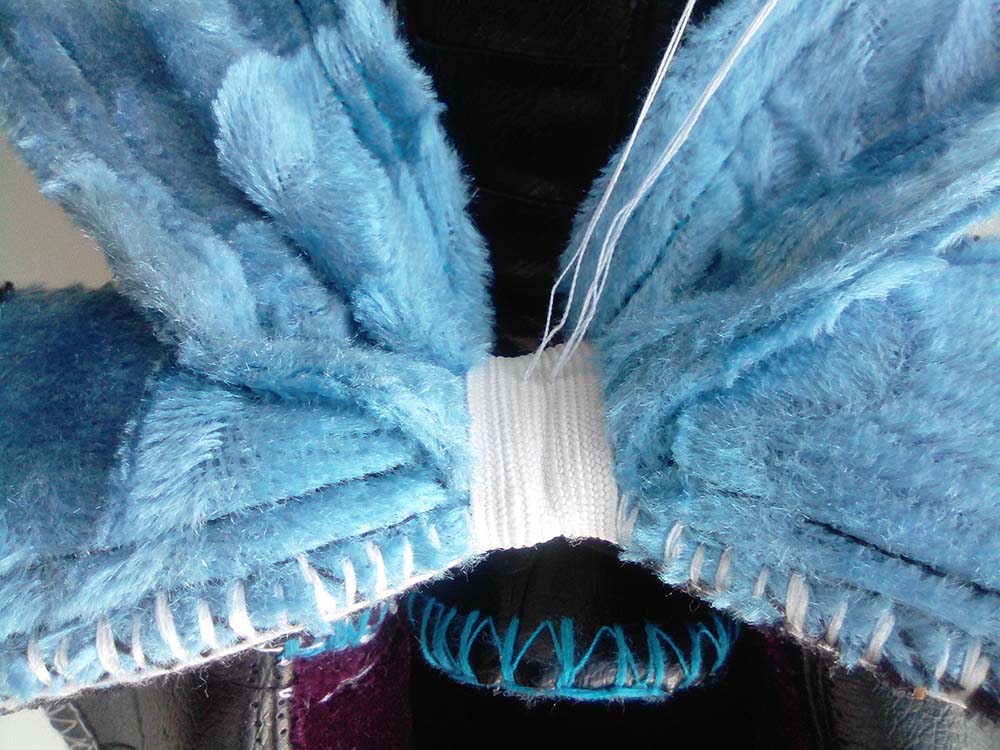
Cut out rectangles for the top. Sew the ends of each. We trim the upper edges with a line.

We impose on the upper edge of the shoe and sew by hand. First with small straight stitches, then overcasting.

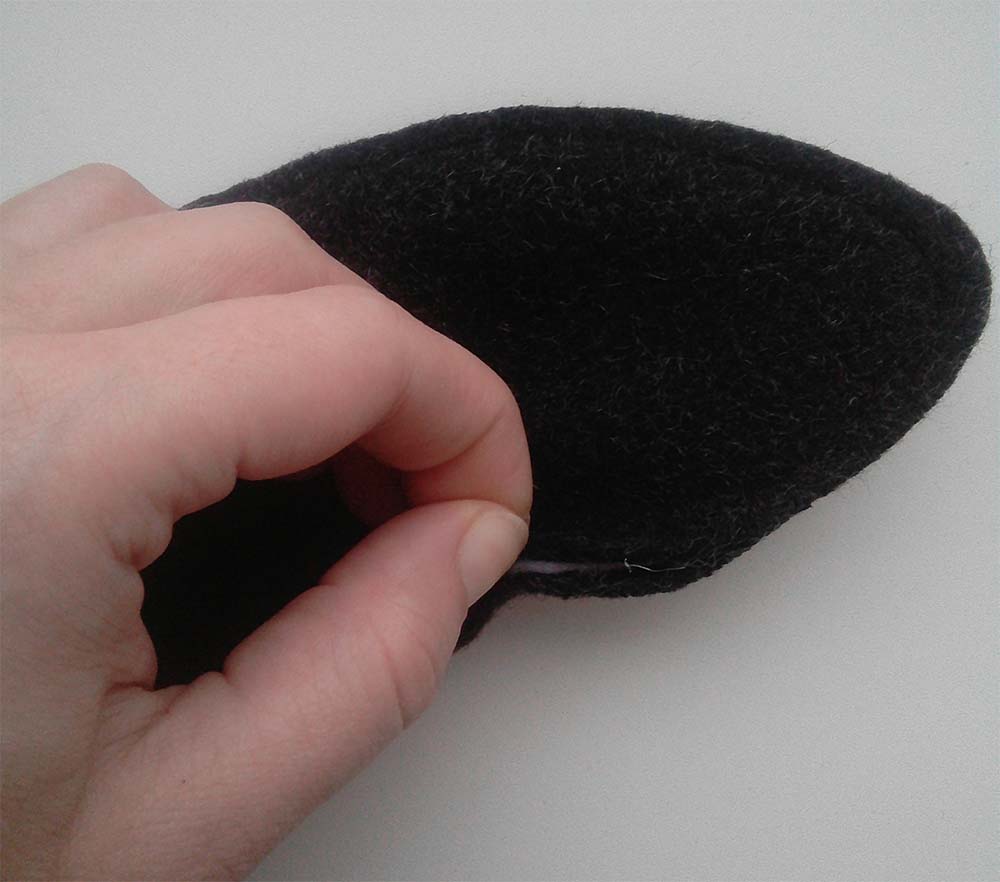
We sew the sole with an overcast seam, starting from the spout.

We make 2 pompoms from fur and sew on spouts.

Ready! Turned out soft and cute.


And general view.


You might say that it doesn't quite look like gnomes. Yes, white fur is more associated with Santa Claus or the Snow Maiden. But we gave all the recommendations. No beard? And who said that these cannot be the children of the gnomes who have not yet grown it?