What you need for home brew. How to brew homemade beer.
How to brew beer from malt and hops at home
This will be an unfiltered, unpasteurized, real malt and hop beer, not a beer drink from a store.
Once you have mastered home brewing and brew your best home brewed beer, tasted and appreciated it, you will never go back to the store.
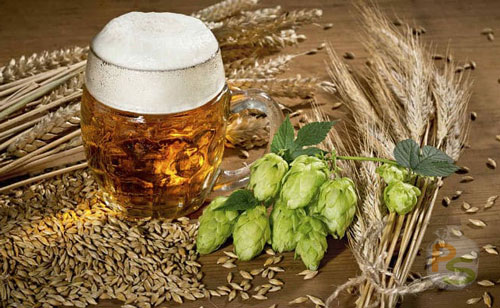
To prepare 25 liters of quality beer you will need:
1. Malt - 6 kg
2. Hops - 45 grams
3. Yeast - 11 grams
4. Water - 25 liters.
Grain beer making process
Before mashing, grind the malt in a grain crusher. We crush, not grind into flour. This is very important in such a process as separation (filtration) of wort from grains. After crushing, many whole grain shells remain, which, when drained, beer wort during filtration, a filter layer is created.
The wort, passing through this dense layer of the preserved grain rind, is perfectly filtered when it is drained from the mash tank.
For the first cooking, you should not go deep into all the subtleties and nuances. It is enough to follow the important basic principles of home grain brewing such as purity, temperature conditions, quality ingredients.
Before each brewing of beer, it is imperative to disinfect all equipment. Rinse everything thoroughly after brewing. Particular attention should be paid to hard-to-reach places, such as the drain valve.
Beer wort is a super-nutritious environment for various microorganisms, bacteria and other things we don't need. And it gets infected very easily.
A small piece of dried wort can negate all your efforts, completely and irrevocably ruin the final product.
Mashing
As a reminder, mashing is a process in which crushed malt is mixed with water. The process is extremely important, as it gives almost the last opportunity to modify the composition of the wort, and therefore the beer. the main objective mashing - transfer of insoluble components of malt (starchy raw materials) into a soluble extract as a result of enzymatic reactions. Diastase, formed in malt during sprouting of barley, converts malt starch into sugar and dextrin. Under the influence of some other enzymes, the protein components in the malt also dissolve and pass into the wort.
The simplest single-poke mash.
Insert the filter system into the tank and connect it to the tap. The filter system is needed in order to filter the wort from the grains during draining.
In the absence of this necessary device, some "advanced" users do not bother and pour the malt into rag bags, which are lowered into a container with water, and taken out after mashing.
Pour 20 liters of water into the tank. It is advisable to settle the water a day before brewing the beer. In order for all sorts of tasteless chlorine and potassium cyanide) to disappear. Heat water over a fire on a gas stove or whatever you have to about 73 degrees.
Pour the pre-ground malt into the container, constantly stirring the mash. The mash temperature will drop to about 70 degrees. Close the container with a lid and leave for 60 minutes.
If you have an enameled pan, then at this time it should be wrapped with some kind of insulation, in order to more or less maintain a constant temperature regime.
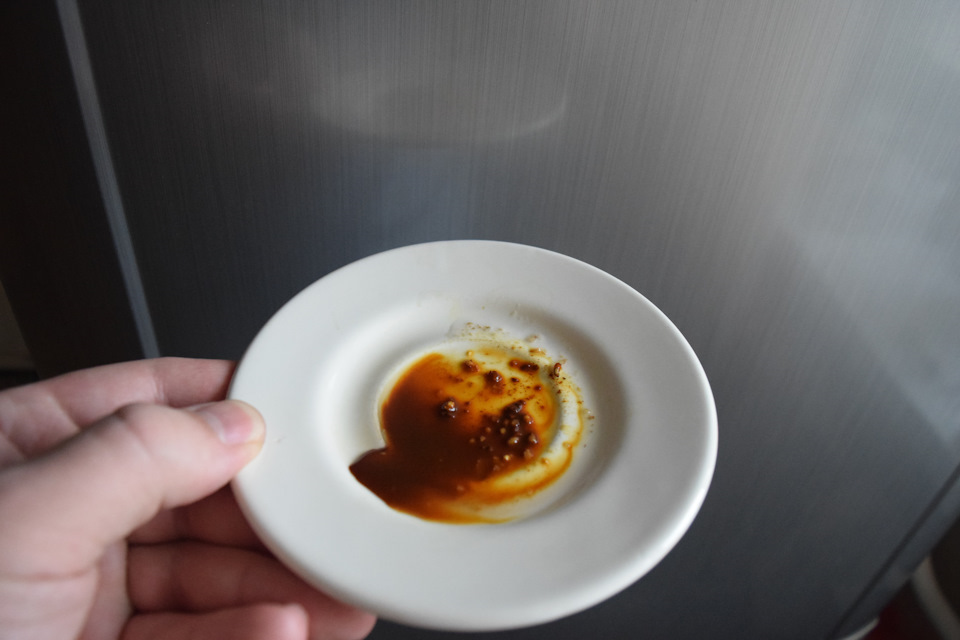
At the end of the mash, an iodine test should be performed to make sure that no starch remains in the mash.
Put a few drops of wort on a clean plate and mix with iodine.
If the solution turns dark blue or black, continue to pause 70 degrees for another 15 minutes. If the color has not changed, then saccharification is over.
After that, raise the temperature to 76-78 degrees to stop fermentation and start filtering the mash.
After mashing is complete, the mash contains a mixture of dissolved and undissolved components, water solution extractives are called wort, and undissolved ones are called grains.
To obtain beer, only wort is used, while the grains must be completely separated - this is the main task of filtration, which is divided into two stages: draining the wort and washing out soluble components from the grains.
Filtration and rinsing.
We start filtering. We already have a filter system in the mash tank, which we connected to the drain cock.
We are waiting for about 10 minutes until the grains settle down and open the tap.
The first 3-5 liters of wort you pour into a separate container and pour back into the mash. Thus, we wait until the pure, transparent wort comes out.
The time filtering process usually takes from 30 minutes to an hour.
In the process of draining the wort, gradually, without letting the grains become bare and without shaking it, you need to top up with pre-boiled water. In order to wash out the remaining extractives.
The rinse water temperature should be 76-78 degrees.
In order not to raise the spent grain from the bottom and not to worsen the filtration, I put a plate in the mash bowl and gently pour water on it. You can cut a circle out of foil, make small holes, and place the pellets on top.
An important point. It is not necessary to let the grain be exposed; it should always be hidden under water to avoid oxidation. Until you empty all the rinse water.
Flushing water needs approximately 7-10 liters. It needs to be prepared in advance.
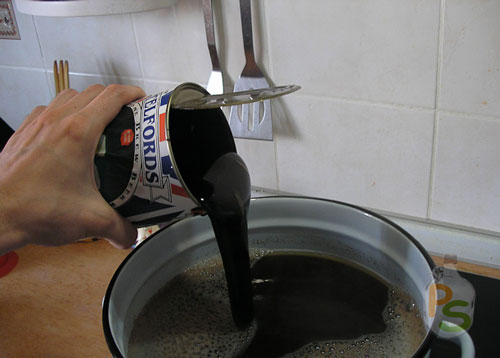
Further, after filtration, we wash and clean the mash, remove the filter system and pour the wort from the container back into the mash. And we start boiling. If you have a separate brew tank or kettle, filter the wort directly into it.
Boiling the wort
Boiling takes place within 90 minutes
As soon as the wort boils, pour out the first portion of hops.
The amount of hops depends on the recipe.
For a start, this option is suitable: 15 grams at the beginning of the boil, the next 15 grams after 40 minutes and another 15 grams 10 minutes before the end of the boil. Total 45 grams of hops. Can be both pineal and granules. I didn't notice much difference. Granules will probably still be more practical.
If you're not into high bitterness, go for low alpha hops.
The wort should boil vigorously, but not like in a jet gas turbine. Average, so to speak, gurgling.
15 minutes before the end of boiling, we lower the chiller-cooler into the cooker. Let it boil for disinfection and sterilization.
After the end of boiling, we connect the chiller to running cold water and cool the wort to 18-22 degrees for 15 minutes.
Important! Cool the wort after boiling quickly! So that bacteria unnecessary for fermentation do not have time to get into it, billions of which suit " festivities"In the air of your apartment.
In the absence of this gadget (chiller) and if available good health, you will have to drag the kettle into the bath (if there is one) and cool it there. Or in some other way. In such cases, there is always a chance to stumble when dragging and scald the neighbors with wort from below and jump in boiling water yourself.
Therefore, it is better to buy a chiller or make it yourself. Or carry a cooker, but do this procedure very, very carefully.
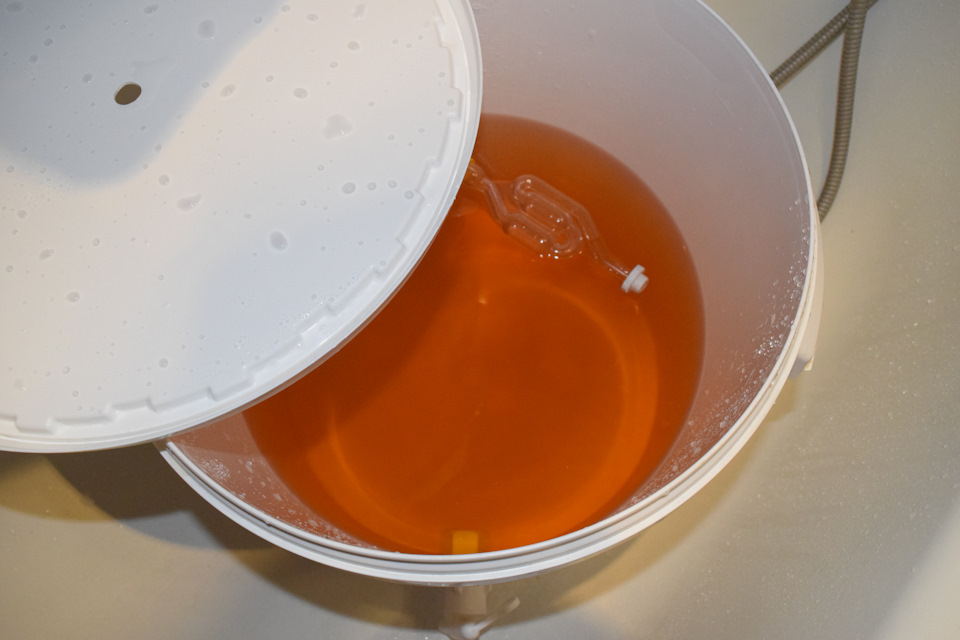
After cooling, open the tap, pour the wort into the fermentation tank.
To filter out suspensions and hop residues, it is enough to wind a sterile bandage on the drain valve, which will retain any dregs.
And it is advisable to pour from a height in order to saturate the wort with oxygen as much as possible. It is almost absent in the wort after a long boil.
Oxygen is very important for yeast during fermentation.
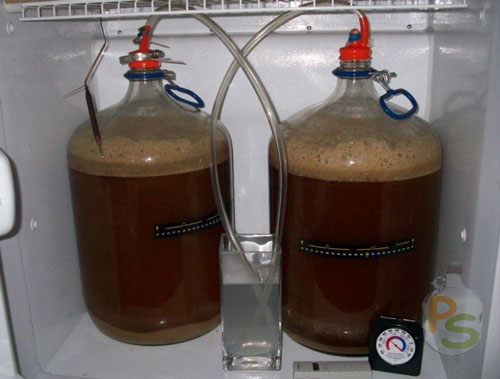
Fermentation
So, we poured the wort into the fermentation tank.
Now you can simply sprinkle the yeast from the bag over the surface of the wort. Directly onto the foam without stirring.
Or try to dilute them first.
To do this, before boiling, you need to take about 0.5 liters of the finished wort, after mashing, into a separate sterile container and cool it to a temperature of 26 degrees (usually the fermentation temperature is indicated by a bag of yeast).
Pour yeast in there, stir and cover with a clean napkin or lid. You can stir periodically.
After 90 minutes, during which the wort will be boiled, our yeast will already begin to ferment.
Next, just pour them into the fermentation tank.
We close the lid, put a water seal to hear the enchanting sounds of boules and boules and leave in a dark place for 7-10 days. The room temperature should be no higher than 23-25 \u200b\u200bdegrees.
Vigorous fermentation usually begins in 6-12 hours and can last from days to 2-3. Further, the obvious fermentation processes, in the form of boules-boules, subside and after 7-10 days you can safely bottle it.
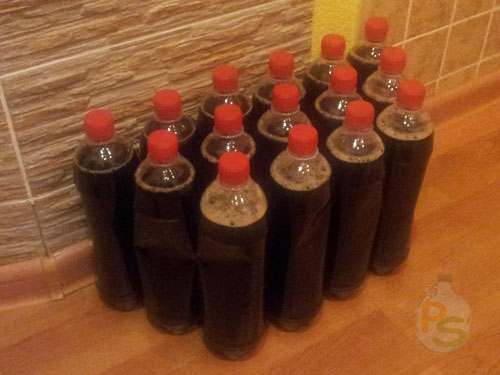
Filling. Carbonization. Maturation.
Carbonation - in our case, it is the natural saturation of the beer wort with carbon dioxide.
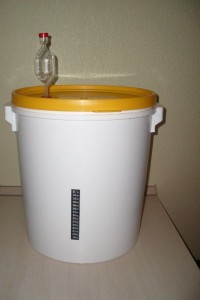
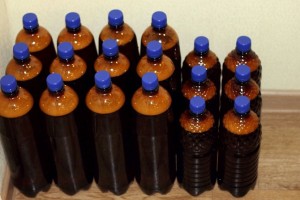
So, after our beer has fermented, we need to pour it into the containers in which it will carbonize and ripen. For this, clean, processed glass bottles or PET containers are suitable. Can be for example bottled in 15 liter PET bottles. The rest is 0.5 - for further tasting :). Pet bottles can be purchased at the same stores that sell draft beer.
Before bottling, add sugar or glucose to each bottle at the rate of 9 grams per liter. We pour it through a silicone hose. Important! Not PVC, but silicone!
The easiest way to recognize silicone is to burn it with a lighter or match. Real silicone burns very badly, forming white ash. All other plastics burn with soot and form black ash. Silicone is never crystal clear, slightly unclear in the light. Also, silicone does not harden in the cold, other plastics noticeably lose flexibility. You can buy silicone hoses at hardware stores, laboratory equipment stores, or for aquarists.
Carefully lower one end into the fermentation tank, taking care not to disturb the settled yeast. We lower the other end to the bottom of the bottle. For the least contact of the wort with air.
Do not top up about 2 cm to the edge of the bottle neck. We seal up.
We put in a cool dark place. Optimum temperature 18-24 degrees.
You will always have your fresh and tasty beer at hand.
The longer it costs, the better and richer the taste becomes.
You can try young beer in a week and in 25 days. In order to feel the difference.
Enjoy!
If Home Grain Brewing Becomes For You interesting topic and you will want to know and understand all the subtleties and secrets of cooking home beer, then for further acquisition valuable experience - the Internet is in your hands. And you might be a super duper brewer! 🙂
Good luck!
As I wrote above, brewing beer consists of several stages. Each stage has its own purpose and pursues a specific goal, so one cannot say that this or that stage is more important than others - they are all needed, otherwise the beer simply will not work.
Stage one: Preparation.
At the stage of preparation, our task is to find all the necessary equipment and thoroughly wash it. Next, you need to measure and grind the malt (you can buy ground malt), calculate the required amount of mash water and heat it up.
Naturally, all proportions of malts, hops and water should be taken based on the recipe. You can choose any from our site. All of them are verified and tested in practice.
Also don't be afraid of small deviations from the recipe in the amount of malt or water. However, with hops, you should not deviate too much from the recipe.
When everything is prepared and washed, and the malt is ground, you can proceed to the second stage.
Second stage: Mashing.
At the stage of mashing, fermentation and saccharification of starch occurs. Since various enzymes work with different temperatures, then when mashing the malt, the temperature breaks should be maintained in accordance with the recipe.
So, you have poured the right amount of water into the pot - this is mash water. Heat the mash water to the temperature of the first temperature pause and add the ground malt (). Wherein wooden spoon mix it all well to avoid clumping.
During the temperature pause, it is important to monitor the temperature of the mash, it should not rise, but it should also not drop, so the heating should be reduced or turned off altogether. In this case, it is worthwhile to periodically stir the mash and control its temperature.
After the pause time has elapsed, the heating switches back on to the maximum and brewing of home brew continues. When the next temperature break is reached, everything is repeated over again.
Usually, after a pause of 72 degrees, it is done, after which the temperature rises to the last pause, and at this point the mashing stage ends.
The third stage of brewing home-brewed beer: Removing the lees and brewing the wort.
Now that the mashing is complete, the wort is drained into another container - this can be done through a simple sieve. The malt left over after mashing is called pellet. The grain is washed to extract the maximum amount of sugars. On the this stage the amount of wort removed will be greater than the planned amount of finished beer.
Now we need to measure the gravity of the wort. If you do not have a hydrometer, and you followed the recipe, then you can skip this, this measurement is not important when brewing homemade beer, it will still be delicious. For density measurement, no a large number of wort and be sure to cool to 20 degrees. Then the measurement is taken. The rest of the wort is put on fire and brought to a boil. It is important that the boiling process takes place quite violently and without a lid. Otherwise, your beer will taste like a vegetable.
During boiling, the hops are added in accordance with the recipe. After the end of boiling, the loss of wort will be about 20% -30%, so you can add hot water while boiling. It is important to control the density.
When the cooking is complete, proceed to the next step.
Stage 4: filtration, cooling, yeast addition.
Cool the hot wort as soon as possible. To do this, you can use, and if not, then just put the pan in a bath of cold water or in the snow. stir the wort to cool quickly. In the process of cooling the wort, it can also be removed from the sediment by filtering it through a sieve, gauze or other filters.
When the temperature of the wort is 20-24 degrees, you should take 10% of the wort for a primer and put it in the refrigerator. You also need to take a small amount of wort to rehydrate the yeast (how to do this, read here)
After adding yeast, the wort is poured into a fermentation tank and sent to fermentation.
Home beer fermentation stage.
When we brew beer at home, it happens that fermentation takes place in 2 days, and it happens that it starts only on the second day - do not be alarmed. fermentation usually lasts 3-4 days. After the yeast cap settles, fermentation is complete, you can bottle it.
The final stage of home brewing.
A primer is added to the fermentation tank, the young beer mixes well, leave it for 30-40 minutes and bottle it. Try to minimize the amount of sediment in the bottles. Then the bottles are sent for additional fermentation for 2-3 weeks.
After fermentation, your homemade beer is made with your own hands of their malt and hops ready.
Beer is very popular all over the world. The drink was invented in Ancient egypt... Today, it is sold in almost all retail outlets related to food: shops, bars, restaurants. Different types of drinks have their own recipes.
How to make homemade beer the right way
Some people think that special equipment is needed to prepare a homemade product. In fact, this is not the case. Here it is enough to have ordinary kitchen utensils. The required components are usually always available in specialized stores... Therefore, it is not necessary to get hop cones somewhere, to cook barley or wheat malt.
There are many ways to brew beer at home using own technology... Due to the fact that the product is quite versatile, a large number of different components are presented on the market to obtain it.
But in classic version the most commonly used are yeast, malt, hops, water.
If you use good recipe, then homemade drink will turn out to be tasty, rich, with a dense thick foam. No pasteurization or filtration is required here. Only natural ingredients are used.
Few lovers of the noble potion dare to brew good beer at home. Most people in the street believe that it is much easier to buy a ready-made bottle at the nearest store. Therefore, all recipes are mainly designed for those people who are loyal fans of this product... As a rule, such people prefer pure and original taste.
Main ingredients and components for brewing beer
- Yeast. Before making a beer at home, you need to buy good yeast. A positive outcome largely depends on their quality. home brewing... It is advisable to buy beer yeast. They must be dry and alive.
- Malt. To make the liquid light, the malt must be dried naturally. Dark color achieved by using a special caramel grade added to the bulk. The proportion of the additive is about 10%. Since malt is dried barley grains wrapped in a hard husk, the husk serves as a natural filter when brewing at home. These ingredients must have white color, nice smell and a sweetish aftertaste. Before using the malt kernels, they must first be ground so that the husk remains intact.
- Hop. It usually comes in two flavors: aromatic / aromatic and bitter. One or another type is used depending on what needs to be achieved: a pleasant aroma or bitterness. Hops are a must have good qualityas this affects the gravity of the home-brewed beer. The hop cones should be slightly reddish with a yellow tinge.
- Water. To make good beer with your own hands, it is best to use spring water. If she will bad quality, the drink will turn out to be tasteless.
- To saturate beer with carbon dioxide, you need to add a little sugar in the following proportion: 8 grams of granulated sugar is poured into 1 liter of liquid. The usual inventory is used kitchen dishes... To boil the wort, you need a 30-liter enamel pot. It also requires another container in which the liquid must ferment.
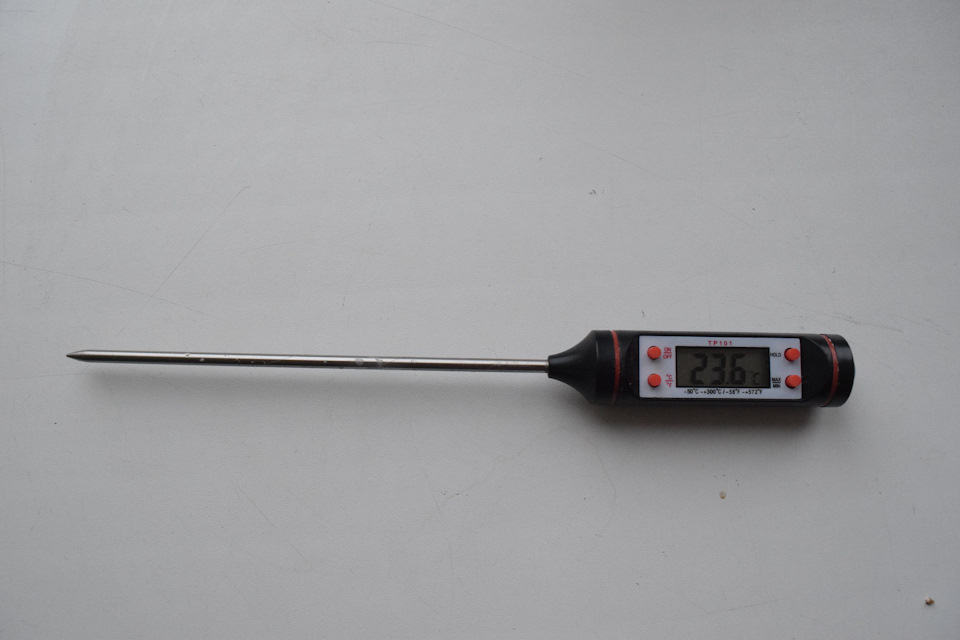
- Thermometer. To watch over temperature regime, a thermometer is required. You can cool the beer wort in your home bath by filling it with cold water.
Usually home brewing starts with preparatory phase... All utensils and necessary equipment should be thoroughly washed. You need to get started with well-washed hands. Otherwise, the dirt can infect the wort with some microbes. Because of this, instead of a pleasant product, you get a sour wash.
Step-by-step recipe for making a drink
Initial data: 32 liters of water, 5 kg of malt, 45 grams of hops, 25 grams of brewer's yeast and granulated sugar... Typically, beer brewing technology consists of the following stages:
1. Take a 25 liter pot and fill it with water. Then it should be heated to about 80 degrees. After that, drop the ground malt into the water. It should be immersed in a special bag made of several pieces of gauze. Then the lid of the pan is closed and a pause is made for two hours. The temperature should be kept around 70 degrees. It is at this value that the desired reactions in the malt flow best. As a result, the wort becomes sweet and aromatic.

2. After two hours, the temperature should be increased to 80 degrees. We do the exposure for about five minutes. After that, remove the bag of malt from the pan and rinse it in the remaining water, which is then poured into the wort.
3. Then the wort is brought to a boil, remove the foam and add about 15 grams of hops. After 30 minutes of boiling, the same hop portion is added. After that, the wort must be boiled for an hour, then add the last portion of hops. Total time for a procedure with the addition of hops - an hour and a half.
4. Now the liquid must be quickly cooled in a bath of water. The faster it is done this procedure (20 - 30 minutes), the lower the risk of contamination of the prepared product with harmful bacteria. After the wort has cooled completely, it should be poured into another container. During the transfusion, it is advisable to filter through cheesecloth.
6. After that, the container is transferred to a dark place and left to ferment. The room temperature should be about 20 degrees. The boiling process will take about 3 days. At this time, carbon dioxide will be released from the liquid. At the end of the process, the product will become significantly lighter. When gas bubbles stop coming out, the fermentation process will be completed.
7. For a thick and dense foam to appear, the drink must be refilled with carbon dioxide. It will also help to improve the palatability. This is done as follows. 8 g of sugar is poured into liter bottles. After that, using a silicone hose, the home beer is bottled. Do not touch the sediment at the bottom of the pan. If it gets into the drained liquid, the beer will be very cloudy and unpleasant in taste.
8. In filled bottles a secondary fermentation process will take place. In this case, the liquid will be saturated the required amount carbon dioxide. The filled bottles are also placed in a dark place for 2 weeks. After this time, the product will be ready for use. It can be moved to the cellar or put away in the kitchen fridge. At this point, the drink will be tasty and aromatic, with a thick white foam. After a month in the cellar, the beer will become even tastier.
A 25 liter saucepan makes 15 liters of an excellent homemade drink. Its strength will be about 4.5%. The shelf life of such beer is 8 months.
Wort preparation
Wort mashing is the process of grinding malt and mixing it with hot water. Due to this, the starch contained in the grains is broken down into sugar and other soluble substances. You can buy malt on the market in finished formwhich is specially designed for brewing. As a rule, it is skillfully and qualitatively detailed enough, thanks to which the task of making your own drink is greatly facilitated.
If you purchased whole grains, you can grind them yourself. For this, a conventional mechanical meat grinder is used. However, when grinding the beans, they should not be turned into flour. They should be detailed into small pieces. It is imperative to preserve the peel particles, as they are involved in filtering the wort. Grinding malt into hot water promotes the separation of sugar. At the same time, the strength of the homemade drink increases.
Beer quality
If the question arises, how to check the quality of beer, then you can use the following advice. Before directly brewing the drink, it is necessary to check if starch remains in the ingredients used. To do this, pour a little wort into a clean white plate, then add a few drops of iodine there. If the solution turns blue, you need to boil it for another 15 minutes. When iodine stops changing its color, we can assume that the wort is completely ready. This means that the beer will be of good quality.
We are waiting for your advice on how else you can check the quality of home brew in the comments below.
›We brew beer at homeHello, friends. I bring to your attention a pre-holiday theme: a detailed account of how I brewed a light wheat beer in the Bavarian style. I tried to make a detailed photo report and descriptions, in case someone is thinking of joining the ranks of home brewers)
He started, like many others, with reports on YouTube. The video Cooking homemade beer in a saucepan part 1 helped a lot
Twice Father Demetrius.
The first time I cooked in an ordinary saucepan, as in the video. After a successful first brew, the 40 liter tank has undergone improvements. I hit a tap and on the other side a tee.
It is needed to install the filter system. It is made from a conventional stainless steel gas hose with notches on the bottom. Grain shells are packed around these holes and create a filter layer.
Any beer brewed using the technology is delicious. The technology is not very complicated, the main thing is to approach it with heart. The basis of beer is malt. For brewing, I chose a specially simple recipe for wheat beer. We need barley and wheat malt, hops, beer shivers.
All this is sold in special stores, and you can safely order, even with delivery to your apartment. Next, the malt must be ground, and this must be done so that the shells of the grain remain intact - they will then help with filtration.
There are special malt roller mills for this, they do not break the husk. You can often get malt grind in the store for an additional fee. Here is the grinding result.
It is needed for filtering. Wheat malt is always refined.
For beer it is better not to use tap water, it may affect the taste.
Spring or bottled is suitable.
The recipe itself.
Ingredients
Malt:
1.5 kg (50%) | Pilsner
1.5 kg (50%) | Wheat
I used domestic malt.
Hop:
15 gr | Traditional (Germany) - granules, a-k. \u003d 7.8% | Adding to the boiler in 60 min. until the end of boiling
Yeast:
6 gr. | Fermentis - Safbrew WB-06 | Fermentation: 19 ° С,
Mashing options
Mash water volume: 15 l.
Mash start: 55 ° C
Pauses: 55 ° C - 15 min., 65 ° C - 40 min., 72 ° C - 20 min., 78 ° C - 5 min.
Mash end: 78 ° C
Rinse water: rinse - 6 l. water (78 ° C)
Extra options
Boil time: 90 min
Batch size after boiling: 17 l.
First you need to heat the water to the right temperature, a couple of degrees above the first temperature pause at 55. A thermometer is required to measure the temperature.
and add the grain, stirring constantly, then cover the pan for 15 minutes at 55 ° C.
Grains with water in brewing is called "mash", and the procedure itself is "mashing." The main purpose of malting is to start germination of barley, later drying to stop germination. For brewers, this is very important process, during which the main enzymes are formed, in addition, it triggers 2 important changes in the grain. First - glucans in cell membranes are broken down, second - proteins are also broken down, which saturates the wort with amino acids necessary for yeast growth, reducing the likelihood of protein turbidity in beer, increasing its biological stability. We pause the temperature just to start the process of converting starch to sugar. After the first pause, bring the temperature to 65 ° C, cover and wait 40 minutes for the enzymes to do their job. The next pause is 72 ° C, at this temperature the final saccharification will take place. After 20 minutes, a control test, take a sample of the wort and add the iodine solution. If it hasn't changed color, then we have succeeded, there is no more starch.
You can stop the process. A mash-out is required, a five-minute pause at a temperature of 78 ° C, otherwise the enzymes will continue their work. Let's start filtering. This liquid is already called "wort". So, the first liters of wort must be returned back to the mash tun, because the filter layer has not yet formed, and the wort comes with pieces of grains.
Hops, on the other hand, give the beer a bitterness and characteristic tones in the flavor and aroma. After boiling, the wort will need to be cooled as quickly as possible to the fermentation temperature (about 20C). For this purpose, we put the pot in a tub of cold water. Chilled wort is very easy to infect; everything that comes into contact with it needs to be disinfected. An iodine solution for 20 liters of water is suitable for this, in which I soak the fermentation tank and a water seal for 15 minutes.
It only seems that the surrounding air is clean; in fact, it contains billions of bacteria and wild yeast that can easily spoil our work.
First, pour 10% of the wort into a bottle and put it in the refrigerator, this is a primer, you will need it later. The rest of the wort is poured into the fermentation tank.
This will allow the yeast to clean up excess esters from the primary fermentation and improve the flavor of the beer. From the first container we collect the tremors into a jar and put them in the refrigerator, they can be reused. We are waiting for another 7 days, add the primer to the tank and pour beer into sterile bottles in an hour. Another week or two and the beer is ready.
I agree that the process is long, but we get very tasty beer, and most importantly natural. Homebrews, bottled in clean conditions, will last for years in the cupboard, and the taste will gradually change, because the yeast in the beer is still alive. So, beer aged for several months acquires a more complex fruit bouquettherefore, bottle aging is highly recommended for some styles of beer.
Thank you all for reading) If you liked the report, please rate it) Like, repost)
6 months
More and more people are becoming interested in craft and home brewing. But this is not an easy matter, and open questions beginners have plenty. We asked the author of the nuBO.ru website, a collector of beer paraphernalia, Pavel Egorov, to tell us about the culture of home brewing, its origins, and also about where to start if you want to make your own beer.
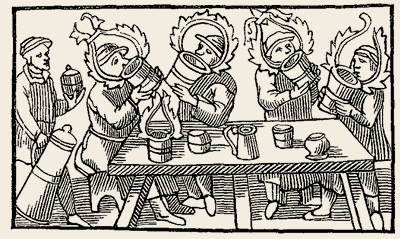
Home brewing in Russia
When did home brews appear? Initially, in Russia, brewing was exactly home-brewed, they brewed beer at home, on holidays, usually by sharing. Beer brewed in monasteries or in manor houses also bore a "home" imprint. More or less factory production arose only under Peter I, when beer began to be massively brewed for the army and navy. But also during the XVIII and early XIX for centuries, brewing was a handicraft business. Only from the middle of the 19th century, factories began to be built in Russia, already quite similar to modern ones (some of them, by the way, have survived to this day).
Home brewing practically did not exist in the USSR. Although, of course, beer was still brewed here and there in the villages according to the old-fashioned recipes, and in the Baltic states breweries were already producing concentrated beer wort, which means that there was little demand for it. Massively in the USSR, homemade kvass was made from concentrated wort, but kvass is one of the types of beer where fermentation is simply not completed (which means that its production takes a very short time compared to making beer).
More or less factory production arose only under Peter I, when beer began to be massively brewed for the army
and the fleet.
Perhaps it is worth debunking one of the popular myths. How is beer brewed at the brewing giant different from home brew? Brewing giants brewing beer from powder, as opposed to homebrewers who brew truly real beer? Oddly enough, but everything is exactly the opposite: large factories always use classic technologies making beer, but at home, for the sake of simplicity of production, they often skip many operations and actually make beer from "powder" (or rather, from concentrated beer wort, which is sold in powder format).
Technology
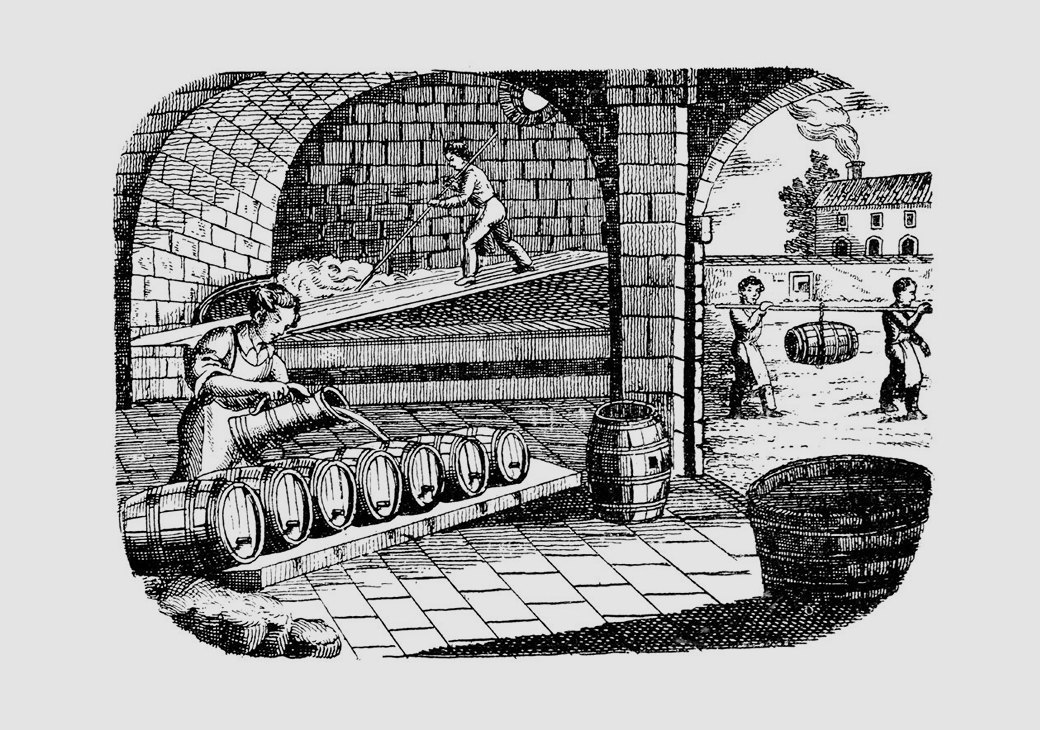
Beer is one of the hardest to make alcoholic beverages... In short, the technology of its production is as follows. First, malt is made by soaking and sprouting grain (usually barley), then the sprouts are separated and dried finished product... Why do they do this? During germination, enzymes arise in the grain that will help turn the starch of the grain into sugar, namely, the sugar is consumed by the yeast, converting it into alcohol and carbon dioxide. The second stage is mashing, when the malt is crushed and started to dissolve (mash) in water. For the enzymes to work, certain temperatures are required, so mashing is a rather complicated process (lasting about an hour or two), when the wort is heated, stirring until certain temperature pauses, kept and the temperature raised until the next pause. After complete saccharification (when the starch has turned into sugars), the wort is filtered through a layer of grain husks (grains), which can also take an hour or more. In the final stage, the resulting wort is boiled with hops to give it the necessary aroma and to precipitate the proteins contained in the grain. After filtering the hopped wort from proteins (bruch) and hop pellets, the wort is cooled and sent to fermentation.
According to the method of fermentation, beer is divided into beer with top (warm) fermentation, which is collectively called ale (and it is always ales that are always brewed at home, since fermentation is carried out with room temperature) and with bottom (cold) fermentation, collectively called lager (such beer now dominates the world, but serious refrigeration equipment is needed for its production).
Malting, mashing, wort boiling are the most difficult, time consuming and energy intensive operations in the brewing process. But the resulting hopped wort can be concentrated by evaporating water from it (up to a dry powder), and the resulting concentrate can be used to make beer, bypassing all these stages technological process... Large factories never use such technology, because in this case there will have to be huge factories producing concentrate in the same amount, which they would sell it to breweries at a premium for themselves (and evaporation is not a cheap process). Therefore, it is more economical and easier to do this at the plant itself. But for home use concentrate greatly simplifies the process of brewing beer, and a significant increase in costs (a kilogram of malt can be bought even in small retail for less than 100 rubles, and a kilogram of concentrate usually costs from 500 rubles) for home made not so critical.
The first to understand the prospects for home brewing was in the United States, where already at the end of the 20th century, an extensive infrastructure to support home brewers began to be built. And now this occupation in the United States is carried away by one million people. Concentrates for home brewing arrived in Russia in the mid-1990s. In 1994-1995, the Teddy Bear company was formed, which began to actively promote the idea of \u200b\u200bhome brewing to the masses. The name of the company has become in some sense a household name, often beer brewed from concentrates is called “teddibrating”.
What does it take to brew beer from concentrate? You need a saucepan to dilute the concentrate, and you need a fermentation vessel in which the wort will be fermented with yeast (this vessel - a fermenter - is often called a "brewery"). Yeast is used high, ale, the working temperature of which is room temperature (in contrast to the grass-roots, lager yeast, which ferments at a temperature of about 10 degrees, and ferments at zero). After the main fermentation (which takes an average of a week), the beer is poured into bottles, into which a little sugar is added so that fermentation continues slowly and the beer is saturated with carbon dioxide released during this. Here it is worth debunking another persistent myth - that "live" beer cannot be stored for a long time. With this technology, the beer is exactly "live", because it really "lives", slowly fermenting in the bottle. Moreover, the shelf life of such beer is very long. Light varieties can be aged for months, and strong varieties for years. Of course, glass bottles should be used for long curing, not plastic PET. This technology is used not only by home brewers; since the late 1990s, many microbreweries have appeared in Russia, the productivity of which was measured not even in tons, but in hundreds of liters per month. The prime cost of such beer was high, according to the existing technological instructions sugar was usually added to the malt concentrate, often in a ratio of 1 to 1, so the taste came out excessively mash, and although this beer had its own adherents, the term “taddibrating” began to acquire a somewhat negative connotation. Several such producers still exist, although their age is usually short-lived, it is difficult for them to compete with classical breweries due to the high cost price.
"Live" beer really "lives", slowly finishing in a bottle. Moreover, the shelf life of such beer
very large.
Home brewing
equipment and process
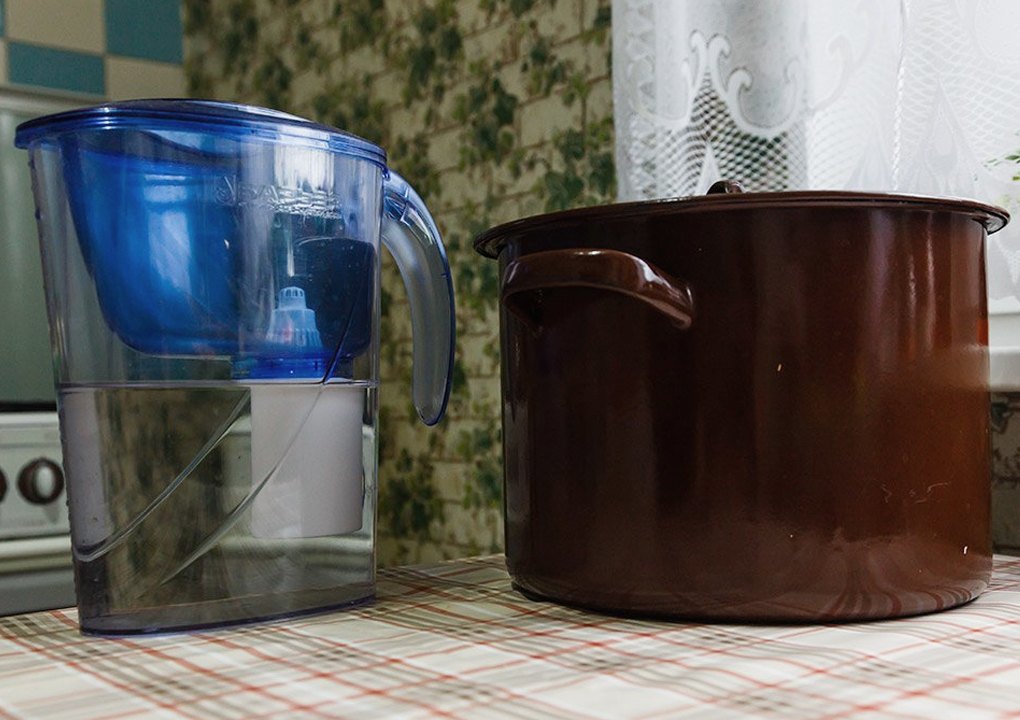 Water preparation by filtration through a charcoal filter, a saucepan for boiling the wort.
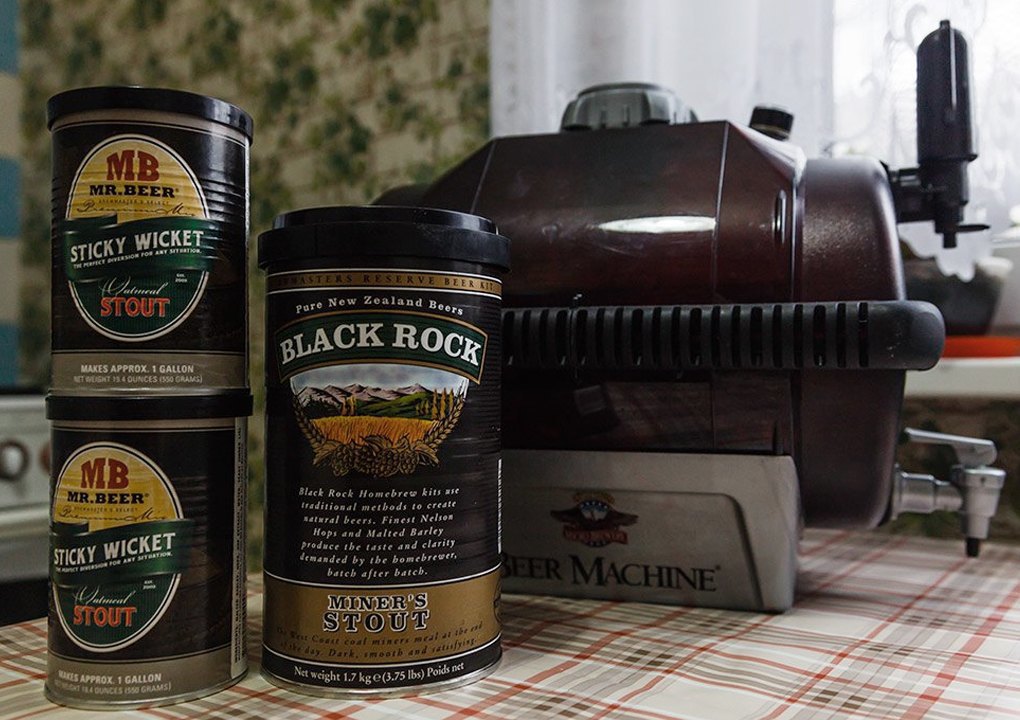 Cans with beer wort concentrates, beer fermentation tank BeerMachine.
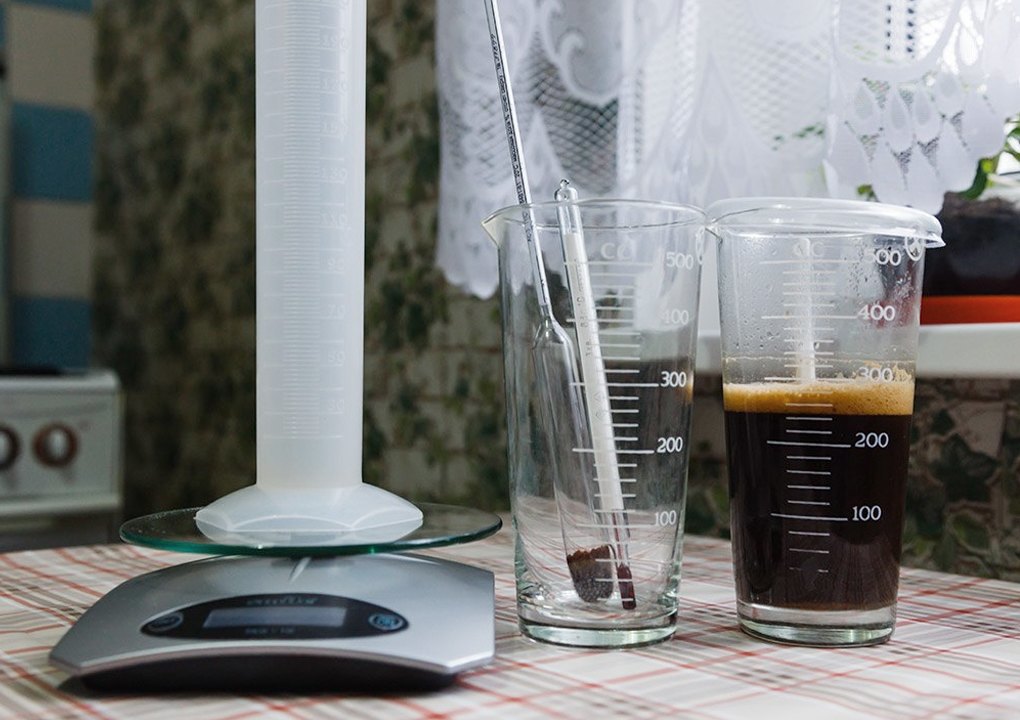 Electronic scales, beakers, thermometer and hydrometer (device for determining the density of beer). Yeast is fermented in one of the beakers.
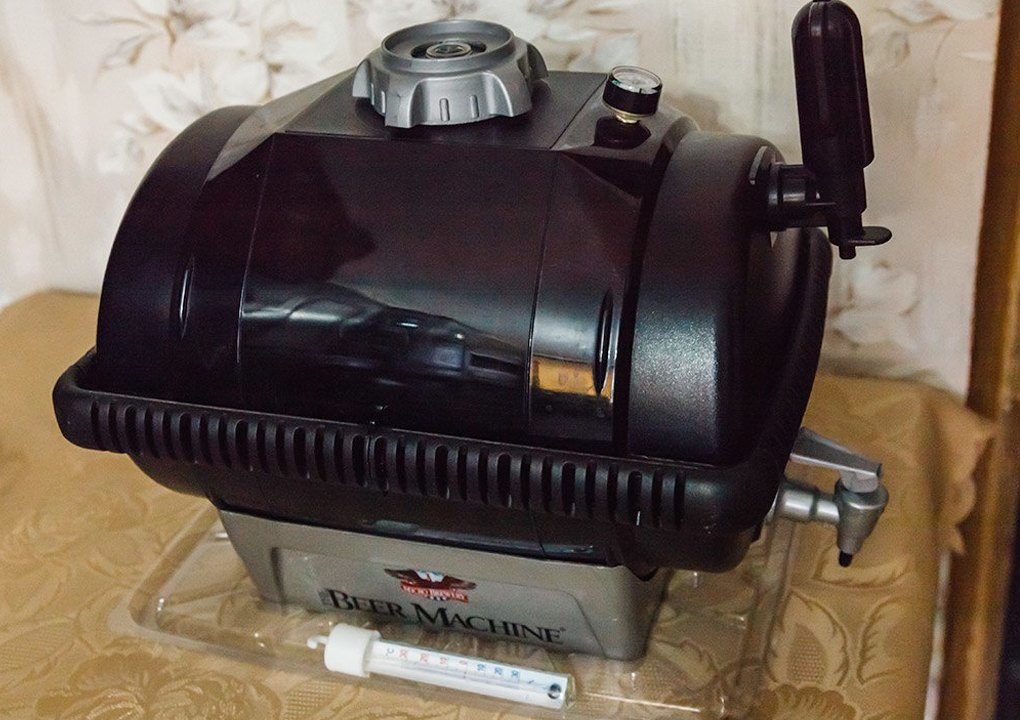 Tank for fermentation of beer BeerMachine with a thermometer.
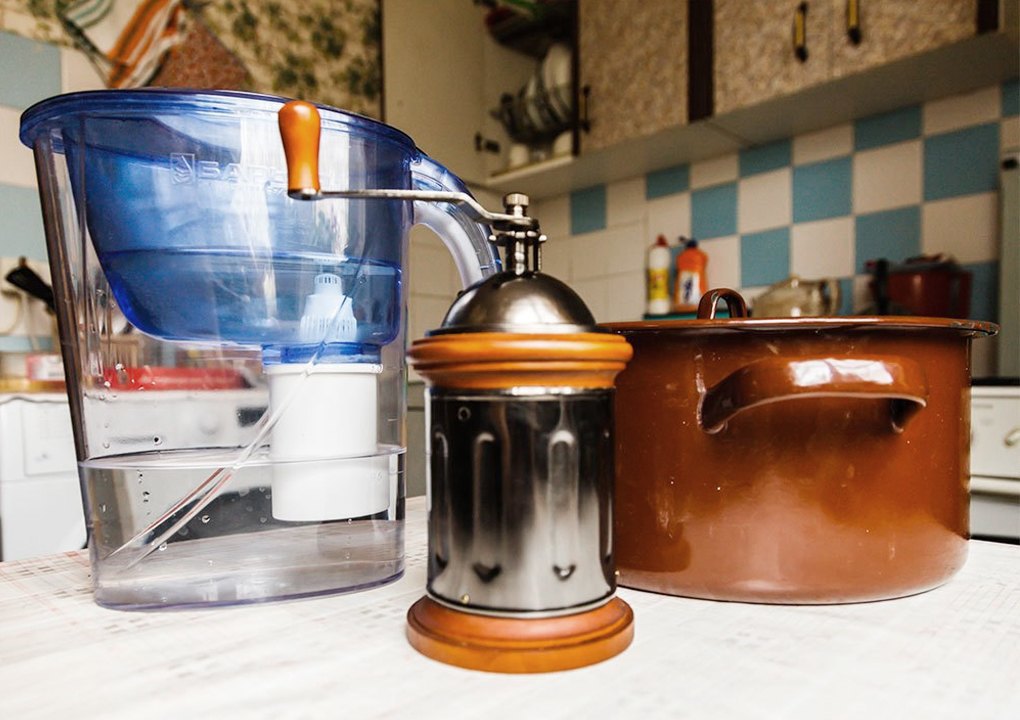 Water preparation by filtration through a charcoal filter, a coffee grinder for the milk of malt, a saucepan for boiling the wort.
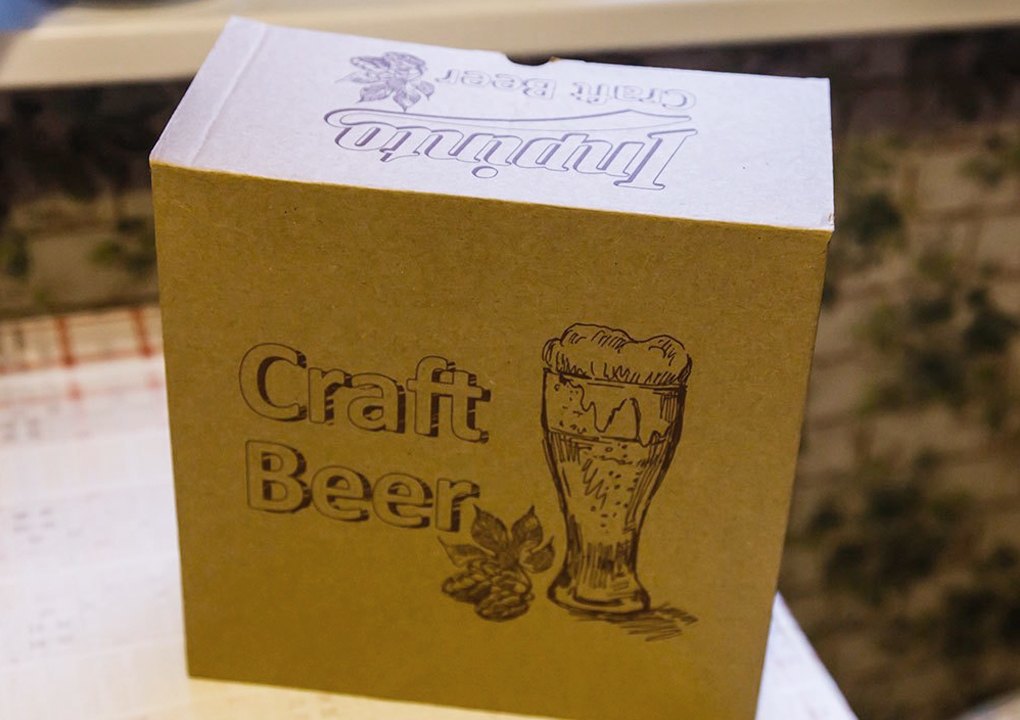 Home brewing set.
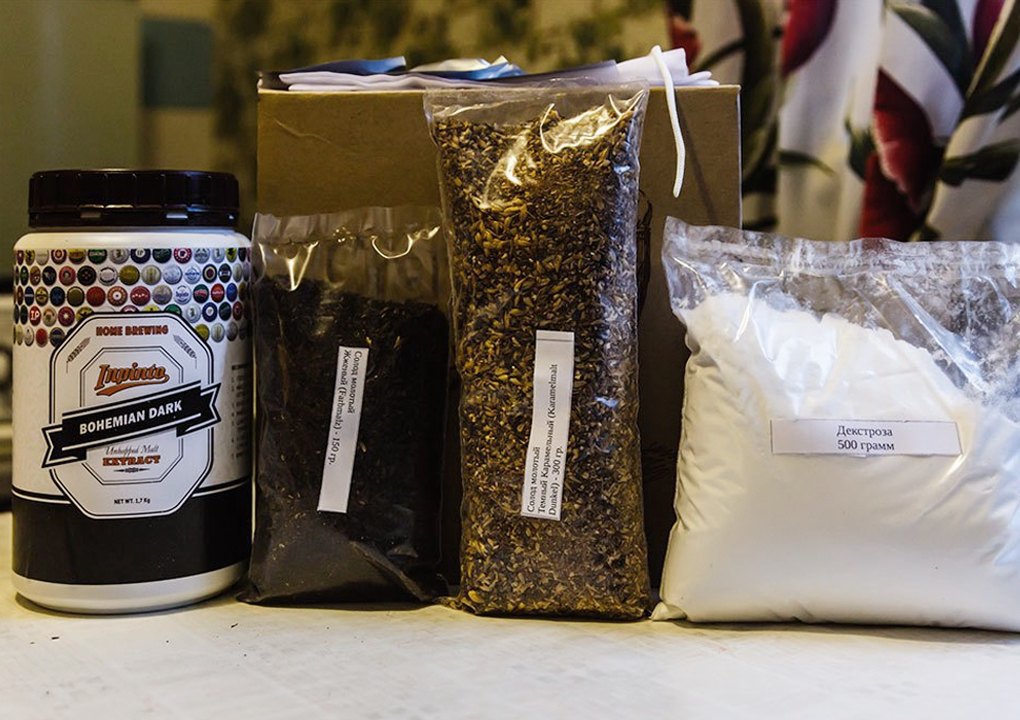 Home Brewing Kit - Unhopped Beer Concentrate, Malt, Hops, Yeast, Dextrose.
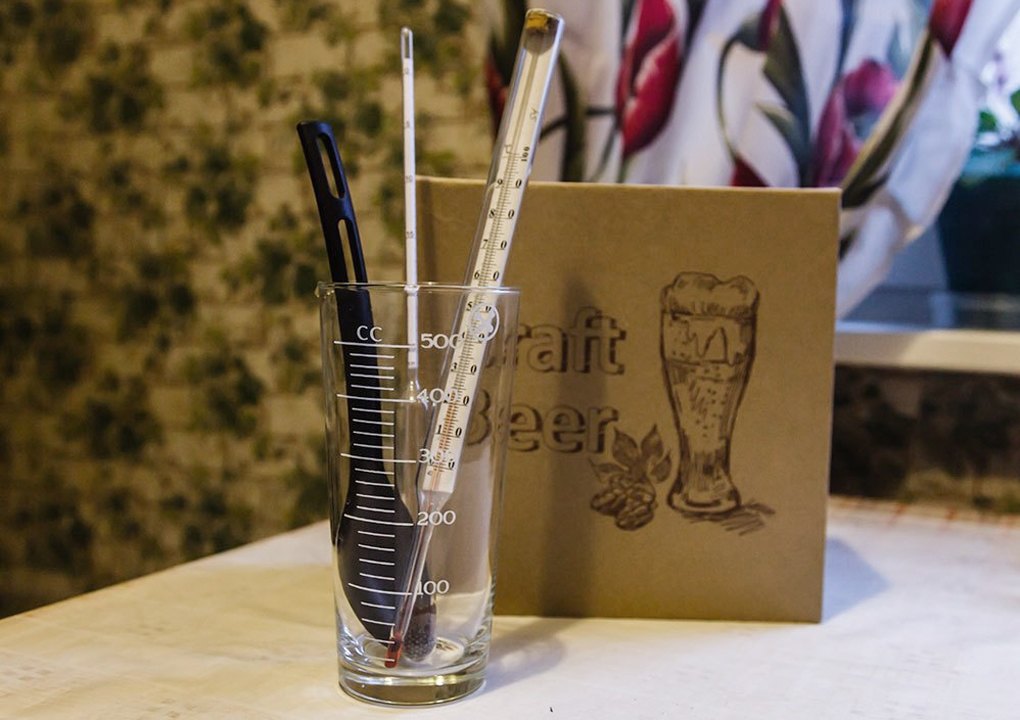 Home brewing set, beaker with thermometer and hydrometer.
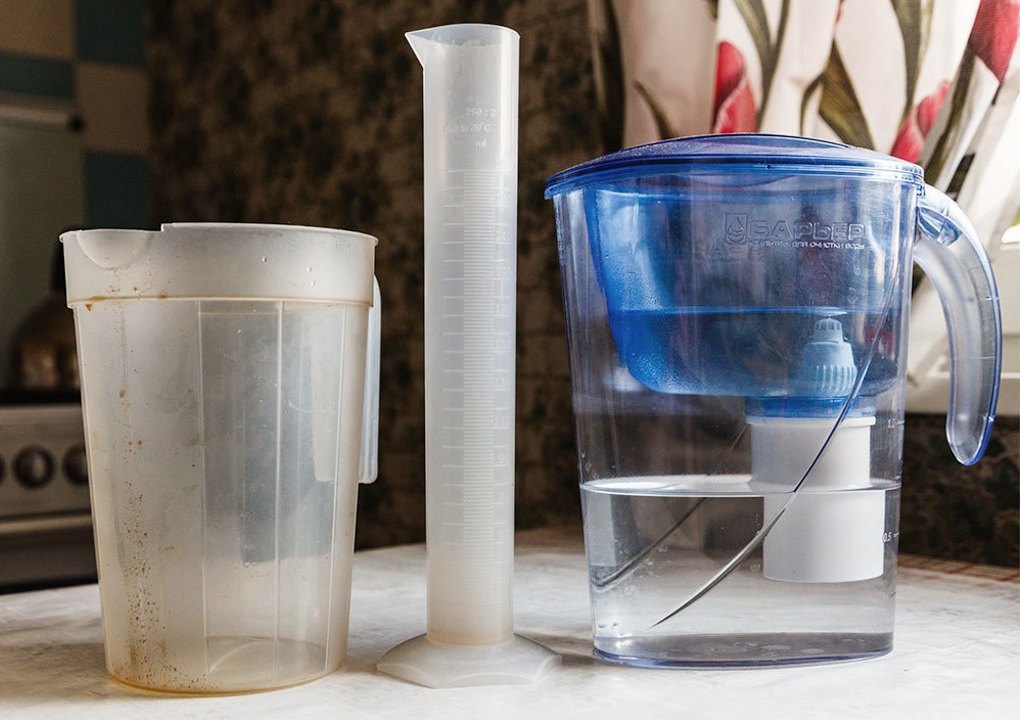 Water filter, various containers.
 Mashing malt in a bag.
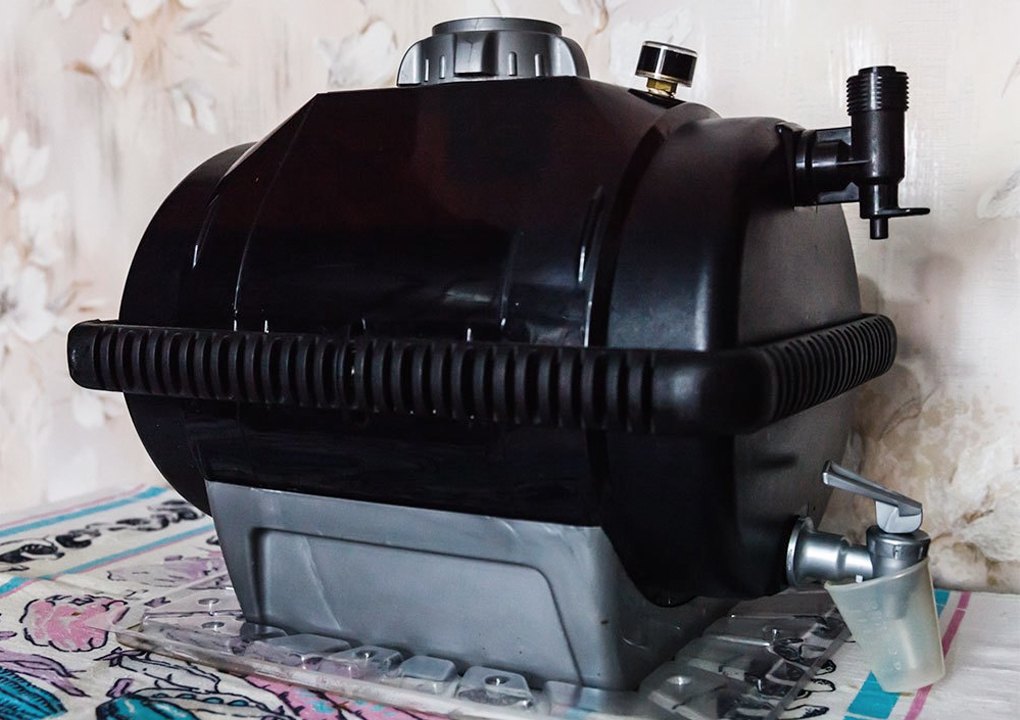 Fermentation tank BeerMachine.
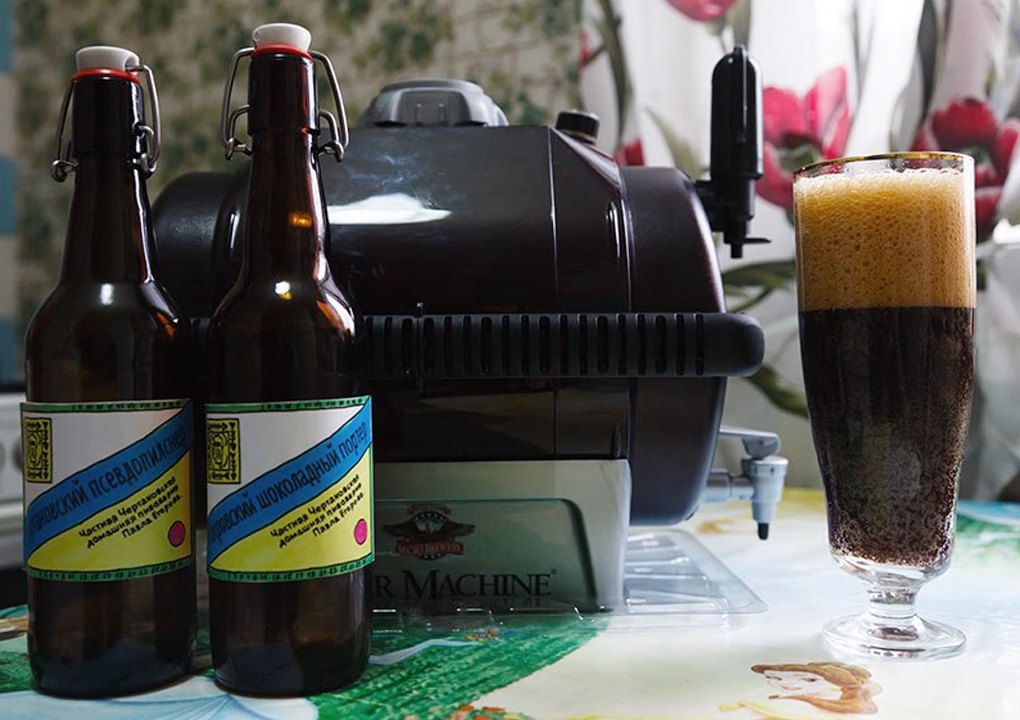 Fermentation tank BeerMachine, homemade beer in a glass and bottles with homemade labels.
Ingredients
At first, a limited number of malt concentrates were presented in Russia, in fact, they were concentrates for pale, amber and dark ales. But over time, the number of suppliers has increased significantly, now there are concentrates on sale from America, Australia, New Zealand, Great Britain, Finland, Belgium, and the Czech Republic. And most importantly, the number of types of beer that can be brewed from these concentrates has significantly increased. Several companies with stores in Moscow, St. Petersburg, Perm are already engaged in the sale of these concentrates; Internet trading is very active. To more fully satisfy home brewers in their creative process, complete sets for brewing began to appear on the market, in which a technology was used that was already close to the classic, albeit simplified for home use. The kits consist of malts that must be placed in a bag and soaked in hot water. The resulting wort is blended with unhopped malt concentrate and brewed with hops. The result is a beer that tastes very close to industrial beer.
But there comes a point when the homebrewer, having tried different types concentrates and realizing all their advantages and disadvantages, he begins to think, why not brew beer the way it is done in large factories? In general, this only takes time, a lot of time, and additional equipment is not necessary, although desirable. Of course, no one is engaged in malting, it is not a problem to get malt, but you can grind it with a meat grinder or a coffee grinder (but you can also buy a real malt grinder, which are already on sale). Mashing can be carried out in a large saucepan, stirring the mash with a scoop and using a thermometer to monitor the desired temperature breaks by adjusting the hotplate. You can also do it differently - insist the mash in a thermos, pouring boiling water into it to raise the mash temperature to necessary pauses... You can filter the wort through a flour sieve, although you can make (or buy) a real filter vat, where at the bottom there will be a metal braid or plastic hoses with holes leading to the tap, and the wort will be filtered through a layer of grains, as in large factories ... In short, adapting technology for home needs is not a problem.
It's not a problem to boil wort with hops, you can cool it by putting a pan in a bath of cold water, or buy a special chiller - a copper tube, which is dipped into the wort, passing through it cold water... The protein and hops can be separated by filtering the wort through a nylon cloth or just plain cheesecloth. And here we have a "whole grain" wort is not worse than in large factories. The question arises - where to buy different types of malt, different varieties of hops, where to get the right races of yeast? Now this is no longer a problem, and the same stores that sell beer concentrates offer a very wide range of ingredients.
But there comes a time when a home brewer, having tried different types of concentrates, begins to think: why
not brew beer the way they do in large factories?
Home brewers
Who are the homebrewers? These are enthusiastic people who did not want to limit themselves to store beer, but decided to brew for themselves the one that they most like. Homebrewing associations date back to the dominance of the Teddybears, which gradually culminated in the formation of the Homebrewing Club. Sometimes a hobby turns into a profession. Several homebrewers have already become top brewers in industrial production... And home breweries such as Victory homebrew and Malz & Hopfen developed into industrial breweries after purchasing large brewing equipment.
What kind of beer do homebrewers make? That light, light, filtered lager with which all the shelves of our stores are forced to brew at home is very difficult (oddly enough), homemade beer is a variety of ales, that is, those types of beer that dominated until the middle of the 19th century. Now the versions of American, English and, especially after new and absolutely incredible in terms of aroma American hops have reached Russia, are very popular. These are stouts and porters in english styleThis is German-style wheat, this is the Belgian "white" and also the "abbey" ales. That is, for the most part, these are beers that are difficult to fit into any category, since nothing prevents the home brewer from experimenting with the most incredible combinations of different malts, hops, various additives in the form of aromatic raw materials, as well as fruits.
How to Become a Home Brewer? For this, in general, only one thing is required - the desire to brew beer. And if you have it, then do not restrain yourself, but just take and brew beer. Start with Concentrated Beers, and as you get more experience, move on to grain brewing... Moreover, now on the Internet you can find information on all difficult issues home brewing.
First of all, refer to brewiki in Russian, you will find a lot of information on the website of the oldest company serving home brewers "Teddy Beer". Many books devoted to this issue are published - here also stands out a short but sensible brochure from "Teddy Beer", a more serious and detailed book by J. Palmer, "The Art of Home Brewing". Forbes K.'s book "Beer, Wine and Cider at Home. Secrets of Cooking" would not have been a bad help, if it had not been spoiled by a terrible translation into Russian (Palmer's book also partially suffered from the translation). Literature on english language many, but start off with the homebrew classic, founder of the American Homebrewers Association Charlie Papazian ("The Complete Joy of Homebrewing"). And most importantly - try to brew your own beer - and you will not regret it.
Art
home brewing
John Palmer
Beer, wine and cider at home. Cooking secrets