Homemade beer cooking recipe in a saucepan. Home brewing.
More and more people are becoming interested in craft and home brewing. But this is not an easy matter, and open questions beginners have plenty. We asked the author of the nuBO.ru website, a collector of beer paraphernalia Pavel Egorov, to tell us about the culture of home brewing, its origins, and also about where to start if you want to make your own beer.
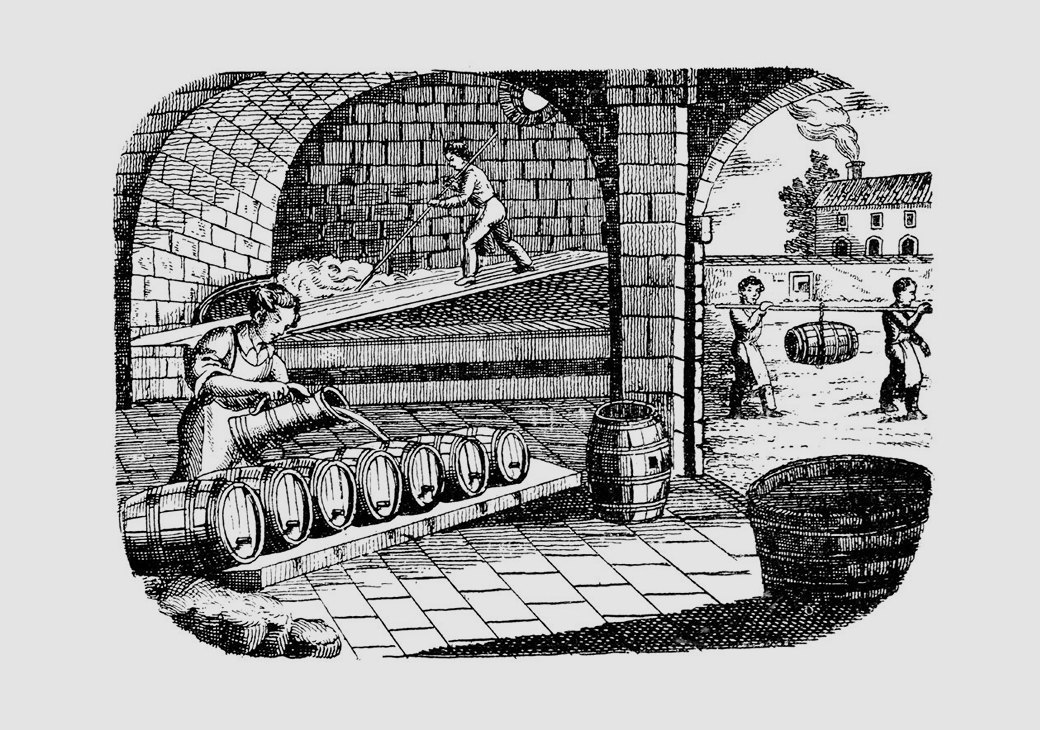
Home brewing in Russia
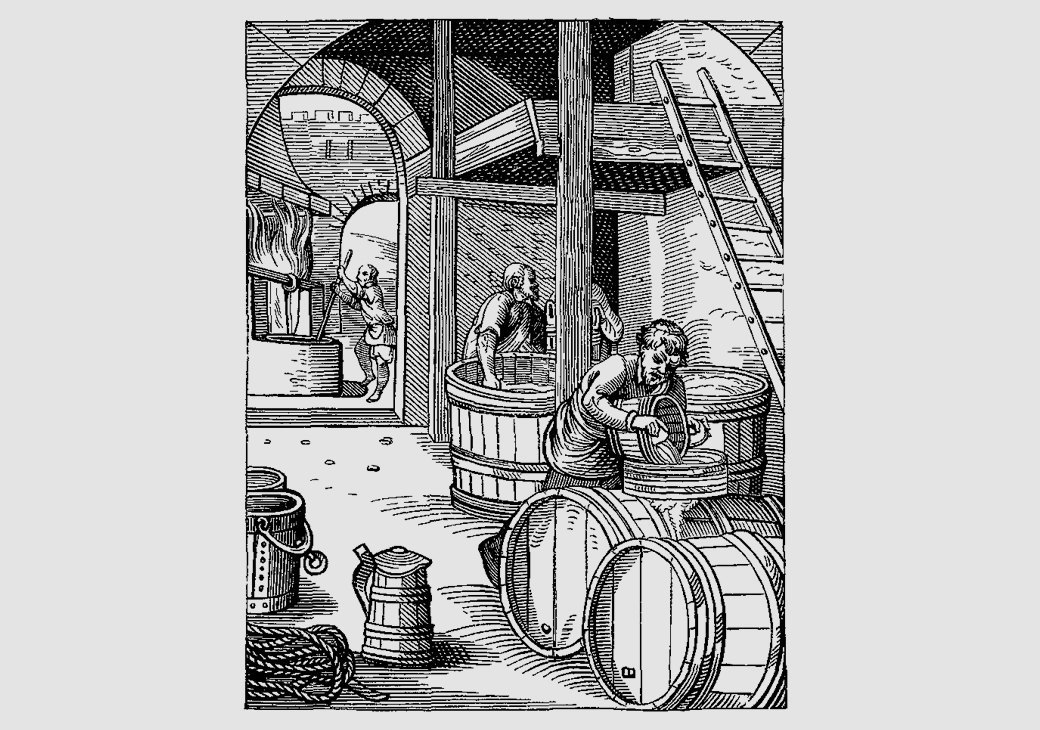
When did home brews appear? Initially, in Russia, brewing was exactly home-brewed, they brewed beer at home, on holidays, usually by sharing. Beer brewed in monasteries or in manor houses also bore a "home" imprint. More or less factory production arose only under Peter I, when beer began to be massively brewed for the army and navy. But also during the XVIII and early XIX for centuries, brewing was a handicraft business. Only from the middle of the 19th century, factories began to be built in Russia, already quite similar to modern ones (some of them, by the way, have survived to this day).
Home brewing practically did not exist in the USSR. Although, of course, beer was still brewed here and there in the villages according to grandfather's recipes, and in the Baltics, breweries were already producing concentrated beer wort, which means that there was little demand for it. Massively in the USSR, homemade kvass was made from concentrated wort, but kvass is one of the types of beer where fermentation is simply not completed (which means that its production takes a very short time compared to making beer).
More or less factory production arose only under Peter I, when beer began to be massively brewed for the army
and the fleet.
Perhaps it is worth debunking one of the popular myths. What is the difference between beer brewed at the brewing giant from home beer? Brewing giants brewing beer from powder, as opposed to home brewers who brew real beer? Oddly enough, but everything is exactly the opposite: large factories always use classic technologies making beer, but at home, for the sake of simplicity of production, they often skip many operations and actually make beer from "powder" (or rather, from concentrated beer wort, which is sold in powder format).
Technology
Beer is one of the most difficult alcoholic drinks to make. In short, the technology of its production is as follows. First, malt is made by soaking and sprouting grain (usually barley), then the sprouts are separated and dried finished product... Why do they do this? During germination, enzymes arise in the grain that will help turn the starch of the grain into sugar, namely, the sugar is consumed by the yeast, turning it into alcohol and carbon dioxide. The second stage is mashing, when the malt is crushed and started to dissolve (mash) in water. For enzymes to work, certain temperatures are required, so mashing is a rather complicated process (lasting about an hour or two), when the wort is heated, stirring until certain temperature pauses, kept and the temperature raised until the next pause. After complete saccharification (when the starch has turned into sugars), the wort is filtered through a layer of grain husks (grains), which can also take an hour or more. In the final stage, the resulting wort is boiled with hops to give it the necessary aroma and to precipitate the proteins contained in the grain. After filtering the hopped wort from proteins (bruch) and hop pellets, the wort is cooled and sent to fermentation.
According to the method of fermentation, beer is divided into beer with top (warm) fermentation, which is collectively called ale (and it is ale that is always brewed at home, since fermentation is carried out with room temperature) and with bottom (cold) fermentation, collectively called lager (such beer now dominates the world, but serious refrigeration equipment is needed for its production).
Malting, mashing, wort boiling are the most difficult, time consuming and energy intensive operations in the brewing process. But the resulting hopped wort can be concentrated by evaporating water from it (up to a dry powder), and the resulting concentrate can be used to make beer, bypassing all these stages technological process... Large factories never use such a technology, because in this case there will have to be huge factories producing concentrate in the same amount, which they would sell to breweries at a premium for themselves (and evaporation is not a cheap process). Therefore, it is more economical and easier to do this at the plant itself. But for home use concentrate greatly simplifies the process of brewing beer, and a significant increase in costs (a kilogram of malt can be bought even in small retail for less than 100 rubles, and a kilogram of concentrate usually costs from 500 rubles) for home made not so critical.
The first people to understand the prospects for home brewing were in the United States, where already at the end of the 20th century, an extensive infrastructure to support home brewers began to be built. And now this occupation in the United States is carried away by one million people. Concentrates for home brewing arrived in Russia in the mid-1990s. In 1994-1995, the Teddy Bear company was formed, which began to actively promote the idea of \u200b\u200bhome brewing to the masses. The name of the company has become in some sense a household name, often beer brewed from concentrates is called "teddibrating".
What does it take to brew beer from concentrate? You need a saucepan to dilute the concentrate, and you need a fermentation vessel in which the wort will be fermented with yeast (this vessel - a fermenter - is often called a "brewery"). Yeast is used high, ale, the working temperature of which is room temperature (in contrast to the grass-roots, lager yeast, which ferments at a temperature of about 10 degrees, and ferments at zero). After the main fermentation (which takes an average of a week), the beer is poured into bottles, into which a little sugar is added so that fermentation continues slowly and the beer is saturated with carbon dioxide released during this. Here it is worth debunking another persistent myth - that "live" beer cannot be stored for a long time. With this technology, the beer is exactly "live", because it really "lives", slowly fermenting in the bottle. Moreover, the shelf life of such beer is very long. Light varieties can be aged for months, and strong varieties for years. Of course, glass bottles should be used for long curing, not plastic PET. This technology is used not only by home brewers; since the late 1990s, many microbreweries have appeared in Russia, the productivity of which was measured not even in tons, but in hundreds of liters per month. The cost of such beer was high, according to the existing technological instructions, sugar was usually added to the malt concentrate, often in a 1 to 1 ratio, so the taste came out excessively mash, and although this beer had its own adherents, the term “taddibrating” began to acquire a somewhat negative connotation. Several such producers still exist, although their age is usually short-lived, it is difficult for them to compete with classical breweries due to the high cost price.
"Live" beer really "lives", slowly finishing in a bottle. Moreover, the shelf life of such beer
very large.
equipment and process
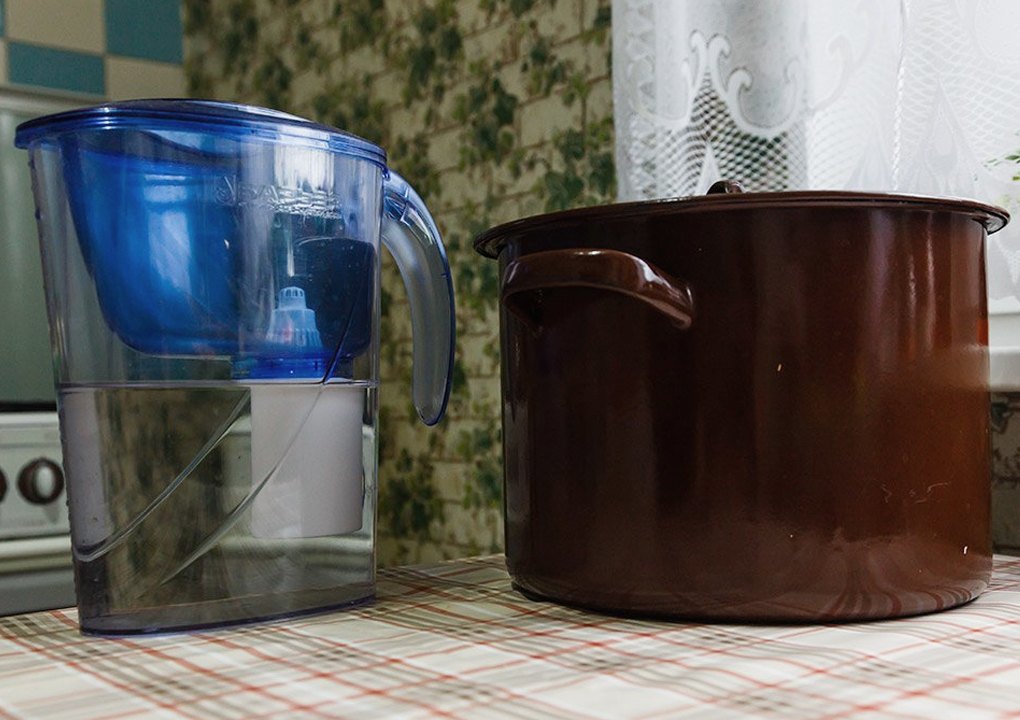 Water preparation by filtration through a charcoal filter, a saucepan for boiling the wort.
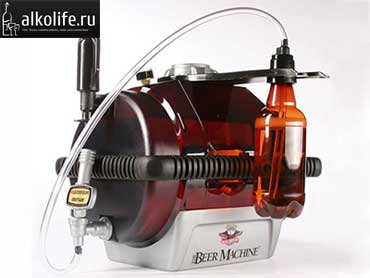
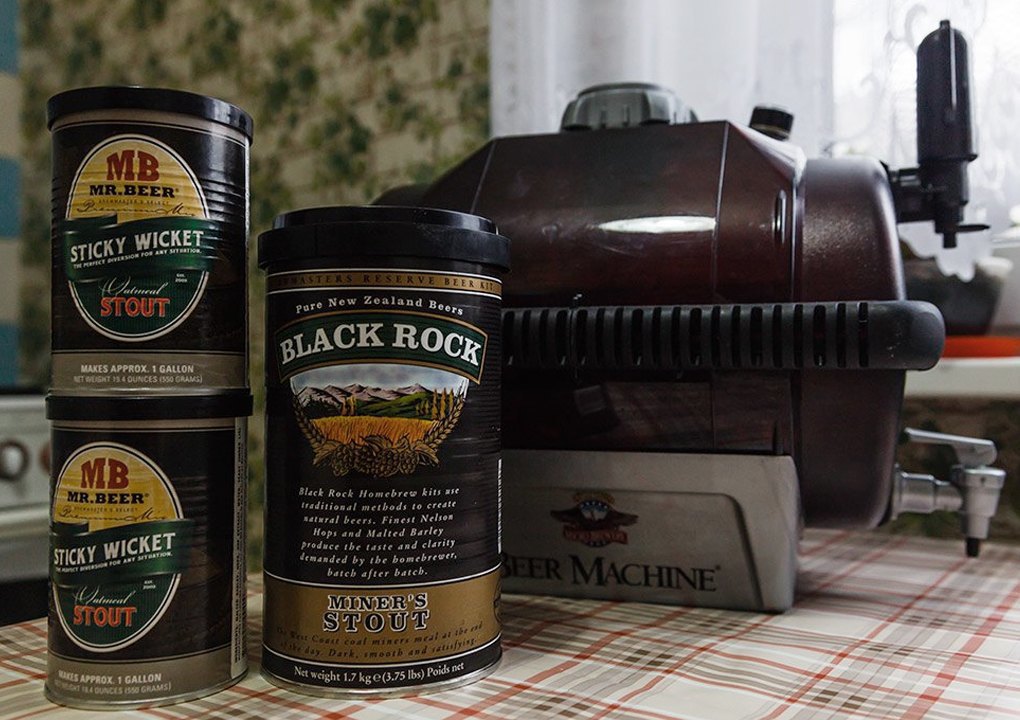 Cans with beer wort concentrates, beer fermentation tank BeerMachine.
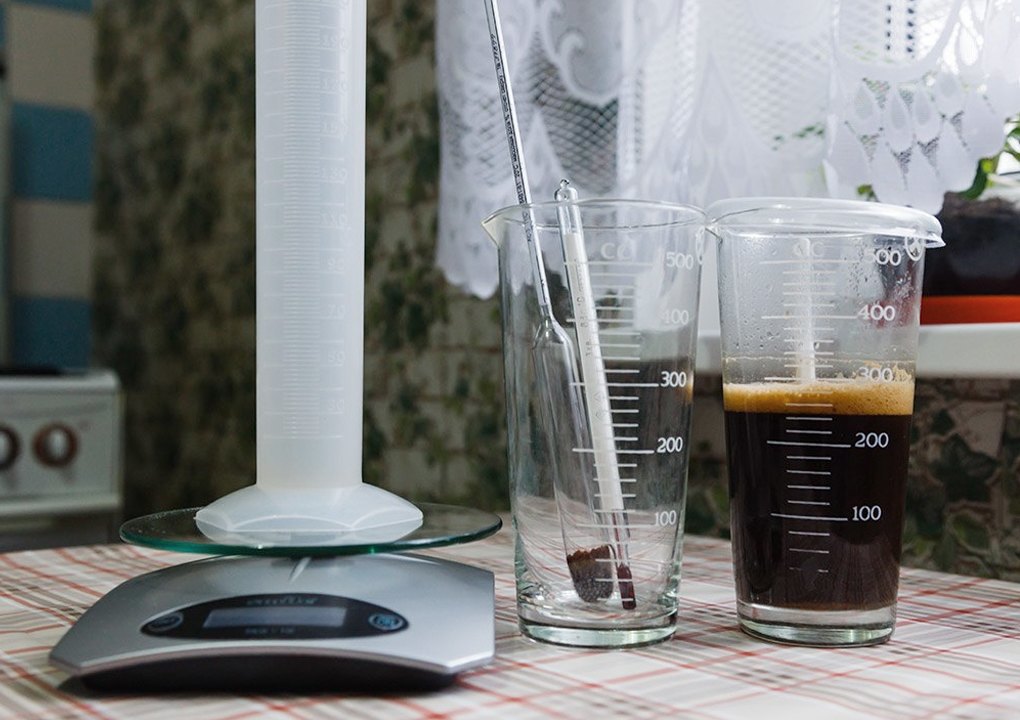 Electronic scales, beakers, thermometer and hydrometer (device for determining the density of beer). Yeast is fermented in one of the beakers.
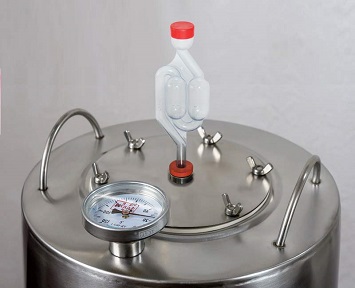
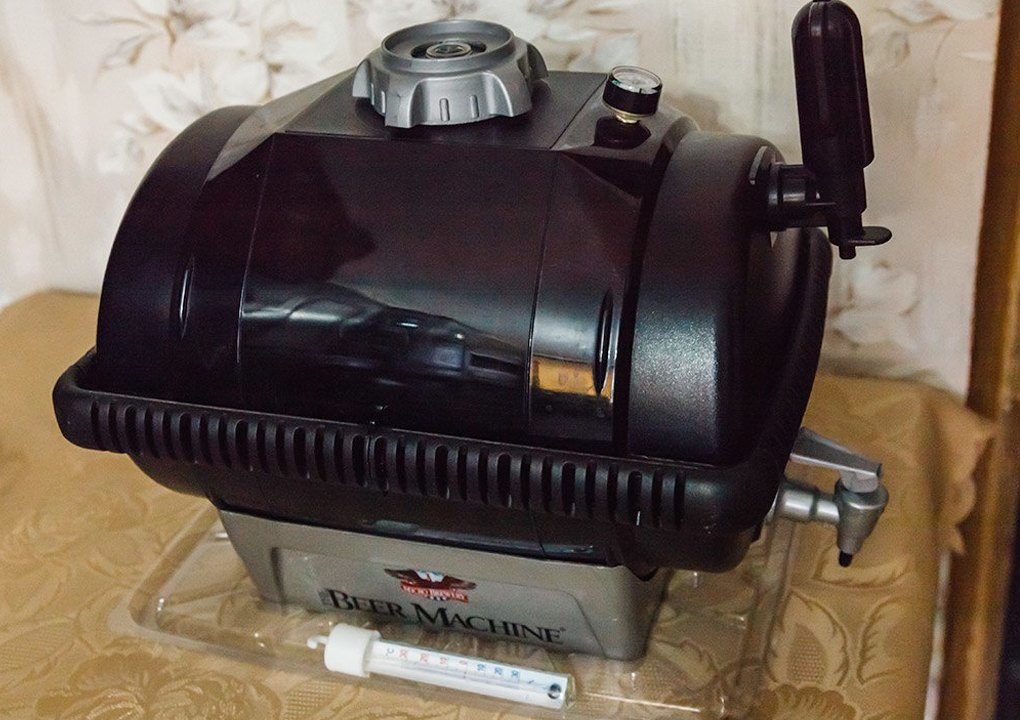 Tank for fermentation of beer BeerMachine with a thermometer.
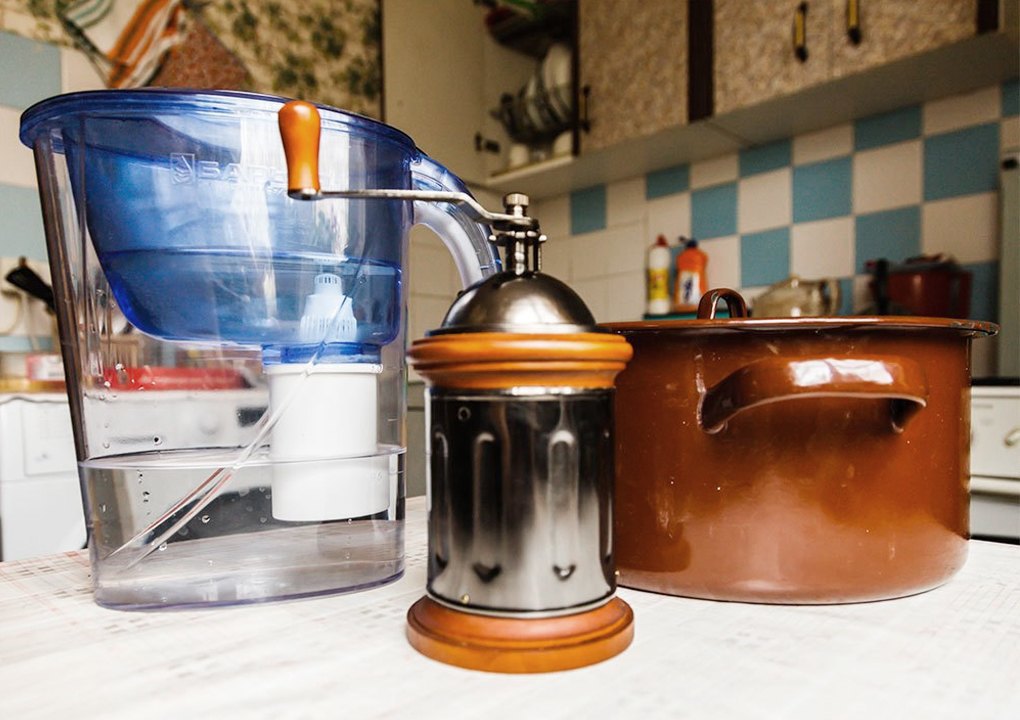 Water preparation by filtration through a charcoal filter, a coffee grinder for the milk of malt, a saucepan for boiling the wort.
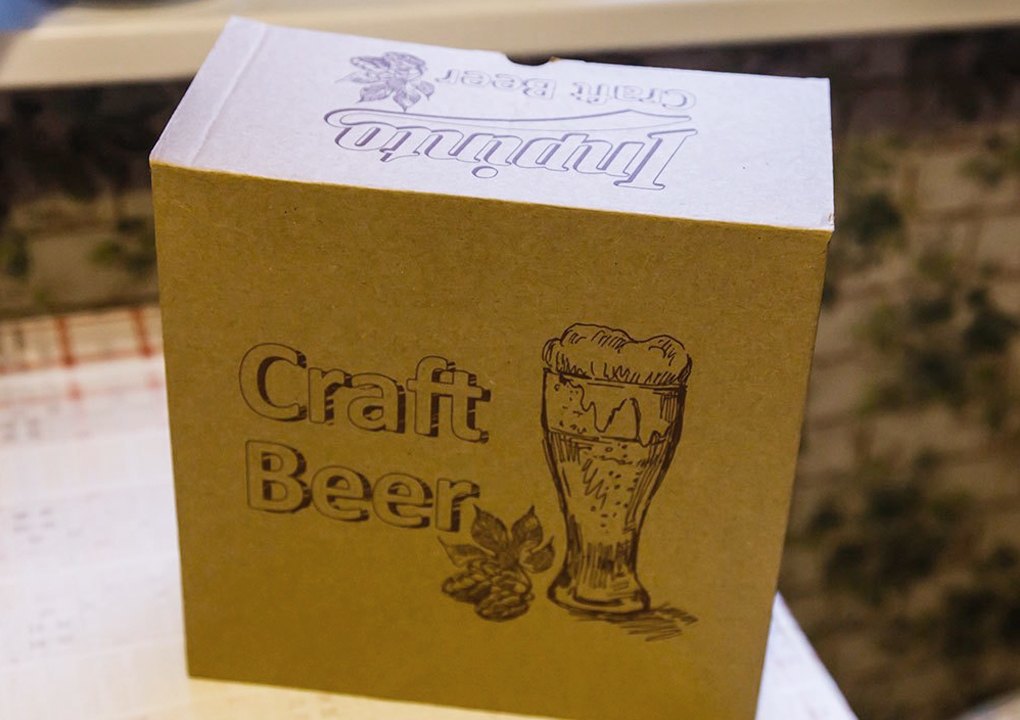 Home brewing set.
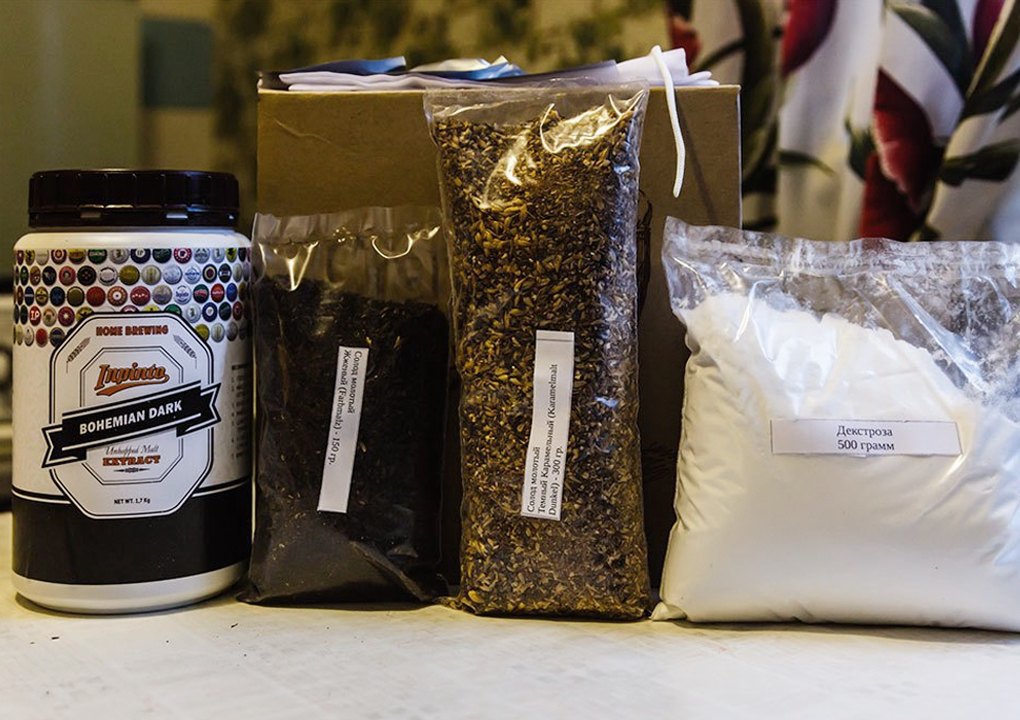 Home Brewing Kit - Unhopped Beer Concentrate, Malt, Hops, Yeast, Dextrose.
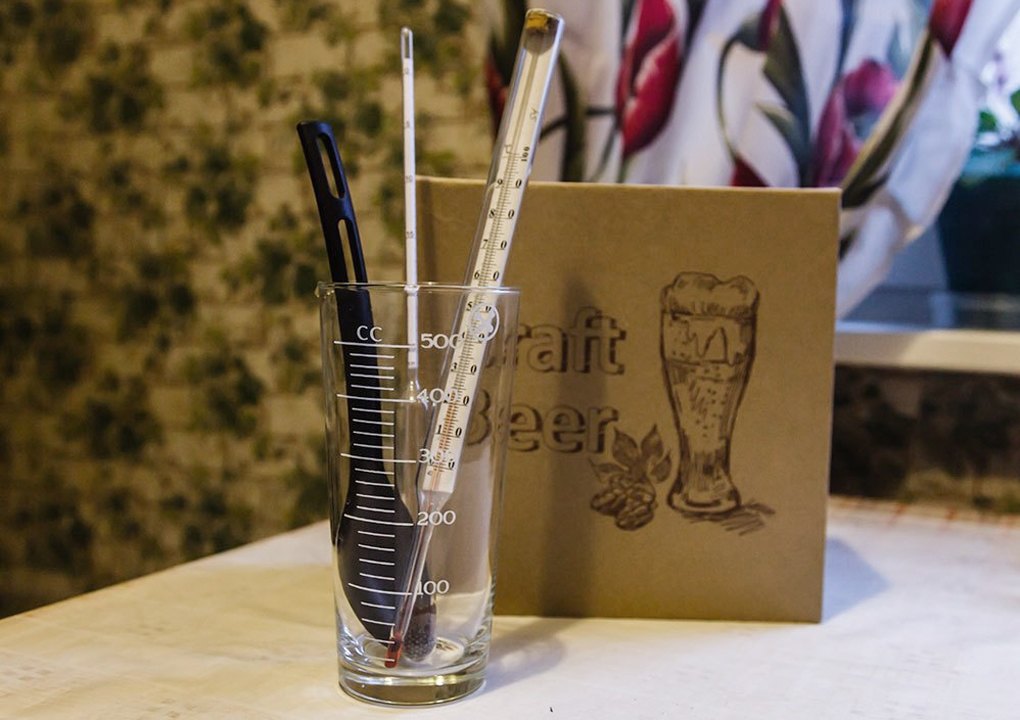 Home brewing set, beaker with thermometer and hydrometer.
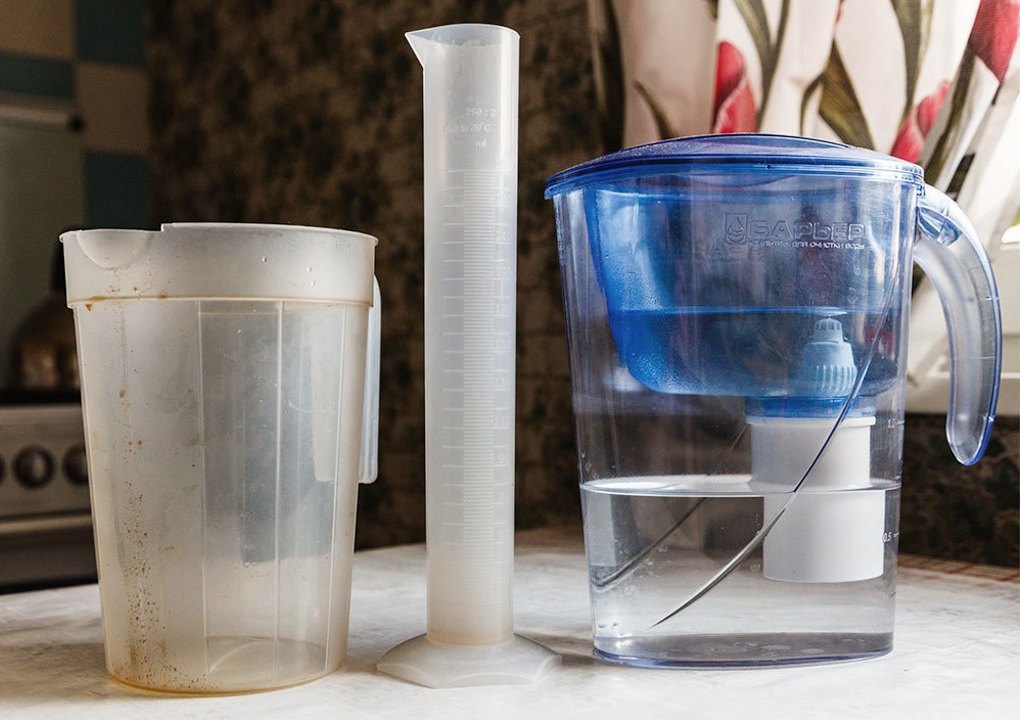 Water filter, various containers.
 Mashing malt in a bag.
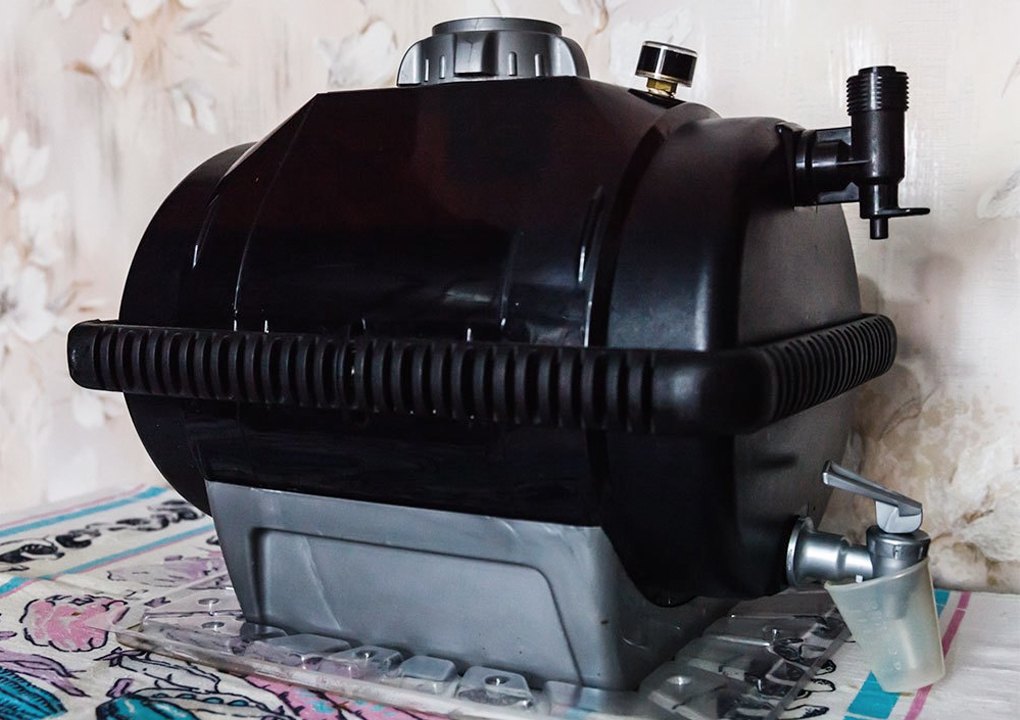 Fermentation tank BeerMachine.
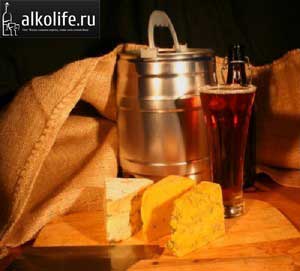
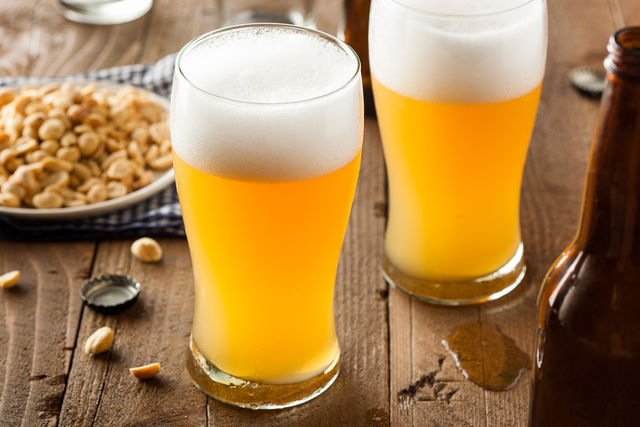
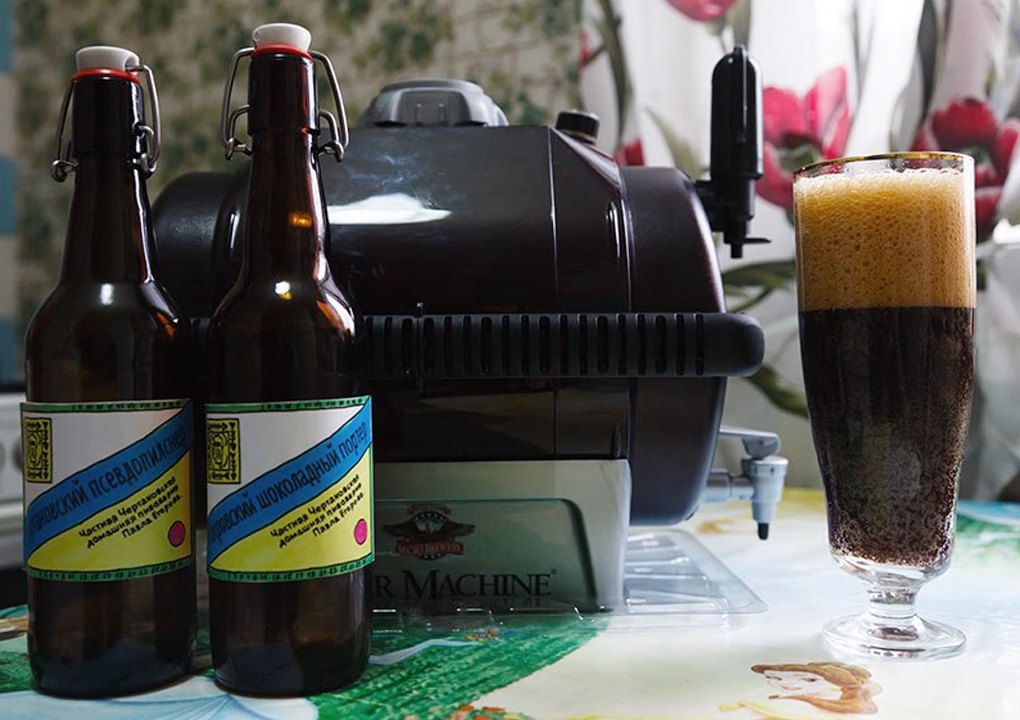 Fermentation tank BeerMachine, homemade beer in a glass and bottles with homemade labels.
Ingredients
At first, a limited number of malt concentrates were presented in Russia, in fact, they were concentrates for pale, amber and dark ales. But over time, the number of suppliers has increased significantly, now there are concentrates on sale from America, Australia, New Zealand, Great Britain, Finland, Belgium, and the Czech Republic. And most importantly, the number of types of beer that can be brewed from these concentrates has significantly increased. Several companies with stores in Moscow, St. Petersburg, Perm are already engaged in the sale of these concentrates; Internet trading is very active. To more fully satisfy home brewers in their creative process, complete sets for brewing began to appear on the market, in which a technology was used that was already close to the classic, albeit simplified for home use. The kits consist of malts that must be placed in a bag and soaked in hot water. The resulting wort is mixed with unhopped malt concentrate and brewed with hops. The result is a beer that tastes very similar to industrial beer.
But there comes a point when the homebrewer, having tried different types concentrates and realizing all their advantages and disadvantages, he begins to think, why not brew beer the way it is done in large factories? In general, it only takes time, a lot of time, and additional equipment is not necessary, although desirable. Of course, no one is engaged in malting, it is not a problem to get malt, but you can grind it with a meat grinder or coffee grinder (but you can also buy a real malt grinder, which are already on sale). Mashing can be carried out in a large saucepan, stirring the mash with a scoop and using a thermometer to monitor the desired temperature breaks by adjusting the hotplate. You can do it differently - insist the mash in a thermos, pouring boiling water into it to raise the mash temperature to necessary pauses... You can filter the wort through a flour sieve, although you can make (or buy) a real filter vat, where at the bottom there will be a metal braid or plastic hoses with holes leading to the tap, and the wort will be filtered through a layer of grains, as in large factories ... In short, adapting technology for home needs is not a problem.
It's not a problem to boil wort with hops, you can cool it by putting the pan in a bath with cold water, or buy a special chiller - a copper tube, which is lowered into the wort, passing cold water through it. The protein and hops can be separated by filtering the wort through a nylon cloth or just plain cheesecloth. And here we have "whole grain" wort no worse than in large factories. The question arises - where to buy different types of malt, different varieties of hops, where to get the right races of yeast? Now this is no longer a problem, and the same stores that sell beer concentrates offer a very wide range of ingredients.
But there comes a time when a home brewer, having tried different types of concentrates, begins to think: why
not brew beer like they do in big factories?
Home brewers
Who are the homebrewers? These are enthusiastic people who did not want to limit themselves to store beer, but decided to brew for themselves the one that they most like. Homebrewing associations date back to the dominance of the Teddybears, which gradually culminated in the formation of the Homebrewing Club. Sometimes a hobby turns into a profession. Several homebrewers have already become top brewers in industrial production... And home breweries such as Victory homebrew and Malz & Hopfen developed into industrial breweries after purchasing large brewing equipment.
What kind of beer do homebrewers make? That light, light, filtered lager with which all the shelves of our stores are forced to brew at home is very difficult (oddly enough), homemade beer is a variety of ales, that is, those beers that dominated until the middle of the 19th century. Now the versions of American, English and, especially after new and absolutely incredible in terms of aroma American hops have reached Russia, are very popular. These are stouts and porters in english styleThis is German-style wheat, this is the Belgian "white" and also the "abbey" ales. That is, for the most part, these are beers that are difficult to fit into any category, since nothing prevents the home brewer from experimenting with the most incredible combinations of different malts, hops, various additives in the form of aromatic raw materials, as well as fruits.
How to Become a Home Brewer? For this, in general, only one thing is required - the desire to brew beer. And if you have it, then do not restrain yourself, but just take and brew beer. Start with concentrate beers and move on to grain brewing as you gain experience. Moreover, now on the Internet you can find information on all difficult issues home brewing.
First of all, refer to brewiki in Russian, you will find a lot of information on the website of the oldest company serving home brewers "Teddy Beer". Many books devoted to this issue are published - here also stands out a short but sensible brochure from "Teddy Beer", a more serious and detailed book by J. Palmer, "The Art of Home Brewing". Forbes K.'s book "Beer, Wine and Cider at Home. Secrets of Cooking" would not be a bad help, if it had not been spoiled by a terrible translation into Russian (Palmer's book also partially suffered from the translation). Literature on english language many, but start with the homebrew "classic", founder of the American Homebrewers Association Charlie Papazian ("The Complete Joy of Homebrewing"). And most importantly - try to brew your own beer - and you will not regret it.
Art
home brewing
John Palmer
Beer, wine and cider at home. Cooking secrets
I used to wonder how to make beer at home and what is needed for this whole undertaking. It seemed that it was unrealistic to make beer at home, but Google helped me, and everything turned out to be not so scary.
Today I have gained a little experience in brewing. On account of 4 brews of beer and only yesterday for the first time I put on extract fermentation, let's see what happens.
I want to write a post about the basics of brewing beer at home, without going into too much detail. For those who want to start brewing beer on their own, I hope the text will clarify and be useful.
When purchasing the ingredients, I saw a DIY (do it yourself) kit in the Russian version for cooking in the store and bought it. The peculiarity of such a set is that it contains the ingredients, accessories necessary for the first brewing, and a mixture of malts that has already been ground with the original recipe.
I bought a set called "Forester's Hut". The trick of the recipe is that in we will use the herringbone \u003d). There will be a semi-dark beer with pine needles.
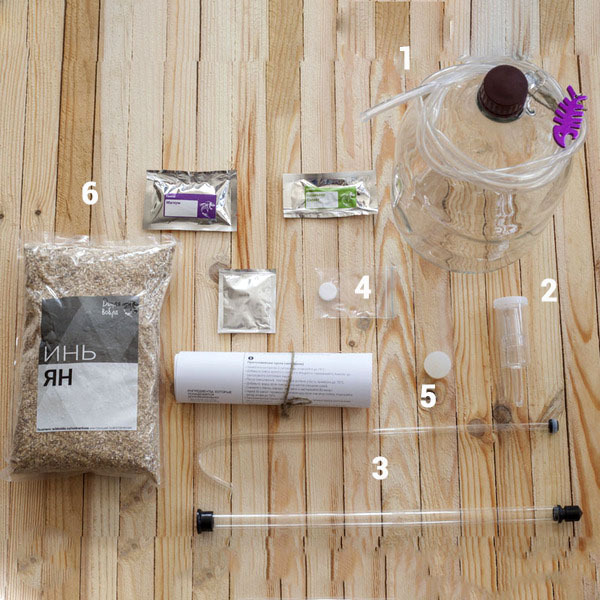
The set includes ( all these things are useful for everyone):
5 liter bottle ( 1 ) - a glass bottle, it is believed that ferment and store alcoholic drinks better in glass. It interacts least with liquids and does not affect taste.
Water trap ( 2 ) - releases gases during fermentation and does not let air in during fermentation.
Autosiphon ( 3 ) - this thing is needed to pour the wort from one container to another without allowing the collection of sediment.
Disinfectant ( 4 ) - disinfection is the most important point... Infect beer, count it all in vain. All equipment that interacts with the wort needs to be processed! The pills are not expensive, but very important. 1 tab. 10 liters. water.
Silicone stopper ( 5 ) - bottle cap. Easy to use, it came in handy as I put the wine to fermentation.
Laboratory thermometer (glass) - The temperature in brewing must be closely monitored. Alternatively, you can purchase an electronic one, but in Russia it is about 500 rubles.
Cooking set 5 l. beer ( 6 ): a mixture of malts (1 kg), hops, yeast.
In principle, there is everything for the first brew. The rest is in the kitchen.
The brewing process itself is divided into several main stages.
1. Mashing
2. Flushing
3. Wort boiling
4. Fermentation
5. Bottling
6. Tasting \u003d)
1. Mashing
There is nothing to rub here, just the process of boiling malt (brewing grain) at a certain temperature
Brewing malt is a variety of sprouted grains and roasted at a specific temperature. Malt color index - EBC. Sometimes under 1000 EBC, it looks like malt, like sun-burnt seeds. Typically the base (most used) malt for all recipes is - Pilsen
Pre-set to heat 2 liters. water (enough for 1 kg of malt), and while the water was warming up, finely chopped our main ingredient in this cooking - spruce, into 5 liters. you need 150 gr.
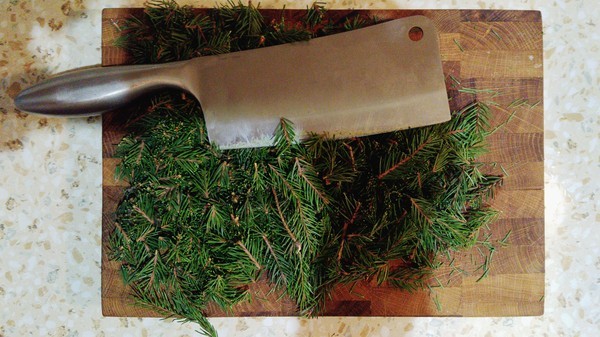
I picked a spruce in the forest, and when I cut it, the whole kitchen smelled of forest and new year.
We fall asleep in preheated 2 liters. water the malt mixture, spruce and stir, if the mash turns out to be very thick, you can add water.
The water temperature in my case according to the recipe is 70C. We fell asleep and cook, adhering to the recommended temperatures and pauses according to the recipe.
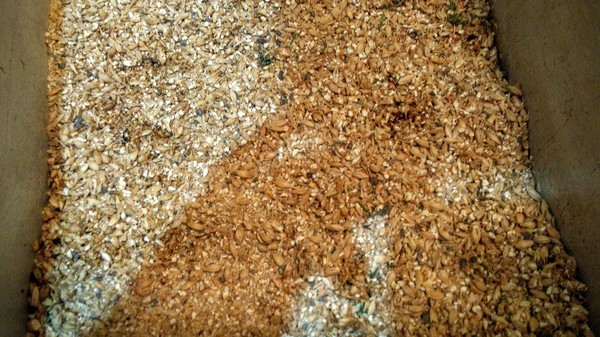
Temperature pause - the mash heats up to a certain temperature, and is held with the right temperature for a while. Malt converts starch to sugar. In recipes, these pauses are usually scheduled, it is important to observe them.
The main task is to get our sugars from malt and nutrientsso that the yeast has something to eat during fermentation.
While the mash is cooking, we need water to flush it out. We prepare 4 liters. water with a temperature of 70C.
2. Flushing
We will wash out all the tasty treats from our resulting porridge (mash) (get the wort). To do this, we prepare an additional container where the wort will be washed out. Here gauze or a colander will come in handy.
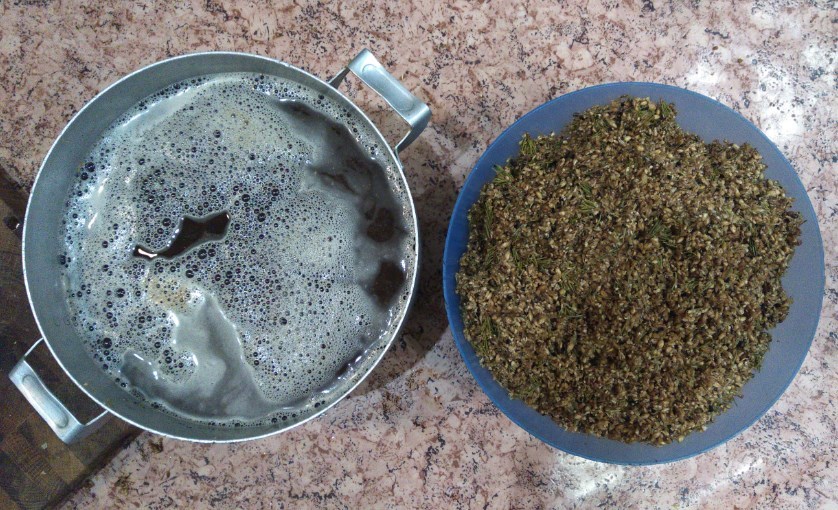
As a result, we get something like the following: on the left, ready-to-boil wort and malt cake.
If a little less wort is produced during rinsing, you can add water.
Touch the cake with your hand and as it dries, you will feel that your hand will become sticky from the sugars from the malt.
3. Boiling the wort
Now you need to cook the resulting wort. Cooking takes 60 minutes. Bring to a light boil and cook like a broth.
The wort needs to be boiled for:
Protein folding - see later how protein flakes float
Evaporation of unwanted wort components
Giving density to beer - the more we brew the wort, the denser the beer is. Recommendations from 60 to 90 minutes. Doesn't make sense anymore
Beer is a drink that has come down to us from time immemorial, with legends and funny incidents. Its first composition: water, malt and hops was determined by the Egyptians (the ancients). It served as both medicine and bread. However, for some, everything has remained so to this day. But for beer lovers it is no longer enough of the already not small assortment that the store offers us. I want something natural, alive, without additives. This is how the experiment and leftovers old recipes home beer options were born. Some, in order to please themselves completely for several years, strive to create only their "perfect" beer.
We do not belong to the descendants of brewing dynasties, so we will offer you traditional recipes and tell you how to make beer, without leaving home. However, if something seems out of place to you and requires correction, experiment with your health!
Maybe your recipes will bring new notes and become just a bomb in the beer field.
In the meantime, it's worth learning about the main components of the future beer (preparation):
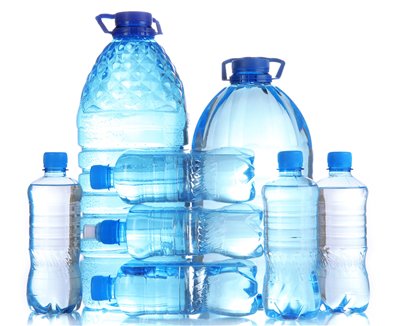
First, it is water. It should be clean, tasteless, colorless, odorless. Preferably artesian, or at least passed through a home water filter. You can also use purchased water. Expensive, but acceptable. Its main advantage is the successfully passed bacteriological control.
Secondly, it is malt. If he good quality, it should be full, sweetish in taste, have a white color inside, smell good and not sink in water.
To make beer, you need to prepare it: soak, germinate (t \u003d 10-30 degrees), dry and grind to a cereal state. The process will take you about five days. However, the color of your beer will depend on how you dry your malt. To get light, you need to dry the barley in a natural wayto dark - it must be dried in the oven, lightly frying at the same time.
Thirdly, it is hops. It is he who gives the beer taste and the necessary density. Hops must be of good quality. Consider it. The bumps should be reddish or greenish yellow tint... If the color is dirty, green, then this raw material is not good. It is good if yellowish dust is present under the scales of the cones.
Fourthly, it is yeast. It is better to take beer yeast, but if you have not gotten it, then ordinary yeast will do. The main condition is that they must be alive.
How to make beer?
So, it's time to move from theory to practice. The recipe below is a classic one, according to which you can get both light and dark beer. This will depend on how you dry the malt.
In order to fully immerse yourself in brewing, you need to prepare both the necessary components and the "technological" inventory.
Home Brewing Components:
- 27 liters of pure water
- 45 grams of hop cones
- 3 kilograms of malt (barley)
- 25 grams of yeast (brewer's)
- granulated sugar at the rate: eight grams per one liter of young beer (to saturate with carbon dioxide)
Inventory required in the work:
- a container for boiling wort with a volume of 30 liters (a huge enamel pan will do)
- container where fermentation will take place
- thermometer for control temperature regime
- containers where the finished drink will be bottled (glass or plastic)
- narrow silicone hose for filling beer into bottles
- bath filled with very cold water (to cool the wort)
- large piece of gauze (at least 5 m.)
- iodine tincture and dish white (optional)
- device for determining sugar content (hydrometer) (optional)
How to brew beer at home (preparation):
Stage 1. Preparatory.
All inventory (except for the thermometer) must be washed, poured over with boiling water and dried. Wash your hands in hot water and dry them (no need to pour over boiling water). The entire cooking process must be accompanied by complete sterility! This is very important condition to get just beer, not mash.
Prepare malt as described above: soak, germinate (t \u003d 10-30 degrees), dry and grind (not to flour!)
Yeast needs to be activated. To do this, before adding them to the wort, you need to dilute them with a small amount of warm, pre-boiled water.
Stage 2. Wort grout.
At this stage, the crushed malt is mixed with some of the hot water. 25 liters of prepared pure water it is necessary to pour into a saucepan and heat it to 80 degrees. Then you can do one of two ways: pour the crushed malt directly into the water or place it in a bag from light fabric (gauze), which is then lowered into the pan. This bag will prevent both the mix from burning and facilitate further removal of the remaining malt from the water. You don't have to filter 25 liters of liquid. So, after dipping malt into hot water, the pan must be closed and the contents boiled for 1.5 hours over low heat, maintaining the temperature of the mixture within 61-72 ° C.
This temperature regime is very important. And if you keep the temperature closer to 61 ° C, you will get a stronger drink. If the temperature is closer to 70 ° C, then the beer will lose a little in strength, but will acquire a more intense flavor. The optimal temperature is 65 ° C, when the final product will have a strength of 4% and have a rather bright taste.
After 1.5 hours, you will need to remember your chemistry lessons and conduct an analysis for the presence of starch (it should not be). To do this, you need to pour a spoonful of wort onto a clean white plate and drip 1-2 drops of iodine. If the wort has changed color, acquiring blue colour, it means that starchy substances are present in it, and the cooking process needs to be continued for about 15 minutes. If the color of the wort has remained unchanged, then there is no more starch in it, which means that you can proceed to further manipulations.
If you are not at all friendly with chemistry, then you will have to extend the cooking time by 15 minutes without carrying out an iodine test. This procedure will not make your beer worse.
Now that everything is ready, the temperature in the pan should be quickly raised to 78 - 80 ° C and the mixture should be kept in this mode for exactly five minutes. During these minutes, the fermentation process will stop in it, and the bag with the remaining malt can be removed. But don't throw it away. More precisely, it must be rinsed in the remaining two liters of water. This water is preheated to 80 ° C. Next, water with washed extractives is poured into a common pan.
If you decide not to use a cloth bag, you will have to filter the entire wort several times, spending a lot of time and effort. And most importantly, having arranged in the kitchen a full bedlam with huge containers and partly violating the necessary sterility.
Stage 3. Boiling the wort.
After freeing the wort from the remnants of barley, it must be brought to a boil (but not boiled!) And add 1/3 of the hop (15 g). Now the mixture needs to be boiled for half an hour and add another 1/3 of the hops (15 grams), and when 40 minutes have passed - the last 15 grams. You should now boil for the last 20 minutes.
So your wort should boil for a total of 1.5 hours. And all this time it should gurgle.
Depending on your prescription, total time boiling and hop addition intervals sometimes change, but this option is optimal for obtaining in the future good beer.
Stage 4. Wort cooling.
it important stage, during which there is a very high risk of contamination of the wort by foreign microorganisms. Therefore, you need to do everything quickly. To do this, the pan must be transferred to the bathroom and lowered into ice water... This should be done carefully, as there is a very high risk of scalding and getting deep burns. The wort temperature should reach 24-26 ° C. This will take about 15 minutes to half an hour.
Now the mixture must be passed through a layer of sterile gauze, while placing it in a container, where it will ferment in the future. For the wort to receive enough oxygen, this transfusion procedure (but without gauze) must be repeated two more times.
Stage 5. Wort fermentation.
Activate the yeast first warm wateras described at the beginning. Then add them to the wort and stir.
It is imperative to pay attention to the label and find out what type of yeast you are working with. If this is a top-fermented yeast, then for its introduction it is necessary that the temperature of the wort is at least 18-22 ° C. If it is bottom-fermented yeast, then for its introduction it is necessary that the temperature of the wort fluctuates between 5 and 16 ° C. These differences determine the production of completely different types of beer in the future.
So, the fermentation container, filled with everything you need, is transferred to a room without access to light and we maintain the temperature in it necessary for the operation of your yeast. It is closed with a lid with a water seal and kept for about 1-1.5 weeks. During this time, fermentation becomes sluggish from active, and by the end of the process the beer becomes light.
Either a hydrometer or a water seal will help determine whether it is ready.
If you have a hydrometer, then you are taking readings from two samples of the drink with an interval of 12 hours. If the readings obtained are almost identical (differences in hundredths), then feel free to proceed to the next step.
Focusing on the water seal, you should make sure that bubbles do not appear in it during the day.
Stage 6. Plugging and carbonation.
At this stage, you should saturate the beer with carbon dioxide to improve its taste and to create foam.
To do this, you need to prepare bottles where the drink will be stored in the future. It's good if they are opaque. In addition to sterilizing them, sugar must be added to each. According to the recipe, you will add eight grams for each liter of the resulting drink.
Using a sterile silicone tube, fill the bottles with beer, while simultaneously removing the sediment. The tube should be approximately in the middle of the beer, not touching the bottom of the pot or the surface where yeast may remain. Bottle filling stops at a distance of 2 cm from the neck. After that, they need to be tightly corked. This process is easier if the bottles are made of plastic, as no special tools are required to roll them up.
Bottled sugar will cause lung appearance fermentation, which will saturate the beer with carbon dioxide. In order for this to happen, you need to place the beer in a darkened place, observing the temperature regime in it (20-24 ° C) and leave them there for 2-3 weeks. Shake the bottles weekly, starting from the 7th day. Later due date bottles should be moved to a cool place. This could be a refrigerator or a cellar.
Stage 7. Maturation.
After the bottles have cooled, you will receive a beer that is already drinkable. But, keeping it for another month in a cool place, you will significantly improve its taste.
The result of your efforts will be 22-24 liters of good beer. Its strength will be approximately 4%. You can store it in a cool place for 6-8 months, sealed. Having opened the bottle, you will need to drink it within 2-3 days. But you better do not delay.
This recipe practically reproduces the factory technology, but if this is difficult for you, then use either ready-made concentrates for home brewery, or prepare a drink that imitates the taste of beer according to numerous other recipes.
You can buy beer at any store. However, in breweries, various dyes and preservatives are added to the drink so that the beer retains its presentation longer. If you don't trust beer companies, you can brew beer at home.
Why is homemade beer better than commercial beer?
You can cook it at home. If you carefully read the label on the bottle, you will find that manufacturers often add preservatives, flavors and colors to the drink. And if the addition of preservatives can be somehow justified (natural beer spoils quite quickly, and yet it still needs to be bottled and delivered to the store), then the addition of flavors and dyes is important for manufacturers only to improve the presentation of the product. Also, homemade beer compares favorably with draft beer with thick foam and rich hop-malt taste. Also, factories often resort to the clarification and pasteurization procedure, which decomposes various vitamins and beneficial trace elements.
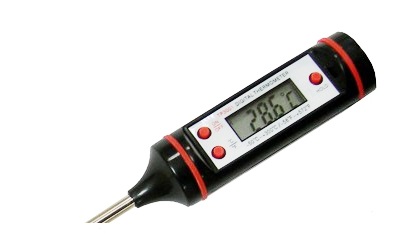
There is an opinion that a lot of special expensive equipment is needed to produce good beer. This is a myth that is actively supported by many brewing companies. Home brewing is not profitable for them. The only expensive tool you can't do without when brewing beer is an electronic thermometer. He will instantly determine the temperature of the liquid in which he was placed. It is really difficult to do without it, since at some stages of cooking it is necessary to maintain a strictly defined temperature.
Necessary equipment
To make beer, we need the following tools:
Pot for 25-30 liters wort ... Give preference to enamel pans without black burn marks. Before cooking, wash the pot well with detergentand then dry in the sun. It is important that there is no detergent left in the pot - this will ruin your drink.
Additional fermentation tank for 20-25 liters ... For this purpose, pots, bowls, various earthenware are suitable. You can ferment wort in one container or in several.
Thermometer ... It's impossible to brew good homemade beer without a thermometer. Moonshine and wine do not require a special regime. But in brewing, you can't do without a thermometer. Give your preference to the long-nose electronic thermometer. Yes, a thermometer can be quite expensive, but the purchase will pay off.
Ready Beer Bottles ... Give your preference to glass containers as glass does not retain odor well. If there are no glass bottles, and their purchase is expensive, you can pour beer into plastic bottles.
Medium thin hose ... Give preference to silicone hoses. We need this component to remove the foam.
Cooler for beer wort ... For this purpose, you can use a large metal bowl filled with cold water. If you don't have a bowl required sizes - you can use a bathroom filled with ice or cold water.
Odor trap ... We need it for fermentation.
Gauze for malt bag and filtration ... The gauze size should be 3-5 meters. It is inexpensive.
Wooden or metal spoon ... We will need it to stir the drink while cooking.
Iodine and a clean white plate to take a sample (optional, you can do without it).
Instrument for measuring the density of liquids - hydrometer (also optional).
What is beer made of?
A standard set for brewing beer looks like this:
- Water - 25-27 liters. We will brew hops and malt in it.
- Hop with an acidity of 4.5% - about 50 grams. Hops can be found in any market. For homemade beer, Russian hops are suitable. Hops will add bitterness and aroma to the drink.
- Barley malt - about 3 kilograms. Barley malt can be obtained from any market or from specialized store... However, remember - Russian malt is usually not very good. high Quality... Buy German or Czech malt. It can be ordered online. The malt will make the drink rich and tasty.
- Brewer's yeast - about 30 grams. Brewer's yeast can be obtained from any market or specialty store. You can also buy Russian yeast. We need yeast for fermentation.
- Sugar... We will need sugar with the calculation of 8 grams of sugar 1 liter of beer. Sugar is important for additional fermentation, as well as for saturating the drink with carbon dioxide.
How to brew homemade beer in six easy steps
There are many ways to make homemade beer. Next, we will look at how you can brew beer at home in 6 steps. Even a beginner can master it.
First, carefully read all the cooking steps and tips, and only then proceed to the process itself.
Stage 1 - preparatory work
Check availability necessary components and equipment. Check the thermometer separately - for this, boil water in a container.
Sterilize the instruments. This is to prevent unwanted bacteria from entering the beer. Wash all equipment and dry in the sun. While the equipment is drying, wash your hands with soap and water. Do not use alcohol or vodka as a sterilizing agent - this will harm the drink. Sterilization is vital. If you don't, there is a chance that you will add so-called "wild yeast" to the wort, which will turn your home-brewed beer into a tasteless mash.
Pick up water. Give your preference to bottled or spring water. If it is quite expensive to get it, you can use tap water. If you use tap water, boil it a day before cooking, and then place it in a dry, cold place to stand. This must be done in order to get rid of various harmful components in water. For example, tap water is often chlorinated, and during settling, chlorine will leave the water per day.
Prepare yeast. If your yeast is compressed, break the yeast brick into small pieces, then fill them with clean warm water for 5-10 minutes.
Stage 2 - prepare the wort for cooking
Take malt, put it in a saucepan. Then take a grinder and grind it to a powder. The malt is then ready for grouting. Sometimes malt is sold already in crushed form. However, experienced brewers advise against buying this malt, as it often contains artificial additives like starch or even flour to increase the weight of the product.
Double Roller Malt Mill
Make a small bag of cheesecloth. Place the ground malt there. The malt must not fall out of the bag. It is recommended to make a bag in 3 layers.
Pour 25 liters of water into a large saucepan and put it on fire. Place a thermometer in it from time to time. When the temperature is around 80 degrees, turn the fire down.
Place the bag of malt in the water and put the lid on the pot. Boil the malt for an hour and a half. The temperature must be maintained at about 67 degrees. Remember that when you put a malt bag in a saucepan, the temperature will drop dramatically, so sometimes brewers will make the fire a little bit bigger.
Brewing at 67 degrees will make the beer thick and soft in taste. Its strength will be about 4%.
After an hour and a half, do an iodine test. It is done to determine the presence of starch in the drink. A sample is made like this: several tablespoons (5-10 milligrams) of wort are taken, they are poured onto a white plate; then a few drops of iodine are dripped onto the wort. If the color of the liquid has not changed, then it is considered ready. If the color of the liquid turns dark blue, boil the wort for another 10-15 minutes. It is important that the iodine test may not be done - it is enough to cook the wort for an additional 15 minutes.
Bad and good result iodine test
During boiling, the malt participated in the natural fermentation. Now we need to stop this process. To do this, we make a larger fire so that the temperature in the pan is about 80 degrees. Cook for 5 minutes.
After that, take out the bag of malt from the pan.
Stage 3 - boil the wort
Increase the fire to boil the liquid.
Add 20 grams of hops there. Do not diminish the fire. After half an hour, add 15 grams of hops.
After another half hour, add the remaining 15 grams of hops. You need to cook the wort for another half hour.
Stage 4 - wort cooling
Our task at this stage - very quickly cool the wort to 25 degrees. This must be done within 20 minutes so that wild bacteria do not have time to settle in it, starting wild fermentation.
- Turn off the pot of wort, put on tight gloves, add some cold water to the bathroom.
- After that, we take a pot of wort and put it in the bathroom. After that, fill the bathroom so that no water gets into the pot. If there is ice in the refrigerator, add it to the bathroom.
- After 15 minutes, take a temperature measurement of the wort using a thermometer. If the temperature is 25 degrees or below, you can proceed to the next step. If not, wait a bit.
- Now pour the chilled wort into the fermentation vessel, before passing it through cheesecloth several times.
Stage 5 - fermentation of wort
Now you need to add yeast. There are two types of them (depending on the temperature regime):
Top fermentation is carried out at 20 degrees.
Bottom fermentation - applied at 10 degrees.For our case, top fermentation yeast is suitable (if you want to add “bottom” yeast, cool the wort additionally).
The following actions:
Use the instructions on the yeast pack to calculate required amount yeast.
Take a glass of cold water, pour the yeast into it, stir it well.
After that, pour a glass of yeast into a saucepan with wort, mix well the resulting mixture.
Place the pot of yeast in a cool, dark place. Install a water seal to prevent excess oxygen from entering the container.
In about 12 hours, fermentation will begin. Active fermentation lasts about 2-3 days, after which the process begins to die out.
After a week, remove the pan, remove the water seal and check the density of the liquid using a hydrometer.
After half a day, remove the pan again, remove the water seal and check the density of the liquid using a hydrometer. If the numbers are the same, fermentation is over. If they differ, let the liquid ferment more.
Stage 6 - clogging, adding sugar, obtaining carbon dioxide
Now you need to carbonate. This must be done in order for the beer to foam well and be carbonated:
- We take glass or plastic bottles, add 8 grams of sugar per liter to each. After the beer is added, the sugar will cause a little additional fermentation, which will release some carbon dioxide.
- Pour beer into bottles, close tightly with a lid. The distance between the beer and the lid should be up to 2 cm.
- When pouring, the bottles should not be shaken so as not to disturb the yeast. If you touch the yeast, the beer will turn out to be very cloudy (although some people like it).
- Place the bottles in the dark dry placewhere the temperature will not exceed 24 degrees. After three weeks, the beer will be ready. Shake the beer well every week. Then transfer the beer to the refrigerator. The beer is ready to drink. In a good refrigerator, beer can be stored for up to 9 months. After opening the bottle, the drink is stored for three days.
To make home brewing easier, experienced brewers advise the following:
- Russian malt is of rather low quality. Therefore, give preference to foreign malt, such as German or Czech.
- Never buy ground malt, as vendors often add starch to it. Do not overpay extra money for starch.
- You can let the beer mature. For this on final stage do not put the beer in the refrigerator, but let it sit for another month. As a result of maturation, the beer will acquire a caramel flavor.
- Remember to stir the mixture with a spoon while boiling the malt. This will enhance fermentation, which will have a good effect on the quality of the drink.
How to brew beer at home - a traditional recipe
4.7 (94.12%) voted 17
Live beer homemade, aromatic and tasty, is much better than the store, because you know exactly what products were used in the cooking process. It is pleasant to treat friends and relatives with such beer, because home brewing of beer is a very rare phenomenon in our life.
How to quickly and easily brew beer at home?
There is an opinion that home cooking technology requires special equipment... In fact, it is not at all necessary to buy a home brewery, you can completely get by with ordinary dishes, unless, of course, you are going to open a brewery. There is no need to cook barley or wheat malt and dry hop cones, it is much easier to buy ready-made ingredients from the store. Exist different recipes home brewed beer, and you will need malt or malt extract, hops, yeast and water to make a classic drink. Some recipes include molasses, honey, salt, jam, cornmeal, black pepper, bread, and other foods, as beer is a versatile drink that allows you to experiment with flavors.
Homemade malt beer according to an old recipe
It is the malt that gives the beer full flavor, richness, pleasant color and persistent head. To make beer, malt is mixed with water and heated to 75 ° C in a large saucepan. Then the resulting malt porridge is filtered through a sieve to separate undissolved grain particles. This is how beer wort is obtained - a vegetable raw material ready for fermentation, to which crushed hop cones are added. The wort is boiled for another 2-3 hours with constant stirring, and then it is again cleaned through a sieve - now to remove hop residues. To save time and effort, you can dip the hops into the wort in a gauze bag, then you don't have to filter. The resulting drink is infused for several hours, and then filtered again.
When it comes time to add yeast, you need to decide which beer you want to brew - top fermentation or bottom fermentation. If yeast is introduced into the wort at a temperature of 20-22 ° C, top fermentation begins, due to which the beer is brewed faster. Bottom fermentation lengthens the brewing process (and therefore shelf life) and gives the beer a hoppy flavor.
The ideal temperature for the active life of the yeast is 18 ° C, so cover the pot with a lid and leave the beer for a week. If foam appears on the surface after two days, it means that you did everything correctly, and if it is not there, put the pan in a warmer place, remembering to periodically remove the foam. After about five days, the beer will acquire the familiar beer flavor, and then you will have to pour it into bottles without shaking and leave it in a cold place for two weeks. There are various variations of malt beer: often sugar, salt, raisins are added to the wort, and hops are sometimes added to the bottles after fermentation is over, the order of laying the products and the methods of fermentation can also change.
Homemade beer according to unusual recipes
There are many technologies for making beer without malt, and these are the most suitable for home brewing. In many recipes, honey is dissolved in water, mixed with hops, and boiled for an hour, then fermented and kept warm. Beet beer is very original - in this case, finely chopped beets are boiled in water with salt, then hop cones and juniper berries are added to the pan, then everything is boiled again and fermented for two weeks. Beer with molasses is distinguished by its rich taste, which is prepared according to the same technology as classic beer, only molasses in this recipe replaces malt.
Yeast-free beer has dark brown and spicy taste, as it is made from ground wheat, barley and rye, fried in a pan. Next, the grain mixture is boiled in water with chicory, and then lemon peel, hops and sugar are added to it. After six hours of brewing, the beer is bottled and stored in a cool place. Sometimes hops are ground with flour and sugar, mixed with water and boiled, and yeast and molasses are added later.
You can make beer from pea, hop and sage pods, and for festive table ginger beer or wine beer will do, orange juice and zest. Beer can be oat, buckwheat, pumpkin, corn, carrot, smoked, chocolate, fruit and even dairy. Brewing beer is a creative process in which any experimentation is appropriate!
Brewing secrets
Beer water should be fresh, clean and soft, so the best way - filtered or boiled water, and if possible, then from natural sources. On bad water, the beer turns out to be tasteless. The same applies to yeast, so for brewing beer, you should buy not food, but special brewer's yeast, fresh or dry.
For cooking, both malt, obtained from the germination of barley, rye or wheat grains, and malt extract, which is an evaporated or concentrated malt emulsion, are used. The choice of malt undoubtedly influences the taste and aroma of the beer. In addition to the traditional varieties - wheat, barley and rye - there are other varieties of malt. Caramel malt gives a sweet flavor to beer, honey notes can be caught in stewed malt, smoked concentrate gives a drink with a fire aroma, roasted malt has a coffee-chocolate flavor, and melanoidin malt has a bright and characteristic taste only for it.
Beer wort - favorable environment for the reproduction of microorganisms, therefore all utensils that are used for brewing beer must be pre-sterilized. Strict hygiene rules should also be followed during cooking.
Beer needs oxygenation during brewing, which is facilitated by intensive stirring and pouring the wort into the pot from a great height. However, during and after fermentation, aeration will only hurt, so while the beer is fermenting, it should not be disturbed - transfer, stir and open the lid unnecessarily. The only thing that can be done is to skim off the foam, which can later be used as yeast.
Many recipes contain incredible amounts of beer ingredients, such as 30 liters of water and 3 kg of malt. You can reduce the proportions depending on how much beer you need to brew.
Correctly brewed beer in plastic bottles has a shelf life of 2 to 6 months, depending on its strength. In glass bottles with corks, beer stays fresh for up to a year, and better ways storage of homemade beer - in the cellar and refrigerator. However, if you've learned how to brew homemade beer, you won't have to store it for a long time, since this tasty and aromatic drink always ends very quickly!
Recipes
Homemade beer without malt
Ingredients: 10 liters of water, 1/3 cup of hops, 1 cup of liquid brewer's yeast, 0.5 liters of molasses.
Cooking method:
1. Pour water into a saucepan, add molasses, mix well, bring to a boil and cook until the smell of molasses disappears.
2. Dip the hops swirled in cheesecloth into the liquid, boil for 10 minutes.
3. When the contents have cooled, add the liquid yeast to the saucepan and mix very well.
4. Pour the beer into bottles and leave uncovered until foam appears on the surface.
5. Skim off the foam, cork the bottles and leave in a cool place for 4 days.Beer intoxicating
Ingredients: 900 g sugar, 90 g hops, 1 kg malt extract (or 8 kg malt), 9 l boiling water, 50 g brewer's yeast.
Cooking method:
1. Pour boiling water over sugar, hops and malt and cook for an hour.
2. Add water to the original volume (9 l) and introduce yeast.
3. Leave the liquid for 3 days in a sealed container at a temperature of 18-20 degrees.
4. Strain, bottle, cork, wire the caps and store in a cool place for a week.