How to make paper pulp for papier mache. Pulp recipe. Papier-mache with newspaper material
The papier-mâché technique has become popular for a very long time. It is used to create different forms and figures from the mass, where paper is used as the basis. Per long time the existence of such a technique, many different recipes, how to make a mass for papier-mâché at home. In this article, we will look at options for the most popular and proven papier-mâché recipes that are used professional craftsmen... Making such a mass yourself with your own hands is absolutely not difficult and not expensive.
Mass recipe for papier-mâché No. 1.
We need:
Gray toilet paper.
Universal PVA glue (can be used for construction).
Linseed oil.
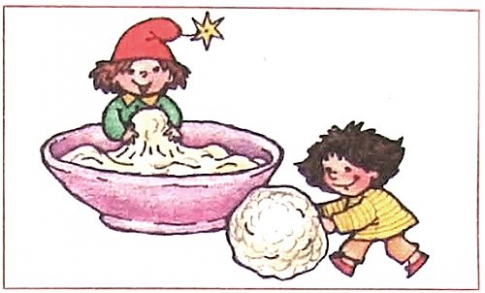
1. First of all, we tear the paper into small pieces and put in a deep bowl.
2. Then fill it with boiling water and leave it for a day. All paper must be submerged in water.
3. After the allotted time, wring out the soaked paper. For this, ordinary gauze or fabric is most often used; you can also do this using a synthetic mesh in a small hole. As a result, the mass should remain slightly moist and it is better to squeeze it out in small portions, approximately 100-150 grams each.
4. Then we crush the wrung out lumps of paper in small portions in a blender and put them in an empty bowl. This is done in order to eventually mass for papier-mâché turned out to be more uniform.

Fig. 1 Masks made from papier-mâché pulp
5. When all the paper is ground, add to it in small portions universal PVA glue. For about one roll toilet paper it takes 200-250 g of glue.
6. Mix everything thoroughly and add linseed oil (1 tbsp. Spoon for 1 roll of paper), then re-mix the mass until a homogeneous consistency.
Thanks to linseed oil the working mass will turn out to be much more plastic. Any shape can be created from such a mass. It should be borne in mind that after drying, the shape decreases in size from 2% to 6%.

Fig. 2 Figures made from papier-mâché pulp
Mass recipe for papier-mâché No. 2.
We need:
Gray toilet paper.
Universal PVA glue.
Fine-grained putty.
Liquid soap.
The whole sequence of actions is the same as in the first papier mache recipe... Only here, after PVA glue, we add putty (5 tablespoons per 1 roll of toilet paper) and liquid soap(1 tablespoon per roll of paper). Putty is needed in order to make the mass more plastic, and liquid soap gives additional smoothness to the resulting figures.

Fig. 3 Jewelry made from papier-mâché pulp
Mass recipe for papier-mâché No. 3.
We need:
Water - 1 liter.
Dry wood glue - 500 g.
Thin paper (newspaper) - 250 g.
Natural drying oil - 100 g.
Rosin - 20 g.
Fine chalk - 3 kg.
1. First of all, soak wood glue in water and cook it until a homogeneous mass is formed, while not allowing it to boil (see the package for the ratio of water and glue).
2. Then we prepare the paper. To do this, grind it into small pieces, fill it with water and cook for about an hour on low heat.
3. Then let the paper cool down to room temperature, and then knead it as much as possible until smooth.
4. Then we are faced with the task - to squeeze out all the paper with gauze, as best as possible.
5. Add the resulting lumps in small portions to the hot glue and stir.
6. Then add drying oil and crushed rosin.

Fig. 4 More masks made from papier-mâché mass
7. Heat the whole mass for papier-mâché over a fire and stir constantly until the rosin is completely dissolved.
8. The resulting mixture must be allowed to cool completely and only after that you can start kneading it into chalk.
9. To do this, pour a pile of chalk on a flat surface and make a depression in the center.
10. It is into it that we add the cooled glue in small portions.
12. For greater plasticity, add drying oils to small amount. Mass for papier-mâché ready to go.

Fig. 5 A vase made from papier-mâché pulp
Mass recipe for papier-mâché No. 4.
We need:
Egg boxes.
Flour paste.
1. We prepare boxes for eggs (with interesting ideas You can familiarize yourself with crafts from such boxes c). First of all, they need to be brought to a state where you can work with them. To do this, we tear the boxes into small pieces and pour boiling water over them.
2. We leave it in this state for a day, after which we change the water and leave it for another day.
3. After the indicated time, they should be soaked well, after which they should be squeezed out well with the help of a colander.
5. To the resulting mass, we begin to add flour paste, with a consistency similar to liquid sour cream and mix everything thoroughly.
6. To the received mass for papier-mâché knead 2-3 tablespoons of flour. The mass should be soft and pliable. It is good to make masks with such a mass.

Fig. 6 Works made from papier-mâché pulp
Do you know that interesting art papier-mâché did not appear in France, as you might think from the name, but in China? It was the inhabitants of the Far East who came up with the idea that paper is great stuff for modeling. Try and join the creativity of papier-mâché, using the materials that you have at home.
Application methods
There are several different papier-mâché techniques - working with a pre-prepared mass and pasting with pieces of paper a certain form... The method of work must be chosen depending on what kind of product you want to make.
Mass work
A sticky plastic material made from paper soaked in paste is perfect for creating bulky large objects using the papier-mâché technique. For example, in ancient times, Chinese guards were dressed in light paper armor.
Modern craftsmen use this technique to create toys, decorative elements for home decoration, and even furniture! The work process resembles modeling.
Pasting with pieces of paper
Machining - that's what they call this technique papier mache. Initially, the master selects the shape that he would like to repeat in his product. After that, you need to prepare a lot of paper pieces - you can just tear newspaper sheets into small pieces. The base is pasted over with several layers of paper, after which the product is removed from it and painted.

With the help of waving, it is easy to create dishes: vases, dishes, plates. In addition, in this way you can make small volumetric figures, hollow inside - rattles or maracas, for example.
Paper dough: recipe
A lot of papier-mâché is easy to make at home, because everything necessary ingredients are probably already at your fingertips! In the process, you will need thin paper like a newspaper, starch, water.
- Pour the starch over with water slightly warmer than room temperature to create a gummy substance, similar in consistency to pancake batter.
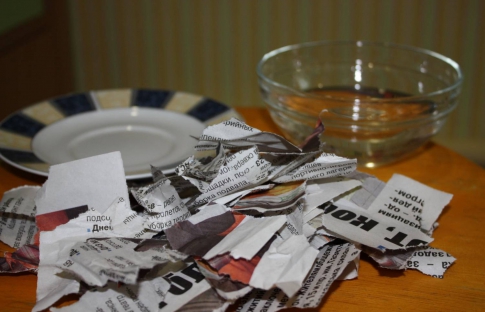
- Tear the paper into small pieces and place in a high-sided dish.

- Gradually add small amounts of starch paste and knead the paper pulp until you get a smooth paper dough.
The dough should be a little sticky, viscous, like plasticine. Ready mix can be used immediately. If you have too much work material, tighten the dish with it cling film and put it in the refrigerator - then the paper pulp can be used at any time.
You can use the recipe this test to complete the next video tutorial - creating a molded vase decorated with fabulous bird from papier-mâché.
This papier-mâché technique is so simple to perform that it can be used in labor lessons or in creative orphanages. Children will love sculpting from new original material, other than salt dough and plasticine.
V recent times Craftsmen are gradually moving away from the papier-mâché dough recipe described above. Now they use materials that were not there before: instead of starch paste - 500 grams of liquid PVA glue, instead of old newspapers - paper towels and toilet paper.
In addition, papier-mâché masters have found a way to make the material more plastic - for this they wrote down 3 tablespoons of linseed oil in the recipe.
- Chop 2 rolls of toilet paper as hard as possible, put in a deep bowl and pour about 1.5 liters of water. Take the paper so that it is all in water, and leave it to swell for a day at room temperature.
- The next day, squeeze out the mass, but so that a little moisture remains inside. Add glue in small portions and mix thoroughly to form a homogeneous consistency.
- Finally add oil and stir again.
This mass can also be set aside and used later. But do not forget that before storing in the refrigerator, the dish with the material must be wrapped with cling film so that the moisture does not evaporate.
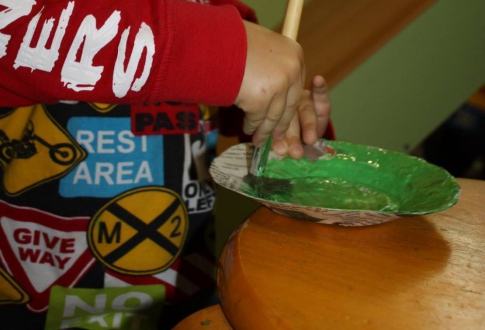
Papier-mâché plate
This technique of creating paper crafts a little easier and takes less time than the previous one. It does not require pre-kneading the dough. Just pick a lot of strips and pieces from newsprint, prepare a plate-shape, a bowl of water at room temperature and PVA glue or wallpaper.
- Turn the plate upside down. Lubricate the workpiece vegetable oil or petroleum jelly - so your papier-mâché product will not stick.
- Soak a piece of paper in water and attach to the workpiece. Lay out the entire first layer of the work in the same way.

- Dip the first piece of paper of the next layer in glue and glue to work. Repeat with all the details of the second layer, then generously coat them with PVA glue on top using a brush.
- Do the subsequent layers in the same way as the previous one. Depending on how thick the product you want to get, increase or decrease the number of paper levels.
- When you have reached the desired thickness of the workpiece, leave it to dry in a dry place at room temperature. Wait about 1-2 days.
- After the workpiece is completely dry, remove it from the plate - it will be easy to do thanks to the oily layer of oil.
- Sand the jagged edges and surface with sandpaper and apply a layer of putty. This will make the garment smoother.
- Color your plate as you see fit.
The craft can be decorated with stucco patterns from paper dough- in this case, you combine both papier-mâché techniques in one product.
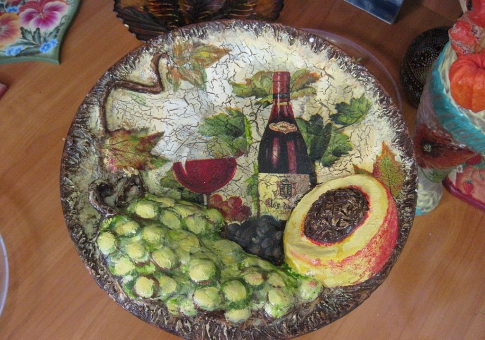 Use thick paints such as oil paints or gouache paints to get bright colours drawings. After the paint has dried, be sure to cover the product with varnish to protect it from peeling and the paper absorbing moisture from the air.
I suddenly thought: "Millions of people live in the provinces, where you won't find all these plastic clays, paperclays and other delights with fire in the daytime, but in every hardware store you can buy PVA glue and toilet paper." Then I decided to make papier mâché at home, the idea was pushed to me by the egg packs. So, I took a roll of toilet paper, cheap for 2 rubles, tore it into pieces and soaked it in water. The paper quickly sold out and turned into paper pulp, then I squeezed out this pulp and poured PVA glue over the peephole. I kneaded the dough. The dough seemed to me thin for modeling, then I leveled the surface and began to spread sheets of toilet paper on it, I waited for the sheet to get wet and mixed it into the total mass, and only then glued the next sheet to the smoothed surface. The result is such a mass. I added a little lemon juice to it for preservation and mixed well again. I wanted to sculpt a pink hare, so I added red gouache to the dough. I put the dough in comfortable glass jars, tightly closed the lid and put it in the refrigerator. In the morning I started sculpting.
The mass is easy to mold, easily smoothed:

Then I twisted the frame from the wire, wrapped the foils for the body and head and blinded this hare:

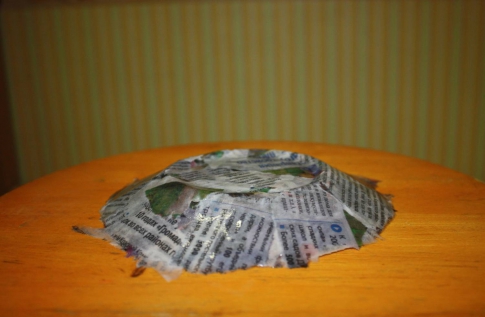
Before sculpting a hare, I tried the material in practice and rolled a ball on a foil base, dried it and looked at the result. The surface wrinkled a little and looked like those egg cartons. Then it became clear that the material was suitable for sculpting various animals with wool. On my bunny, I deliberately roughened up with a hard brush. In the photo, the bunny is not dry yet, only the ears and tips of the paws are dry.

After final drying, I tried sanding the surface of the ball. Zero didn’t take it, I don’t keep another skin in the house, so try it. The finished product is very strong and hard, but if you want, you can push it with a fingernail, pressing hard, I tried to make an effort and break the ball, it didn't work. Can be sawn, drilled, etc.
Sculpt to your health! I hope my advice will encourage you to get creative.
++++++++++++++++++++++++++++++++++++++Pulp recipe

Papier-mache (from the French papier mache - lit. chewed paper).
Papier-mâché products are made in two ways: by external pasting of some form with small pieces of paper and by molding from paper pulp.
We will learn how to make papier-mâché by sculpting (molding). In this method, the pulp is used like clay in the hands of a sculptor.
Starting material - any paper (newspapers, kraft paper from packaging, paper cells from egg packaging, cardboard
Glue - wallpaper, PVA or boil paste (cooked from starch: 1 tsp starch or flour per 1 glass cold water, boil).
Paint: In general, any paint can be used to paint papier-mâché. The most popular is acrylic paint. It's easy to use. It is cheap and contains a lot of color variations. Dries quickly. Also for matte surface finished product tempera paint is suitable, for shiny paint - alkyd or oil. If the tempera painted surface is covered with colorless varnish, it will shine too. It is better not to paint papier-mâché with gouache and watercolors, because they get dirty and erased. To make the gouache more resistant, it is good to add 1 tsp to it. PVA glue (for 1 jar). Can be painted with ink.
Making papier-mâché:
Tear the paper into small pieces and soak in water until it is completely soaked (some craftsmen recommend boiling this paper pulp for 30 minutes). Mash the gruel, you can use a mixer to make it uniform. The goal is to break down cellulose fibers. Squeeze the resulting mixture well. If there is more gruel than you need, save it in a plastic bag for next time.
Now prepare wallpaper glue or weld paste, or use ready-made PVA. Add the glue little by little to the paper gruel, stirring and kneading all the lumps until it becomes soft and elastic, like dough.
Papier-mâché is ready.


How to make papier-mâché (photos from the book " Original jewelry", translated from Italian, published by ASTpress, 2001).
Personally, I like toilet (very cheap)) paper. Pour boiling water over the roll, let it stand until it cools, shred it, chop it (with handles), squeeze and add PVA, knead carefully and the mass is ready, sculpt what you want)
Handsome men are drying, getting ready for painting :) .. I wonder what they will be tomorrow :)) ... 
It took nine of my hearts one roll of the cheapest toilet paper.
1.Tear the roll to shreds :)
2.Fill with water, continue to shred the paper :)
3. We squeeze water out of the resulting mass using a cotton rag (towel)
4 continue shredding pieces of paper 
5. Prepare 1 glass of flour glue - 2 tablespoons flour + water, heat, but do not boil. Bring to the consistency of jelly :)
6.Add the resulting flour glue to the paper and mix well.
7.Add half a glass of PVA glue.
8. Mix well until a pasty mass is obtained, which should not stick to the hands. 
9. We make whatever our heart desires :) 

Connoisseurs say that it is better to dry at room temperature so that the product does not crack.
A good workshop on making papier-mâché, video:
http://art.phi.co.il/blog/2009/01/26/2852/
A mass of papier-mâché. MK from Tatiana Bushmanova.
Many thanks to the talented master for the very useful MK!

Hurray, here we are and will prepare the plastic mass of papier-mâché.
I will not describe how many ingredients I have gone through, all the same, you cannot always buy many items in our stores.
Whoever wants to add wallpaper glue instead of PVA, let them take into account that such products will shrink more, since we dilute wallpaper glue with water.
P.S. for those who will copy the master class, please indicate the source.
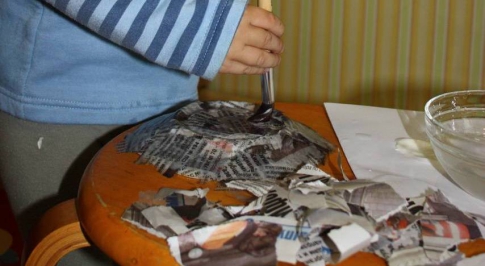
Girls, I add. I do not sculpt from this mass (as you can see from my products), I SPREAD it IN THIN LAYERS WITH DRYER. And since toilet paper is lost of different quality, try a little, do not knead the bucket right away.

We need: toilet paper (gray one that quickly soaks in water, the weight of one roll is about 50 grams), PVA glue (thicker), any putty (preferably fine-grained, even oil-glue, even latex), mosquito net (the same , which is attached to the vents, can be replaced with another stronger fabric).

We tear the toilet paper into pieces (you don't need to tear it, it will get wet by itself).

Fill with hot water.

And the most interesting thing is that I use a plunger. We start chomping our paper porridge. Anyone who does not mind a blender can use it (it will definitely not harm him from this, as well as the stomach).

It turned out paper porridge-malasha.

We pour our porridge in portions into a mesh (there was an idea to sew bags from a mesh and squeeze into washing machine, but hands have not yet reached this experiment).

Squeeze out as hard as possible.

We get such paper poop. Use our hands to break them into smaller pieces.


Grind ...

We get fibrous grains, similar to chopped boiled chicken meat (do not try to taste it for a tooth).

Here we got a lot of paper grains.

I forgot to add some soap product (liquid soap, faerie) in the materials, I have Aos. I pour about 1 tablespoon into the paper chips.

I add about 5 tablespoons of putty.

I pour in the glue little by little, so as not to overdo it, in the process I slowly mix it and bring it to the desired condition. Then I kneaded this mass with my feet (I didn't really show you my legs, so as not to embarrass).

And what we end up with is about (went to weigh) 2500 grams of papier-mâché mass, which in consistency resembles dough for shortbread cookies.
Conclusions: what did the putty give us (a more plastic mass, which will later be easier to skin), soap (gave us smoothness, plasticity and non-sticking to hands), and glue (gave us bonding properties).

Sometimes I also make a mass with the addition of blue clay (instead of putty). This gives us a stronger strength, but more shrinkage. Products with the addition of heavier clay are skimmed.
+++++++++++++++++++++++++++++
I'll add an interesting recipe to the topic:
Self-hardening paste recipe
"So we take 10 tablespoons of starch, PVA glue and toothpaste. Knead like a dough, you can add some water. Sculpt anything! It freezes in 20 minutes. Modeling paste is very expensive, but this one is cheaper and is not inferior in properties! this bottle is also made with this paste and sea salt! "
From the magazine "Handmade".
Good day to all! Very often they ask how I do salty dough... As the saying goes, it's better to show it once than to tell it ten times.
I will also tell you how I paint the dough, how I dry it and what varnish I cover. Rosette for lure. Sculpted from salt dough with the addition of paper.
I tried many, many recipes and finally settled on this one. I'll tell you about the pros and cons of this test compared to the usual one.
Pros:
- less brittle;
- less cracking (often a problem, the product cracks after drying, usually with back side);
- keeps its shape well;
- lighter in weight than usual;
- dries faster with the addition of glue the moment of super PVA (1/4 part of super PVA and 3/4 part of ordinary PVA).
Minuses:
- time consuming preparation;
- "paper fibers" along the edges when cutting, you need to smooth it either with a brush or with your fingers;
- lumps of paper in the dough, if you are unlucky with the paper. If the paper is selected correctly, there will be no clumps.
So let's get started. Let's start with paper. I took a paper towel, you can use regular toilet paper if you sculpt from unpainted dough. When I was preparing MK, I made a mistake, I decided to try a new pink pack, and as a result, the cooking process turned out to be more laborious. A sign that there will be lumps of paper in the dough - when cutting, the paper sticks together under the scissors. If the paper breaks down easily when cutting, then you are in luck, it will be easier to prepare the dough. Therefore, take a tougher paper, pink tutu softer and more delicate to the touch, it will not suit us.
We will prepare paper for 0.5 kg of salt and 0.5 kg of flour. To do this, I cut the roll in half, and the half in half. So take 1/4 roll paper towel... If you have a regular roll, use the same amount, because a roll of regular toilet paper is much heavier than a roll of paper towel. The weight will be approximately the same (30-40 grams of paper for 0.5 kg of salt and 0.5 kg of flour).
Fill the paper with water. I poured 1.5 glasses of water (plastic cup, disposable). At 3 o'clock, it is even possible at night, nothing will happen to her. This is necessary so that the paper swells and spreads well afterwards over the dough.
The paper is swollen, beat it with a blender to make it even more fluffy. If you chose the correct paper, then you will not have to twist the dough through a meat grinder further, there will be no lumps after this stage.
And 0.5 kg of flour and mix thoroughly.
Add just under 1/4 cup sunflower oil... Mix well with your hands.
Let's add some paper.
And we begin to knead the dough. In the process of mixing, you can add water, but very little.
initially, the dough will fall apart. And look like this.
You need to continue to knead and add some water (the water must be cold). But still no more than 1/2 cup for this amount of salt and flour. If your PVA glue is liquid, then you will need less water. Further you will see, if lumps of paper are still visible in the dough, then further we need a meat grinder to get rid of them. If the paper is "correct" there are no lumps and the dough can be put into the refrigerator for ripening.
Traitorous lumps of paper stuck out in my dough and I had to take up the meat grinder. I have divided the dough into pieces for convenience.
And she began to twist it through a meat grinder.
This is how the minced meat turned out. The dough field of the meat grinder becomes more elastic and you can completely get rid of lumps. I scrolled 3 times, the lumps of paper have almost all dissolved, and the salt has also dispersed, no grains are visible.
So our dough is ready. Now we put it in the refrigerator, at least for a day. I clean for 3 days.
A little about coloring. I paint the dough with gouache (I buy large cans), with these colors and food coloring... The dried product is most often painted with ordinary gouache, but if effects are needed, then I use acrylic paints metallic and pearlescent. I don't mix acrylic into the dough.
So, take a piece of dough, pour in the color scheme or add gouache or dry dye and mix thoroughly until it is uniformly colored. The work is of course dirty, but what can you do ...
This is how I dry my handicrafts. The first 2-3 days on a foil or file or baking paper, and then gently transfer to the wire rack. And I usually finish drying in natural conditions... So there will definitely not be unnecessary deformation.
I show it from the back side, so that you can see how dry the product is from above, so that you can transfer it to the wire rack. In case of emergency, I dry it in the oven, usually 2 days. Hours 3-4 - 35 degrees and the same at 75 degrees. I do not take it out of the oven until it cools completely - this can lead to bending and cracks. I'll make a reservation - I have an oven with a fan, which I use when drying. The finished dried product is determined by a knock, it must be sonorous.
Good day to all! People often ask how I make salty dough. As the saying goes, it's better to show it once than to tell it ten times.
I will also tell you how I paint the dough, how I dry it and what varnish I cover. Rosette for lure. Molded of salted dough with the addition of paper.
I tried many, many recipes and finally settled on this one. I'll tell you about the pros and cons of this test compared to the usual one.
Pros:
- less brittle;
- less cracking (often there is a problem, the product cracks after drying, usually on the back side);
- keeps its shape well;
- lighter in weight than usual;
- dries faster with the addition of glue the moment of super PVA (1/4 part of super PVA and 3/4 part of ordinary PVA).
Minuses:
- time consuming preparation;
- "paper fibers" along the edges when cutting, you need to smooth it either with a brush or with your fingers;
- lumps of paper in the dough, if you are unlucky with the paper. If the paper is selected correctly, there will be no clumps.
So let's get started. Let's start with paper. I took a paper towel, you can use regular toilet paper if you sculpt from unpainted dough. When I was preparing MK, I made a mistake, I decided to try a new pink pack, and as a result, the cooking process turned out to be more laborious. A sign that there will be lumps of paper in the dough - when cutting, the paper sticks together under the scissors. If the paper breaks down easily when cutting, then you are in luck, it will be easier to prepare the dough. Therefore, take a tougher paper, the pink pack is softer and more delicate to the touch, it will not work for us.
We will prepare paper for 0.5 kg of salt and 0.5 kg of flour. To do this, I cut the roll in half, and the half in half. So, take 1/4 of a roll of paper towel. If you have a regular roll, use the same amount, because a roll of regular toilet paper is much heavier than a roll of paper towel. The weight will be approximately the same (30-40 grams of paper for 0.5 kg of salt and 0.5 kg of flour).
Fill the paper with water. I poured 1.5 glasses of water (plastic cup, disposable). At 3 o'clock, it is even possible at night, nothing will happen to her. This is necessary so that the paper swells and spreads well afterwards over the dough.
The paper is swollen, beat it with a blender to make it even more fluffy. If you chose the correct paper, then you will not have to twist the dough through a meat grinder further, there will be no lumps after this stage.
And 0.5 kg of flour and mix thoroughly.
Add a little less than 1/4 cup of sunflower oil. Mix well with your hands.
Let's add some paper.
And we begin to knead the dough. In the process of mixing, you can add water, but very little.
initially, the dough will fall apart. And look like this.
You need to continue to knead and add some water (the water must be cold). But still no more than 1/2 cup for this amount of salt and flour. If your PVA glue is liquid, then you will need less water. Further you will see, if lumps of paper are still visible in the dough, then further we need a meat grinder to get rid of them. If the paper is "correct" there are no lumps and the dough can be put into the refrigerator for ripening.
Traitorous lumps of paper stuck out in my dough and I had to take up the meat grinder. I have divided the dough into pieces for convenience.
And she began to twist it through a meat grinder.
This is how the minced meat turned out. The dough field of the meat grinder becomes more elastic and you can completely get rid of lumps. I scrolled 3 times, the lumps of paper have almost all dissolved, and the salt has also dispersed, no grains are visible.
So our dough is ready. Now we put it in the refrigerator, at least for a day. I clean for 3 days.
A little about coloring. I paint the dough with gouache (I buy large cans), with these colors and food colors. The dried product is most often painted with ordinary gouache, but if effects are needed, then I use metallic and pearlescent acrylic paints. I don't mix acrylic into the dough.
So, take a piece of dough, pour in the color scheme or add gouache or dry dye and mix thoroughly until it is uniformly colored. The work is of course dirty, but what can you do ...
This is how I dry my handicrafts. The first 2-3 days on a foil or file or baking paper, and then gently transfer to the wire rack. And usually I dry it out in natural conditions. So there will definitely not be unnecessary deformation.
I show it from the back side, so that you can see how dry the product is from above, so that you can transfer it to the wire rack. In case of emergency, I dry it in the oven, usually 2 days. Hours 3-4 - 35 degrees and the same at 75 degrees. I do not take it out of the oven until it cools completely - this can lead to bending and cracks. I'll make a reservation - I have an oven with a fan, which I use when drying. The finished dried product is determined by a knock, it must be sonorous.